


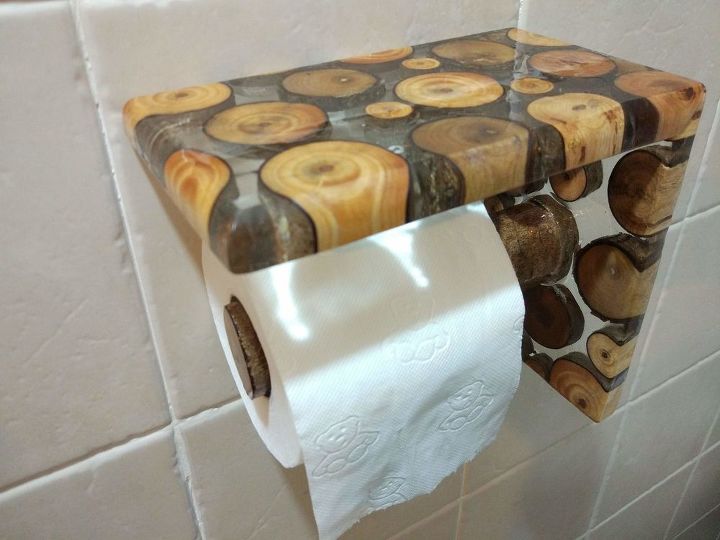
Epoxy Toilet Paper Dispenser 7" by 6"

When we moved in into our apartment, we had an old toilet paper dispenser in our bathroom.
Other than being plain boring dispenser, our main issue with it was the time-consuming process of replacing an empty toilet paper roll to a new one.
So, we've created this awesome dispenser which is easy to maintain, pleasant on the eye and has space to put down either a phone or a book while you're doing your business...
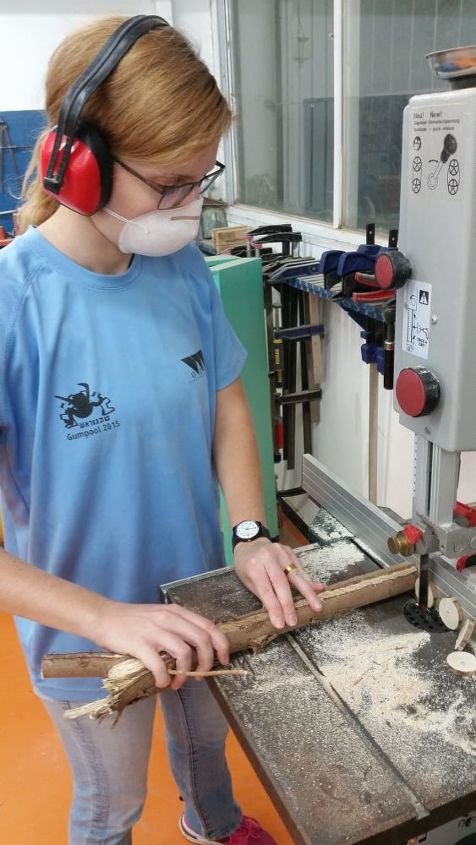
We began by scouting the outdoors for nice looking branches.
Ready to be sewn, we took our branches to the workshop and set the saw to cut about 1" thick pieces.
We used about 30 pieces for out dispenser.
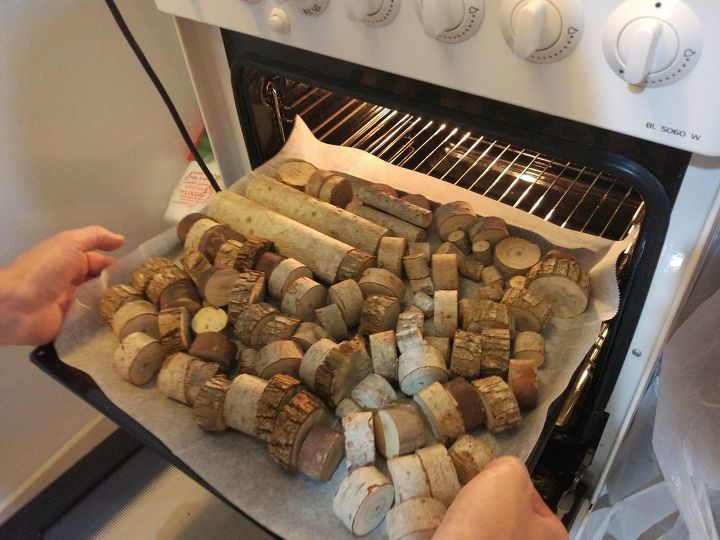
Then we dried the pieces in the oven. It took about an hour on a low temperature to remove any moisture from the wood.
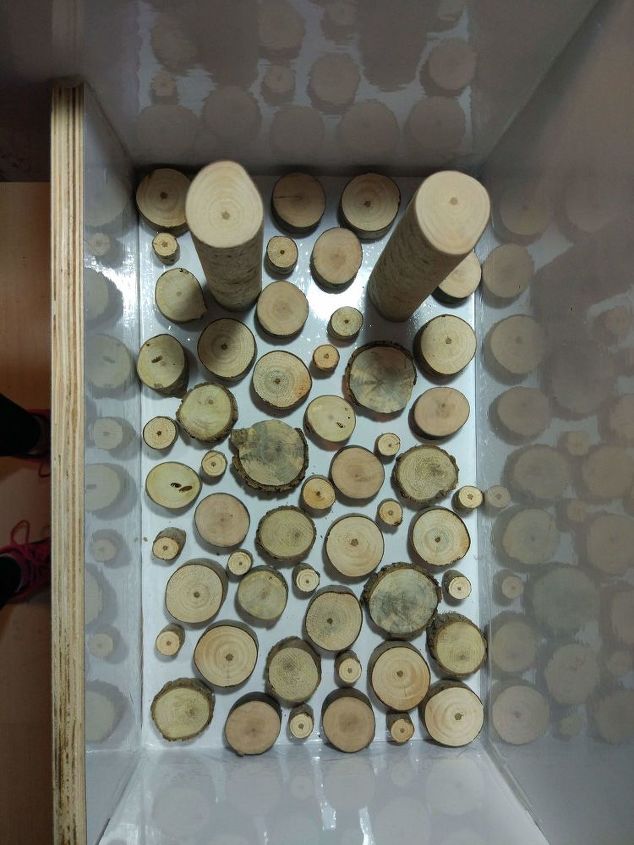
Then we built a sealed mold for the Epoxy. Using a framed box we applied duck-tape generously making sure we won't have any leaks and also making it easier to release once the Epoxy is dry. This is an important step. You should always make sure your mold is completely sealed before pouring in the Epoxy.
We poured the Epoxy in two steps:
First, we poured just a thin layer enough to set the pieces in place.
The big logs are 7" long so the TP can roll freely.
As you can see, we made two dispensers at the same time so we could choose which one we like better. 
After a couple of hours we poured the second layer.
We measured the approximate volume of the mold in order to make the correct amount of Epoxy mix.
It usually takes 24 hours to cure. Depended on the ambient temperature.
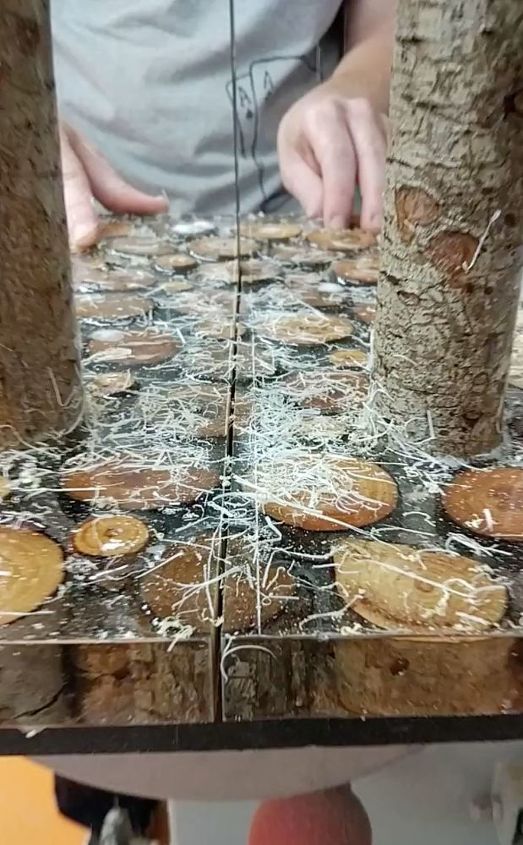
We cut the cured Epoxy to two. Each half one make one dispenser.
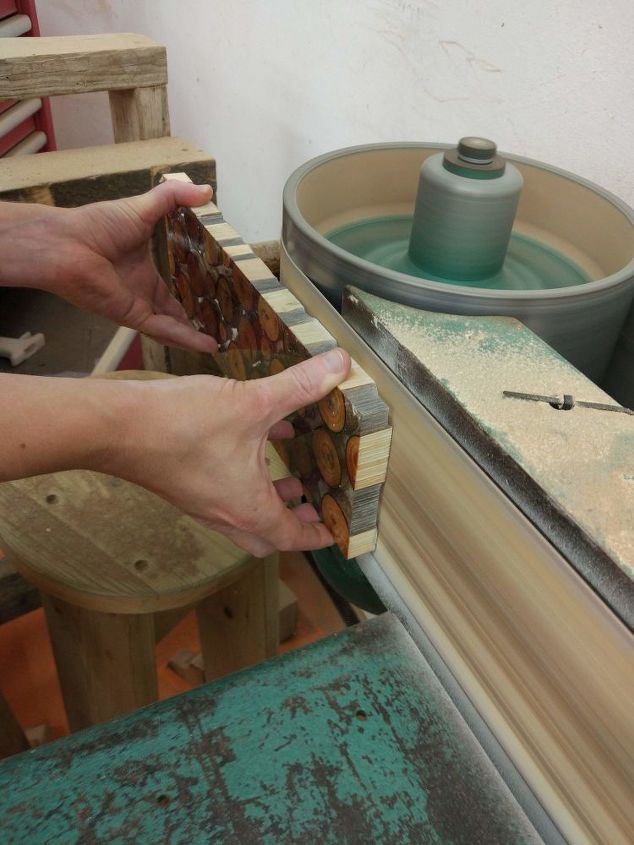
After trimming the edges, we sanded the surface to make it smooth.
The Epoxy immediately turned opaque. To make it transparent again we applied another thin layer of Epoxy.
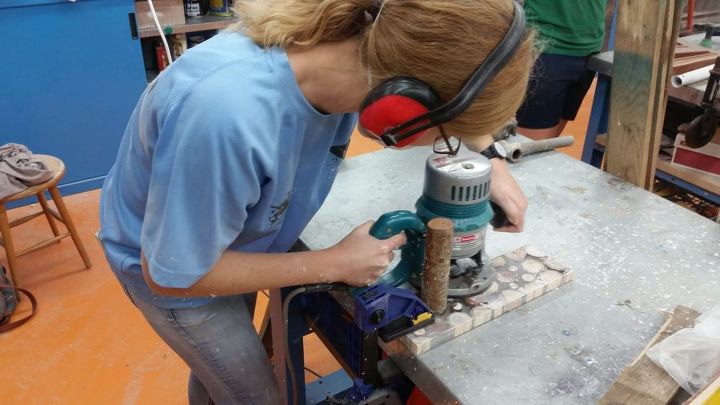
Using a Router we rounded the edges,
We set the saw to make a 45 degree cut. Then, we glued the two pieces together, creating a 90 degree. After the glue set, we applied the final Epoxy layer to get the shiney look back.

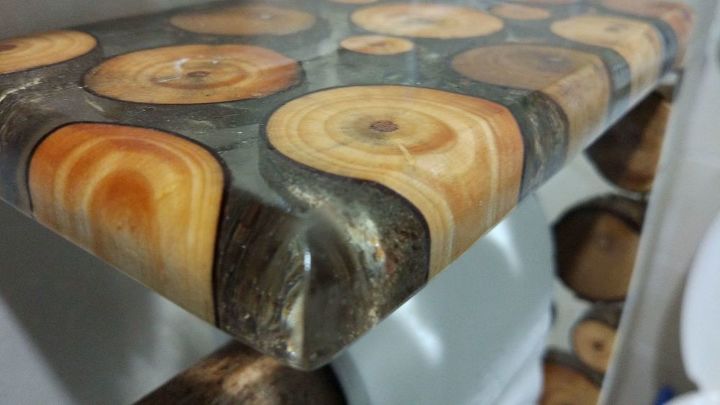
A close-up of the finish product.


Comments
Join the conversation
-
That looks great!
-
This is inspiring; I am not good with epoxy but your design could be translated in many other materials. Thanks for sharing


Frequently asked questions
Have a question about this project?
Love the idea. How do you attach to the wall?? I didn't see that step and I read it twice.
Where’s the video?
Where is the video ?