


How to Build a DIY Fire Pit- No Matter Your Budget or Skill Level

Building a DIY fire pit is a great way to update your backyard and entertain friends and family. A DIY fire pit doesn’t have to be difficult or expensive to build. Whether you are looking to build a simple or advanced design there is a DIY fire pit project for every skill level and budget. Check out these ideas to build your very own outdoor fire pit.
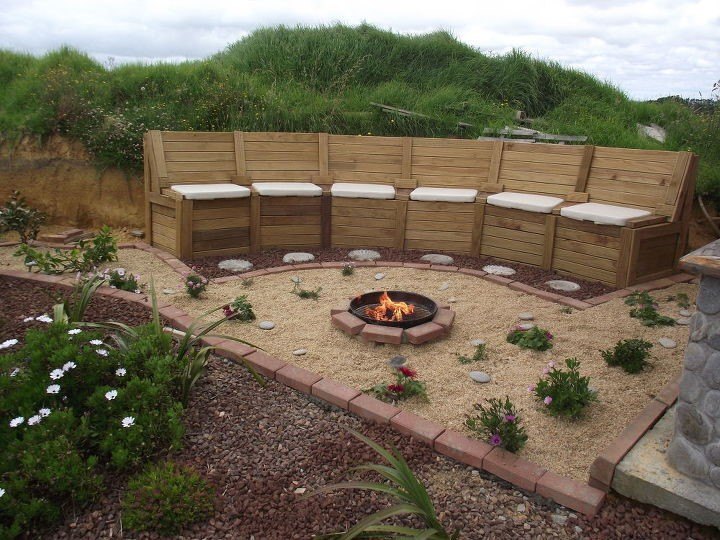
See post: Patricia Presto | Down Home Southern Fire Pit
Outdoor Fire Pit Ideas
Is there anything more cozy on a cool night than snuggling up to a bonfire with friends and family? There’s nothing like the sound of a crackling fire to bring loved ones together while you roast hot dogs and marshmallows. A fire pit allows you to enjoy your outdoor living space all year long not just in the summertime.
The following tutorial will teach you how to build a simple fire pit that can be completed in one afternoon with inexpensive supplies from the home improvement store. This tutorial is a great place to start if you have never built a fire pit before.
You can customize your new fire pit by adding tile mosaic, flagstone, a wood cover or even a fire bowl for grilling.
If you are ready to tackle a more advanced project, at the bottom of this post I will show you how to take things to the next level and make a gas or propane fire pit for your outdoor space.
DIY Fire Pit - Before you Begin
Before you begin building your fire pit: Call your utility company (dial 811; for more info, go to call811.com) to check the location of buried utility lines. Also, check the fire pit code in your area.
Most codes require a fire pit to be 25 ft. away from any structures and trees. Think about how the prevailing winds blow through your backyard. Be a good neighbor and don’t locate your pit upwind of your patio or where the smoke will blow into your neighbor’s windows.
How big should you make your fire pit? A 3-ft.-diameter fire pit creates enough room for a good fire, complies with most codes and keeps everyone close enough to chat.
How to Build a Fire Pit With Bricks
Tools and Materials
● Firebricks
● Sand
● Shovel
● Tape measure
● Level
● Tamper
● Steel Rake
Because regular clay brick can crack at high temperatures, you need to use firebrick (also called “refractory” brick). Firebrick is a dense brick that’s kilned to withstand high temperatures. It’s larger, thicker and wider than regular brick, and it can be found at most home improvement stores. Firebrick is more expensive than landscaping stones, but it will stand up to nightly fires for years to come.
Regular concrete is prone to spalling & cracking in direct fire exposure. Concrete blocks should never be used for fire pits. They can explode and cause serious injury and/or death. Always use firebrick or cinder block for fire pits.
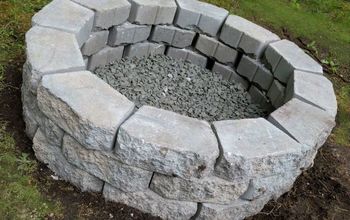
Beginner DIY Fire Pit Instructions
- Lay out your pavers in a circle in the approximate size and shape of your fire pit (about 36-44 inches in diameter) Lay the fire pit stones out to the correct dimension, mark the area and then pull the pavers out of and away from the pit.
- Once you have your circle roughed out, dig a 12-inch-deep hole in that location.
- Pour sand into the bottom of the hole and tamp the sand level.
- Begin to lay your bricks around the perimeter of the hole. Continue stacking the stones so that they are 12 inches above the surrounding ground.
- Every fire pit needs air flow to provide oxygen to flames. This becomes more of an issue when you light a fire contained within an above ground walled pit. Place one 2-inch hole every 24 to 36 inches around the base of the pit.
- Pour a layer of sand into the ring of stones so that it covers the first layer, approximately 4 inches deep.
The basic design I described will get you started: There are a lot of variations you can make with this simple fire pit tutorial. Try some of these ideas to take your fire pit to the next level:
See post: Ellora DIY | Backyard Fire Pit
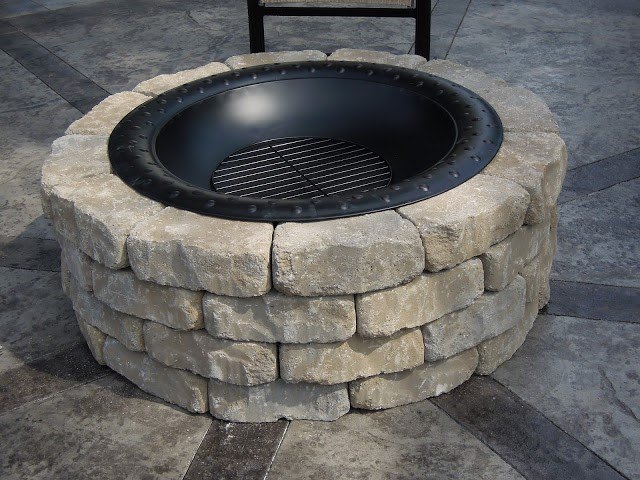
Fire Bowl
Adding a fire bowl to your fire pit looks great and allows you to place a grill and gives extra protection. You can purchase a fire bowl from a home improvement store. Simply place it on top of your finished brick fire pit and you are ready to go.

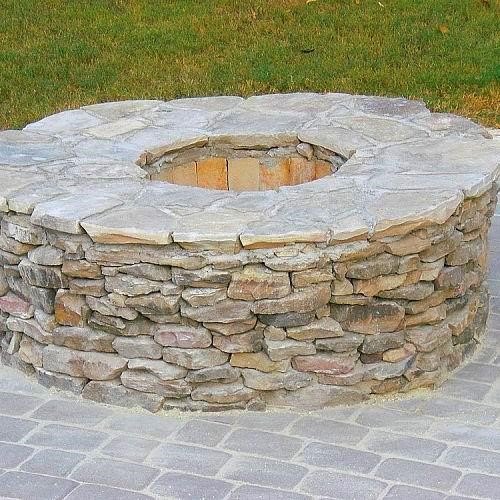
See post: Jim Cox| Flagstone Fire Pit for the Backyard
Flagstone Fire Pit
Flagstone can be used around the base of your fire pit to add an interesting look like in this DIY fire pit. Use gravel under the flagstone to create a base for your fire pit. Twist and press the stones into the gravel so they have a solid base under them. You want the gravel to fill in the uneven surfaces on the bottom of the flagstones. Fill in the gaps with a concrete sand mix from the local home improvement store.
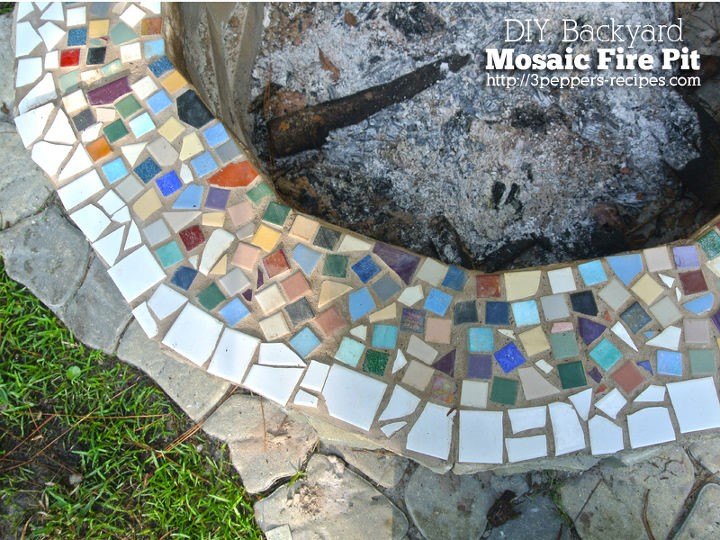
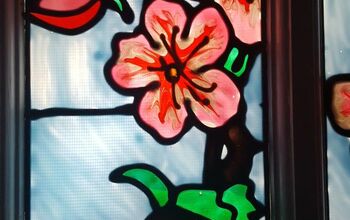
See post: Kristy Lingebach | DIY Backyard Mosaic Fire Pit
Fire Pit Mosaic
If you want to top off your fire pit with something a little fancier you can add a mosaic right on top of the brick. Using mosaic tiles or regular tiles broken into small pieces. Attach them to the stone with sticky tile adhesive paper. Place the tiles all the way around the fire pit before grouting them down. Use cement or sanded grout for the tiles and let them dry for 48 hours. This is a great finishing touch for your fire pit!
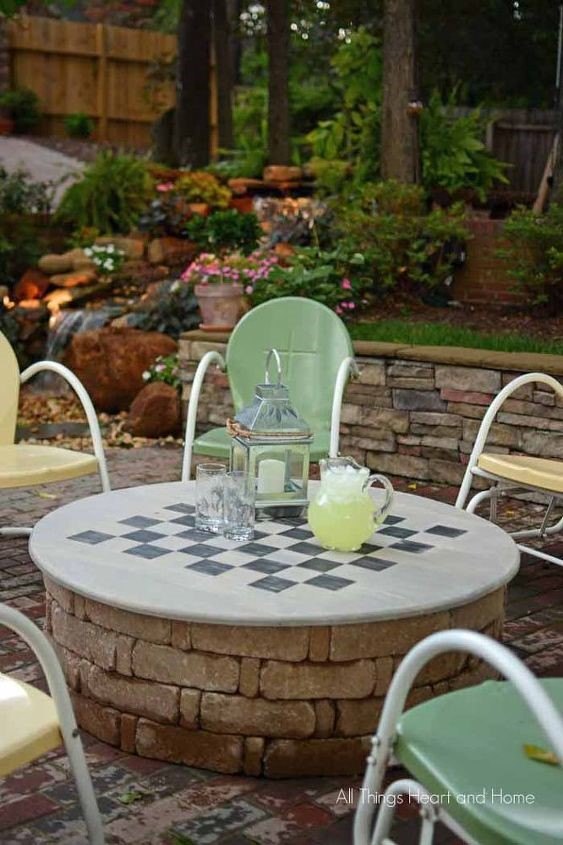
See post: All Things Heart and Home | DIY Fire Pit Cover
Fire Pit Cover
If you think the look or charred wood or a grill looks unsightly you can add a fire pit cover to the top of your pit like this fun game board fire pit cover. Simply cut a large circle out of cypress wood and paint squares on top. Seal it and you can have a place to play checkers or chess.
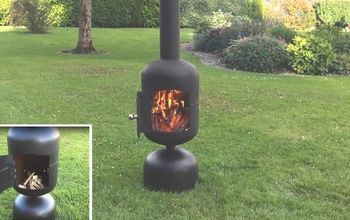
See post: Stephen Tyler | A Fire Pit in the "Chill Out" Area
Gas Fire Pit Tutorial
If dealing with chopping wood and smoke isn’t your thing, you might want to take things to the next level and try making your gas fire pit. This tutorial is for more advanced DIYers who feel comfortable working with their gas and propane lines. Use the following tutorial to make a DIY gas fire pit.
The easiest way to build a gas fire pit is to purchase a manufactured drop-in fire pit kit. The kits usually feature a bowl shape and come ready to install into the fire pit enclosure of your choice.
You still need to create the enclosure. You can use the steps I suggested in the beginner fire pit tutorial above.
Materials for Gas or Propane Fire Pit
- Log lighters or gas burners
- Wire guards
- Lava rock or other filler rated for use with gas fire pits (.5 cubic bag or approximately 20 lbs recommended)
- Wire MeshSafety Information for Gas Fire Pit
Before you begin designing your fire pit: First determine your gas supply. Both natural gas and propane may be used but your supply pressure and BTU ratings need to be regulated for both. For natural gas, the supply pressure should be set between 3.5" - 7" of the water column. For propane, the supply pressure should be set between 8" - 11" of the water column.
If you are using a 20lb propane tank, consider the maximum output of the tank to be 90,000 - 125,000 BTU and a regulator must be used. The reason why this is important is that the BTU rating of the 20lb tank will limit your burner options to sizes that are rated for 125,000 or less BTU.
Shape and Size of Gas Fire Pit
The shape and size of your fire pit burner can be selected after determining your gas supply. Choose a burner that is at least 6" smaller than the inside dimension of your enclosure; which will put 3" between the edge of the burner and the inside edge of the pit all the way around your pit.
Fire Pit Pan
A fire pit pan is recommended for use with all fire pit burners but required for fire pits that use a propane gas supply. A fire pit pan can be flat or a bowl style to depending on your style preference. Your pan should be installed at least 3" - 4" below the top surface of your fire pit enclosure. The purpose of a burner pan is that in propane applications it separates the air mixer from the burner, and in all applications, it helps with water drainage and ventilation.
Adequate ventilation is required for all fire pit burners. The recommended amount of ventilation is 36 sq. inches, or (2) 18 sq. inch vents on two opposing sides to create proper airflow.
Fire Media is the final step to finishing your gas fire pit. Lava rock, fire glass, and log sets can be used to complete your fire pit. A maximum of 2" - 4" of media should cover your burner and pan. Your choice for fire media is purely aesthetic depending on what you want for a final look and feel for this tutorial we will use lava rock.
Installation Steps for Gas Fire Pit
Cover the drain: Place wire-mesh squares over the drain in the bottom of the fire-pit to prevent the drain from becoming clogged with grit or debris.Install the Gas Burner
The next step is to install the gas burners, or log lighters, in the bottom of the pit. Log lighters are available from home improvement centers and typically require no tools for installation. They simply tighten by hand.
- Make sure that the pre-installed gas supply to the fire pit is turned off, remove the caps from the gas connections.
- Then set the log lighters in place and screw them onto their connections
- Test the flame
Once you've checked and adjusted the log lighters for proper operation: turn the gas off, allow the elements to cool and turn the log lighters so that the holes face down.
Both the gas holes and the air-inlet should face downward to provide even dispersion of the flame throughout the rocks, and so they don't become clogged or filled with rainwater.
Install Wire Guards
Install wire cages over the log-lighter bases, so they are protected once the lava rocks are added.
Add Lava Rocks
Once all adjustments are made, and the protective cages are in place, add the lava rocks. These rocks are specifically designed to handle heat and are commonly used in fireplaces and grills.
Place rocks under and around the log lighters first so that the weight of the rocks on top won't bend them. Now fill in the center of the pit with more rocks — to a depth of about 4" — to complete the fire-pit.
Building a DIY fire pit doesn’t have to be intimidating or expensive: Make sure you start at whatever your skill level is and build upon your skills to make your fire pit more intricate and custom. Save money by building a fire pit yourself and take pride when you invite guests over to enjoy an evening bonfire with you.
Have you ever built an outdoor fire pit before? Share your tips and ideas on Hometalk!
Written for the Hometalk community by: Adrienne Carrie Hubbard


Comments
Join the conversation
-
Beautiful💪💪
-
Great job! Looks relaxing.


Frequently asked questions
Have a question about this project?
Is it possible to make a rectangular fire pit On a slab alread in My backyard?