


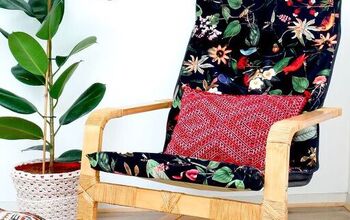
Provincial Chair Makeover...
This post tells you how to completely change the look of a chair! AND do it inexpensively. This makeover only cost me $13.19! Yes, you read that correctly...$13.19!
I've had this chair for a few years and have been wanting to give it a new look but always felt intimidated about redoing it.
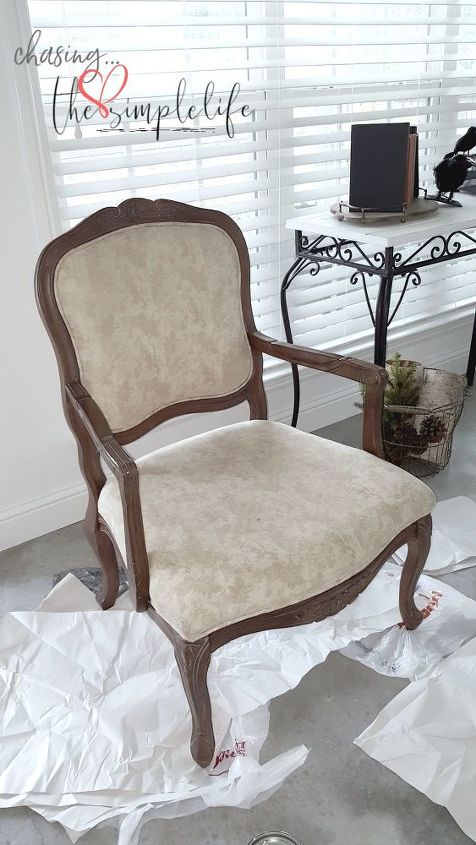
Before I started painting the fabric, I painted the wood. It took 3 coats of white paint. While the paint was drying, I looked for fabric-painting tutorials on the internet. I found several and sort of merged them together. To paint this chair, I used:
4 - 2 oz bottles of acrylic craft paint (Peppercorn color)
1 - 8 oz bottle of fabric medium
1 - well-loved paintbrush
Water
Since I wasn't sure how much paint/fabric medium it would take to cover this chair, I started out with 4 oz of paint, 4 oz of fabric medium and 2 oz of water...1 to 1 to 1/2 ratio.
I mixed this together in a red solo cup and made sure that it was mixed well. Then I began to paint...
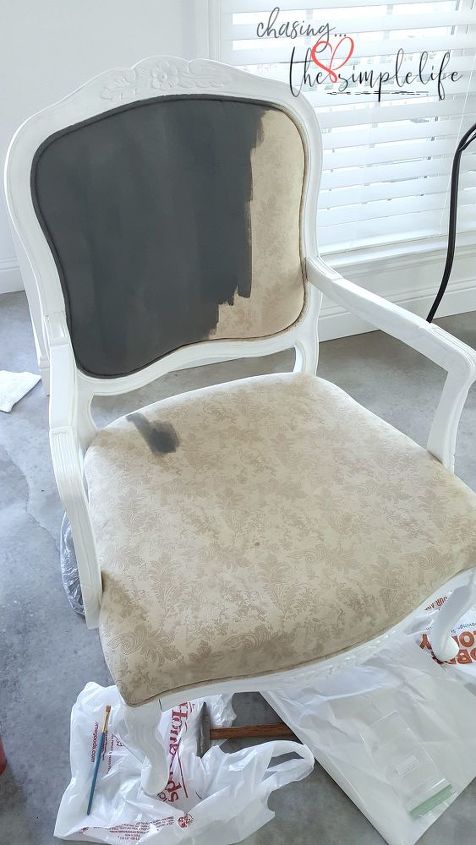
...and paint. I was really surprised at how well the paint mixture covered the fabric. I read that some fabrics need to be wet down with water prior to painting...I didn't have to do that...well actually, I forgot to do that, but who's going to know, right?! I also read that some fabrics need to be sanded lightly with a high grain sandpaper between coats. I did remember that, but I didn't have to sand with this fabric. It stayed smooth.
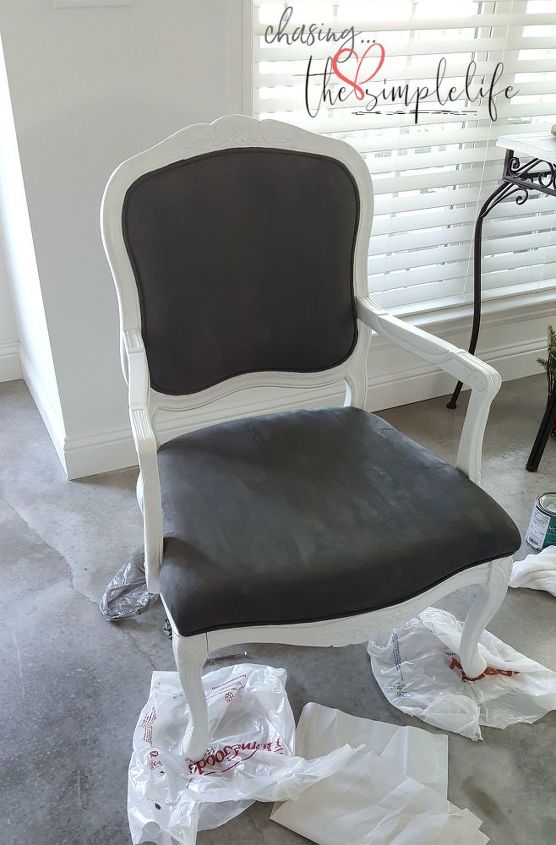
This is how the chair looked after one coat...it only took 2 coats total. The instructions I found said to let each coat of paint dry for 24 hours. I let mine dry for 3 days in between coats because we had to leave to go out-of-town on business.
I used a small artist's brush to paint the piping because I didn't want to get the gray paint on the white paint. I did notice that every few minutes I needed to re-stir the paint mixture because the paint likes to settle to the bottom of your container.
I was pleasantly surprised that it turned out as well as it did. The dark colored paint covered the light fabric very well.

The main thing I learned from this experience was to never use liquid-y paint near your white furniture...where it might splash onto said white furniture...and sit for 3 days before you find it! :-) Be sure to check out my blog for more details!
Resources for this project:


Comments
Join the conversation
-
Well done!
-
Brilliant!!! I have two chairs that are almost exactly the same but the back goes almost to the seat in a circle. I've been dreading putting new fabric on it, I am a perfectionist, paint it is!!! Thanks! Keep up the beautiful work!😊👍🏽


Frequently asked questions
Have a question about this project?
This looks really good! I have two questions though. 1) When you paint a chair like this, I assume the paint soaks down to the padding underneath. If, later, you decide to completely re-upholster, does the padding then need to be replaced? Maybe that answer depends on the type of material on the chair.
2) I have a chair that is in really good shape except that the material is badly faded. I don't really want to reupholster again so I think painting might do well. However, it has deep channel tufting on the back and I am wondering if anyone reading this has had success painting that kind of tufting. If so, any suggestions? Thanks!
Lovelovelove this! Where can I get that adorable oversized change purse that sits on the chair?
Has the paint transferred to clothing?