


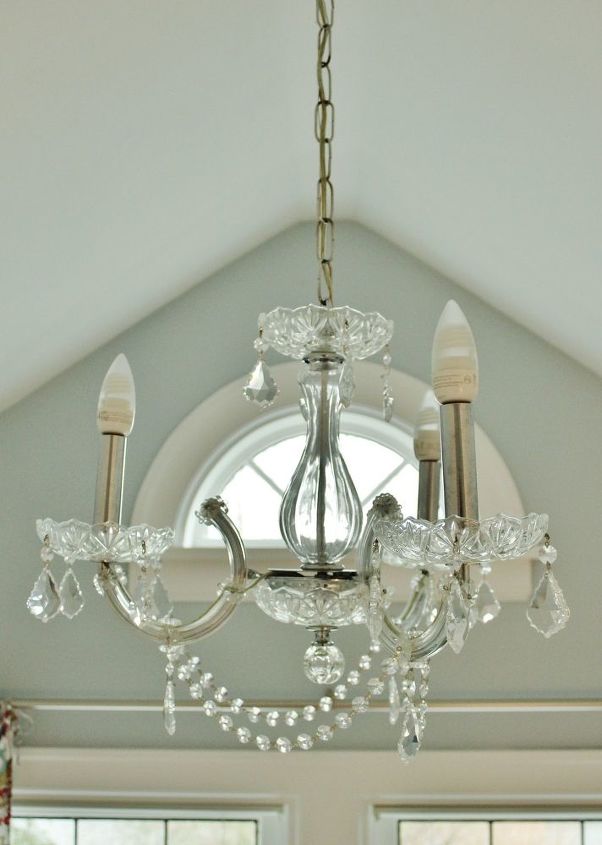
A Budget Chandelier Upgrade

I love the chandelier in our master bathroom. But I was recently in an antique store where all of their chandeliers had silk sleeves covering their chains. The sleeves made the chandeliers look so elegant and substantial.
That is when our chandelier's "plain chain" started to bug me.
A chandelier chain sleeve can cost upwards of $25. But I made my own for 80 cents. Here's how:
- I chose a silver fabric with an elegant, silky texture. My chain was 17 inches long, so I needed fabric with at least a 34-inch width, which was easy to find. I had the fabric store cut me just a quarter yard of the fabric. It was on sale – which is why I only paid 80 cents. All other materials I had on hand.
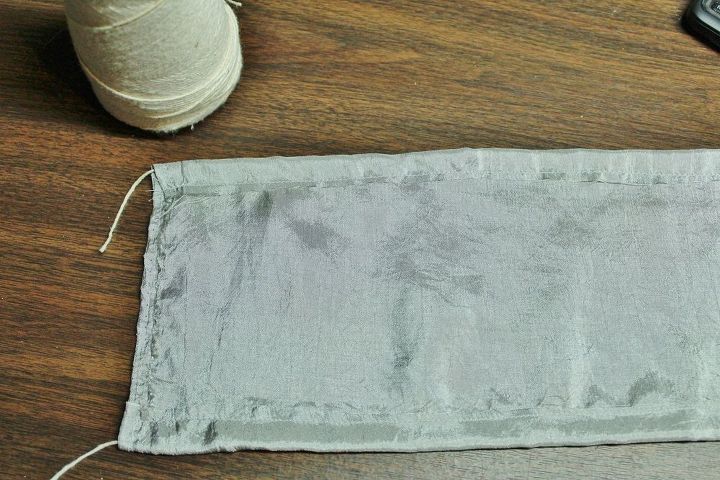
- I cut the fabric to size – 7 inches wide and 34 inches long.
- I machine hemmed each short end of the fabric.
- Then I cut two 40-inch pieces of twine. I wanted the pieces of twine to be longer than the length of the fabric.
- Then I made a half-inch fold on each long side of the fabric, placed the twine inside the fold, and pinned it, creating a pocket for the twine. The photo below better explains it.
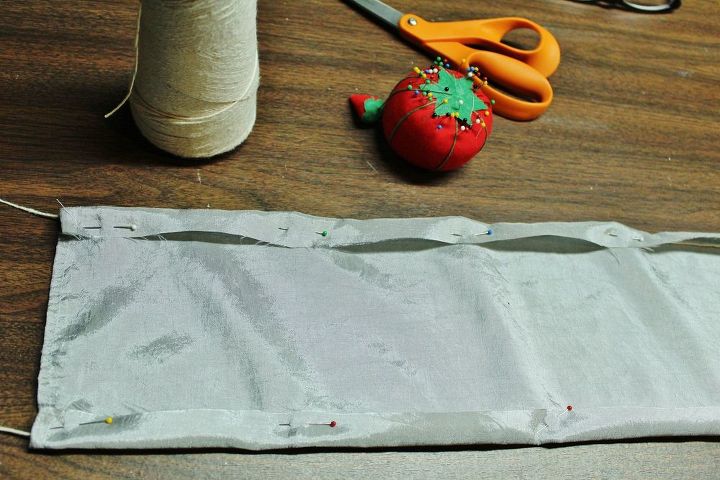
- Then I sewed the pockets closed with a sewing machine, making sure not to sew over the twine. I made sure that a little bit of twine was extending past the ends of the fabric at all times. It’s no fun at all if the twine gets lost inside the pocket of the fabric.
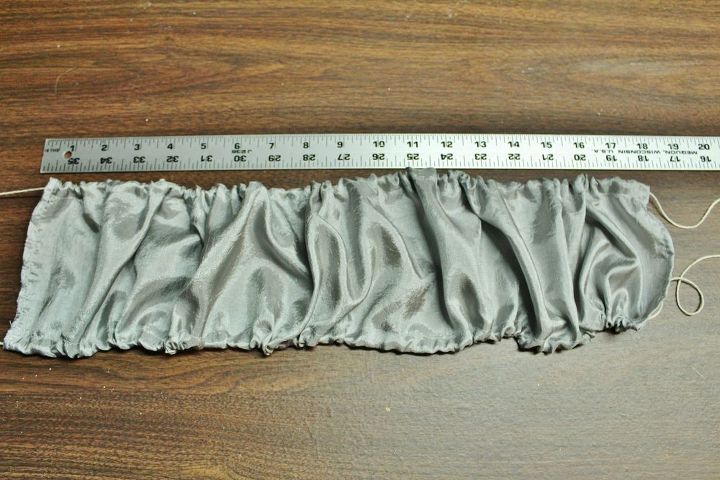
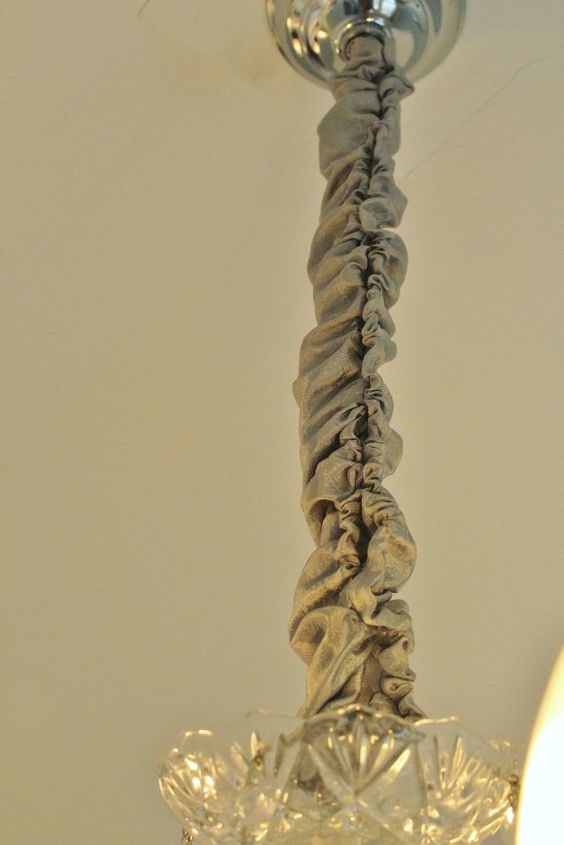
- Then I held the ends of the twine and scrunched the fabric together until it was 17 inches – the length of the chain.
A WORD OF CAUTION: What comes next involved me climbing a high ladder and doing some overhead stitching near an electrical cord. Climbing high ladders, working while standing on them, and working near electricity (even electricity that's been momentarily switched off) are not for everyone. So know you limits, and be safe out there!
- I climbed a ladder to examine the electrical cord running through the chandelier chain. I made sure the cord was in perfect condition, with not flaws whatsoever, before covering it with fabric.
- Then I climbed up on the ladder again with this scrunched piece of fabric and, using the twine, tied one end to the top of the chain and the other end to the bottom. Then as best I could, I scrunched the fabric around the chain. It took a little tweaking to get it just right, but it really wasn’t difficult.
- I cut away the excess twine.
- Then, using a needle and thread, I stitched the sleeve together. I WAS VERY CAREFUL NOT TO PIERCE THE ELECTRICAL CORD WITH THE NEEDLE. (Of course, if done right, the needle should come nowhere near the cord - its only to stitch the outside of the fabric.) I didn't stitch the entire length of the fabric, I simply made a few stitches in about five places along the length of the sleeve to close it up.
- I made sure the stitched seam faced the back of the room so it isn't easily seen. But even so, it does’t really look that bad – certainly better than the bare chain.
- The only thing I might do differently next time is to use Velcro to close up the seam instead of stitching it closed.
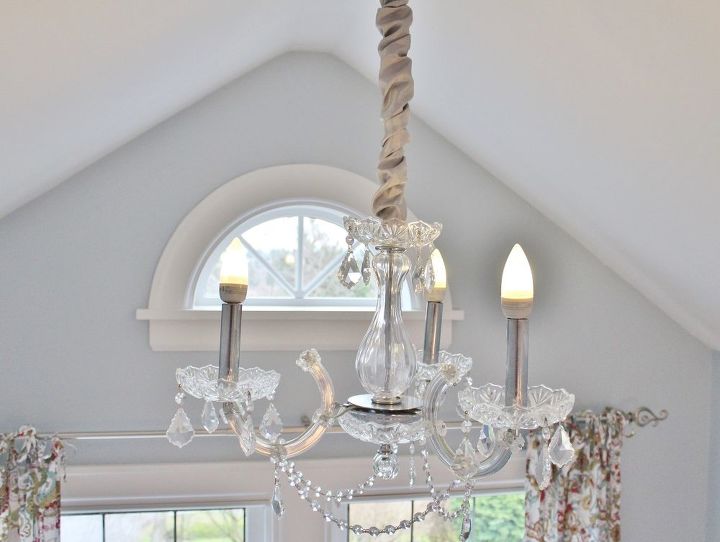
Just what the room needed!
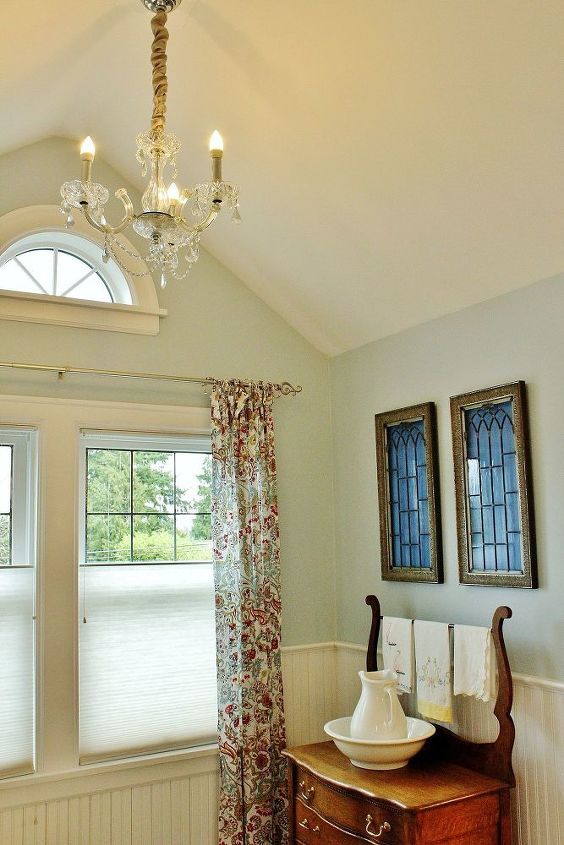
To see more of our master bathroom, which was once just a tiny half bath, check out our master bathroom remodel series.
Since I had the twine and thread onhand, I estimated the cost at $3 for the fabric - which is more than the 80 cents that this project actually cost me.


Comments
Join the conversation
-
elegant finish! great job!
-
Just lovely!! You've given me ideas......


Frequently asked questions
Have a question about this project?