


Nautical Cane Chair Makeover
$100
2 Days
Easy
A-hoy mateys! I found these cane chairs at a yard sale for $10 and decided to use some unusual methods and trim to finish off these nautical chairs. It was a definite learning process and I have documented all of the ups and downs of finishing these chairs via my blog, The Charming Farmer.
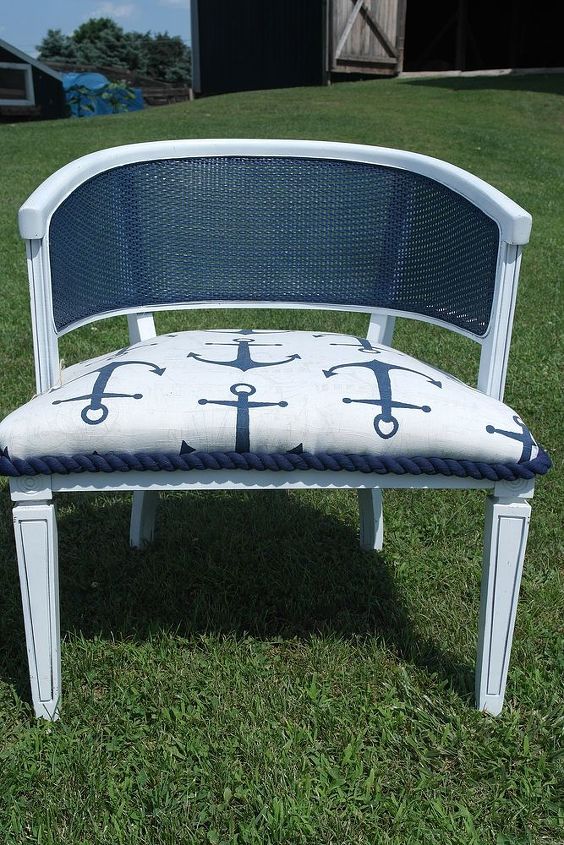
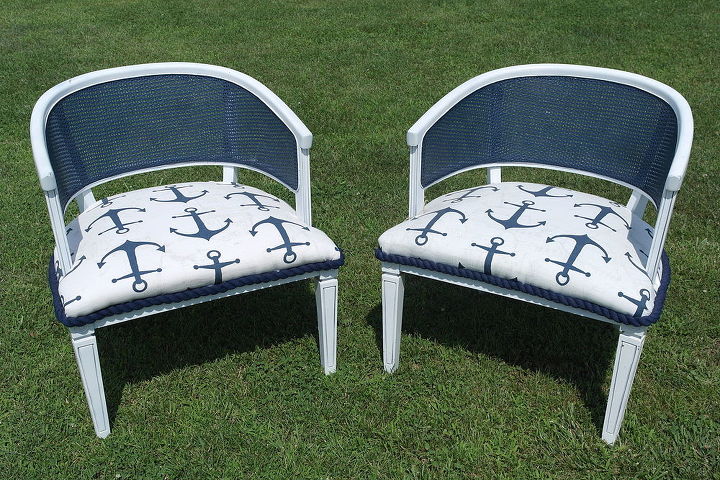
The finished product with a two-tone color scheme and a lead rope for trim!

Originally these chairs were covered in cat urine soaked cheetah print faux fur - yuck! I started by removing all of the fabric including the foam. Notice that the chair is flipped upside down but on a piece of cardboard to project the wood from scratches.
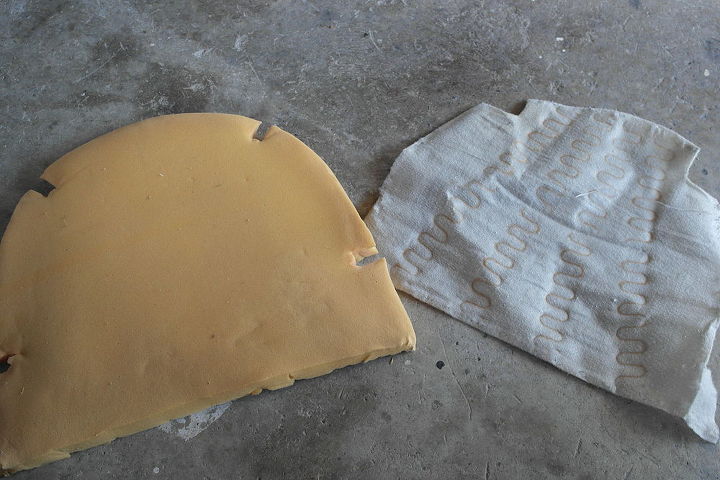
But DO NOT throw away the foam or fabric. These can be used as a template for your new fabric and foam.
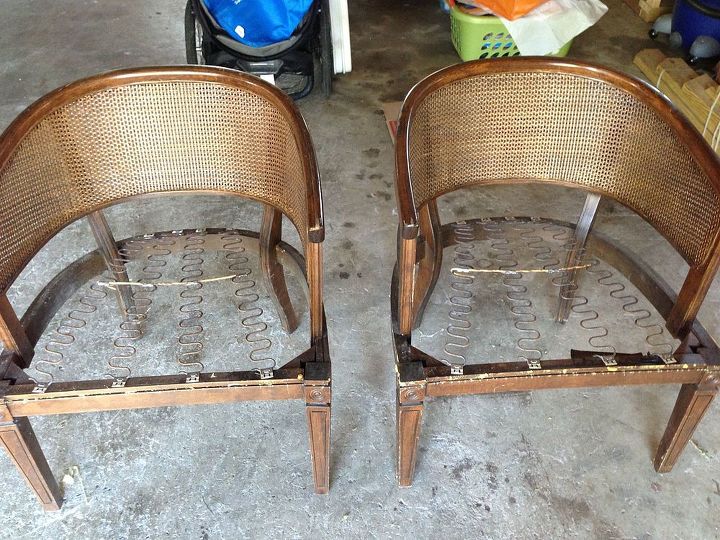
I washed and scrubbed the chairs once they were stripped down to remove any excess smell, dirt, and gunk.
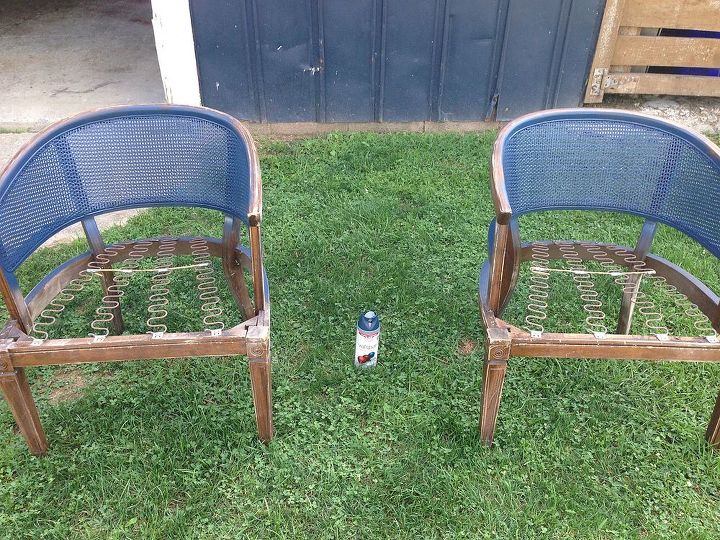
The first paint was the blue on the caning - it's a Valspar spray paint called Indigo Streamer. Make sure this is dried completely before taping in the next step.
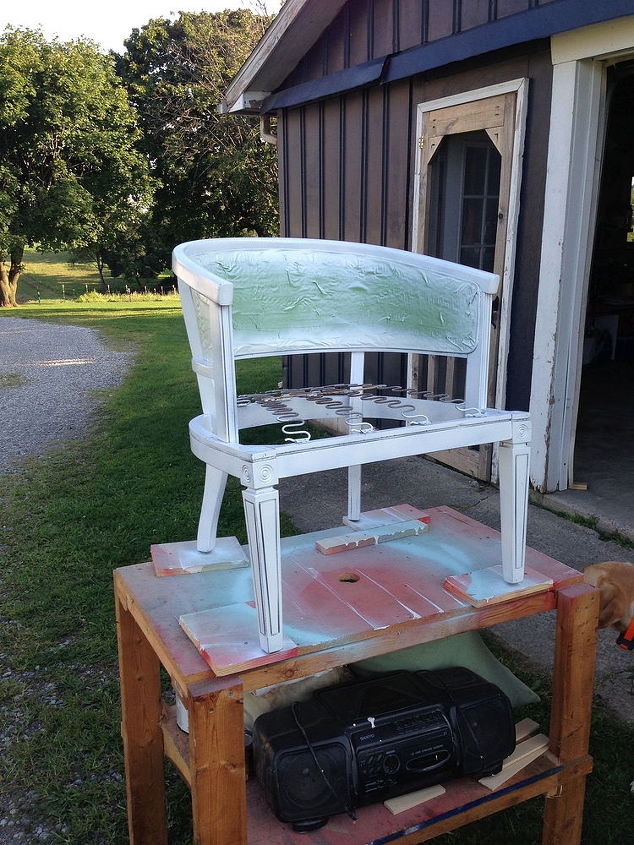
I used a Valspar flat white spray paint for the remainder of the chair.
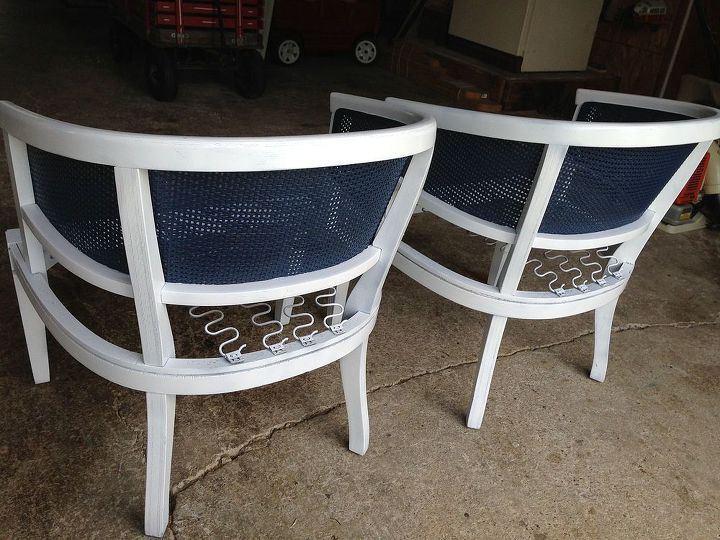
Two-tone chairs!
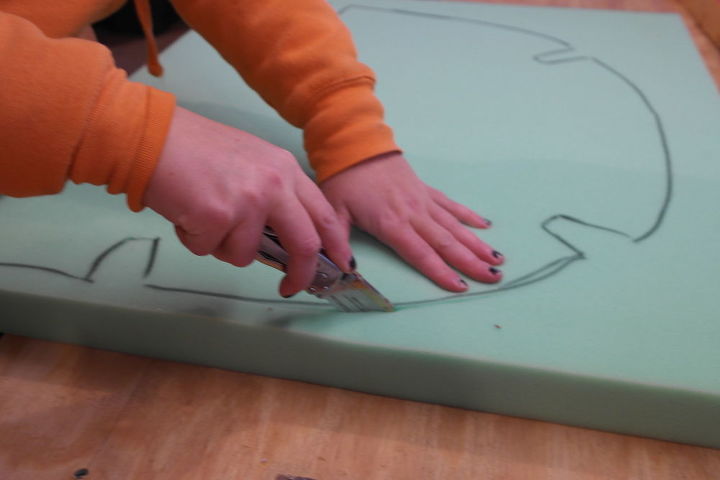
Remember that foam that you saved (hopefully!)? Use it to make a template for the foam and the cut using a box cutter. The fabric recovering process was frustrating because there a NO online tutorials (until now on my blog).

Lay the fabric onto the chair and figure out where small cuts need to be made to account for the posts. Please see my blog, The Charming Farmer, for a MUCH more detailed view of the fabric portion of this project.
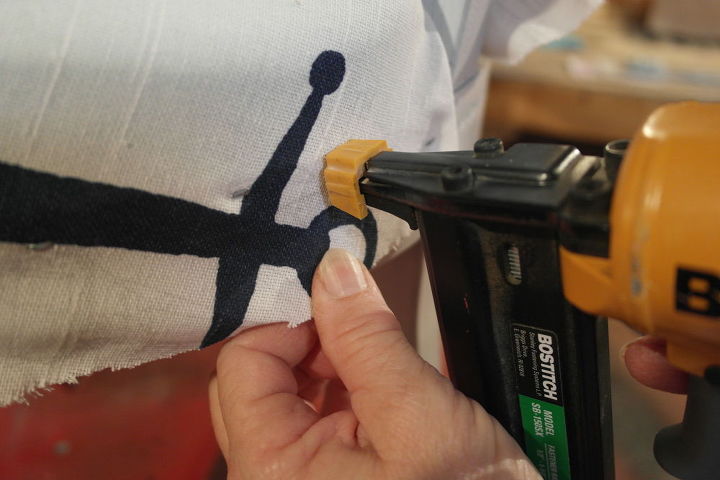
It is really helpful to start in the back of the chair and staple in a few places. Tighten and smooth the fabric as you go along. I went back after the initial placement and reinforced with more staples.
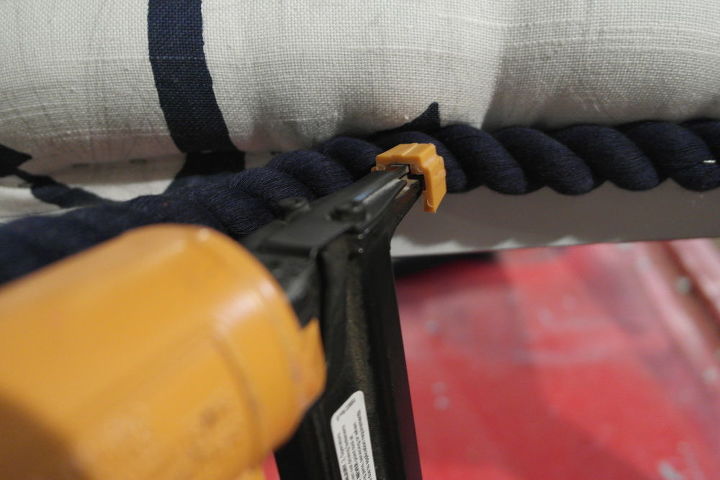
The trim I used was actually one of my horse's lead ropes! I wasn't happy with the trim that I was finding in the fabric stores and wanted something with a little bit of weight. Don't be afraid to use unusual items in your projects! Also, this lead rope costs $10!
I love the finished product and hope that you stop by the blog to leave me some comment love!

Want more details about this and other DIY projects? Check out my blog post!
Comments
Join the conversation
3 comments
-
Awesome post! Love these chairs so adorable <3
-
LOVE these chairs, we plan to do the same navy and white paint, and use navy blue and red plaid fabric on the seats.


Frequently asked questions
Have a question about this project?