


DIY Cutting Board Clock
Do you love having a clock to glance at to tell the time? Despite mobile phones and fit bits nothing quite beats a clock on the wall. This cutting board clock is perfect for the kitchen, the time is marked with sea washed broken pieces of tile we found on a family holiday.

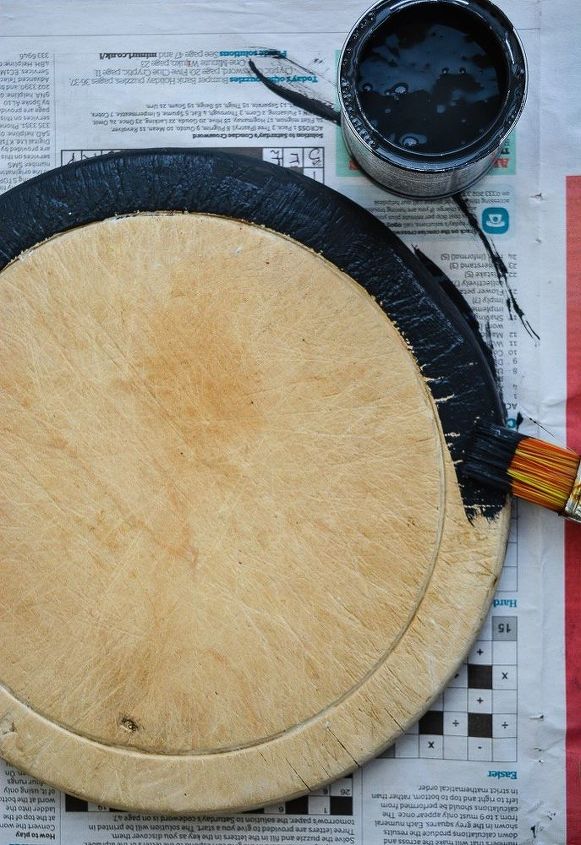
Start by thoroughly cleaning you chopping board. My chopping board has a round set back edge which I have highlighted with Rustoleym chalk paint Graphite
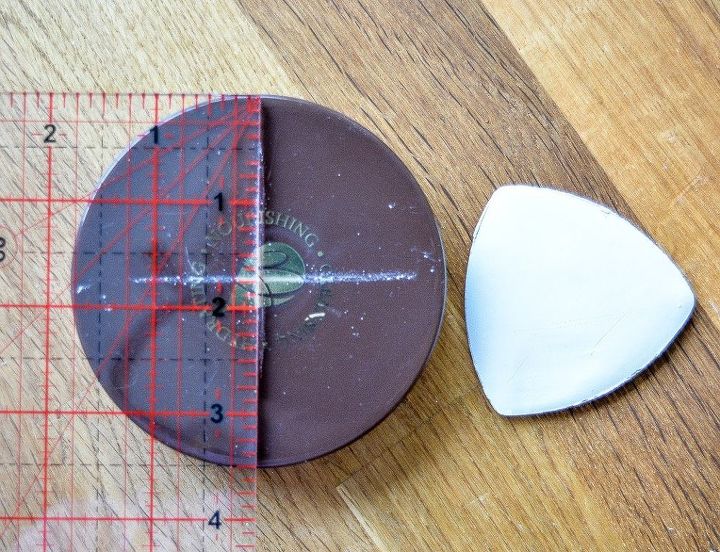
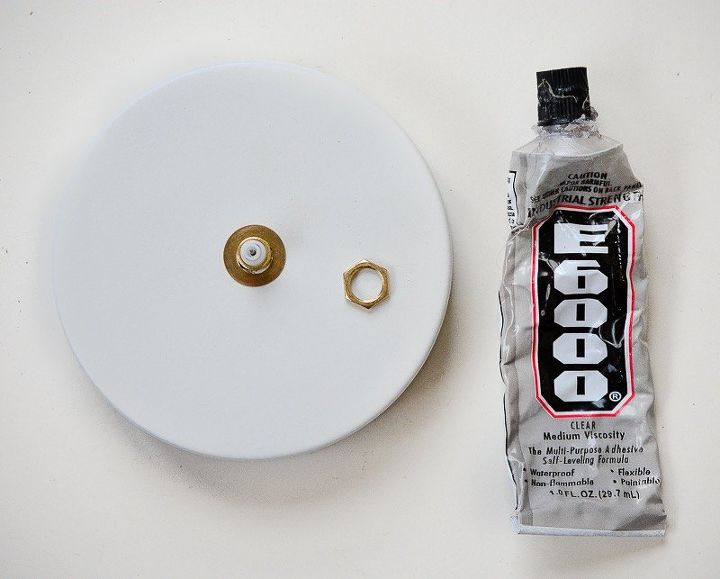
Whilst this is drying find an old round lid which is wide enough to cover a clock mechanism (I bought a clock kit). Mark the centre of the lid.
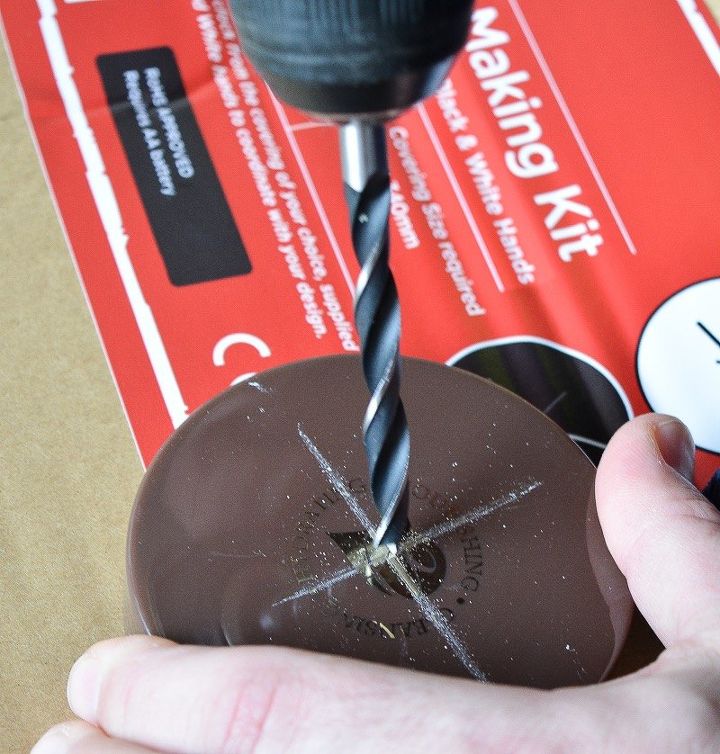
Drill though the lid to create a hole for the spindle to come through.
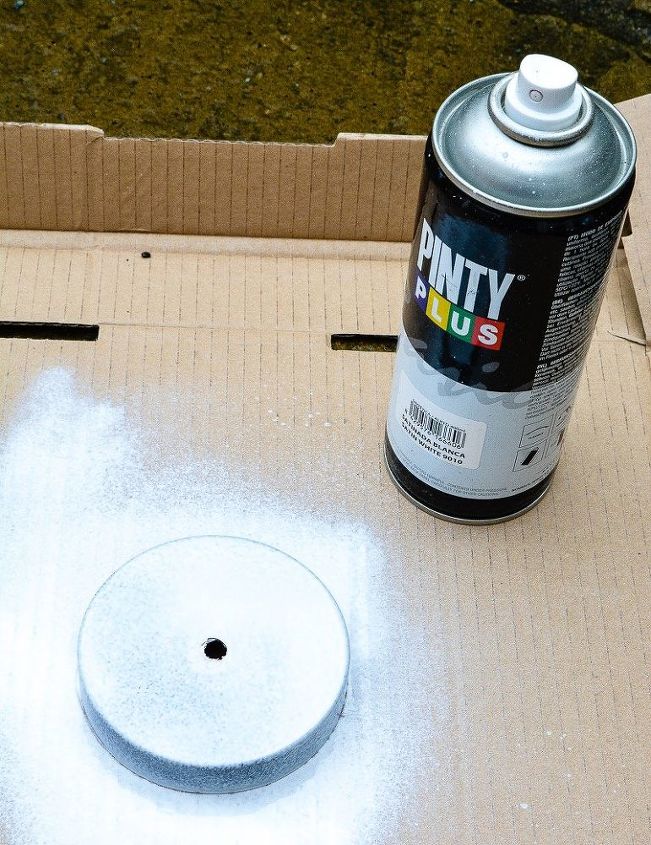
Spray paint you lid in fine even coats of chalk paint. I used Pinty Plus white chalk paint spray.
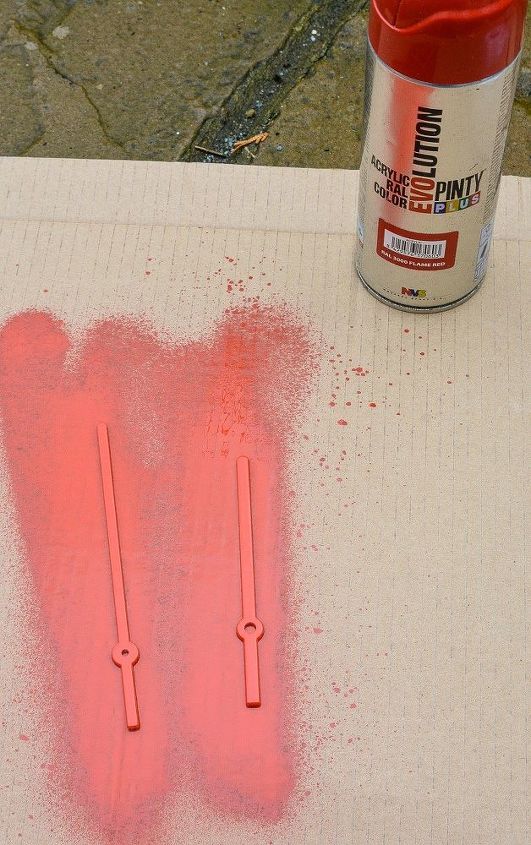
If you would like different coloured handles for you clock spray paint them too.
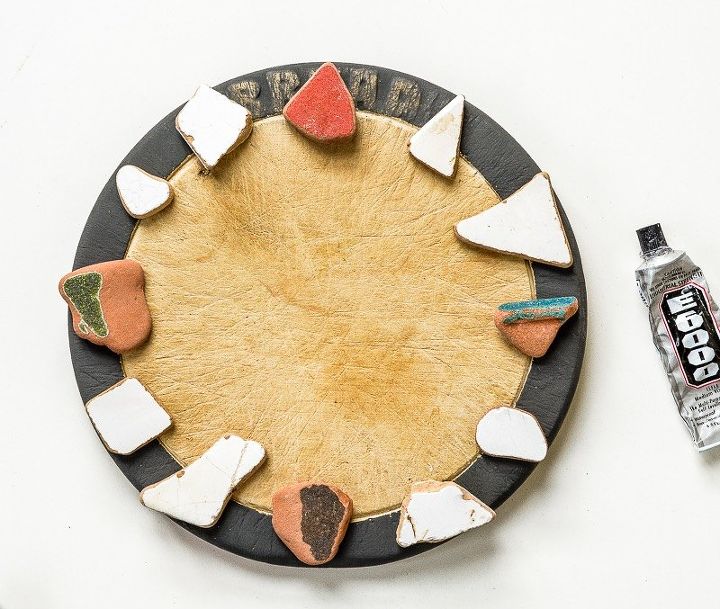
Using a string adhesive add you tile pieces to your cutting board/clock front. I used E6000.
Place your clock mechanism inside the spray painted lid and glue together.
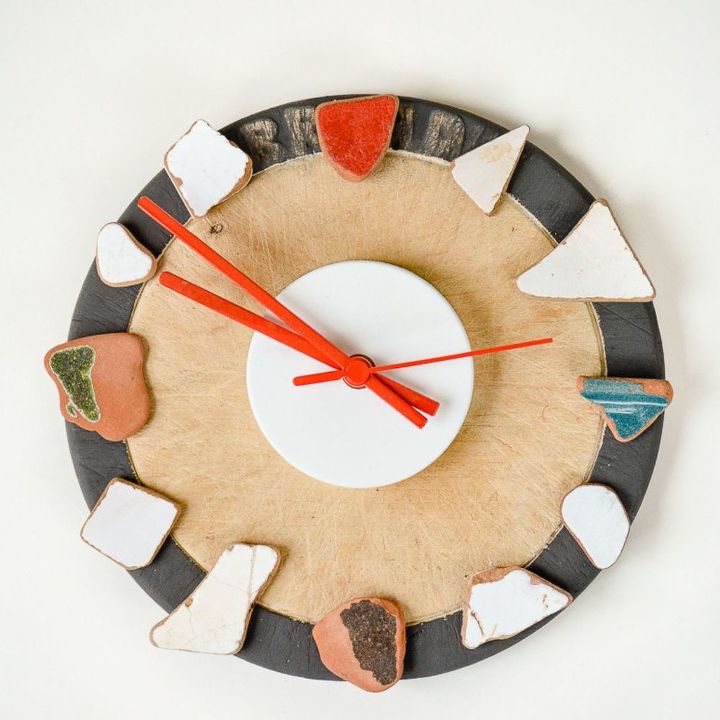
Attach to your clock and add your handles at the correct time. Add a loop of strong string to the back to enable you to hand your clock one the wall. If you need any further details about any of the steps check out my blog post here. I love our kitchen clock, perfect that it is upcycled from a cutting board, each time I look at it I am reminded of family holidays.

Comments
Join the conversation
-
very beautiful, ..nice idea


Frequently asked questions
Have a question about this project?