


Bar Build & Garage Storage- Part 1

This is my son's garage space that he wanted to finish so that it would serve two purposes:
1. A place to hang out with friends, watch sporting events and drink a few beverages.
2. Create storage space for tools, paint cans etc. and have a general workspace area for those odd jobs that come with being a homeowner.
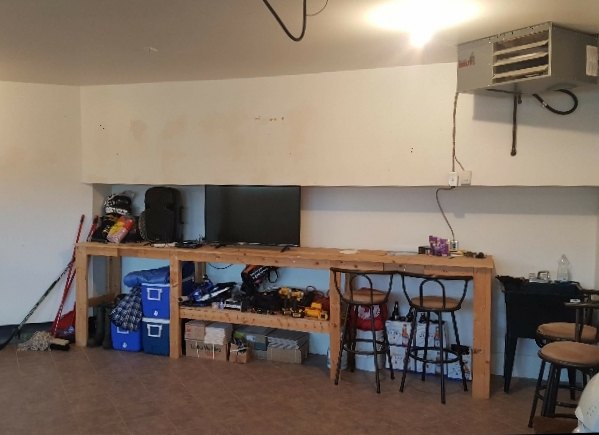
Here is the before shot to show you how bare it was except for a very rugged shelf and a laundry tub. The floors were already completed with ceramic tiles when he purchased the house.
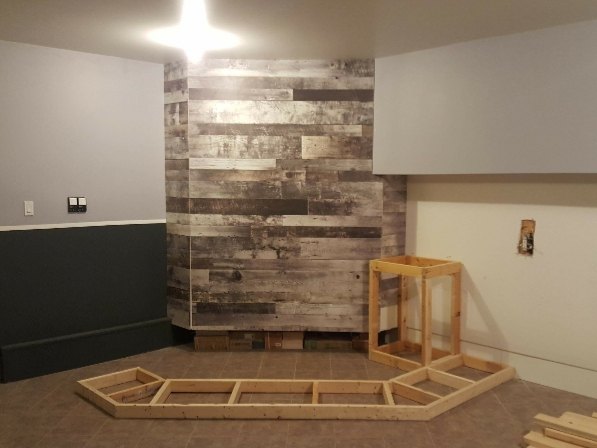
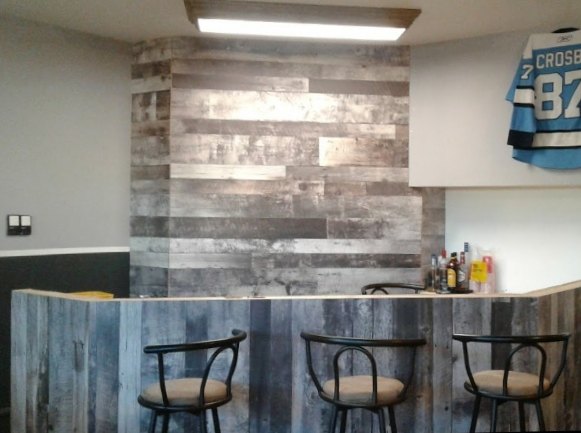
The first task was to touch up the sheetrock with plaster and paint it, he chose a gray paint for the top portion and black for the bottom. Next he created an accent wall with faux barnwood sheeting, it was adhered with liquid nails .
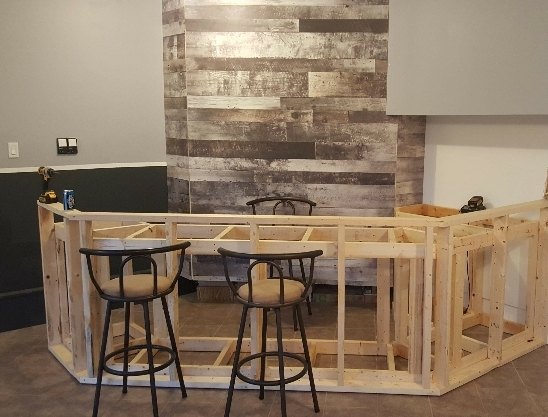
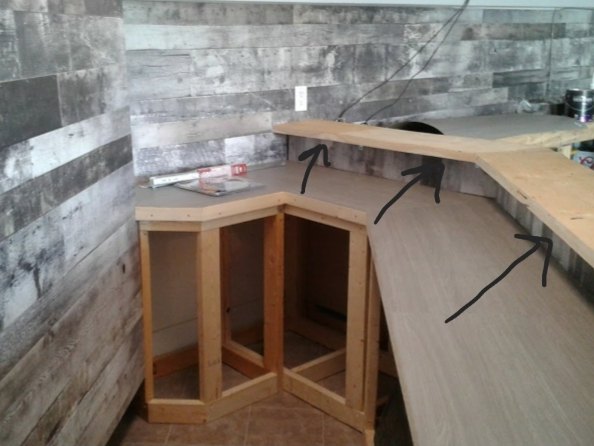
The next part required creating an outline for the shape and size that he could actually build a Bar within the space he had. The framing was done with 2 x 4 boards and 3.5 " galvanized nails, it was not secured to the floor because once it was built the weight of it would anchor it.
The bar framing was then built up to a countertop height of 36" as is standard height.
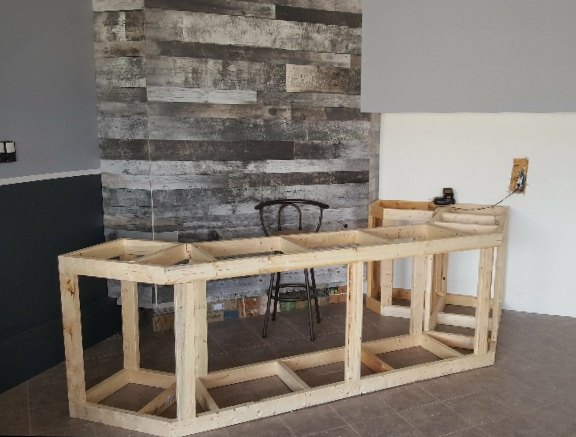
To figure out the height for the top his dad suggested to put the bar stools that he was going to use in place. Then he got him to sit in place to get a feel for where the top would be a comfortable height.
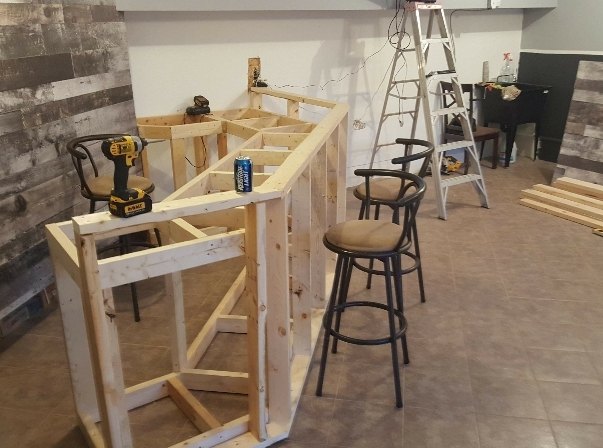
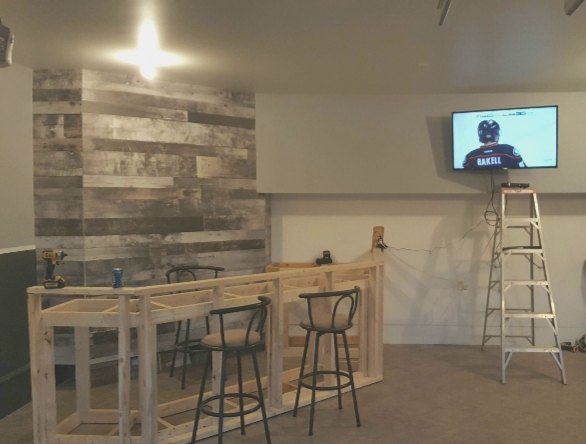
Oh and as the project was only getting started when the boys needed a television installed as you could have guessed! Like father....like son, a T.V. is a must!
The front of the bar was covered in with the same sheeting as the accent wall. A new rectangular boxed light was purchased and installed above the bar as well.
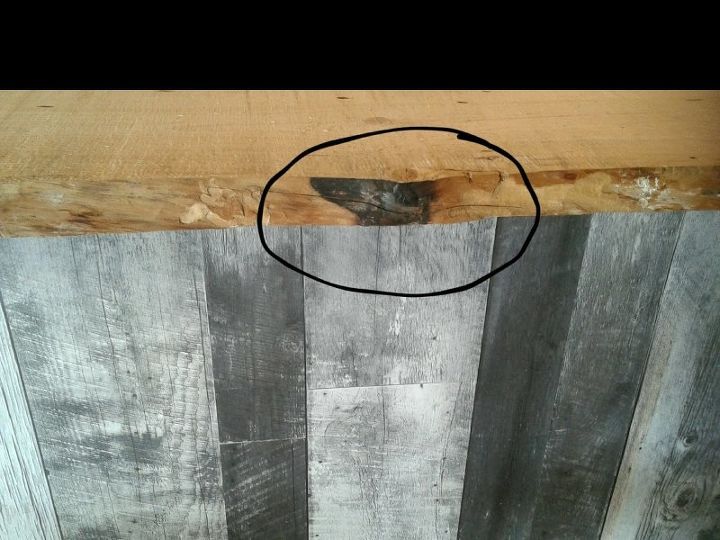
The bar was going to have a very special bar top, a piece of live edge wood that was salvaged from the Fort McMurray fire. My son along with thousands of others evacuated and fled the engulfed town, very scary moments but luckily these are happier times.
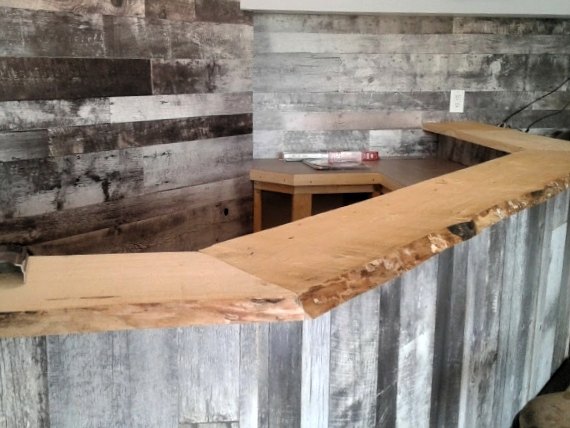
This is an actual scorch mark from the fire, a stark reminder of a scary time and also reflect on being thankful how everyone escaped with their lives.
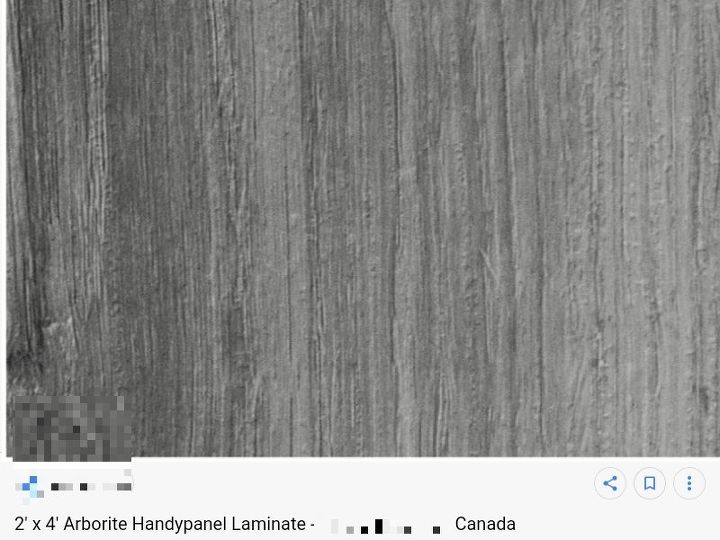
Next were the countertops, he chose to finish them with a laminate sheeting product called Arborite.
It was relatively inexpensive and it was installed using contact cement. Once the contact cement had set up enough to adhere the two surfaces together it was given a firm pressing and smoothing out by hands and using a dry cloth. You must ensure both surfaces have adhered without any air pockets.
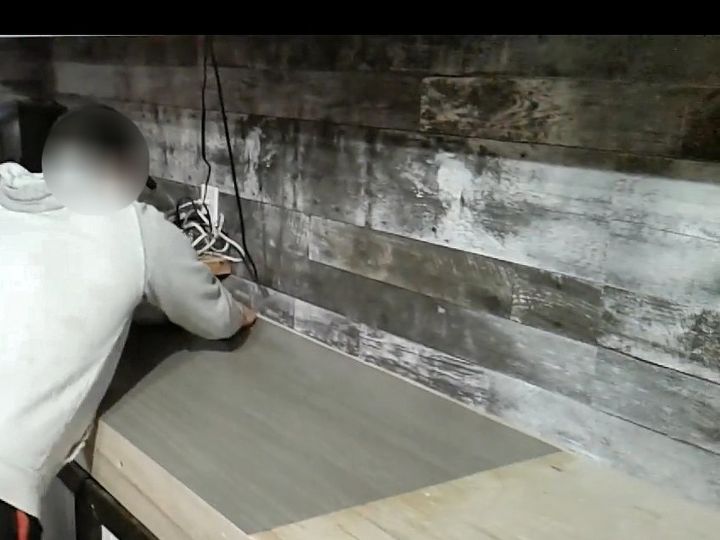
The Arborite was given mitred and straight cuts for fittings to the wood base by scoring it and then cutting with a utility knife and straight edge.
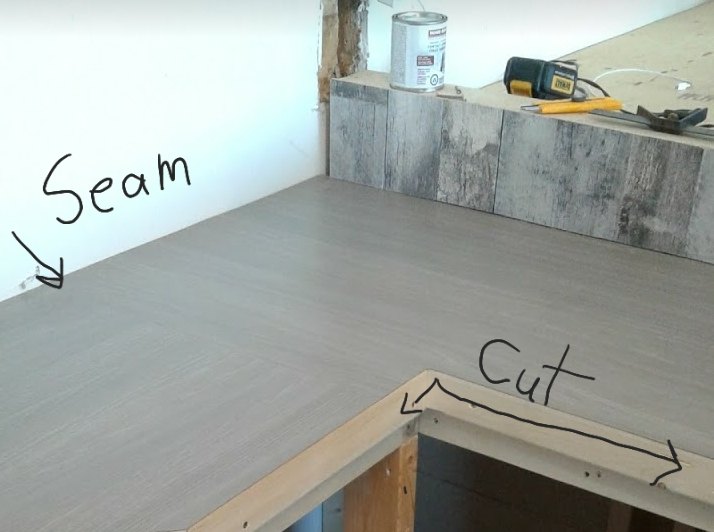
The last instruction for the completion of the bar was to secure the bar top with brackets underneath at the back. The inside edge of the wood was given a straight edge cut as seen below. You'll notice extra sheets of Arborite are shown in the upper right, thats the size they were purchased as.
Eventually a bar fridge and white shelving will be added to the inside here but for now this marks the completion of Part One of the Bar Build. Part Two will share the storage solution and the final touches that were given to the Garage.
Follow the link below to see the completion of this project.
https://www.hometalk.com/diy/windows-doors/doors/bar-build-garage-storage-part-2-40963042
Resources for this project:
See all materials


Comments
Join the conversation
-
This is looking amazing!!
-
You stated, "The front of the bar was covered in with the same sheeting as the accent wall" but I did not find where you said what sheeting was used on the accent wall. I really like the look and wondered what type of sheeting was used for the accent wall and the front of the bar. Thanks!


Frequently asked questions
Have a question about this project?