


Shed Loft

I'm not quite a hoarder, but it's getting close. I have a lot of things that I truly do make use of (or I am pretty darn sure I will someday soon). I do like to know what I have and where it is so organization is key, as is making the most of every storage opportunity. I recently purchased a shed for my yard and wanted to use every inch of it in a neat and easily accessible way. To have a loft built by the shed company would have put me over budget so I decided to give it a go myself.
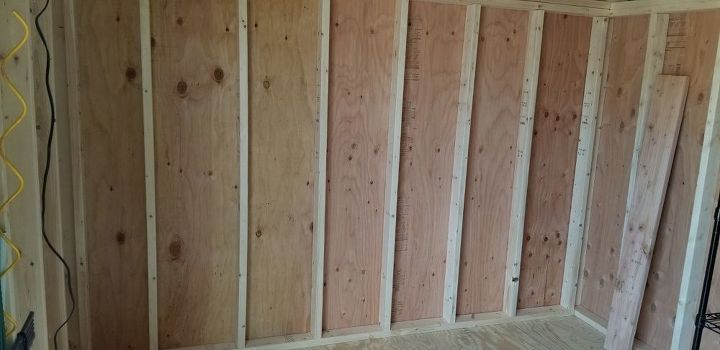
This is the wall in my shed I am working with. It is about 10' long. I have about 4' clearance on each side wall. The walls are about 6' tall.

The first step was to measure and mark the height I wanted the loft. I then screwed in 2x4s into the wall studs with the tops at 48" from the floor. I did this on all three walls surrounding the loft, using a level to be sure everything was straight.
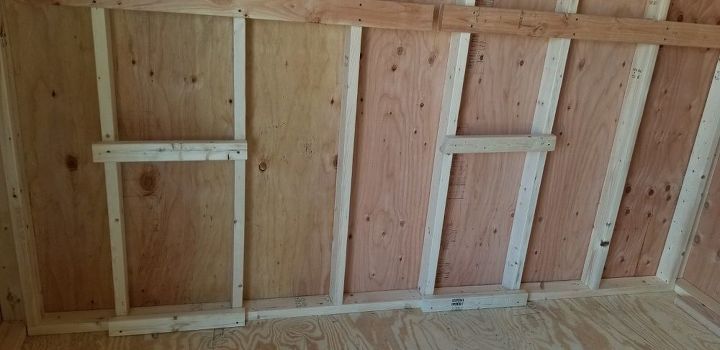
I knew I was going to use two support frames and there were no studs where I wanted to place them. To be sure I would have adequate support for the structure, I installed 2x4s between the wall studs both along the floor and at about 24" from the floor. This allowed me to screw the frames in at the bottom, middle, and top along the back wall.
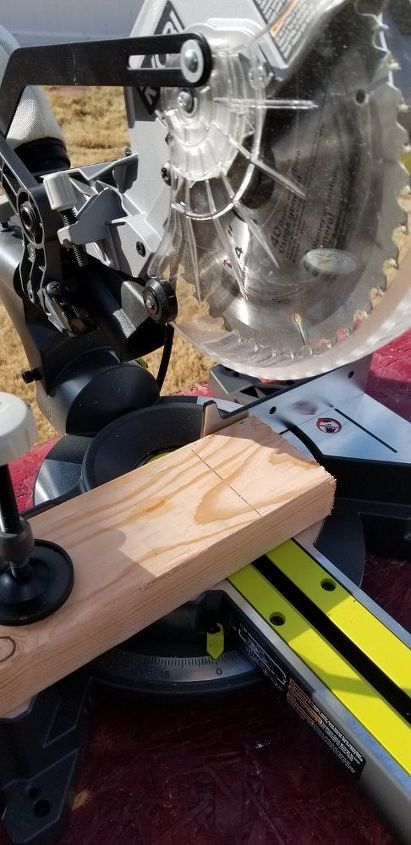
2x4s were used to create the support frames. For each frame, I cut 4 pieces that were 45" long. I wanted them recessed a bit from the front edge of the loft. Since the height was 48", I had to make a 3" allowance for the top and bottom boards.
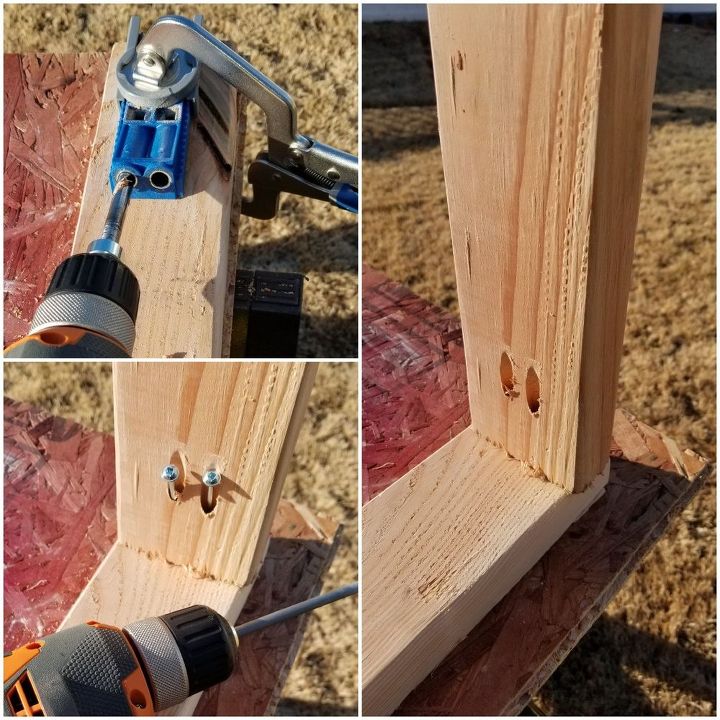
Using my Kreg Jig, I bored two pocket holes in each end of my vertical studs. Next, using wood glue and 2-1/2" pocket hole screw, I built the frames.
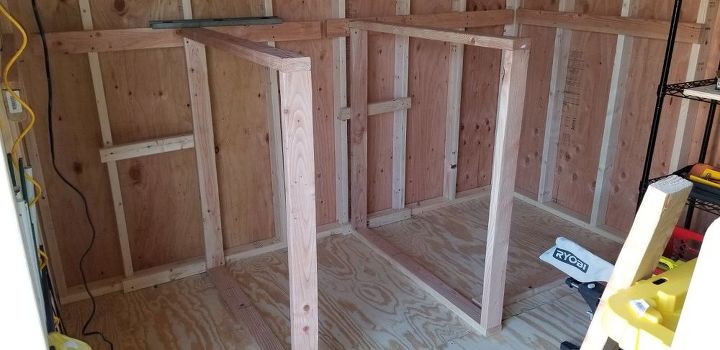
I measured along the floor to space the frames and screwed them directly into the floor. Then, using a level, I screwed them into the horizontal supports that were installed earlier. Lastly, I laid attic flooring boards that were cut for me at Home Depot across the supports and screwed them in. This last step firms everything up and stabilizes the loft.
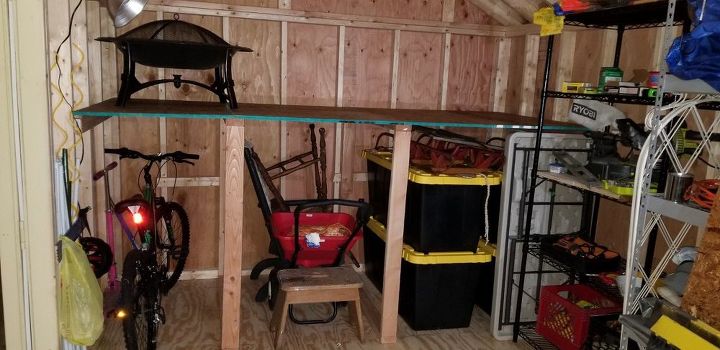
Here is the finished loft. I am sure there are better ways of doing this but it was simple enough, inexpensive, and a very sturdy solution. Best of all, this grandma was able to do it without help (except for the guy at Home Depot)!
Resources for this project:
See all materials


Comments
Join the conversation
-
This is brilliant, adds storage space, and keeps things organized!


Frequently asked questions
Have a question about this project?