


Farmhouse-Style Chalkboard Wall
Using plywood, black chalkpaint & wood trim I created this amazing art space for my tribe of 8...
My little ones and not-so-little ones LOVE to create (and make messes). They color all.day.long.
I decided to construct this chalkboard "wall" for them.
The goal was to give them a larger work space for their artwork while simultaneously decreasing the waste of paper in our home.
I had a very specific sized space I had to work with.
*It's cool. I'm used to it. 10 people living in a small-ish home with 2 dogs means space is constantly being taken by someone or something*
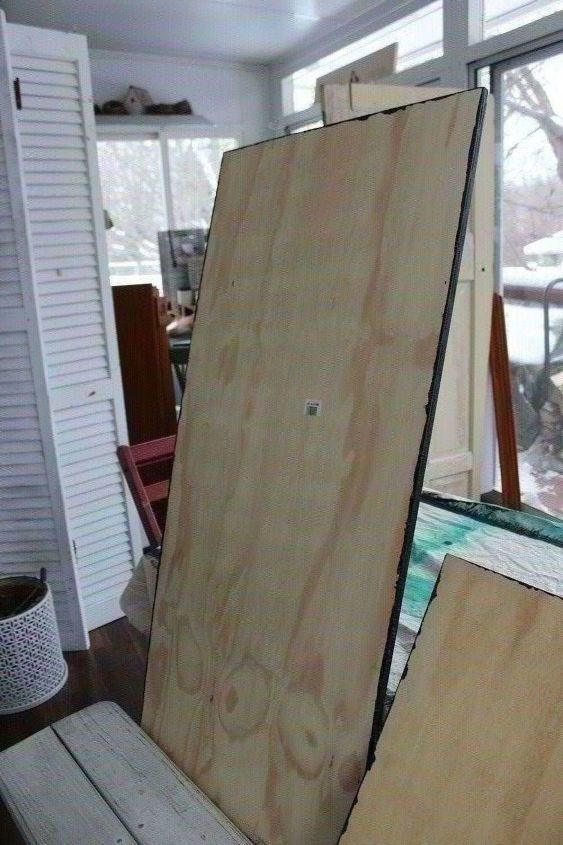
Crazy enough, Home Depot had my exact required sizes in precut and sanded pieces of plywood. They will cut-to-size a larger piece of plywood for you at no charge, but I was pretty excited to be able to just buy and leave!
I decided to go with 2 different pieces for this project instead of one large one for a few reasons.
#1 it was easier for me to handle and construct on my own.
#2 I wanted 2 separate "areas" for chalking (one for the really little ones and one for the sorta little ones).
#3 It's what Home Depot had in the store and I made it work.
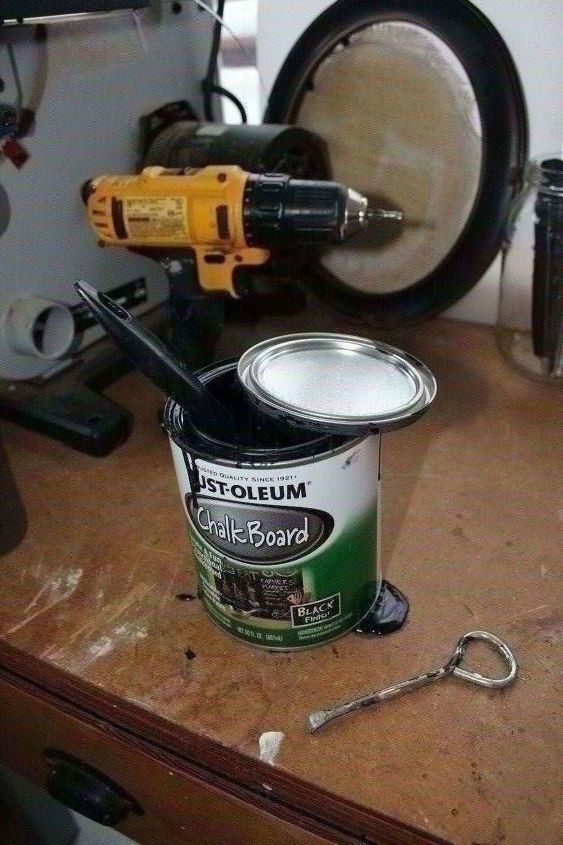
Next, I painted my pieces with black Rust-Oleum chalkpaint. It's by-far my favorite brand to use. And because my pieces were already sanded and I was planning on "trimming" them out on the sides, I literally just brought them in from our abnormally large van and start painting right away.

I did do a good 3 layers of chalkpaint on the wood. Maybe it's over-kill, but I knew these bad boys were going to get A LOT of use. So, I wanted to make sure they would last.
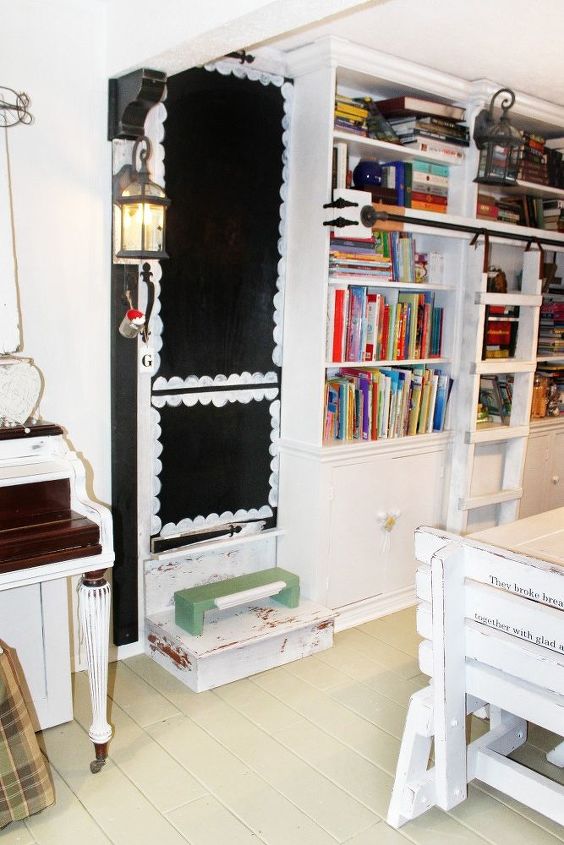
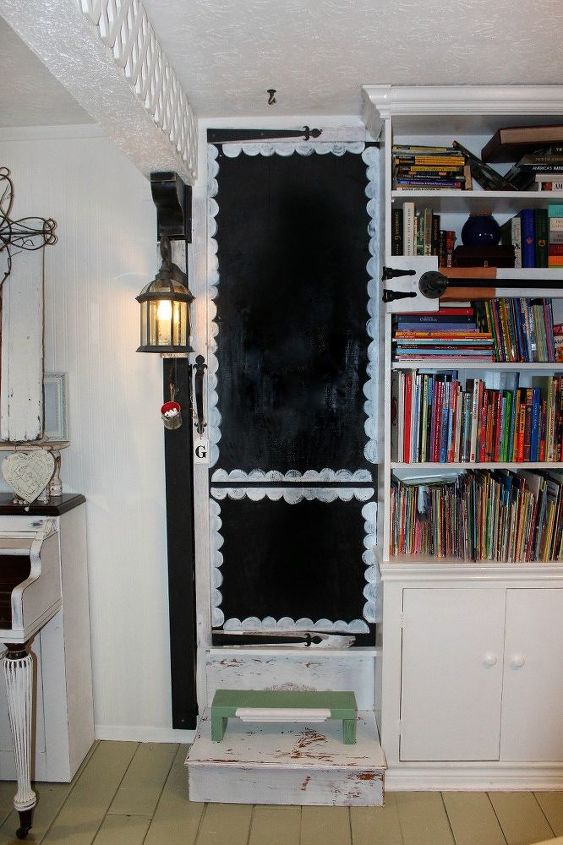
Once they were hung. I took a bit of white chalkboard paint and hand stenciled a sort of scalloped look around the boards with a small paintbrush. I love the fun and "framed" look it gives their pictures!
Plus, it really makes the chalkboards stand out in our dining room!
With the addition of the metal door hardware over the wood trim surrounding the plywood, it gives it a very rustic-farmhouse feel that I love!
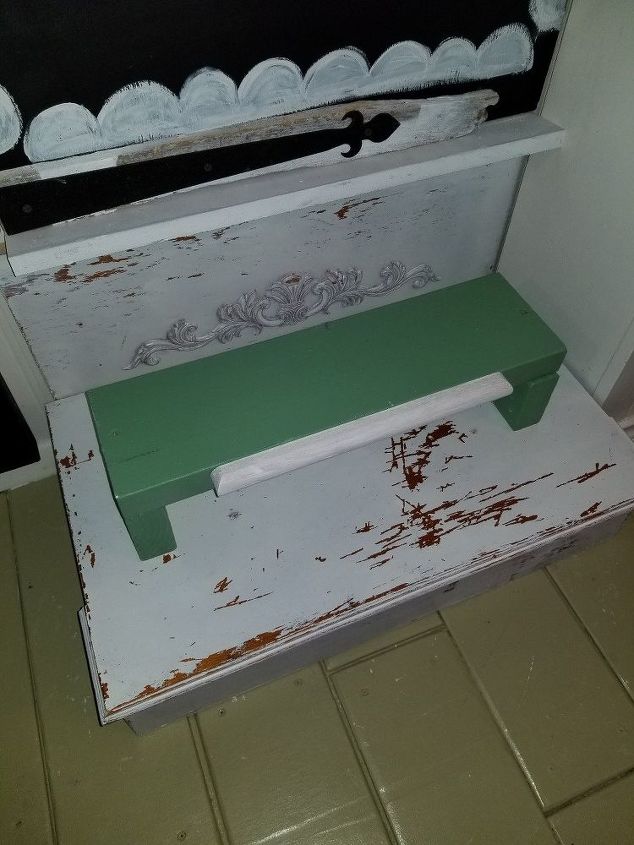
I went a step further and created a stool for my lil' peeps to use to assist them in reaching new heights while Picasso-ing their day away.
This was made from an old fireplace mantle and surround that someone had taken apart and given me.
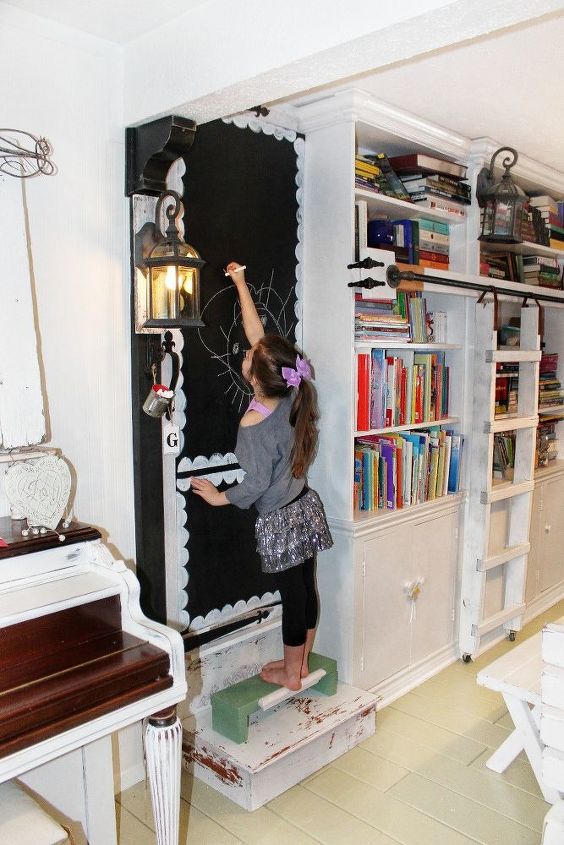
I also attached a lantern to the side of our chalkboard wall that matches the ones hanging from the front of our home library.
They were a set of 3 outdoor lanterns I had found at a garage sale for ridiculously cheap. I love the "Narnia" look they give our library.
PS
I know my library ladder is amazing, if I do say so myself, and I have DIY blogged about that, too!
To see more about my library, my DIY library ladder, my home and my life - follow me
Here on IG: @PerfectlyDeStressed
or Here on my blog: Perfectly DeStressed
Or both if you're cool.

Comments
Join the conversation
-
That is precious! I had to look twice..it looks like an old screen door at first glance. Beautiful job! Also I absolutely love your piano!


Frequently asked questions
Have a question about this project?