


DIY Farmhouse Pantry Door With Glass
My friends asked me to design and build a farmhouse pantry door with glass for their house.
Like I do with most of my projects, I started by creating a 3D model.
The pantry door is made with only 2x6 lumber and it has glass panes. The farmhouse door has a distressed look to accompany the farmhouse style.
This project may seem like it is complex, but it is quite the opposite especially when broken down into 'bite size' sections; therefore, that is exactly what I did in this post.
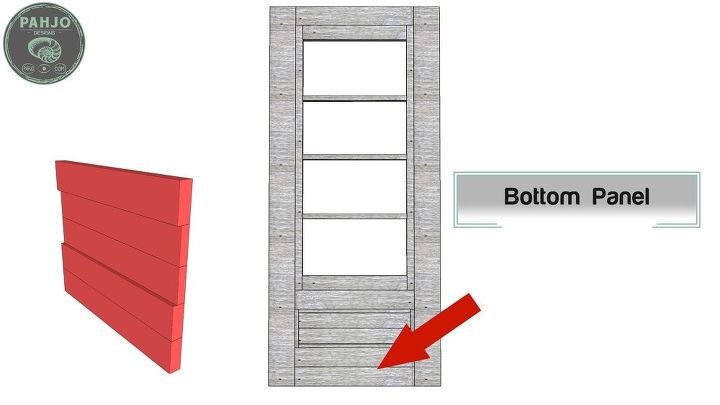
Bottom Section Diagram
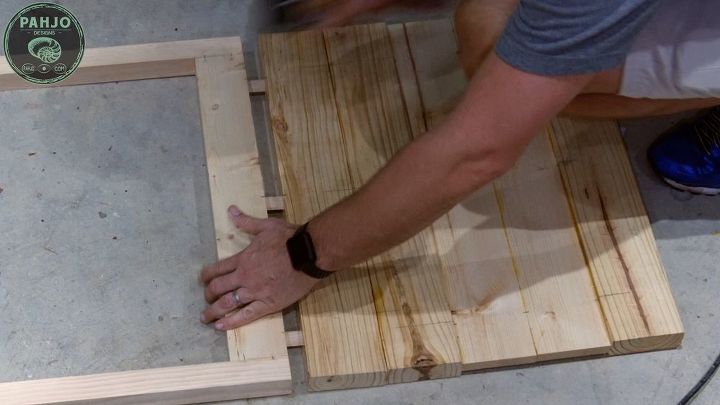
I started by building the bottom panel using 1x4s & 2x4s cut from 2x6s.
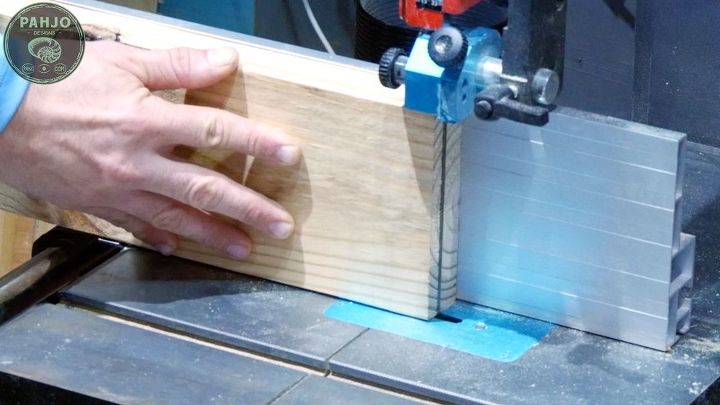
Bottom Section Construction
Next, I used my track saw to cut strips of scrap wood for the few pieces of trim I needed. More on this in a later step.
Then, I resawed 2x6s down to size on my bandsaw, which is how I created the 1x4s. If you don't have a bandsaw, just buy the thickness you need from your local lumber dealer.
I used a domino to join the wood together for this project. Keep in mind, a biscuit joiner or pocket hole jig works as well.
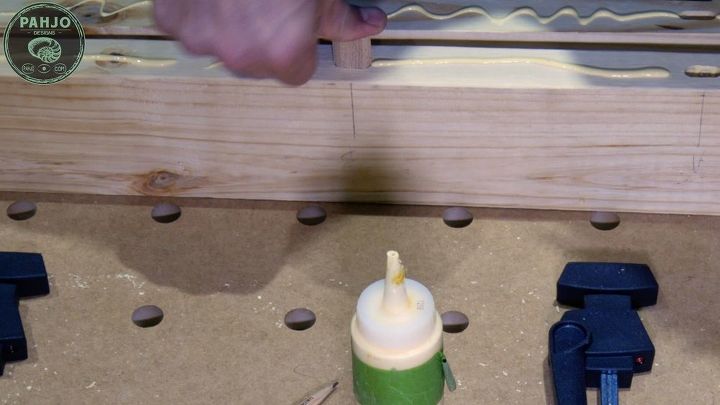
Joining Bottom Section Together
I inserted the dominos, spread glue, and pushed the wood together. I used parallel clamps along with a wood caul on top to keep everything nice and straight.
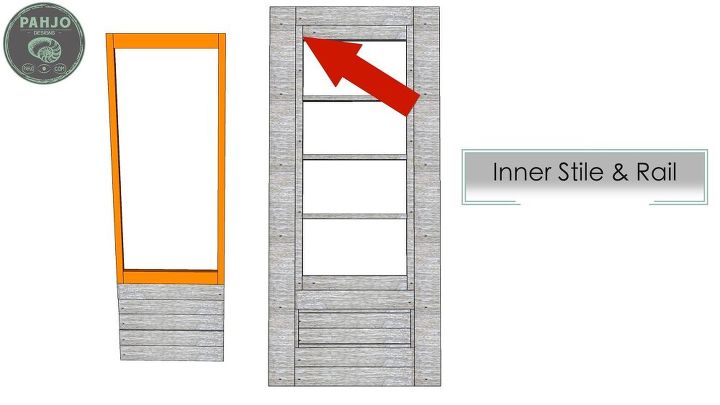
Inner Stile and Rail
After the bottom panel, I constructed the inner stile and rail.
Again, you don't need a miter saw or a bandsaw to cut down 2x6s into smaller dimensions. I did this because I didn't want the 2x6s to go to waste. Simply buy the lumber you need from your local lumber dealer if you don't have the tools needed to mill your own lumber.
Inner Stile and Rail Construction
This consisted of a 2x2 and 1x4 both cut from 2x6s joined with 2 dominos at each corner.
First, I clamped it all together and joined the inner stile & Rail to the bottom section.
Then, I used parallel clamps to hold the sections together until the glue dried.
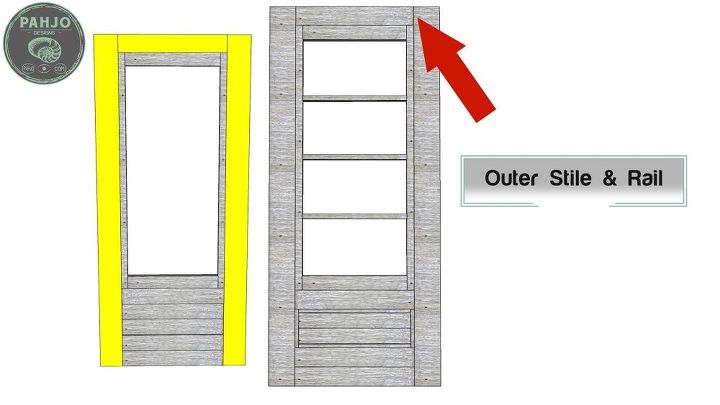
Outer Stile & Rail
Next, I built the outer stile and rail. Although the outer stile and rail looks similar to the inner stile and rail, it is put together differently.
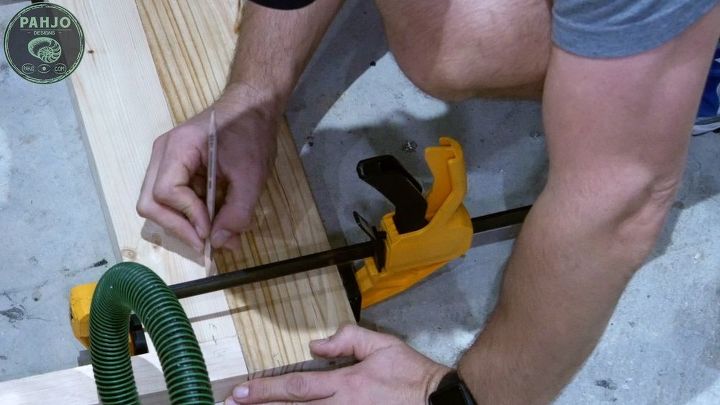
Outer Top Rail
First, I used clamps to hold the top rail in place to mark the locations for the dominos.
Next, I placed dominos at the locations I marked and attached the outer rail to the top of the inner rail.
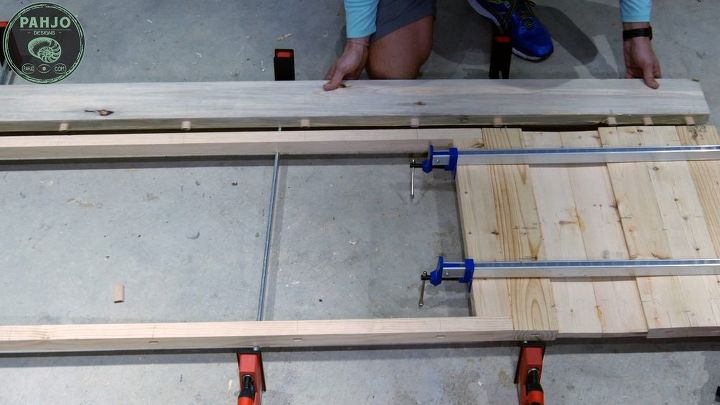
Outer Stiles
I attached the outer stiles the same way as the top rail. I marked the location of the dominos, spread glue, and attached each side using parallel clamps.
The parallel clamps make it easier to attach the stiles by applying even pressure. If you don't have parallel clamps, you can use ratchet straps. Just make sure everything remains level & straight when using straps.
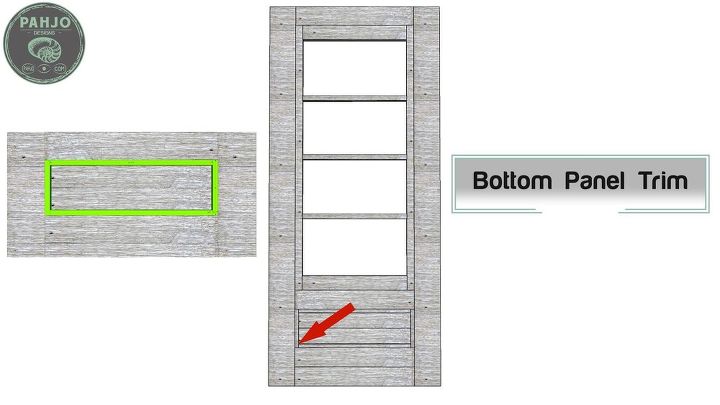
I decided to attach the trim on the bottom section while the glue was drying from the last step.
The trim pieces are scrap pieces of 2x6s cut to size. First, I spread glue and then placed the trim down in place.
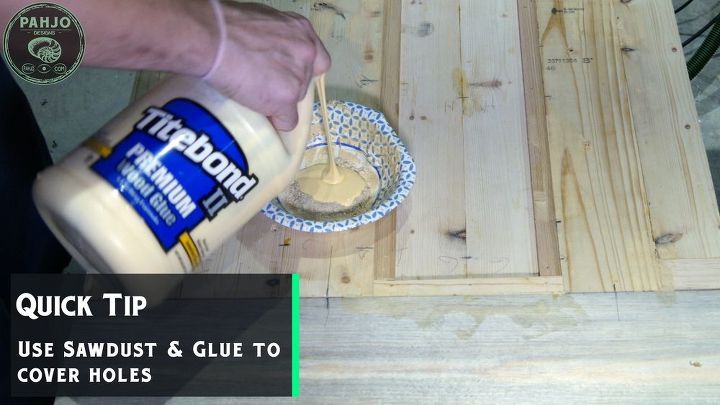
Quick Tip for Patching Holes
As a quick tip, sawdust and glue work great to patch imperfections in a DIY pantry door.
First, mix sawdust and glue to form a putty and patch the holes or seams in the door. Also, make sure to use the sawdust from the wood you are working with.
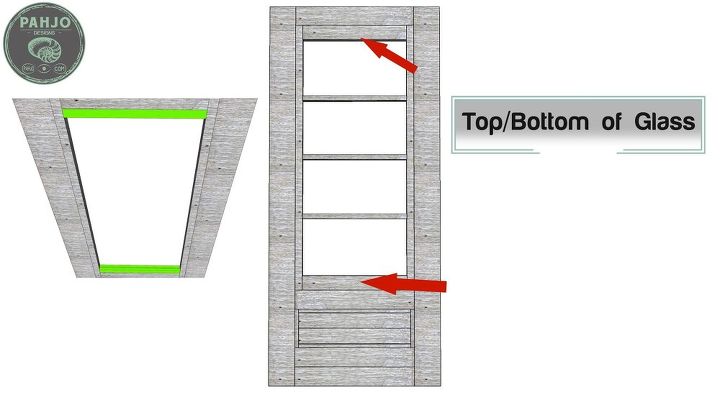
Glass Trim
I used a product called Lexan instead of real glass.
Lexan is a transparent plastic sheet that is virtually unbreakable.
The top and bottom are simply 2 pieces of wood 5/8" thick with a quarter inch gap in the middle for the lexan to rest in.
Also, this is an interior door so it doesn't have to be perfect or weatherproof. Ultimately, the purpose is to hold the lexan in place and make it easy to change if needed.
Next, I layed the glass in place after I put on the top and bottom. Then, I attached the side pieces with glue and brad nails.
Finally, I coated the door with 2 coats of satin paint.
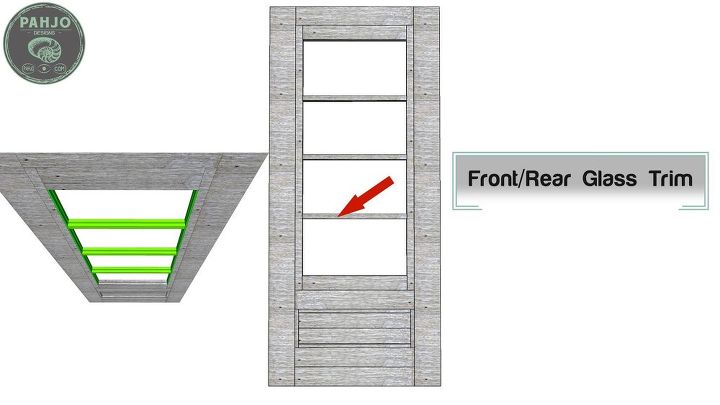
In order to make the one sheet of Lexan appear as multiple glass window panes, I used silicone to attach thin strips of wood on each side.
First, I measured the total length of the lexan and divided by 3.
Then, I used this distance from the top and from the bottom to place the strips.
Conclusion
If you would like to learn how I distressed the paint for this door, checkout my the tutorial on my website or my other HT post.
In conclusion, I hope you enjoyed reading this article and it brought you some form of value.
Leave a comment below and let me know what you think about this project.
Consider subscribing to my YouTube channel to be notified of future videos and visiting my website for other DIY projects.

Comments
Join the conversation
-
Looks good! I guess you’d have to keep the pantry neat and tidy with a window on the door, lol! Or just keep the light off. 😊
-
Really great instructions and project. I've never heard of domino's but they look like they might be a little more secure than biscuits. Thanks for the informative video and article.


Frequently asked questions
Have a question about this project?