


Painted Bins for a Cohesive Look! Red and Metal!
2 Materials
$100
2 Hours
Easy
Getting some order amid the chaos of my workshop. Last week’s post about protecting my modem brought me to this point – a clean floor after nine months of basically not being able to walk in here! With my modem safe I could finally put everything “away” but just because I can walk in here now doesn’t mean I can FIND anything. It was time to go through all of my tools and figure out a home for them.
I hate boxes, I also hate bags and bins and anything that somehow ends up a bottomless pit. I am not a tool belt kind of gal nor have I EVER liked tool boxes. Neither of them have ever worked for me and I absolutely refuse to give them another chance.(Last time I forced myself to use a tool bag I lasted less than an hour before I dumped it out and threw it across the room.)So, what ends up happening, is that I have hoody pockets full of screws (its amazing every time I do laundry), a tape measure clipped to my pants, a marker, a screw driver and god knows what else in my back pockets and my arms full.(You don’t even want to know what I’ve managed to fit down my shirt because, of course, I’m also the kind of person that refuses to take two trips.)Its pathetic and ridiculous.But I have accepted this about myself.
So that means that what I want on hand, what I use all of the time, needs to be IN SIGHT or very easily accessible. I am going to have a tool bench that literally does not include a single bag or box.The rest, though, will be in labeled bins.I emptied out every box and bin in my workshop and started getting organized. I made a pile of everything I want to be able to see and grab without having to open a lid.That left me with a substantially larger bunch of stuff than I was expecting. Where does one put the extra add-ons for their table saw that they will probably NEVER use?Not to mention extra boxes that tools come in. I’ve got one for my skill saw, one for my jigsaw, one for my drill, one for my impact driver and several more I’m not even sure about. And I’m not even kidding myself with these because I know for a FACT that I will never use them!But here I am keeping the damn things…
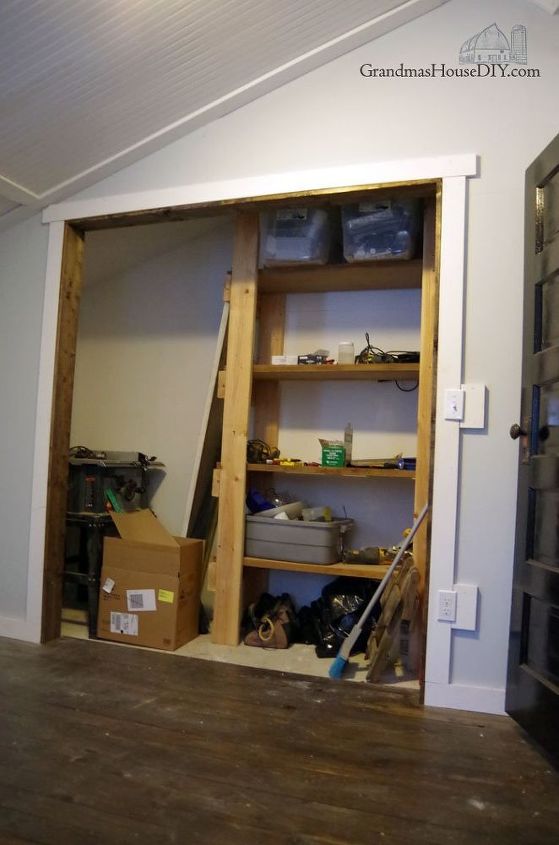
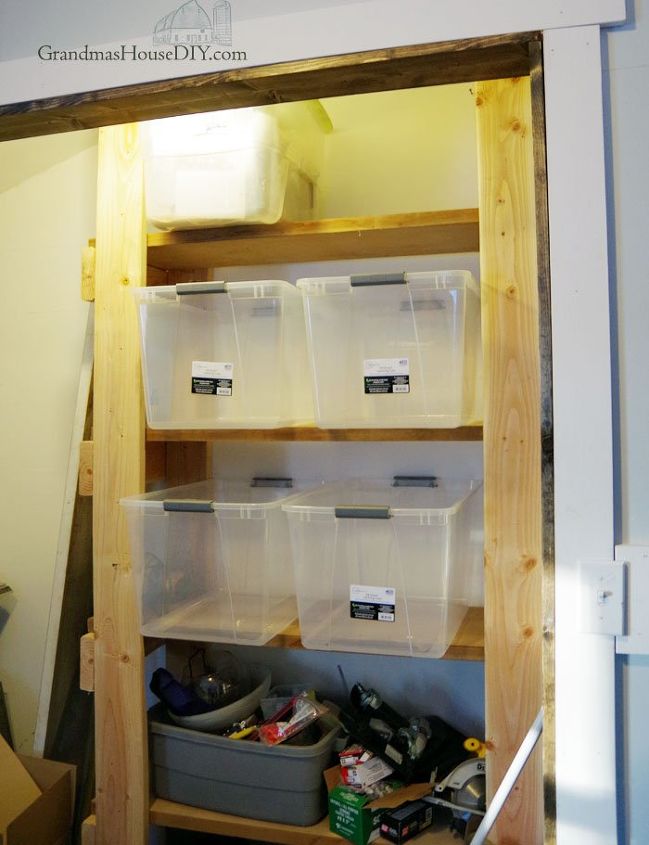
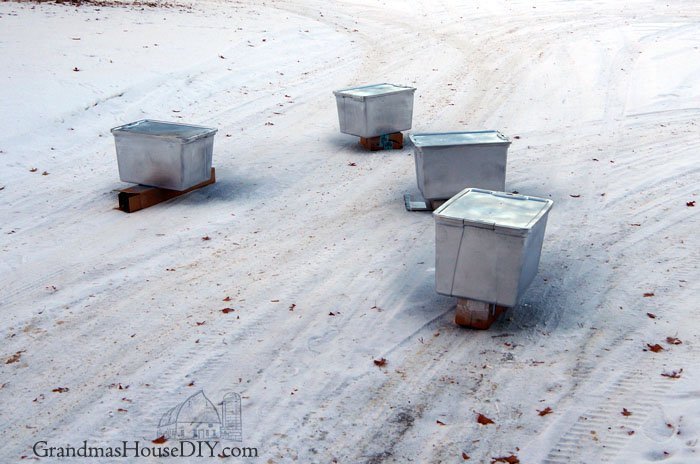
There are also the really cool old tools from my grandpa that I know I’ll never use and am totally happy to keep for sentimental reasons…One of the best parts of this room (especially for a workshop) is the enormous closet. I’ve already got all my paint and stains in here, on the top shelf I went ahead and just stacked all of my excess tool boxes and anything I will basically never need.In the bottom of that shelf I have my old cd player from when I was a kid waiting for me to find a good spot for it and a couple of old printers that I’m storing.(I’ll cover those electronics up to protect them from dust and workshop debris before I get too much further into this.)With that all away I had a big empty shelf and so I headed to Walmart and purchased four bins to add to the two I already had.
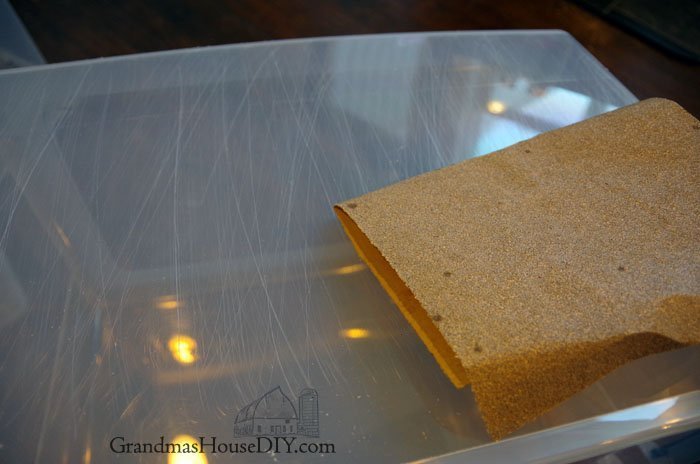
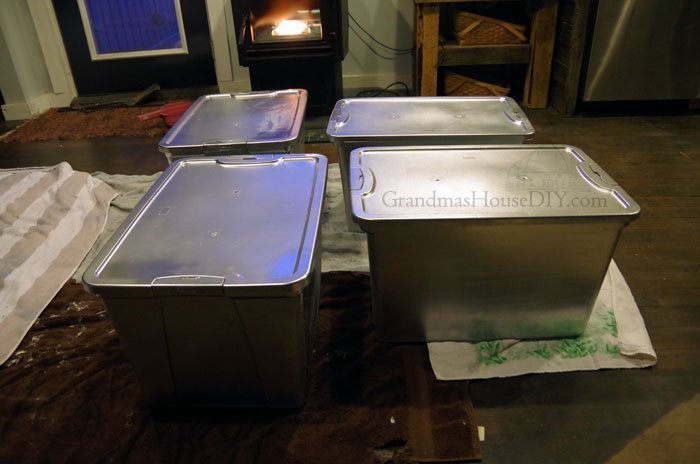
The organization made my heart really glad but dang the ugliness! First I had to tackle them by removing all of the stickers before I could decide how to make plastic bins look like they belonged in my farmhouse Workshop.I wanted a metal look so I went searching on Amazon for Rustoleum’s line of “metal” spray paints. I purchased two cans of Rust-Oleum’s Bright Coat Metallic in Gloss Chrome.

I hand sanded down all the bins with REALLY rough sand paper (40 grit) hitting them in one direction and then the other to create real texture and then I spray painted them outside.Yes, you can spray paint outside even when its really cold out. After about an hour I brought them in to “thaw” and then dry normally.I was hoping for kind of a galvanized look.What a difference!
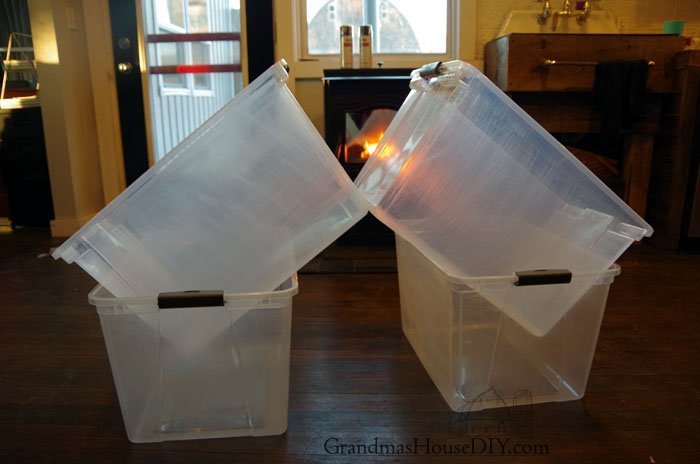
It was literally fun finally putting things away lol and even more fun to realize I had room for four MORE bins!I decided to do something different with the next four though and picked a spray paint in a totally different color. RED. I also didn’t add the texture to my last four bins like I did the first four.
I’m really happy with the contrast between them.On the top shelf went my two bins I’ll be using the least: Rocky and Mario (sheet rock tools and plumbing stuff). The next shelf got Crafty and Sparky (Craft supplies like my glue gun and Electrical tools, extra outlets, wire etc.).The next shelf I put Sandy and Paint (my two electric sanders and sand paper and all my painting supplies.) the next shelf got my Hard and Fast bins (Hardware such as hinges and knobs and then fasteners and screws in the other bin).
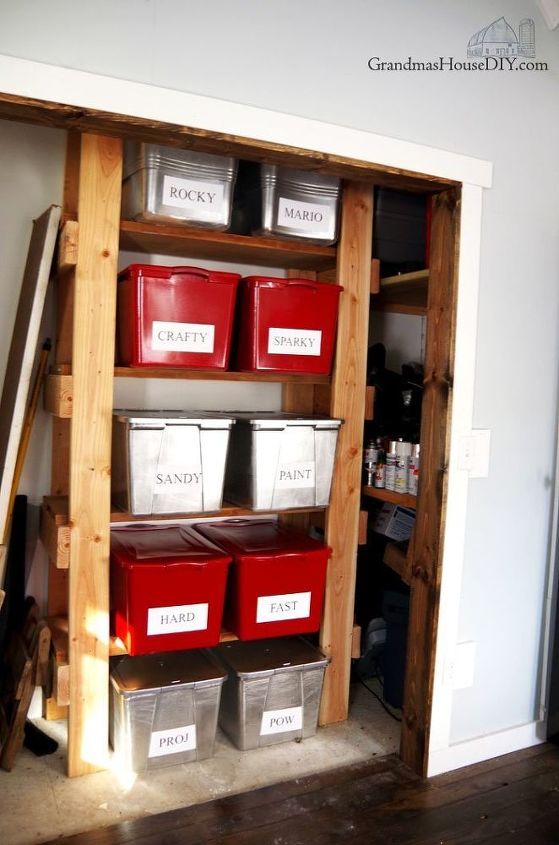
The last two are my Proj and Pow bins which is projects I have that I want to tackle and all of my power tools I don’t use very often.(OMG I finally not only have a spot for not just my power tools but also their extra blades, staples, nails etc. Goodness knows how many times I’ve gone looking for my box of brad nails and ended up just buying another one and they’re not cheap!)What’s wonderful is most of these bins are not full at all and I can find whatever I need out of them really easily. I still have a long way to go but this was definitely a good start!
Resources for this project:


Any price and availability information displayed on [relevant Amazon Site(s), as applicable] at the time of purchase will apply to the purchase of this product.
Hometalk may collect a small share of sales from the links on this page.More info

Want more details about this and other DIY projects? Check out my blog post!


Frequently asked questions
Have a question about this project?