


How To Make A Motorized Coffee Table With a Secret Compartment

For a while now I wanted to create a piece of furniture that moves. I didn’t have a preference for the level of complexity I just wanted to create something. I am a huge fan of having a simple space and keeping things I don’t use everyday hidden. When I got my hands on this 4K Projector the light bulb in my head when off! This was my moment to do something cool and hopefully different! I searched the internet for hours looking to see if this concept existed, I found nothing. Now, that doesn’t mean something of its kind is not out there somewhere, I just didn’t find it. So, it was time to sketch up something. This was the second design I came up with. I had many ideas for this, but I needed to watch my time and not make it be a project that takes a month to produce. After scaling back the design, I drew it up and took the cut list to the shop to get started. If you want to follow along I have detailed set of plans here.
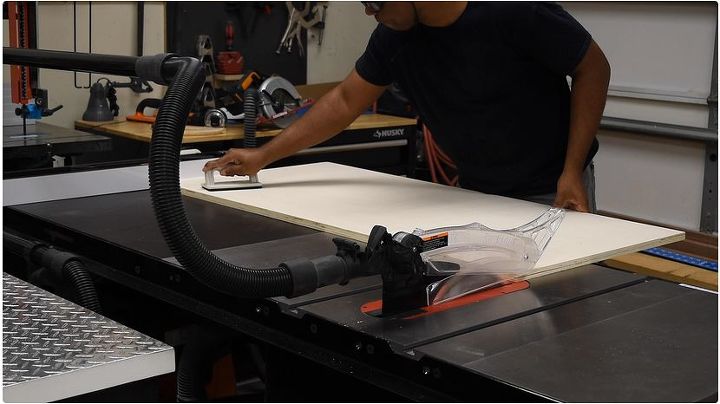
Step 1: Getting Started
Anytime I am in the shop it’s a great day. Although I don’t like to break down plywood, it’s a part of the process. I think this stands true with anyone that has a shop with limited space. After using the circular saw to break down the plywood sheets. I took the rough cuts to the table saw for a more precise cut. You can use a circular saw for the entire build but it’s much more time consuming, but possible.
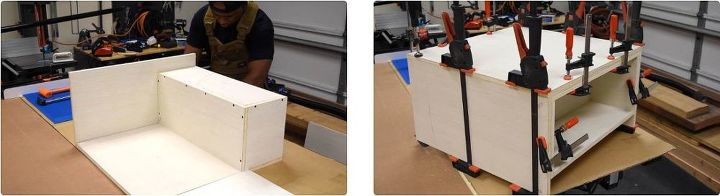
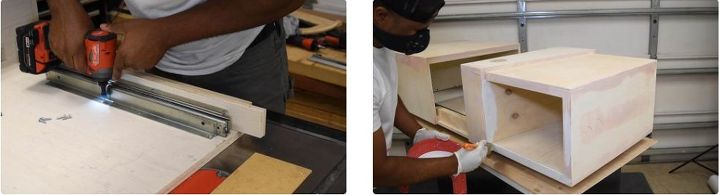
Step 2: Gluing Up The Moving Part
I started off by building the moving section of the coffee table. The majority of this coffee table was double paneled to have a thick appearance. I am a little on the impatient side when it comes to gluing so I normally use a nail gun for a quick hold then add clamps.
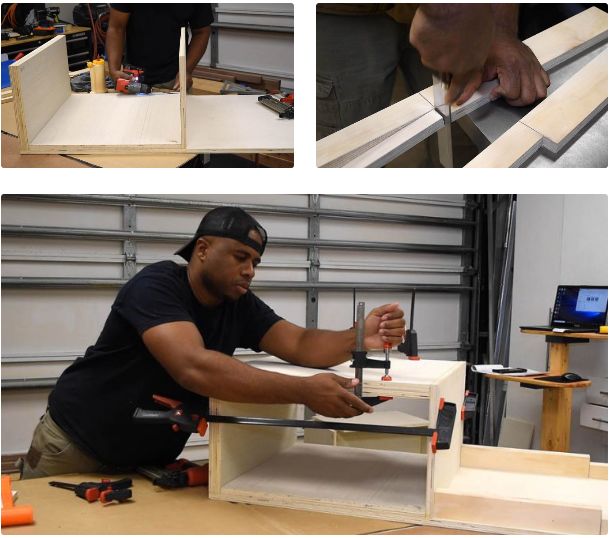
Step 3: Build The Fixed Part Of The Coffee Table
Again, I doubled up on each panel, the areas that were going to be visible I made sure I didn’t over do it with nails. With the side and bottom taken care of, I needed to pull out the pocket hole jig, to make a few holes. Next, I secured the inner panel using pocket hole screws.
I then went on to cut the drawer slide support profile. The slide was later relocated to the inside.
Wrapping up this area, I added the final piece to the top.
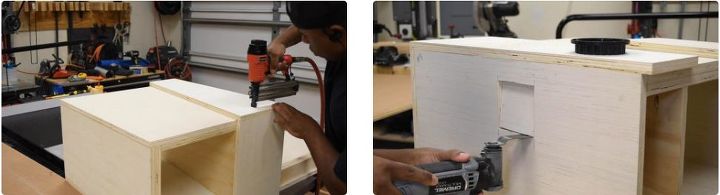
Step 4: Cutting The Access Panel
I added a divider in the middle, that created an empty space which will allow me to hide the pull-up outlet. I then installed the tapered part along the top, this really added depth to the design. Next, I drilled out the hole for the outlet, this is totally optional I just love the idea of having power nearby. Then it was on to cutting out the hole for the access panel. I also cut a hole down below for the power cord to pass through. Finally, I closed off the end.
Step 5: Adding The Modern Profile
After spending time-fighting with the drawer slide location and aligning, I finally got it worked out. It was a relief to overcome the challenges I was facing. At this point, I was behind on the time I had planned for this project. Times like this you can easily get discouraged, but I always look for the quick win to get me pumped up again. That quick win came right after I sanded it down and applied bondo. The first coat of primer did it for me, I was seeing the state of the wood box change and I kicked it into gear; pacing for the finish line.
Note: For a more durable surface and wipeable surface I used a white gloss oil based paint and primer.
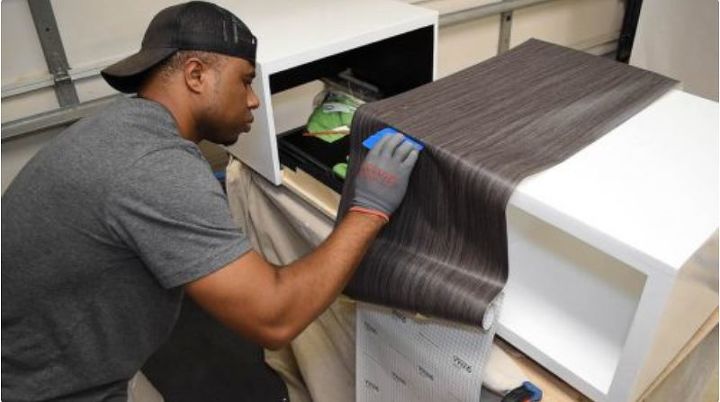
Step 6: Applying Vinyl
Not going to pretend to be an expert in this area, but that wont stop me from trying. With a little trial and error, I eased my way through this. You must make sure the surface is clean, that’s the first heads up. To get started, work your way from one side to the next, then address the complicated areas a piece at a time. I really like the finish look of this vinyl it’s much thicker than the usual.
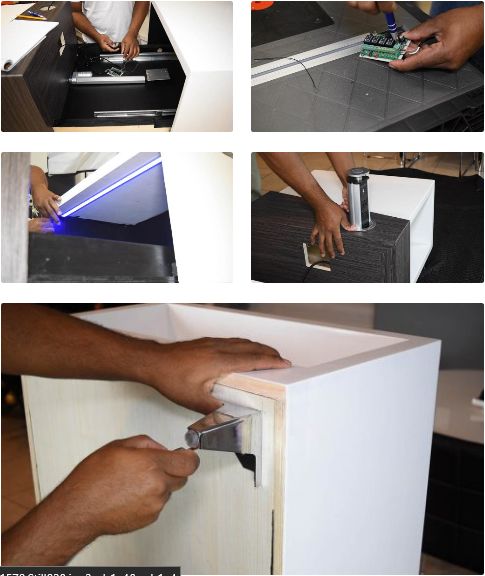
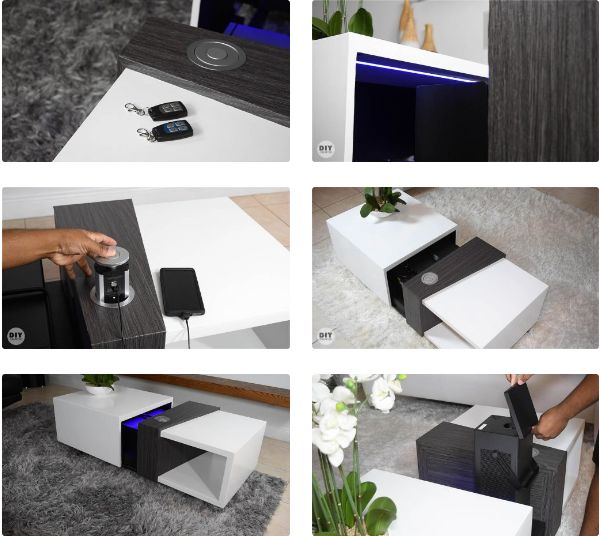
Step 7: Adding The Electronics
There are so many things happening here, I covered this in greater detail in the plans. In short, I installed the actuator in the center of the table. I secured the end with the motor to the bottom with a nut and bolt. On the opposite end, I used this bracket with a piece of 1/8in plate as a way to secure it to the part that moves. The actuator was wired to a 4-channel wireless receiver which I also wired in the LED strip. I would suggest using a LED Kit as a standalone device so you can control each color. The LED were installed in a channel for a cleaner look. If you feel like you are going to do some LED projects down the road I would say grab the channels otherwise you can get by without them.
I also added the pull-up outlet and installed the chrome feet.
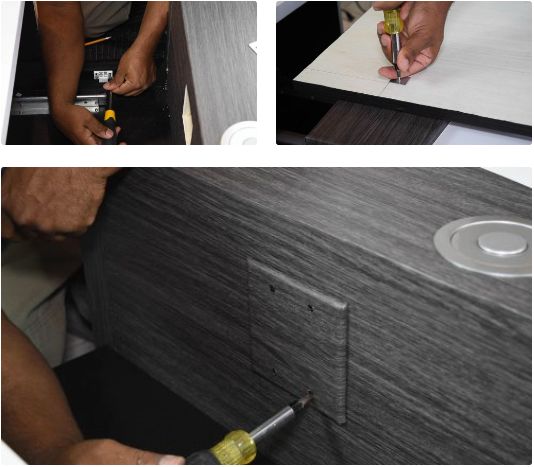
Step 8: Final Touches
To close out this project I added a set of magnetic catch to the cover panel for easy access. If you noticed I also wrapped the cover plate to make the access panel blend in, I know I didn’t show it but you will need this double-gang cut in ring to mount the plate. Of course, you can use magnetics if you want to eliminate the screws. Not a big deal for me.
Step 9: My New Setup
Reaching the finish line was a very exciting time for me. Through all the trial and errors I can now say that this was a success. Bringing ideas to life is what it’s all about, I look forward to the next design challenge ahead. If you want to build your own you can now have the coolest coffee table on the block. I hope you find this post helpful. If so, I would love to hear what you think about it.
Resources for this project:
See all materials


Comments
Join the conversation
-
Amazingly Gorgeous!!!!!!!!
-
This is an excellent idea for projectors. You should be selling these coffee tables. I definitely could use this in my recreation room as we currently just have the projector on a small round table.


Frequently asked questions
Have a question about this project?
AWESOME! You are so awesome to come up with such a clever idea. Are you a furniture artist? You need to patent and sale these coffee tables. I love it. Love the clean lines of the piece.
Hi Glen,
i also live in WPB. My question is about a project that I have seen of yours before (wall mount tv with led). Are you ‘for hire’? I would love to surprise my boyfriend with this. If I attempt it myself the wall would probably cave in &/or I would end up in the ER 😏. He is quite capable of this DIY, but that would not be a surprise 🙃
Can you please let me know the exact brand of vinyl you used? I’ve redone the top of my coffee table in vinyl and it did not hold up to the constant usage the surface got.