


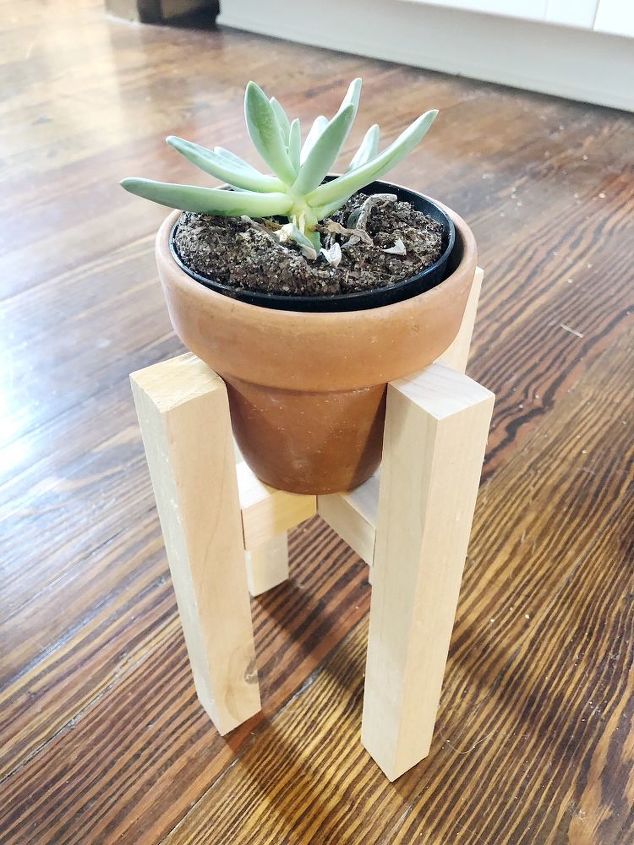
DIY Mid-Century Plant Stand

Go into any home decor store right now, and you will see an overpriced mid-century plant stand. But did you know that they are actually super easy to make? Follow along for an easy tutorial using just a few materials.

Materials:
- A 4-inch flower pot
- (2) 1 inch SQUARE wooden dowels
- 1/4 inch wooden pegs
- tape measure
- pencil
- drill
- chop saw
- sandpaper
- wood glue
- paint/ stain (optional)

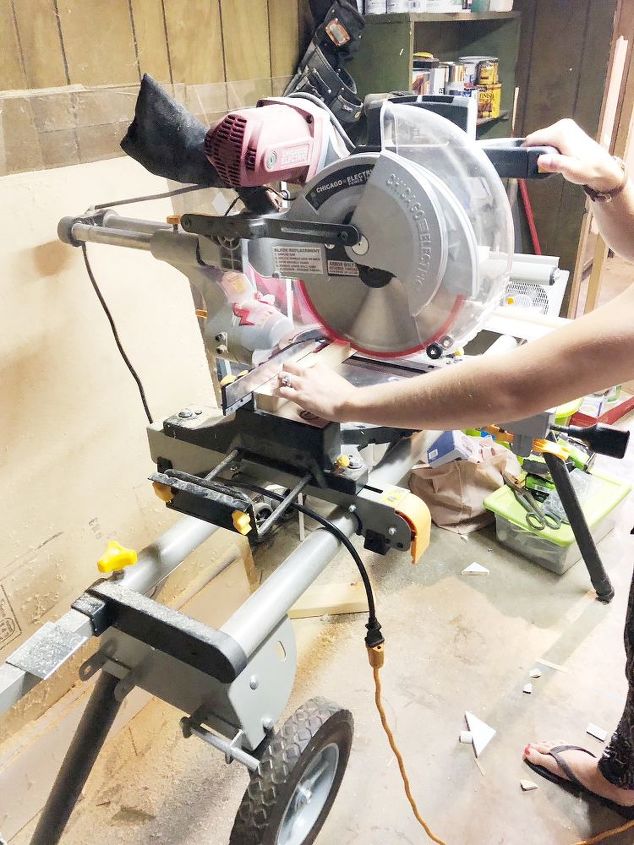
Take your square dowel and cut into 4 9-inch pieces with your chop saw. These pieces will be the legs. This length will depend on the size of your pot. If you use a bigger pot, you will have to cut longer legs. I used a 4-inch flower pot for this tutorial.
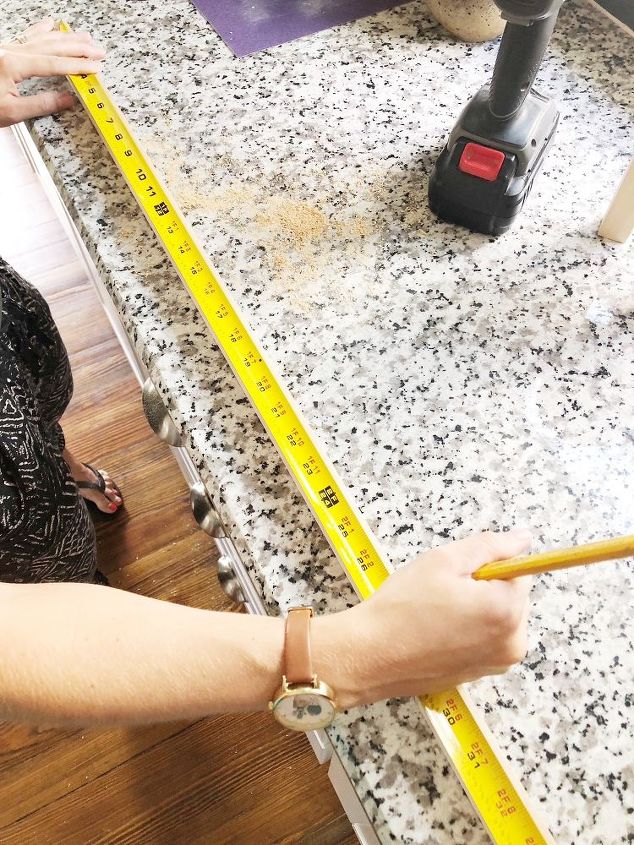
For the supports, you will need one piece that is the width of your pot (4 inches) and then two smaller pieces at 1 1/2 inches each. You should now have 7 total pieces- sand the edges of all of them.
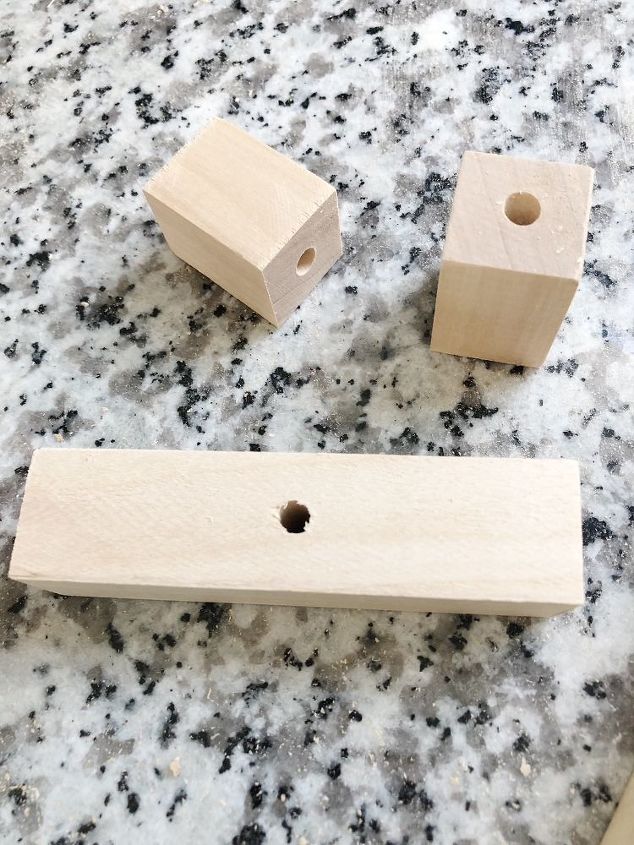
Drill the holes for your wooden pegs. For the legs, you want to measure your pot from its bottom to the bottom of the lip- roughly three inches. Mark three inches from the top of each of the legs and make sure your mark is directly in the center of the leg. Drill your hole, put a little wood glue in the hole, and insert your peg.
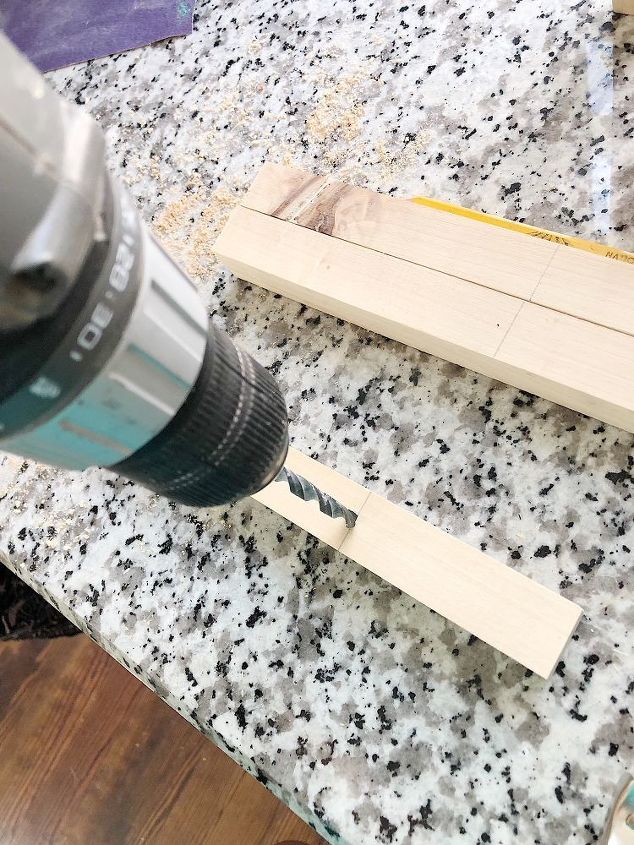
Take your smaller (1 1/2 inch) pieces and find the exact center on the sides. Drill a hole straight through the center.
For the 4-inch piece of wood, you want to drill holes into the ends of each side. Then find the center on the long side and drill a hole straight through.
It’s time to assemble! Grab two of your legs (which should already have the pegs inserted) and the 4-inch piece of wood. Put a little wood glue into the ends of the 4-inch piece’s holes and insert the legs on each side. Your stand should look like an H at this points. Take the remaining two legs and attach the smaller pieces to their pegs, using wood glue as well.
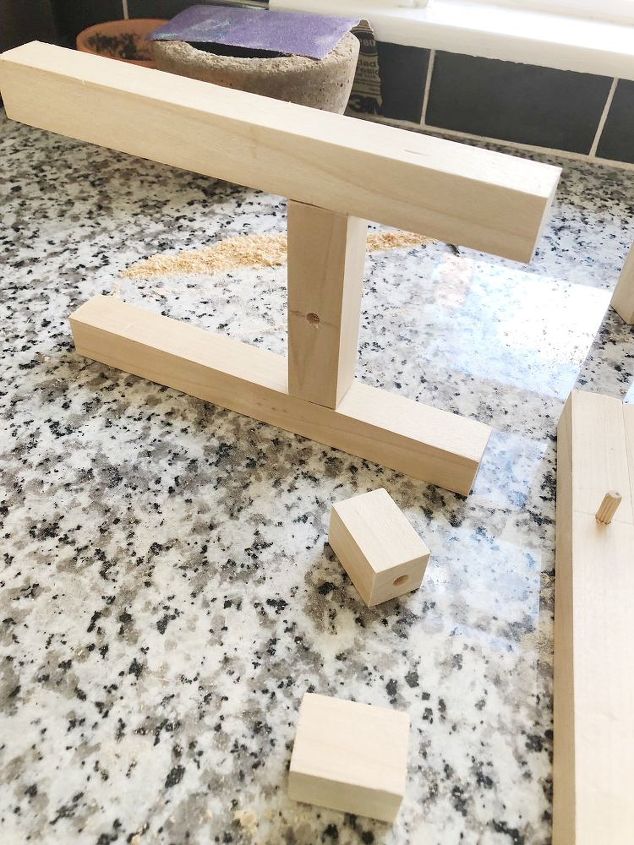
Insert another wood peg into each of the smaller pieces with glue, then attach them to the first part of the stand you created. Let the glue dry before you use it as a stand.
Resources for this project:
See all materials


Comments
Join the conversation
-
Very nice plant stand. So simple and looks great.


Frequently asked questions
Have a question about this project?