


Make an LED Sign WITHOUT a CNC Machine

In this video I show you what materials and tools you'll need to make a sign like this!
Check out my video showing you exactly how to make this sign!

Have you always wanted to make a sign kind of like this one? But you dont have a CNC machine to do it? Don't worry, I don't have a CNC machine so I had to get creative with this build I did for a local dentist office. Scroll on down to see how I did it!
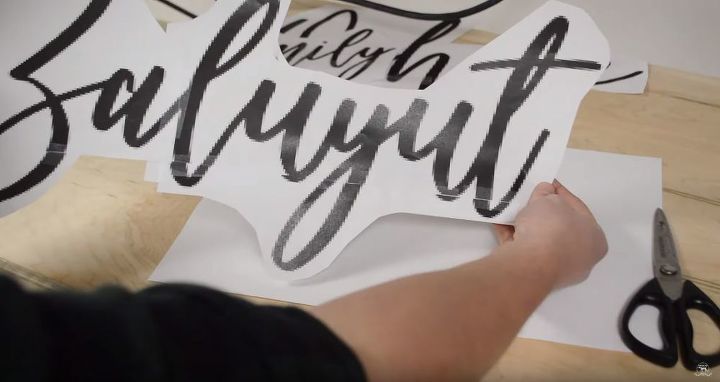
I started off by printing out the logo my client sent me. This is a pretty simple task and can be done in Microsoft word or excel (whichever you're more proficient at). Obviously I didn't have paper that printed this 4' sign out so I chose the option that would print it on multiple pieces of paper. Simply cut and tape, that's really all there is to it.
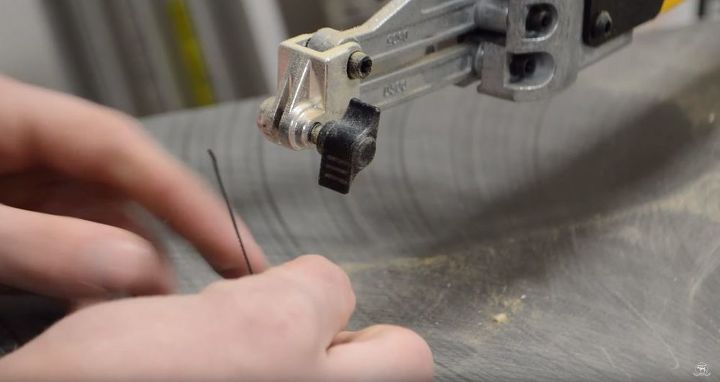
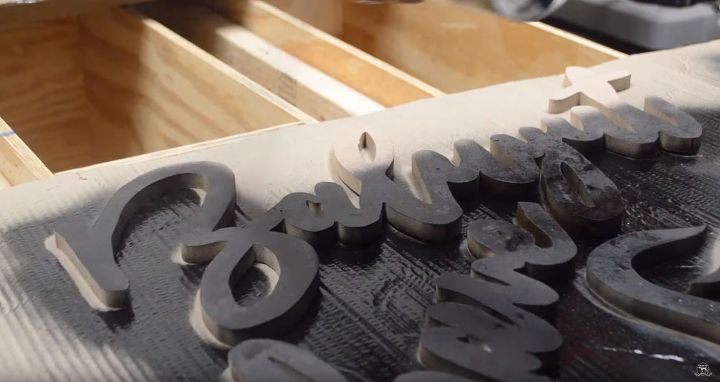
Once all my graphics were printed and stuck to the 1/2 board, I went over to my scroll saw and put in a No. 2 Skip tooth blade (perfect for making tight turns on projects like this). BE AWARE, blades will break on you. It's very common, so switch out your blades often and make sure you're wearing the proper safety eye wear.
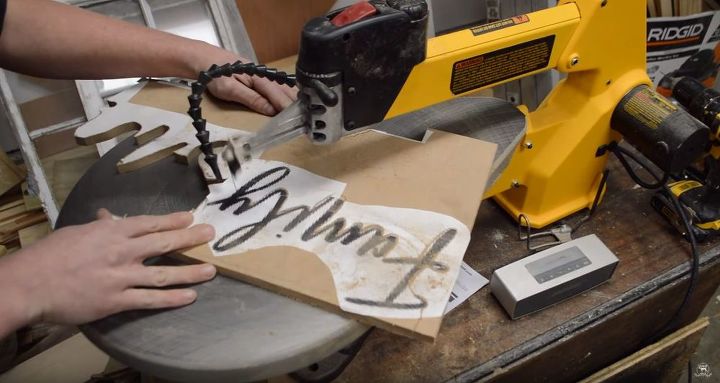
It'll take some time to cut these pieces out so be sure you have a good song playing on your headphones or speakers. My total cut time for these letters was about an hour or so.
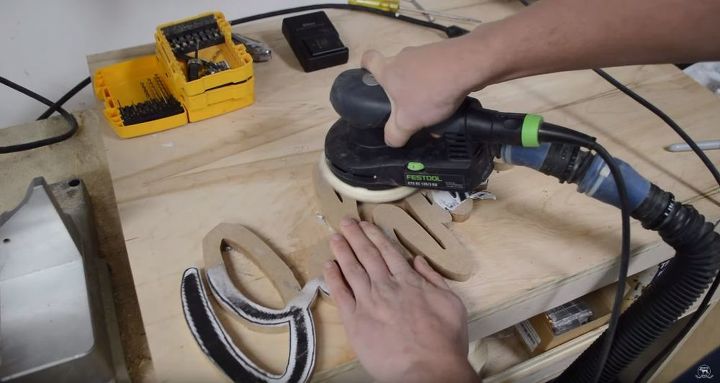
Once all the letters are cut out, I took the piece to my sanding area where I sanded off the paper that was glued to the 1/2" material. I actually received an awesome comment on my Instagram account that said if you use painters tape THEN put the paper on top of that, you can actually forego this experience of sanding and wasting expensive sandpaper. Learn from my mistakes.
Next up, Paint. And lots of it. I used a semi-gloss spray paint being sure to apply thin layers at a time. I used a total of 3 coats.
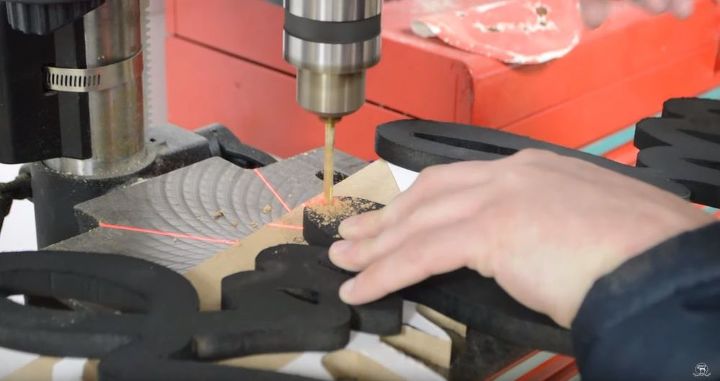
Once the paint is dry, I went over to my drill press (a drill works well here too) and bored out some holes that were a little bigger than the screws I'd be using.
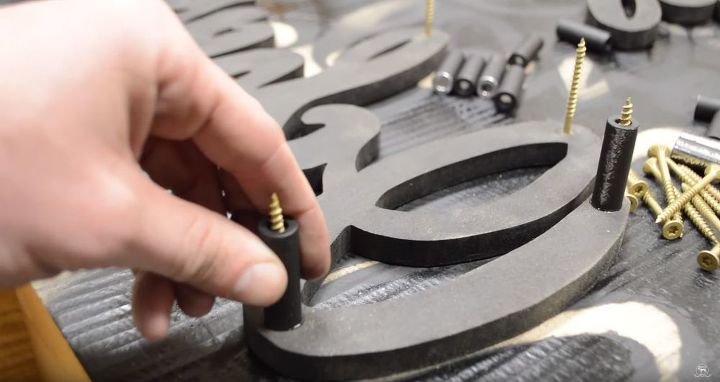
Upon completing said holes, I flipped the piece over sticking the screws in the holes and adding these aluminum spacers that I also painted black. These spacers needed to be used to give some depth to the piece, I used a high strength super glue that'll keep the spacers in place during install
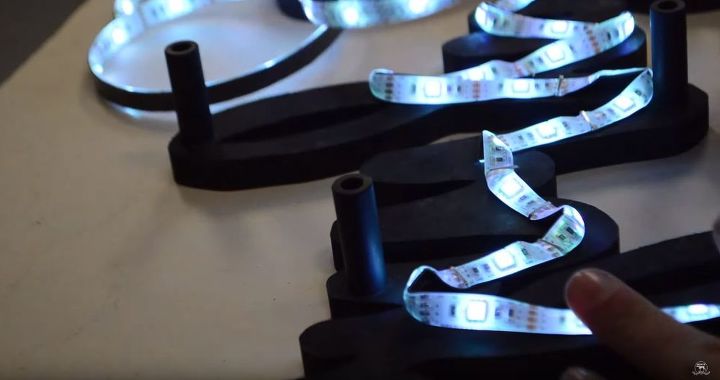
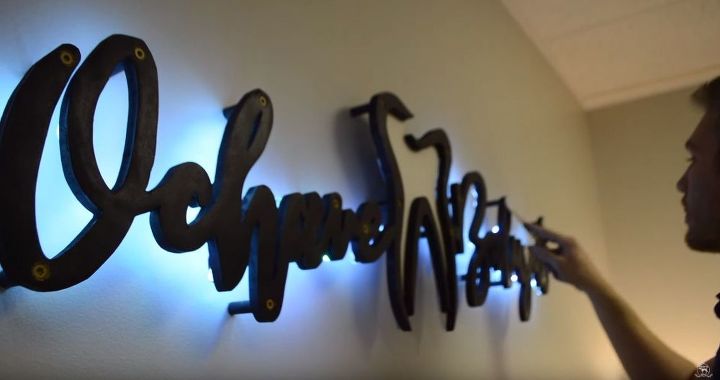
Next up, LIGHTS! I ordered these battery powered lights on amazon for around $15 a piece. I used a total of 2 of these guys and I must say they work pretty well. They take 3 AA batteries and the strip allows you to cut it down to size. See the video to get a feel for how I installed them.
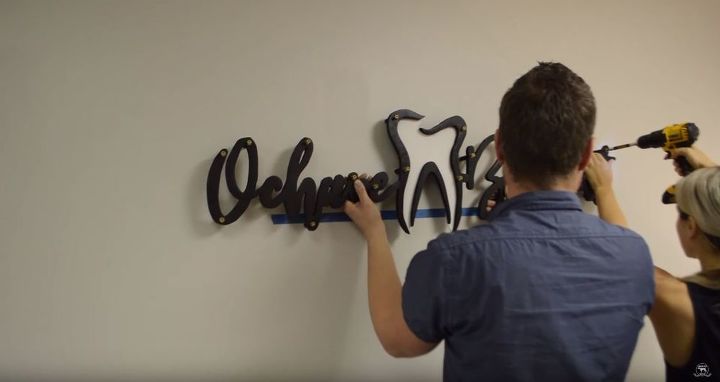
Delivery Day. I found the wall my client wanted to put his new sign on and leveled some painters tape for a reference line. I held it in place while we drilled some holes to account for some wall anchors and screws. It's a pretty delicate process and will involve two people
Now all the screws are installed it was time to come back through and Spackle the holes. You'll want to let this dry over night and come back in the morning to sand it smooth, it may take a few coats to fill the dent in all the way.
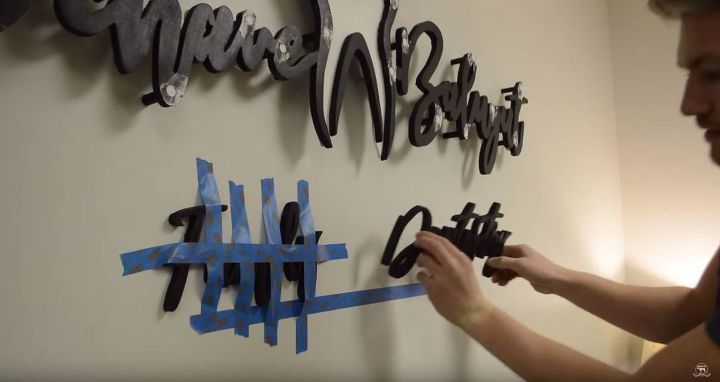
For the bottom letters that don't have lights, we used some high strength super glue and some painters tape to stick it firmly to the wall, this worked out really well and was adhered to the wall tight!
Comments
Join the conversation
-
Let me know what you all think! I'd love to hear some tips if you have them as well!
-
Looks amazing. Perfect for a rec room, man cave, even a kids room.


Frequently asked questions
Have a question about this project?