


Our DIY Bathroom Light Fixture Switchout
We recently switched out our main bathroom light fixture for a new modern one, a DIY project that involved cutting holes in our plaster walls, rerouting electrical wiring, plastering, and painting. A lot of work, but we are so happy with the results! Read more below or visit our blog post URL at the end for more details and photos.
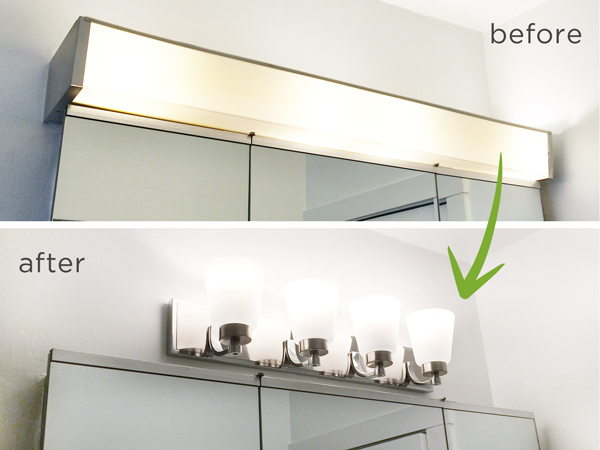
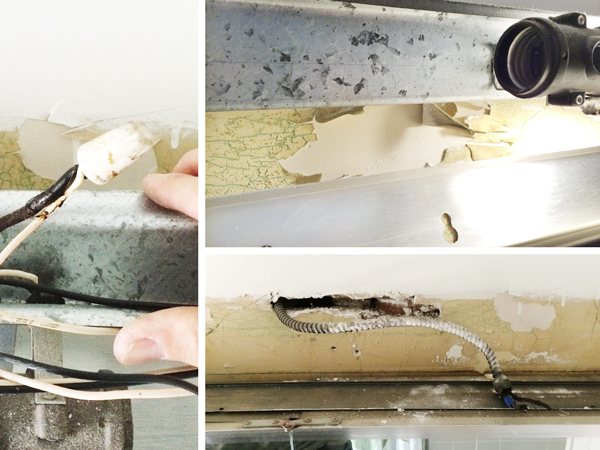
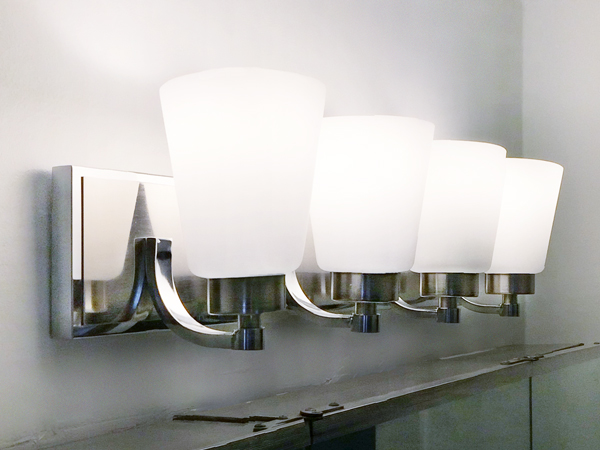
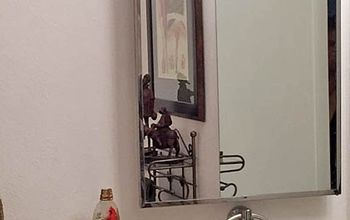
The old light fixture looked like something you’d find in a 1960s medical exam room – not exactly the ambiance we’d like for our main bathroom. And it cast a harsh yellow glow on the white walls and gray tiles, making everything seem kind of dingy and ancient. So we found something large enough to light the space effectively, but not as large as the old fixture, which stretched the full length of the mirror. And we liked that our new fixture had modern clean lines, but wasn't too industrial or utilitarian-looking. But we knew that installing this new light fixture would involve some additional painting and wall repair. Not just because it had a smaller footprint than the old light (so more of the wall behind the old light would be exposed), but also because that exposed wall looked like this.
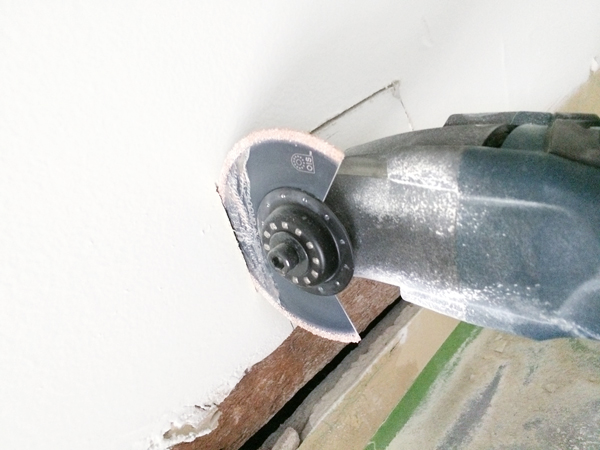
We cut a hole in the plaster of the wall where we wanted to relocate the junction box, using an oscillating saw with a grout/plaster cutting blade.
After cutting and re-building the lath as well, we re-routed the electrical wire over to the new location, and attached it to a new junction box.
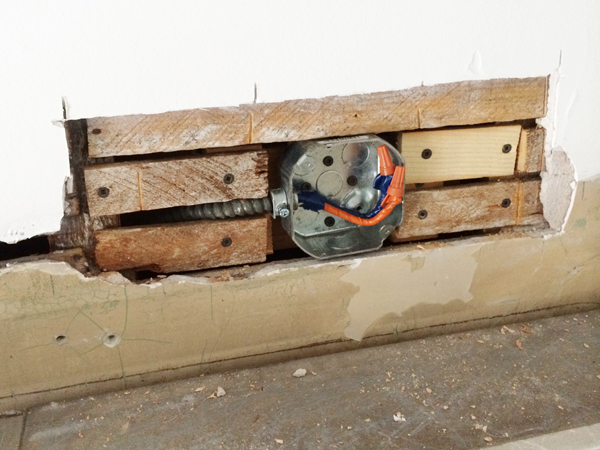
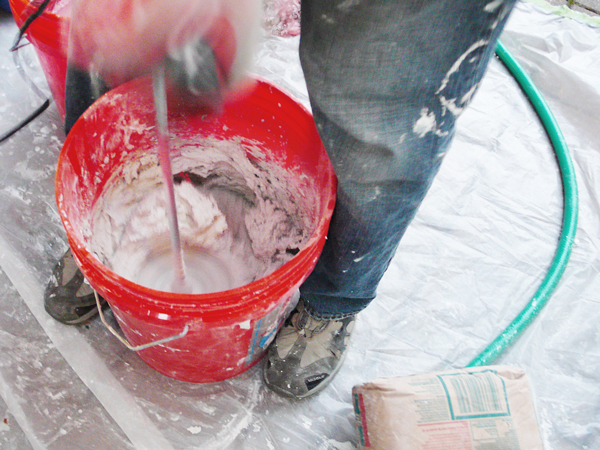
With the junction box in place and all the gaps reinforced, the wall structure was ready to support the new light fixture. But before we could install it, we’d have to plaster over this big hole and repaint the sad looking wall. To match the look and feel of the original plaster to both fill in the hole and smooth out the wall, we mixed up some setting-type joint compound for my patching material – basically, fast-setting plaster. It’s got a similar texture to the original plaster, but dries hard in about 90 minutes (or less) so that you can apply multiple coats in the same day.
We ended up doing a few layers of plaster, sanding between layers. It was a little rough looking, but my initial objective was to get enough plaster on the wall to fill and cover all the trouble spots. Then, right after applying and smoothing out the final layer, we ran a clean damp paint roller over it while it was still wet. The paint roller had a slight nap that helped create a subtle texture to match the rest of the wall surface.
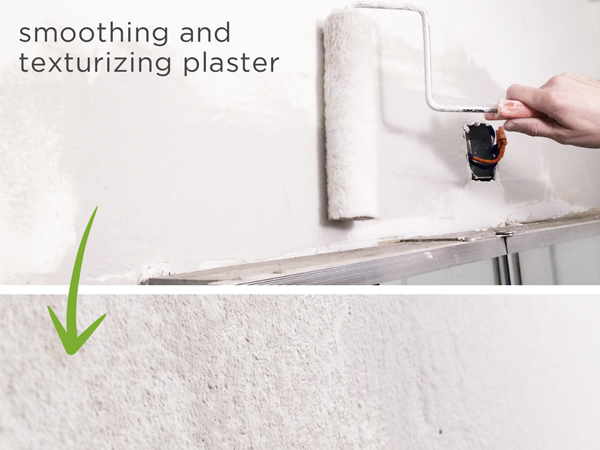
We used a small roller to apply our bathroom wall paint over the plaster, and didn’t worry too much about the few minor imperfections in the painted textured plaster surface. In fact, the imperfections helped this area match the rest of the 92-year-old walls – you’d never know it was newly patched.
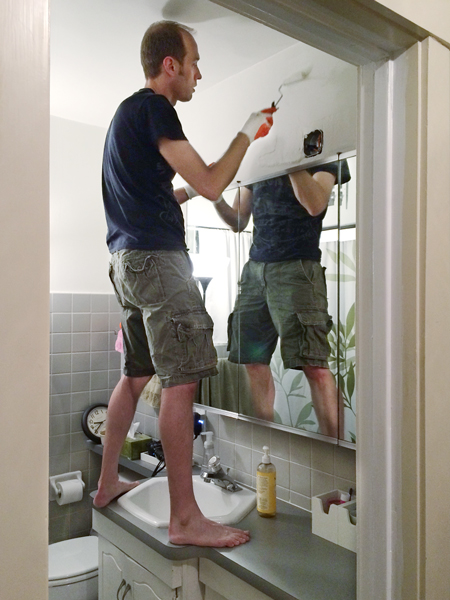
Once the paint was dry, we were finally able to install our new light fixture! Thanks to all the prep work we did to get the wall ready, it was a quick installation. The frosted white shades diffuse the light around the room really well, and the color of the light is much more neutral and bright.
Read more on our blog RatherSquare.com!

Want more details about this and other DIY projects? Check out my blog post!
Comments
Join the conversation
4 of 6 comments
-
Love this lighting trick! We did this in a half bath and it gives a great soft light bouncing off the ceiling. Nice job!!
-
Glad to see your project! We are going to do the same type of thing in our one and only bathroom. We have one of those awful Hollywood strip lights!


Frequently asked questions
Have a question about this project?