


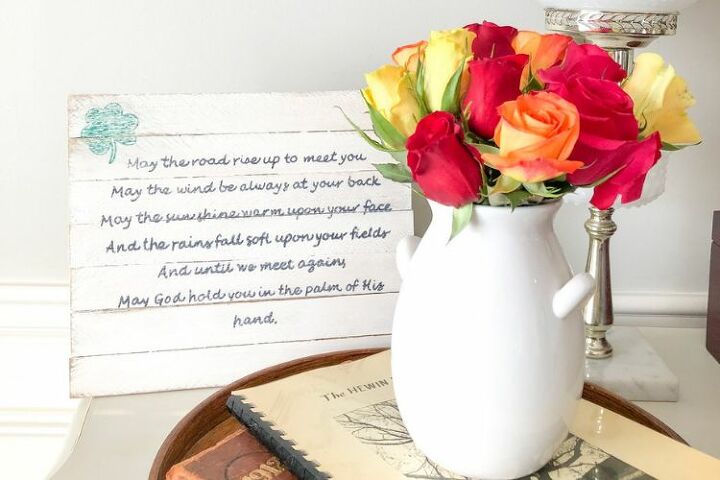
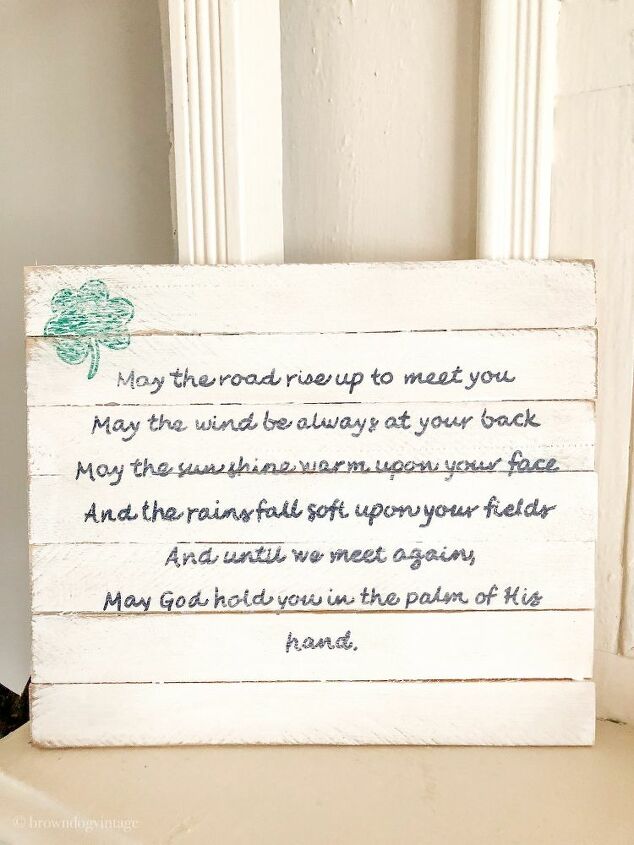
DIY Irish Blessing Sign - Perfect for St Patty's Day!
Be sure to get in on the list for new DIY updates! This is a fun little project for St Patty's Day decorating. I used inexpensive wood shims, a glue gun, my printer, leftover paint, and some DIY effort to make this rustic sign. You can make it as fancy or detailed as you want.
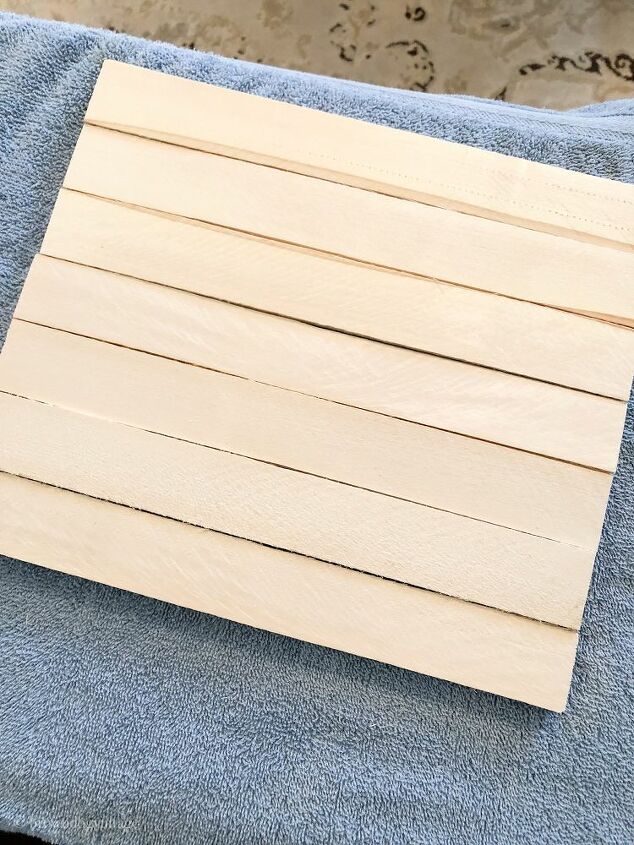
I don't have a vinyl machine to use for making signs so I used a different method for this one. First you need to gather some scrap wood or use wood shims like I did. Wood shims are found in most home improvement stores and they're cheap!
Assemble your shims depending on how big you want your sign. Here's what I did:
- Line up your shims and place one on top of the other. Shims have a fat end and a skinny end. Line up one skinny end on top of one skinny end. Then use the glue gun to attach them together
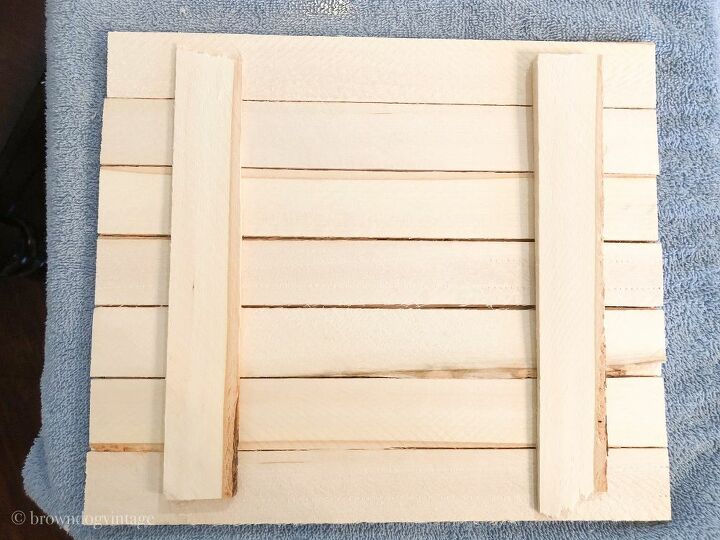
- Use two more shims on the back and glue them vertically for more reinforcement.
- Paint or stain your wood any way you like. I did a light coat of white craft paint. You can find inexpensive paint at any craft/home store.
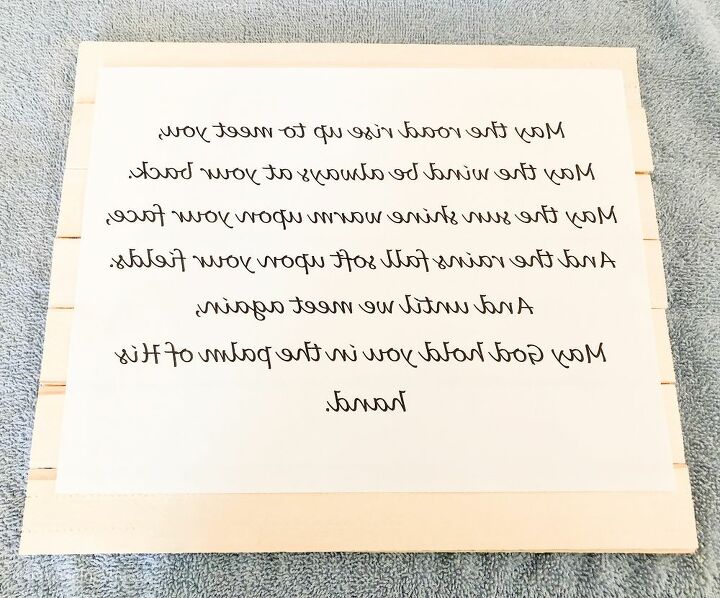
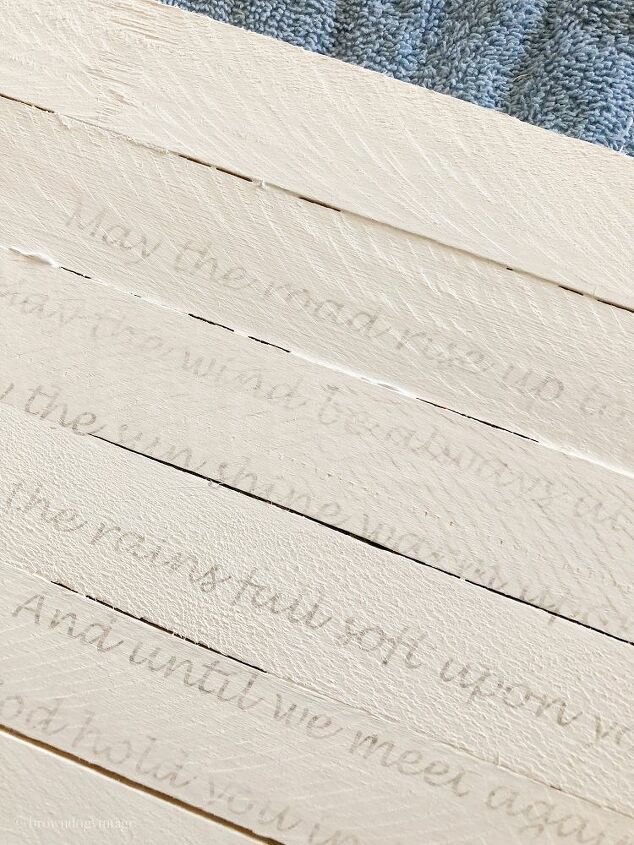
- Let dry completely and then you can transfer your words. If you have a steady hand, you could always free hand whatever words you like or if you are just doing a few words, a stencil would work too.
- I used my printer to create a document in Word. I've got all the details on how I created the words on the blog - here! It sounds complicated, but it's not.
- You need to create your words and then you change the format shape to 3D rotation and choose 180 degrees. This flips your text so you can print it and transfer it.
- Transfer all your words by flipping the paper upside down and using a pencil to scribble over them. This transfers the ink to your wood.
Use a sharpie or paint to fill in the words and that's it! I traced a little shamrock in the corner and then distressed the entire sign for a more rustic look. You can add a hanger to the back if you'd like or just prop it up.

You can find all the details on this DIY sign and more on the blog. Be sure to check out the link for more info!


Frequently asked questions
Have a question about this project?