


Truly Awesome DIY Ways to Install Wainscoting in Your Home

Wainscoting is a lovely addition to any home. It adds elegance and a finished air to interior walls in a traditional, modern, country, or rustic room. Originally meant to protect walls from scuffs and damage, today it’s more often installed for decorative purposes.
See post: Decorchick!|Fake Wainscoting Tutorial
What is wainscoting? It’s defined by a chair rail that divides the wall horizontally. The area below the rail is covered with paneling, plaster, or wooden strips in a decorative pattern. Traditionally, it’s achieved by adding full wooden panels to the wall. However, you can fake it by simply nailing moulding strips to a sheetrocked wall and then painting over them to create the illusion that it’s been created with wood panels. Whether you gravitate toward classic square panels or vertical board and batten embellishments, we’ve got you covered. We’ve rounded up some truly awesome ways to install wainscoting in your home, no matter your style, and as either a beginner or seasoned do-it-yourselfer looking to upgrade your interior walls, you’re sure to find some inspiration and the steps you’ll need to get it done.
How to Install Wainscoting with Moulding Strips
How you decide to add wainscoting to your own home will depend largely on your decor style, your DIY skills, and how much time and money you want to spend on materials and installation. Of course, the simplest way to install it is by adding wooden moulding strips to a finished wall.
Installing a Chair Rail
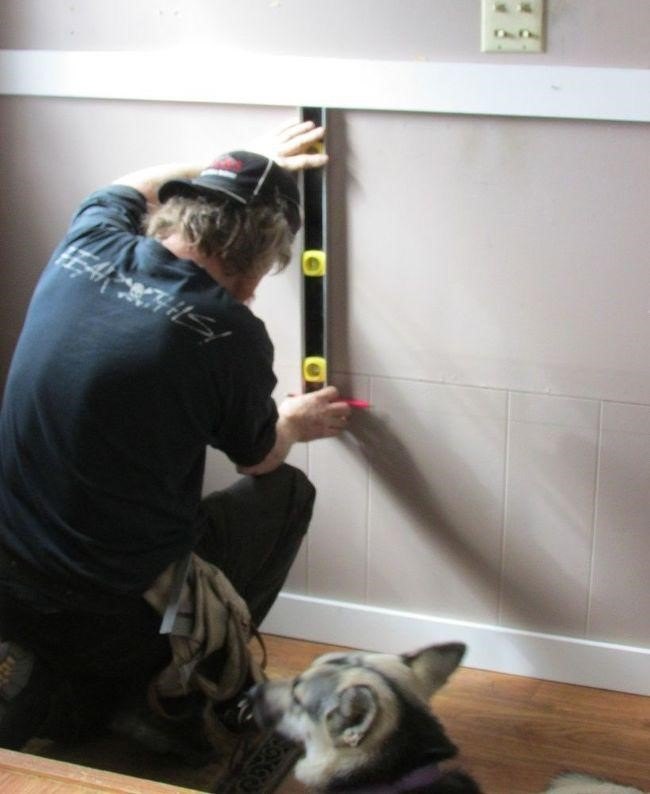
The first step in the process is to decide how far up the wall your wainscoting will go. Traditionally, the chair rail sits about one-third of the way to the ceiling off the floor, or about 32” in a standard room. Of course, you can decide on a design that will raise the rail or lower it according to your taste. Generally, you want to be under windowsills, but high enough to protect the walls from damage that may occur from moving chairs or doors.
Once you have a set height, cut the chair rail to the proper length, wearing eye protection. You can either use a power miter saw for angled cuts, or a hand saw with a miter box if you only have a few cuts to make. Use finishing nails to affix the moulding to the wall. A level will ensure that it is straight.
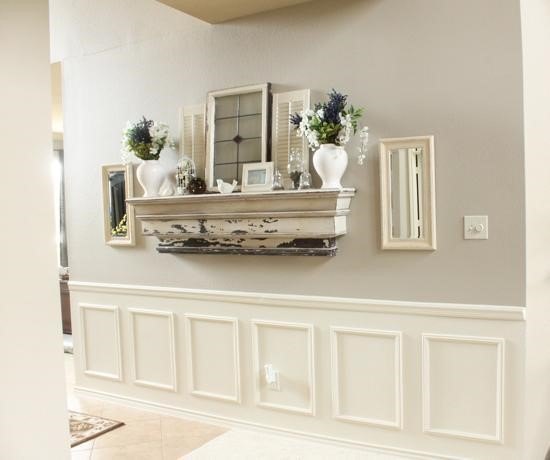
See post: Rustic & Refined|Adding Industrial / Modern Wainscoting for a High Traffic Entryway
Adding the Moulding
The type of moulding you’ll be adding to the wall will depend on the pattern and design you choose. However, the basics of the process are the same for each, beginning with measuring and cutting the wood strips and nailing them to the wall, between the chair rail and existing base moulding. The use of a level throughout this process will ensure that your work is even and true.
Premade Picture Frame Wainscoting
To add a traditional square frame wainscoting wall without any cutting or measuring you can stop by your local home improvement store and grab a few premade, pre-primed squares. Center them between the chair rail and the base moulding and space them out equally horizontally on the wall. Then simply nail them in place and your work is done.
See post: Decorchick!|Fake Wainscoting Tutorial
DIY Wainscot Frames
If you’d like to save a little dough and you’re comfortable with making a few cuts, you can construct the frames on your own. Build a basic square with moulding and then attach them to the wall with finishing nails, paying attention to the spacing each box and making certain they are level. A simple strip between the chair rail and the wainscoting can add a little extra interest.
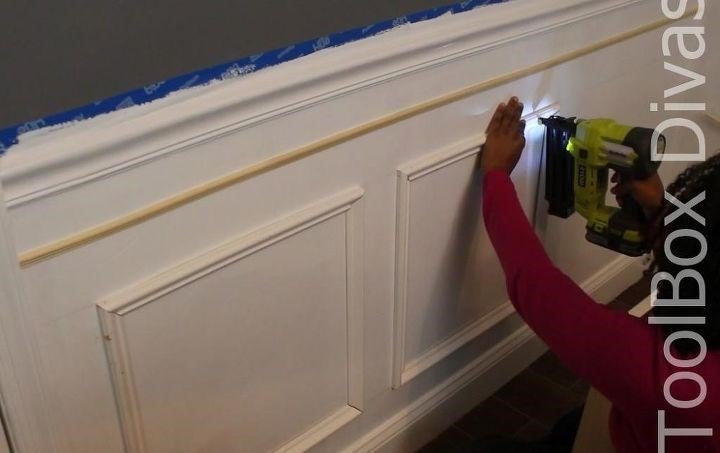
See post: Tool Box Divas|Install Picture Frame Moulding - Budget Friendly Wainscoting
Rectangular Frame Wainscoting
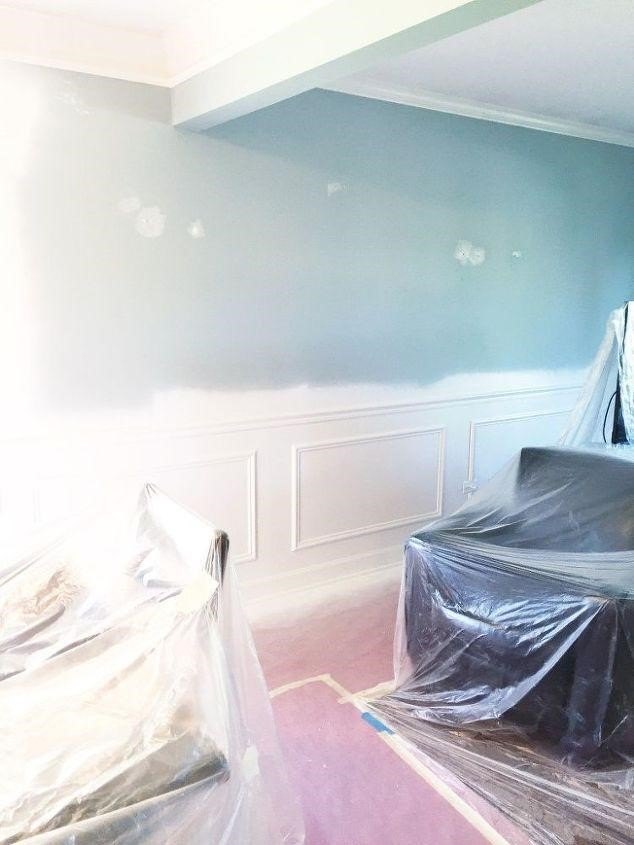
Have a larger space? Increase the size and shape of your frames. Since you’re building your boxes yourself, you can turn those squares into rectangles to cover the area in custom style. Map out your design beforehand to determine the appropriate measurements and spacing, then, with goggles on, start your cuts and then nail the boxes to the wall.
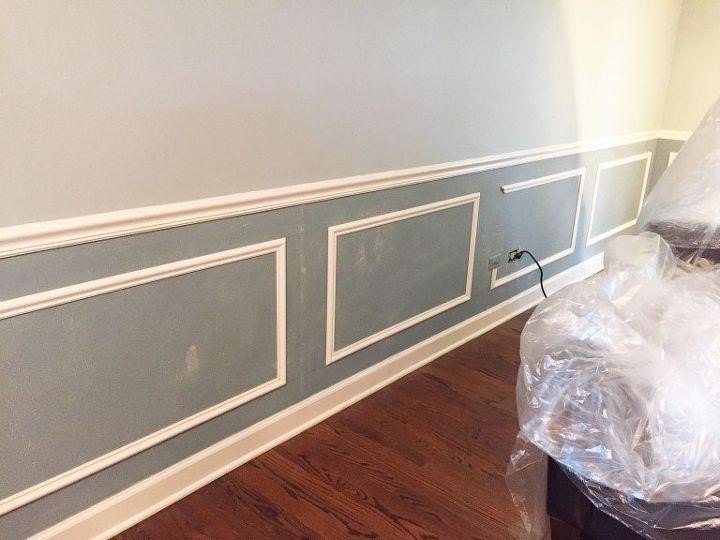
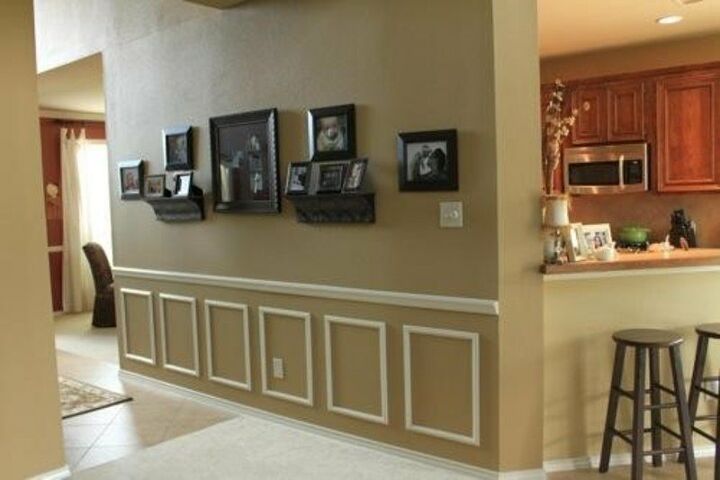
See post: The Confran House|Adding Wainscoting and New Paint to Our Home
Wainscoting in a Stairwell
With a few extra cuts and thicker mouldings, you can add faux wainscoting panels to accent your own stairwell. While it looks tricky, the steps are the same as a flat wall application. It still begins with setting a chair rail height and then adding wood strips to form boxes between the rail and the base moulding. While some of the boxes will be simple squares, others will require corresponding cuts to match the angle of the risers. Careful planning and a little bit of math are necessary, but the results are outstanding.
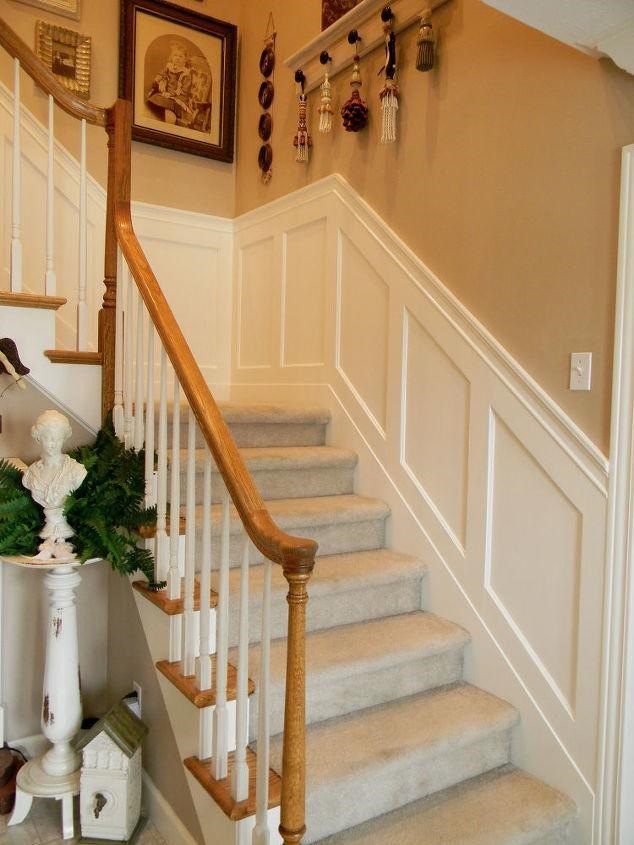
See post: Terry M|My stairwell with painted scallops and new wainscoting.
Board and Batten Wainscoting
Not interested in making any angled cuts? Then perhaps board and batten wainscoting is more your DIY speed. Instead of a square or rectangular boxes, simply add flat, wooden strips to the wall. Set them vertically between the chair rail and base moulding. Measure carefully so that each slat is spaced equally from the next and that they are all centered on the wall. The use of a level is very important in this application to prevent crooked boards.
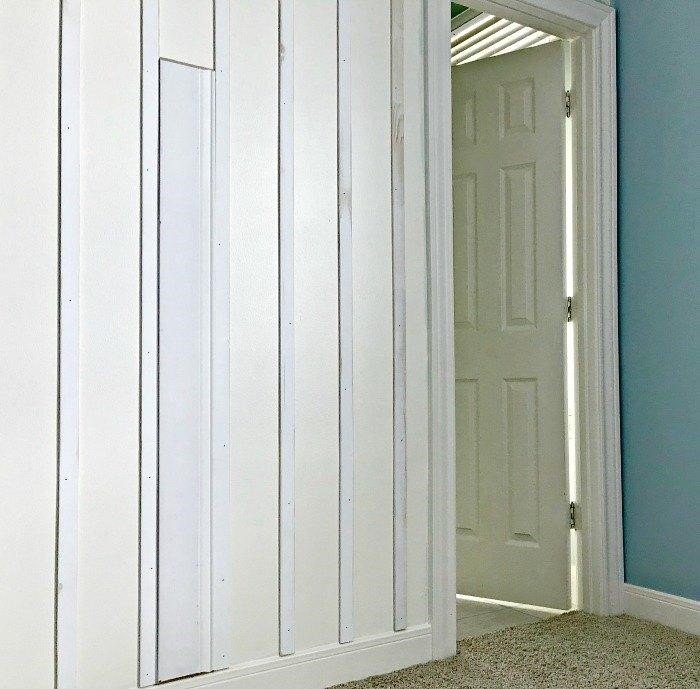
See post: Stephanie Abbott|Install Board and Batten Lattice Wainscoting
Pallet Wood Wainscoting
Wainscoting made from pallet wood is an economical way to dress your wall. The pallet wood can be used in place of a chair rail and the framing moulding. The flat, uniform board size creates a rustic and relaxed facade, appropriate for more casual spaces and country homes.
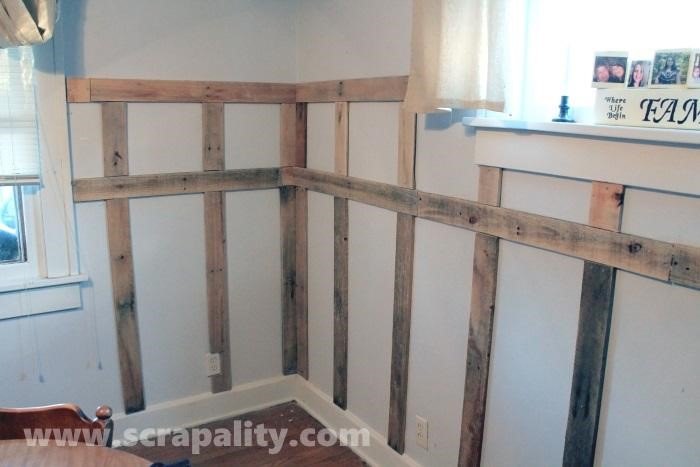
See post: Andrea Fogleman|Add Wainscoting to Walls Using Pallet Wood
Crossbuck Wainscoting
For true farmhouse flair add a crossbuck pattern between the chair rail and base moulding. Begin with a basic square shape made from flat wooden slats. Then add an “X” to the center of each. The railroad sign shape is reminiscent of an old barn door, merging the elegance of traditional wainscoting with the warmth and coziness of country living.
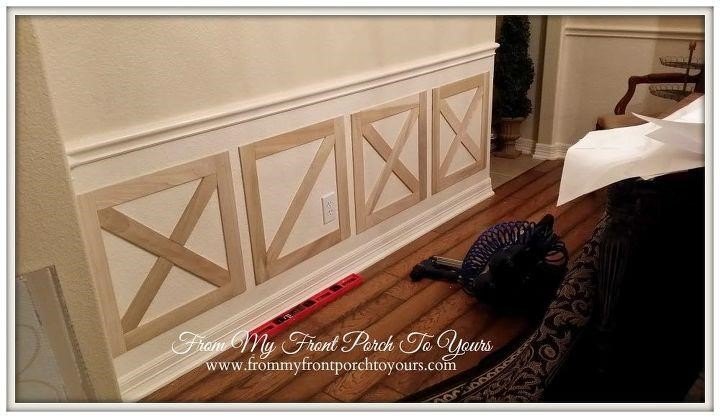
See post: From My Front Porch To Yours|Crossbuck/Barn Door Wainscoting
Rustic Barnwood Wainscoting
An unpainted chair rail combined with board and batten style wainscoting is another way to dress a country home. This delightfully unorthodox interpretation of the classic wall treatment requires no tricky cuts either. Flat, straight edge moulding boards are nailed into place vertically between the base moulding and barn wood chair rail.
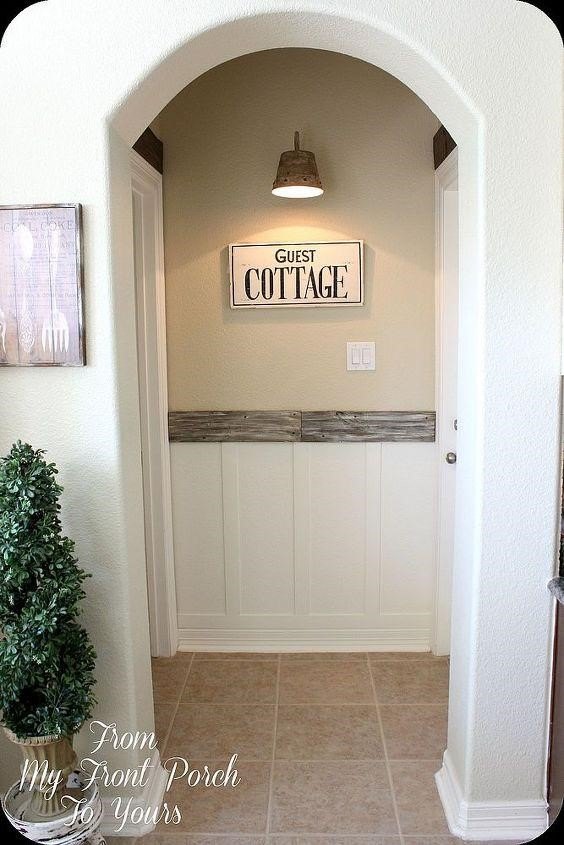
See post: From My Front Porch To Yours|Inexpensive DIY Wainscoting Fix
Finishing It up with Caulk, Wood Putty, and Paint
With the moulding firmly affixed to a wall, it’s time to move on to the final steps in the process, which are essentially prepping the wood and walls for paint.
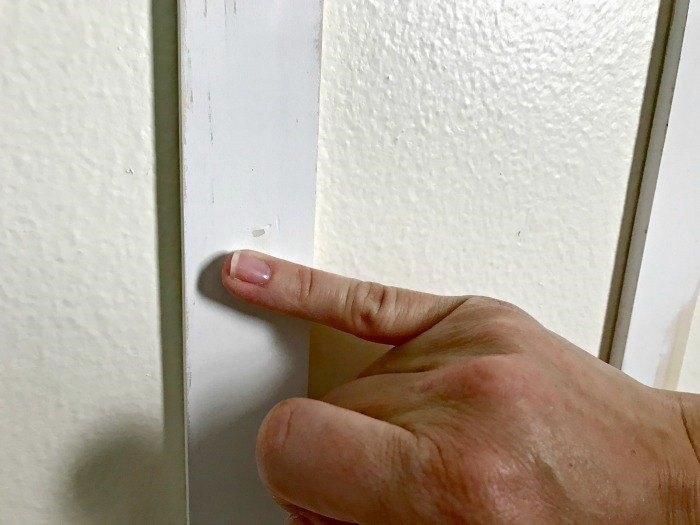
Fill the Nail Holes
Start by filling any nail holes with wood putty. Using your finger or a small putty knife, press the putty into the holes. Once dry, use light-grade sandpaper to make sure all spots are leveled and smooth.
See post: Stephanie Abbott|Install Board and Batten Lattice Wainscoting
Caulk the Crevices
Add a thin bead of caulk between your moulding edges and the wall to seal up any small crevices. This will ensure that there are no open spaces or gaps when you paint for a sharp, professional look.
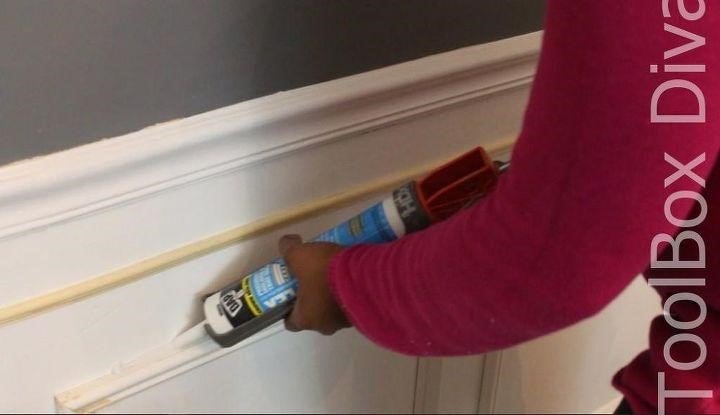
See post: Tool Box Divas|Install Picture Frame Moulding - Budget Friendly Wainscoting
Prime and Paint
To complete your installation, paint the wall and the wood in a satin or semi-gloss finish. If your wood was not pre-primed, you’ll want to apply a primer to the untreated moulding before you paint.
See post: The Confran House|Adding Wainscoting and New Paint to Our Home
And there you have it, fabulously easy and budget-friendly ways to install wainscoting in your home. There’s truly an application for everyone, regardless of your DIY abilities. Just pick a style and you can make your own DIY wainscoting dreams come true!
Do you have a wainscoting project you’d like to share or perhaps you have questions about the process and need more assistance? Why not check out Hometalk and join our community of DIYers?
Written for the Hometalk community by: Kim | Exquisitely Unremarkable
Comments
Join the conversation
-
Definitely going to try this in our foyer 😊
-
Love the look!


Frequently asked questions
Have a question about this project?