


DIY Deck Gate Tutorial
$39
2 Hours
Easy
I’ve got 3 kids, and 3 dogs, 1 of each currently falls in the “less than 2 years old” category, and let me tell you something that 1 year olds love to do.
They love to break free, run wild, and basically be anywhere that “adult” eyes or hands won’t catch them or see them.
They love to break free, run wild, and basically be anywhere that “adult” eyes or hands won’t catch them or see them.
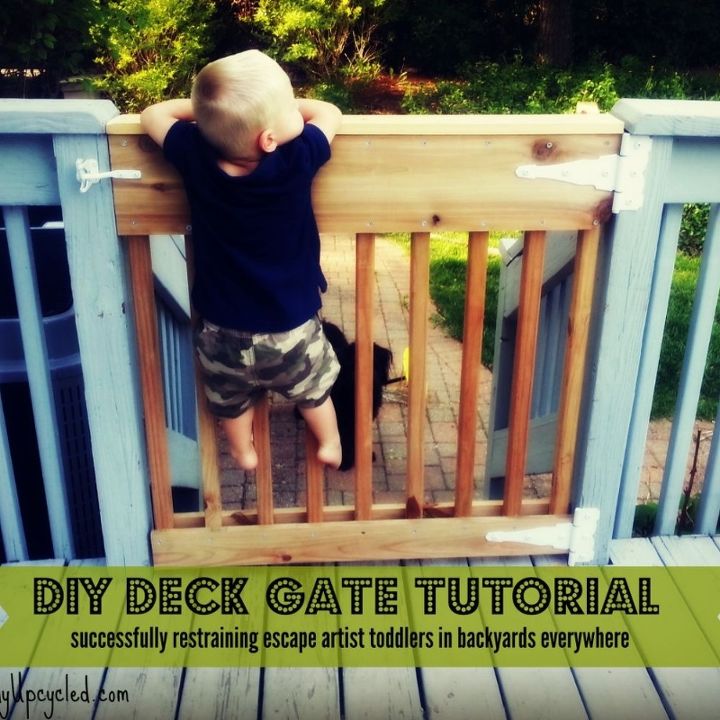
We’ve got a deck that runs all along the back of our house, and its got an opening and set of stairs on one side that opens up into the yard, and a driveway that runs along the side of our house to our neighbor who lives behind us. If my eyes aren’t glued on the little guy 24×7, he could be out that door and onto the side driveway in the blink of an eye.
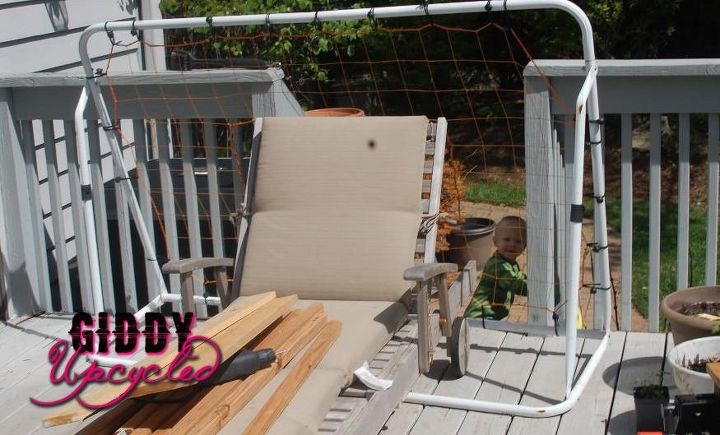
Finally, I decided it was time for a more official gate (and some fun with the power tools!)
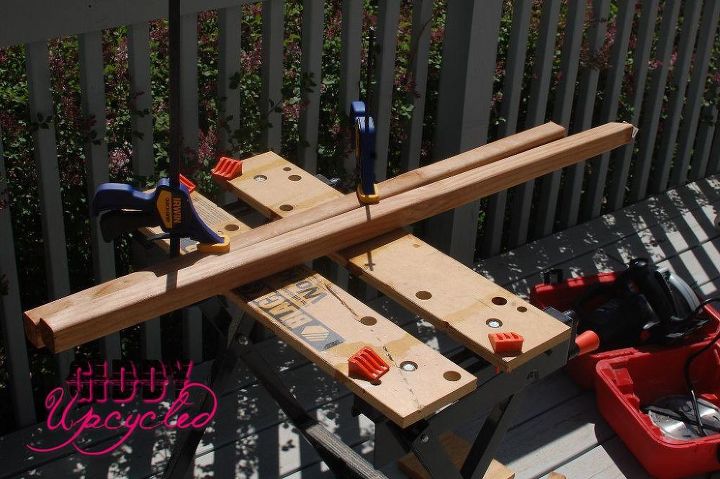
1. If you purchase angled ballusters: Using a handsaw or power saw, cut off the angled ends of each of the ballasters so that each balluster is 1″ less than your Gate Height. In my case, that was 33.5″
3. Optional but makes things easier – I put wood glue between all the connection points and let it dry. This prevented the boards from moving around when I drilled holes.
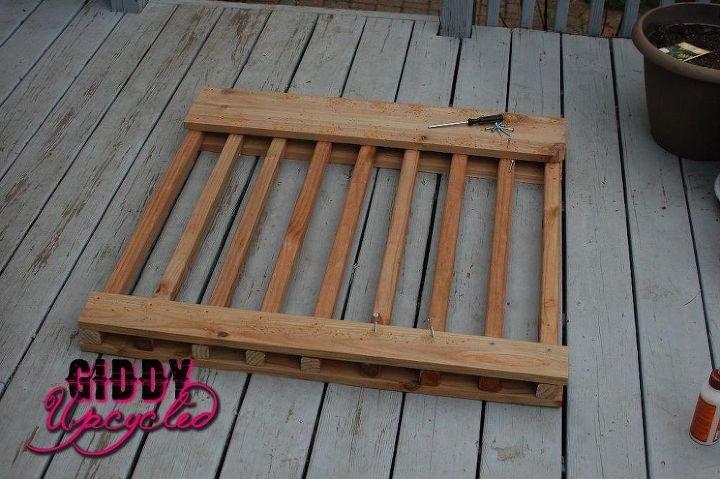
4. When drilling holes for the top and bottom boards, you can stagger your drill holes every other post, alternating between aligning with the top and bottom of the board (I didn’t do this, and I had WAY too many drill holes and way too many screws – was totally not necessary)
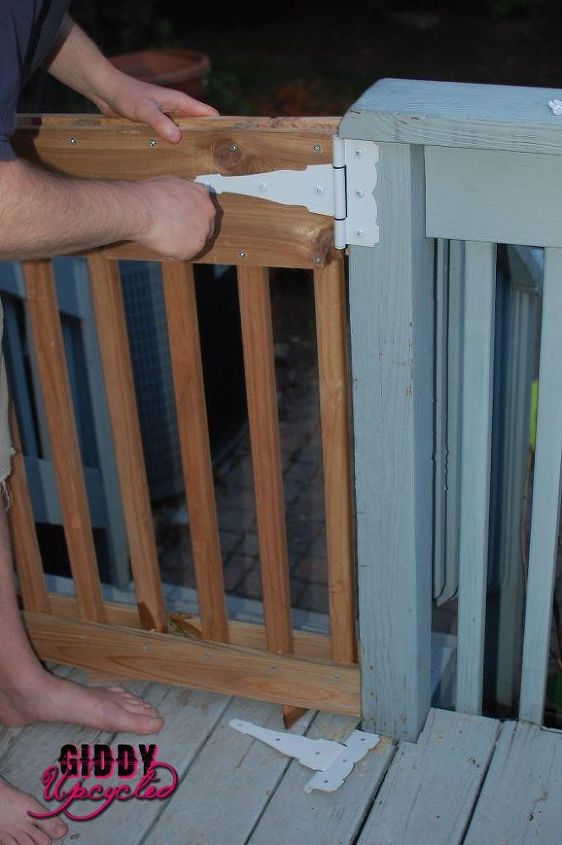
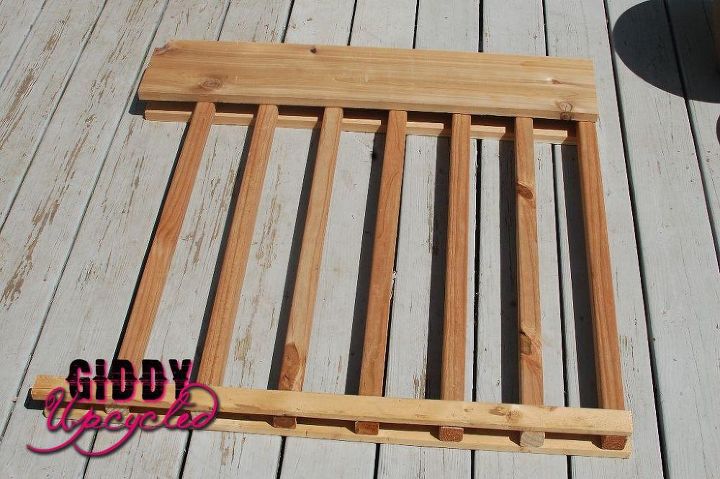
6. Use a couple of pieces (or a big long piece) of your 1″ scrap wood, placing them on the floor of the deck to give your gate something to rest on while you are securing the latch. The gate will be mounted 1″ up from the deck floor.

Want more details about this and other DIY projects? Check out my blog post!
Comments
Join the conversation
2 of 6 comments
-
When we bought our house and seen the deck this was the first thing we ever did . NO one sold any so we made our own .I have a lot of little kids who come and for 24 years now we have always had a gate on the top of the steps . My Husband made ours almost the same way and we put a screen on it so the kids couldn't step in between the slats and climb over . You can use privacy screen on it just the same as you can around the rails we just stapled it on .Kids want what they can see and climbing over to get what they see was one of the things we also thought of .Just an FYI.
-
We did this too. We have seven rescue dogs and we used the gate to keep them on the porch which channels them to a big fenced yard. You are awesome!


Frequently asked questions
Have a question about this project?
beautifully done...my question is this...I need to make a gate as light as possible. the post i want to adhere the gate to is free standing. are the horizontal pieces 2 by 4's.?..Thank you..