


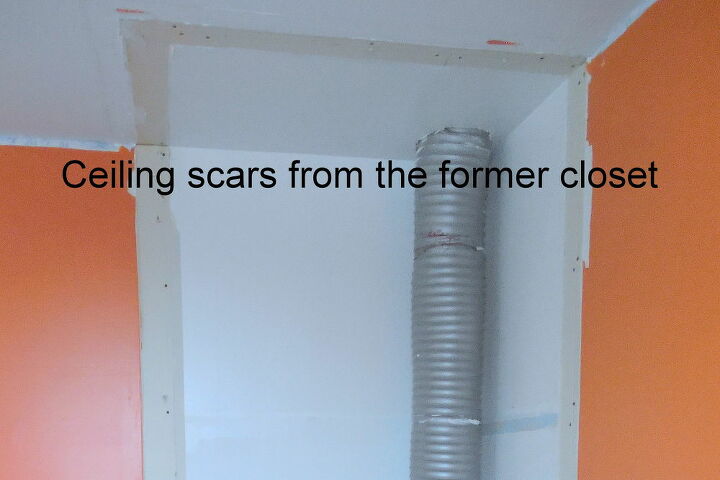
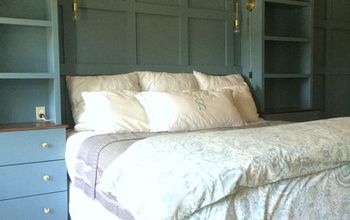
Coffered Ceiling for Bedroom Conversion

So in my previous post I shared with you that we converted two small bedrooms into one large guest room, because of that remodeling we were going to need a lot of ceiling repairs on the sheet rock. I also told you that my husband is not interested in adding any more sheet rock to our home due to the dusty process of installing, prepping and repairing it. So how would we make our ceiling as pretty as our wood walls? With more wood of course this time we chose to create a coffered ceiling to hide the damaged ceiling, again my husband is the craftsman I just offer assistance and opinions, haha!
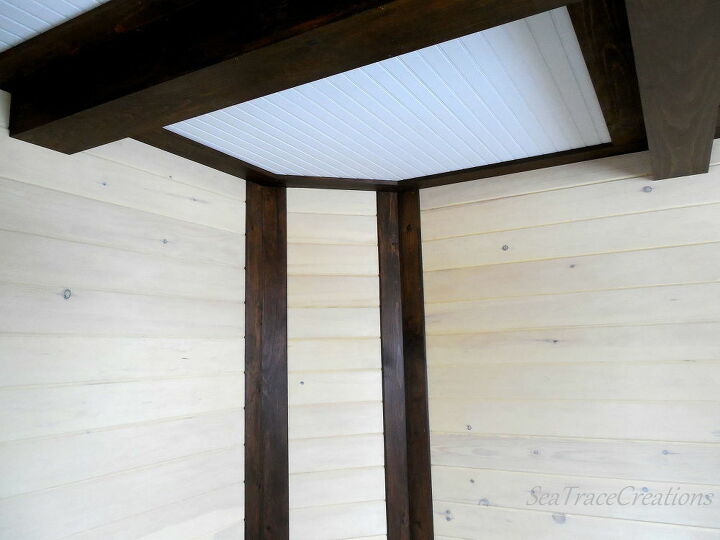
He used 1 x 6 Pine boards to first conceal the damage done midway where the wall partition was. Then he calculated out the measurements to evenly distribute the framing that would form the grid. Scraps of 2 x 4 regular boards and other things were installed directly to the ceiling to provide him with a backing to nail the new lowered ceiling onto. I'm typing this as best as I can describe it because it just comes automatic to him how to build these structures.
He used a Finishing Air nailer and 2" finishing nails along with a mitre saw for precise cuts.
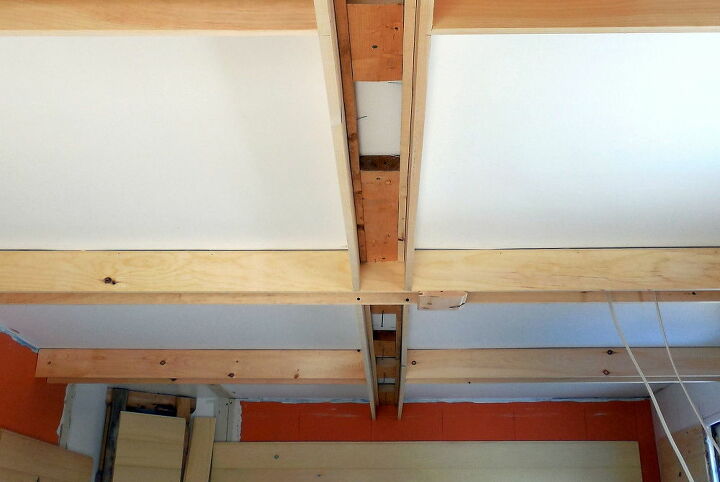
Notice the dangling wires, they were initially the plug ins in the wall that was torn down, they will now be re-routed to provide power for additional lighting in the center. You'll also see that this new framing conceals the ceiling area where the former wall was between the yellow and orange bedrooms.
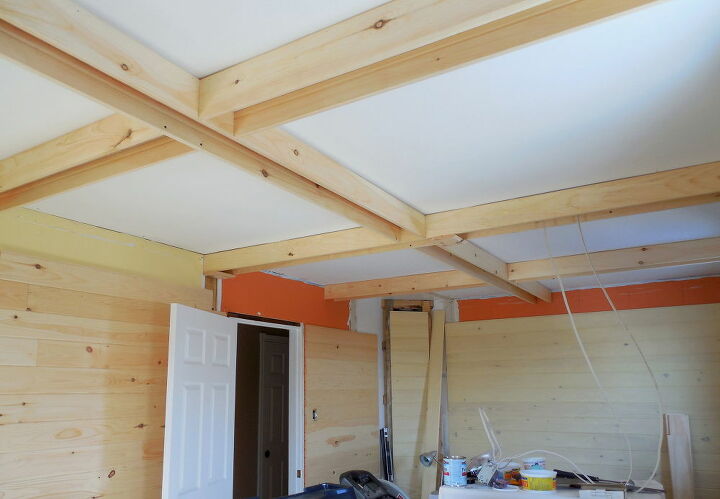
This was carried out during ice fishing season so on days he fished it gave me a chance to tidy up and catch up on the wood staining. The color we chose was a Min Wax water stain in the shade called COFFEE...as I drank coffee to keep me alert up on that gigantic ladder!
The stain was easily applied with a brush, no fumes and and a quick dry time. The boards resting against the wall would become the underside to the framing once holes were marked and made in advance for the electrical wiring for our lights.
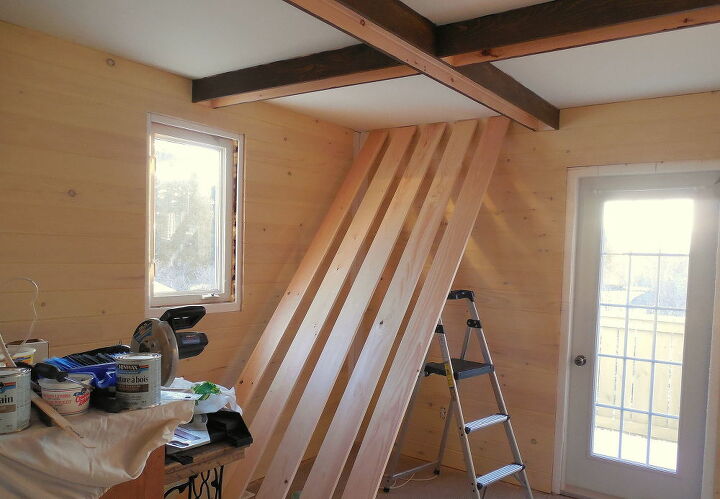

Now the next step was to install the bead board inserts over the remainder of the damaged ceiling. We used a primed mdf product that we gave a few light coats of white ceiling paint to before installing. It was installed with liquid nails applied liberally to the back and a few concealed nails here and there to tack it until the glue had taken hold. Lastly to conceal the bead board edges 1 x 6 stained pine boards were installed in the interior of each block, these were stained before installing of course.
Here is the damaged corner shown at the beginning of the post, all good as new!
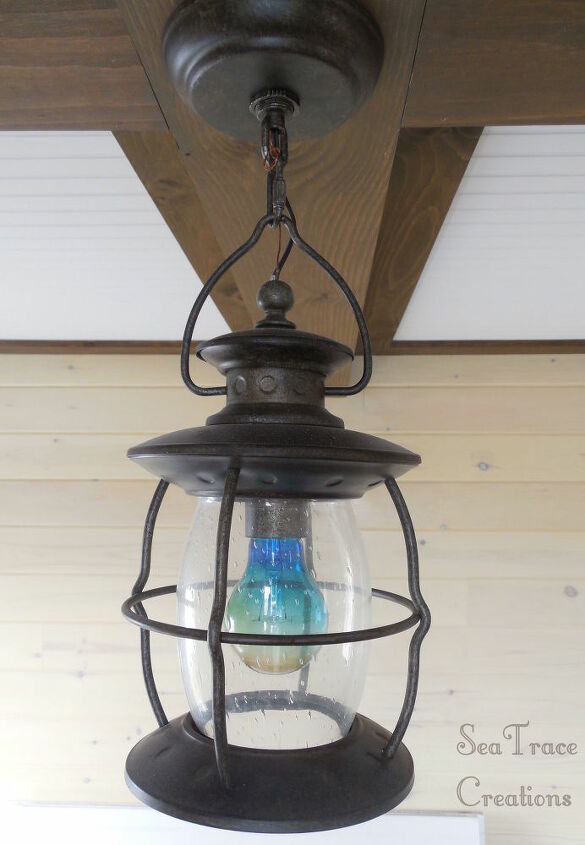
Now I was aiming for a type of beach or antique lighting but I wasn't able to find any interior lights here locally that fit my wish list until....I thought outside of the box! I found beautiful lantern style "exterior" lights and eureka, the problem was solved! They came with long chain link hanging hardware but we opted for a close to flush mount. The blue bulb was just used as a test to ensure they worked.
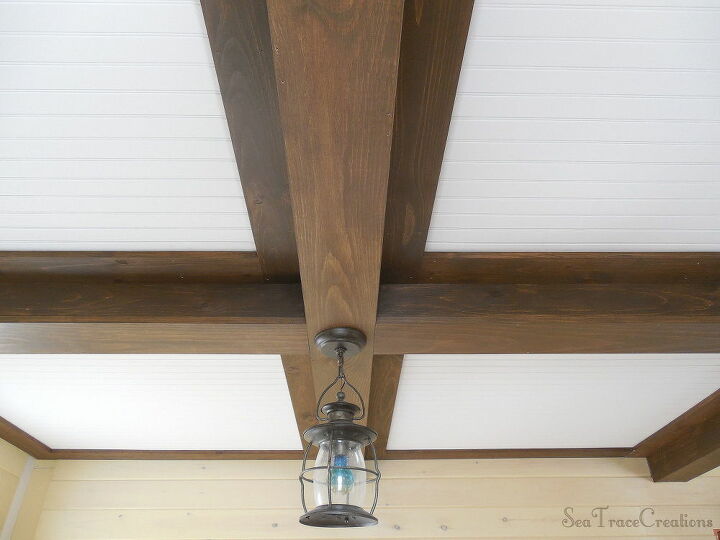
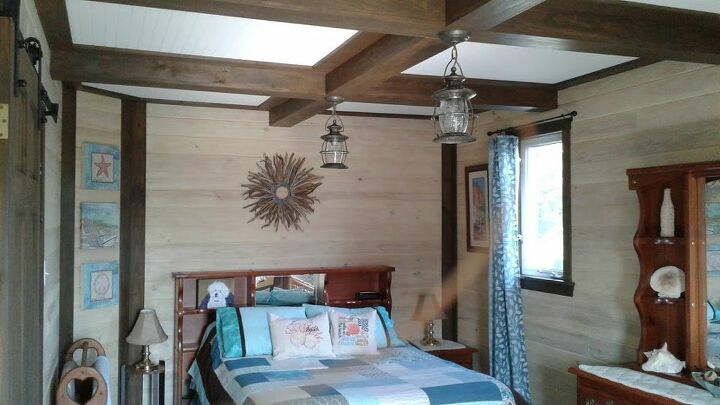
Finally at last the renovation is completed, there are three coach style lanterns at each intersecting point. Fresh white bead board is the center and coffee stained pine installed grid style make this by definition a coffered ceiling. Thanks for viewing.
Here is the link if you'd like to see the beginning of this bedroom conversion http://www.hometalk.com/diy/bedroom/bedroom-c... also a diy Console Table post for this room with the leftover wood after completing the room found here. http://www.hometalk.com/diy/build/furniture/t...
Resources for this project:
See all materials


Comments
Join the conversation
-
I really love it
-
Looks amazing! Great idea! Thanks for sharing! Keep on DIY'ing..oh yeah 😊💖👍


Frequently asked questions
Have a question about this project?
Why not install the bead board first before the "faux beams" and save money, lumber, and labor by not needing all that extra trim?