12 Terrific DIY Floating Shelves to Give Your Walls a Lift
Bring an extra dimension to any wall in your home with a set of DIY floating shelves. As well as their illusionary appearance, a well-placed floating shelf can be as practical as it is eye-catching. In this rundown of top DIY projects, we’ve picked out some of the best floating wood shelves and more. From classy corner units to ingenious fixings, our selection of Hometalk hot picks will give you some serious inspiration.
Budget Floating Shelves
Want to recreate this fantastic set of DIY floating shelves for just $20? Here’s how…Starting with whitewood, OnBlissStreet made her brackets by attaching inner posts to a cleat. Essentially making what looked like a ladder sliced in half, she then attached it to the wall with the posts facing outwards. Pine shelves were fixed above and below using glue and brad nails. Any holes were filled with wood putty, and a front was added to conceal the support. Simple! Get tutorial here
Floating Solid Wood Shelves with Rope
Using some twine and a few knots, you can create a nautical themed floating shelf like Remodelaholic. Using any size and type of wooden board, mark and drill two holes at either end. Sand and stain before screwing metal rope cleats into the wall. If you’re not drilling into stud, add anchors first to support the weight. Tie your rope around the cleat and thread through the board. Finally, tie a double knot and allow it to hang. Get tutorial here
Geometric Floating Wood Shelves
Rustic and shelving go together like varnish and wood, which is why we love this design by Jacob Jennings. Jacob’s tip is to start with the front face board and use select grade pine. Using a 46" board, Jacob cut the sides to the depth he wanted the shelf to be. Next, ridges were fixed at equal distances to the inside of the structure. From there, he made a support onto which the inner posts sat. Finally, he screwed the posts into place and stained them. Get tutorial here
Geometric Floating Wood Shelves
Not all DIY floating shelves need to be perfectly straight! Using offcuts from an LVL beam because of its strength and textured vertical faces, Zac created a template from cardboard. Marking the angle of the corner he wanted to fill, Zac traced the same angle onto six sections of LVL. Using a table saw, each edge was cut to 30-degree slant. To add some character, the angles were alternated, resulting in this fantastic geometric look. Get tutorial here
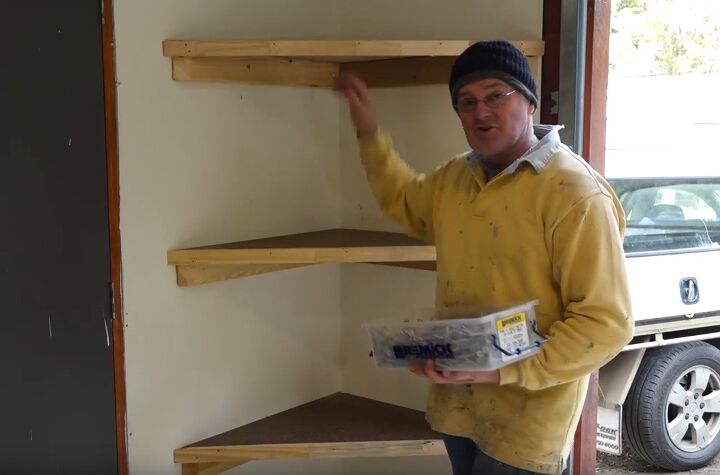
DIY Floating Corner Shelves
DIY floating corner shelves are all about angles. This project from GoJo Geoff shows you how to fill any corner in style. After attaching cleats, Geoff used a square to measure a 90-degree angle. This angle is used to butt-up the back of the shelf to the wall. He then measured a 45-degree angle. This angle goes across the two furthest points at the front of the shelves. The end result is a perfect triangle that fits flush against the wall. Get tutorial here
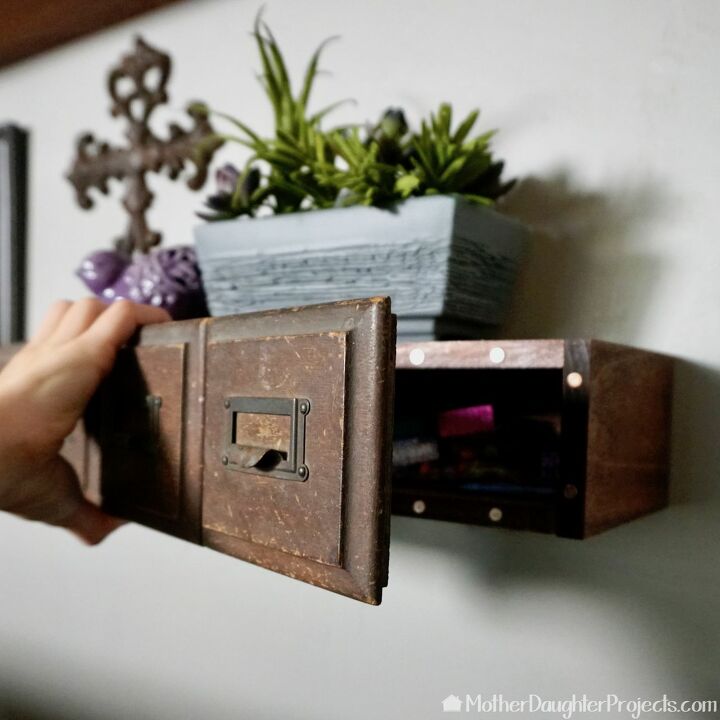
Stylish Secret Floating Shelves
If you can double your storage space and still achieve a stylish look, you’ve created the ultimate floating shelves. Starting with a French cleat and floating shelf structure, Mother Daughter Projects had the ingenious idea to add a removable front. Instead of fixing the front face, they glued four drawer fronts to a faceplate. The trick here was to attach magnets to each corner so the faceplate could be removed to reveal a secret storage compartment. Get tutorial here
Brilliant Bathroom Floating Shelves
Space is always a premium in bathrooms, which is why this project from Mr. ATC is perfect. Using any suitable timber, create a backboard by marking equal distances between each shelf. For this unit, Mr. ATC inserted three shelves along a 1-meter length. After marking with a pencil, he used a router to make 0.7cm-deep cuts. From here, Mr. ATC took another piece of timber and cut shelves the width of the backboard. Finally, he applied glue and stuck them into the crevasses. Get tutorial here

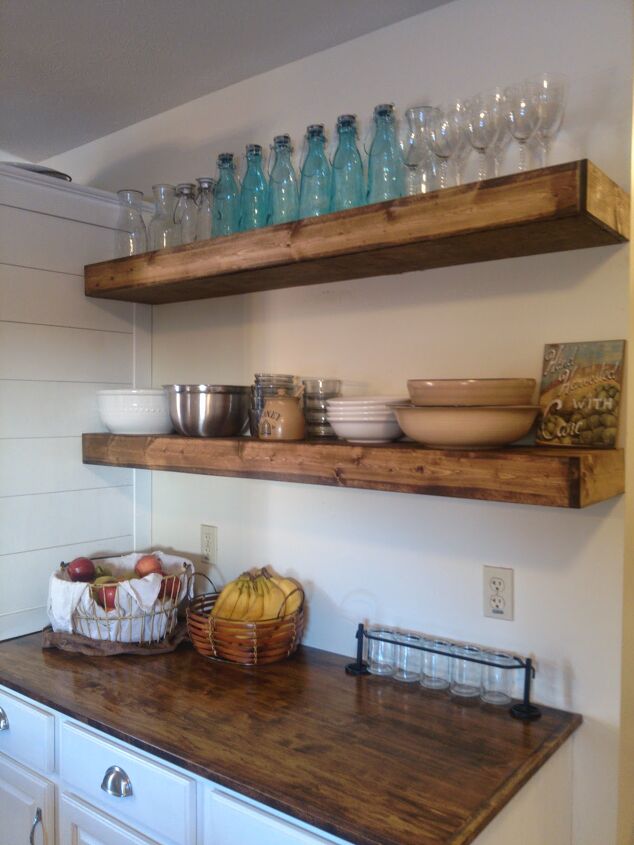
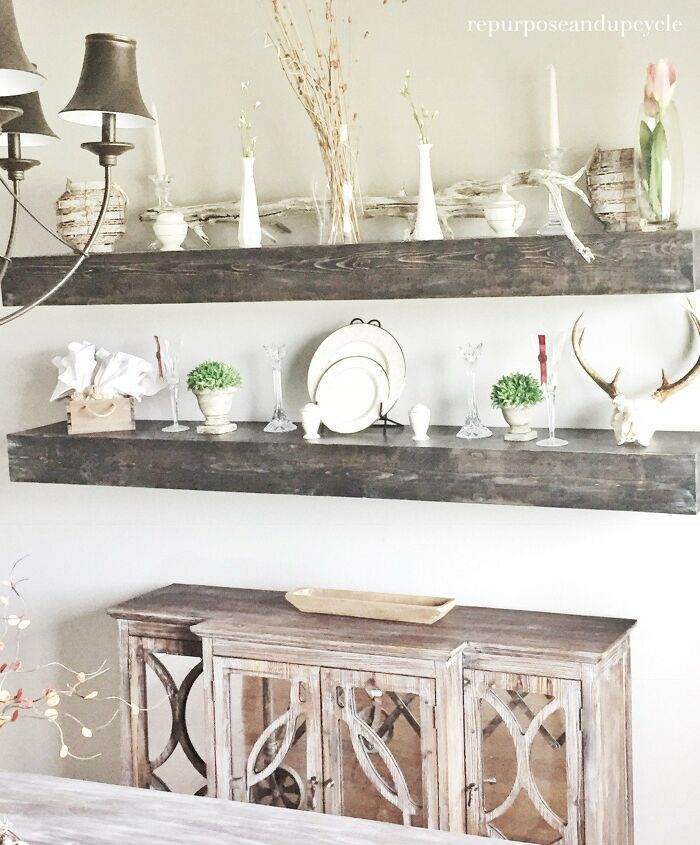
Dining Room DIY Floating Solid Wood Shelves
DIY floating shelves can be used to give your dining room a lift and, in turn, provide a perfect platform for your best china. This project from Lindsey didn’t use a standard floating shelf frame built using 2x4. The top tip here is to fix the frame into the studs. What’s more, Lindsey used two screws per stud to ensure the shelves were super sturdy. The final tip is to use a counter-sinking drill bit to bury the screws. Wood putty can then be used to fill the void to give you a smooth finish. Get tutorial here
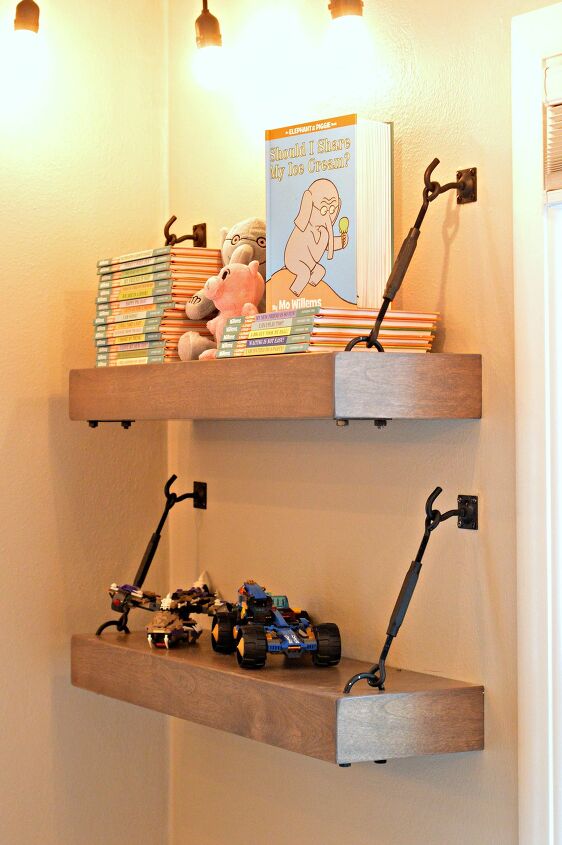
Ingenious Industrial Floating Shelves for Your Bedroom
Industrial has become fashionable in recent years, and Hometalker Heidi used it to great effect with this floating shelf project. After installing two floating shelves, Heidi gave them some extra pop with turnbuckles and screws. Firstly, two holes wide enough for the U-shape screw were drilled into the front edges of each shelf. After securing with a metal plate, wall hooks were installed. Finally, the turnbuckles were attached between the two fixings to give the illusion of supports. Get tutorial here
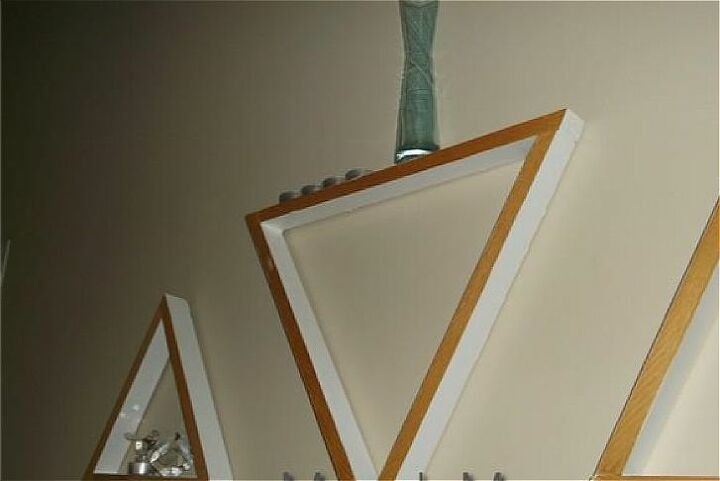
Fabulously Fancy Floating Wall Shelves
Take your DIY floating wall shelves to new heights with this idea from EngineerMommy. Although slightly more decorative than functional, for these DIY floating shelves, solid wood shelving can display small items such as candles. After purchasing two lightwood boards, this Hometalker used a miter saw to get the necessary angles. As the angles in a triangle equal 180 degrees, they set the miter saw to cut 60-degree angles. Once cut and stapled together, this Hometalker painted the edges and glued the triangles to the wall. Get tutorial here
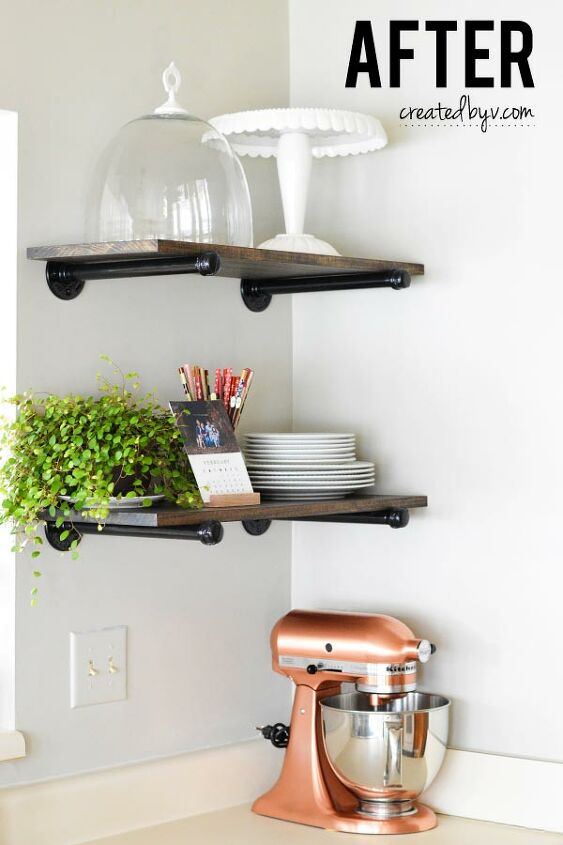
Perfecting Piping: Creative DIY Floating Shelves
Sometimes the most striking part of a DIY floating shelve isn’t the wood…As you can see from this project, old pipes make the perfect support for your shelves. Cutting a black iron pipe into four, this Hometalker added 1" thread to either end (a hardware store can cut and thread for you). To the ends, ¾" floor flanges were screwed in place to make wall brackets. After fixing to the wall, ¾" iron caps were screwed into the opposite ends before the shelf was fixed on top. Get tutorial here
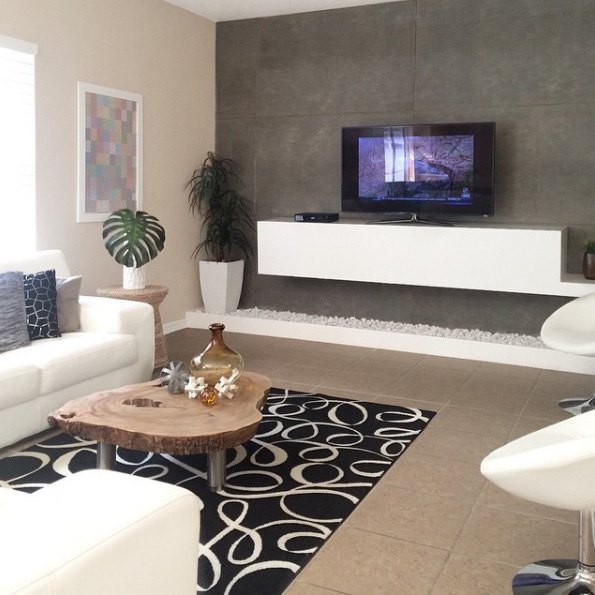
Fantastic Floating TV Wall Unit
When a single shelf isn’t enough, maybe this TV unit will inspire you. Taking a sheet of ¾" birch plywood, a Kreg Jig held the boards in place while supporting joists were screwed into place. At this point, only the top, bottom, and side faces were screwed into place. With the back and the front of the box open, the unit was placed onto the wall's cleat. Once secured, the front was glued in place, and the final product was painted in white for a stylish floating TV unit. Get tutorial here