Easy DIY Custom Bath Tray

This is a super easy and inexpensive project, that not only glams up any bathtub, but will also make any bath you take much more luxurious!
Step 1:
Measure across the width of your tub. You will want your tray to be about 1.5"-2" longer than that measurement. Keep in mind any edge or lack thereof that you have surrounding your tub - if it's very small , you'll need to be sure you aren't making your tray too long, though better to start too long and cut some off than the opposite way around!
Step 2:
Use your tape measure and pencil to mark off the distance you just measured, plus the additional 1.5-2" on your 1"x6"x8' board. Use your mitre saw to cut along your marked line. Sand the edges of your cut board to remove any lingering splinters.
Step 3:
Now use the measurement of the width of your tub, and center that distance on your board. Now add an ADDITIONAL half an inch in on each side (i.e. say your tub measures 15" across, and you added 2" extra as recommended above, for a total board length of 17". You will now mark 1.5" in from each end of your 17" board, and the center section would be 14" total). Use your quick square to draw a line perpendicular to the length of your board at these two ends, both 1.5" in from each end of your board - you are marking where your BUMPERS will be - they will ensure your tray doesn't slip into your tub.
Step 4:
Cut two 5" pieces of your 1"x1" hobby board using your miter saw. You will place each of these on either end of your board, INSIDE the lines you just marked. Use your nail gun and 1.5" nails to tack these down - these will be your bumpers. Now secure them well with one 1.5" wood screw on each bumper.
PRO TIP: Even before screwing them in, you may want to take that board back to your tub to make sure you got this right, and that the bumpers sit inside the lip of your tub, with the tray resting on top! It's always easier to remove a nail or two, than 5 or 6 plus a screw!
Secure each bumper with a screw and several nails.
Step 5:
Use a rag and the stain of your choice (follow instructions on the can) to stain your board and allow to dry about 1-2 hours.
Step 6:
Use Minwax Polycrylic in Matte (or your finish choice) to seal your tray. I used 2 coats and a large 4" paintbrush to make the process go super quick. However I suggest allowing your stain (if oil based) to dry for at least 48 hours prior to adding poly. This ensures that the oil in the stain is completely gone, and thus minimizes a poor reaction with the water based poly. Then allow to dry.
Step 7:
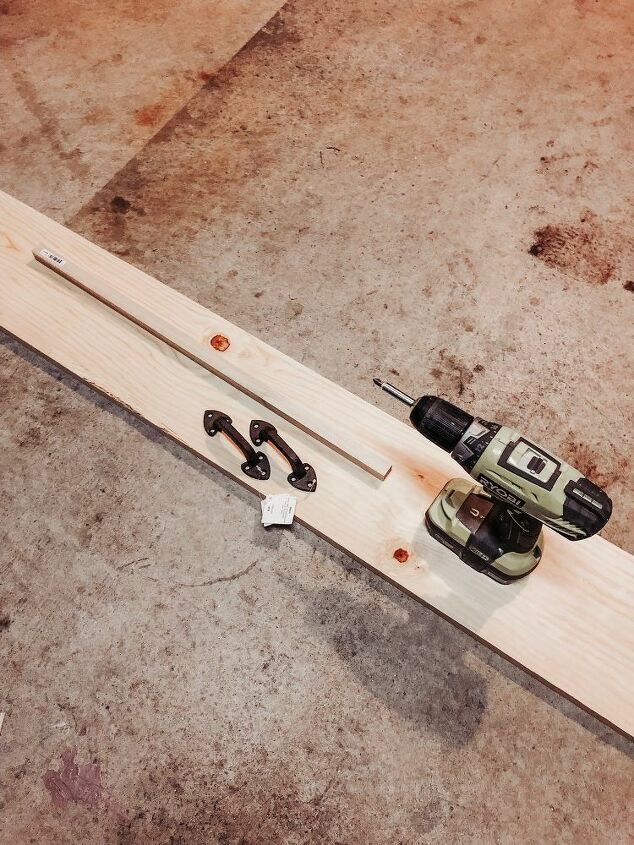
Once your tray is dry, attach your hardware using .75" wood screws - you can add your hardware wherever you think they look best!
My hardware is from Hobby Lobby, and I attached them about 1.25" from each edge! If you so choose, you can paint the heads of the screws to match your hardware, but that's totally optional! I just used a small paintbrush and black acrylic paint, which isn't waterproof, but it's unlikely you'll be getting it so wet as to disturb the paint - if you are worried about that, use a bit of spray paint - spray the paint onto a paper plate and pick up with a paint brush, but BEWARE! You'll likely be throwing that paint brush away, spray paint is crazy hard to remove!
And that's it, you're done!
Now you have a place for your book, a candle, some wine - or all three!
Happy relaxing, friends!
Enjoyed the project?
Suggested materials:
- 1"x6"x8' foot common pine board (Home Depot)
- Cubed (1"x1") hobby board (at least 12" long) (Home Depot)
- Handles/hardware of your choice and accompanying wood screws (be sure (Hobby Lobby)
- Wood stain of your choice (Lowes)
- Rag (Home Depot)
- Miter saw (Home Depot)
- Tape measure (Home Depot)
- Pencil (general store)
- Drill (Home Depot)
- Nail gun (or hammer and 1.5" nails) (Home Depot)
- Two 1.5" wood screws (Home Depot)
- Quick square (Home Depot)
- Polycrylic (Lowes)
- 4" paintbrush (Home Depot)
- 180 grit sandpaper (Home Depot)








Frequently asked questions
Have a question about this project?