Rearranging My Awkward Closet Into a Real Laundry Room With Built Ins

2 Materials
$100
5 Hours
Medium
By rearranging a few things I am determined to make an awkward closet into a real room. My laundry room ended up like this just like the majority of the house: I was not only on a shoe string budget but also felt like I was in a total rush. I realized that I no longer needed to put up with a space just because it was functional. I could change anything I wanted – simply because I wanted to! So it turned out I’ve actually been hating my laundry room for awhile now.


I was doing laundry the other day and realized that I’ve also been unconsciously working on this room in my head for a very long time.This room has some major weirdness going on but it also has potential.First I emptied it.Than I totally cleaned it from top to bottom. The cabinet on the wall was made by my grandparents’ years ago to be above their own washer and dryer.  I painted it and added hardware to it when I first put this room together but now it needs a new coat of paint like everything in my house (more on that coming up).It is actually a rather big space for a closet at 4 feet deep by 6 feet wide.But it felt totally underutilized with awkward hard to reach spaces on either side of my laundry unit.Not to mention it was REALLY difficult for me to reach the upper cabinets because I had to lean over my machine to get to them. (Cheers to us short girls, you really gotta hand it to us!)


I turned the unit and slid it against the wall on the left as that was my initial plan so then I turned it and moved it to the wall on the right. I moved that machine back and forth WAY too many times one night after work…There were MAJOR issues with either place.I was determined to use my Grandma’s 48 inch long old steel counter top but the actual depth of the closet is 46 1/2 inches – I was going to have to hack out an inch and a half of sheet rock and studs no matter where I put the machine to fit the counter in over it.If I put the machine on the left (where I originally wanted it) I would have over a foot of sheet rock and studs to deal with but with the machine on the right it was only about two inches of one stud.On top of that, with the machine on the left hand side, I would have to raise the counter top up quite a bit higher than I wanted to avoid the hoses and the outlet… damn.On the other hand though with the machine on the left I would be able to utilize the weird nook on the right hand side and make some really cool built in shelves… That had been the plan anyway.And then there was the real kicker, the machine’s door opens on the left, meaning with the machine on the left the door would literally open in the opposite direction that I would want it to… And, no (I checked), the door cannot be moved to the other side.


So, my plans changed, the machine ended up on the right! And all it required was an extension cord to do it, I didn’t even need to buy extension hoses!The space suddenly felt huge. Oh but now I have one very ugly back wall with hoses, the drain, water lines and stuff and I got to thinking about a different way to “fix” it.Curtains!Curtains made from a table cloth! With the plan of a curtain running across the whole back wall I knew it could be really pretty.But first my counter top needed to come back into the room. I used L brackets to provide support for the rest of the counter top. The counter itself is really sturdy so I knew I didn’t need to provide support for the center of it. I put the brackets in so it sits about an inch above the machine.


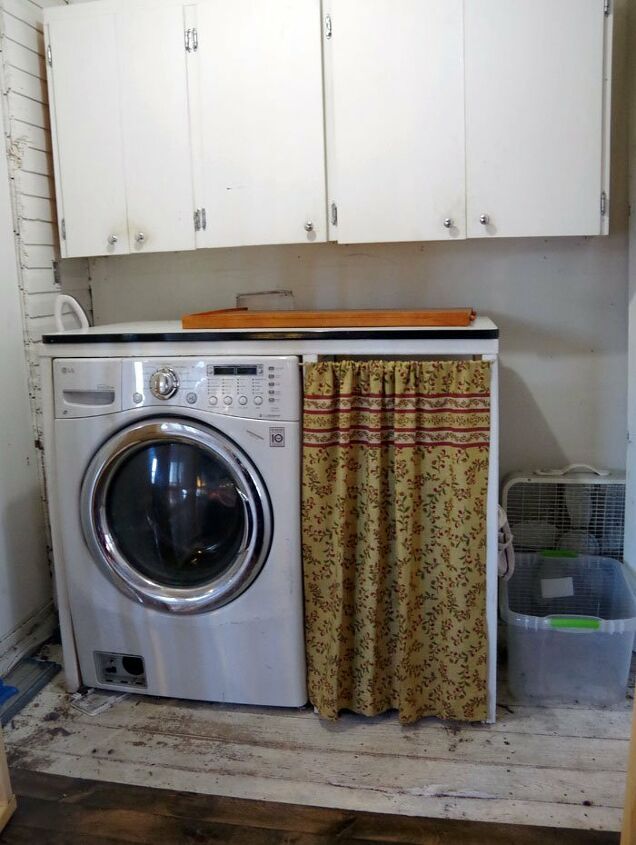
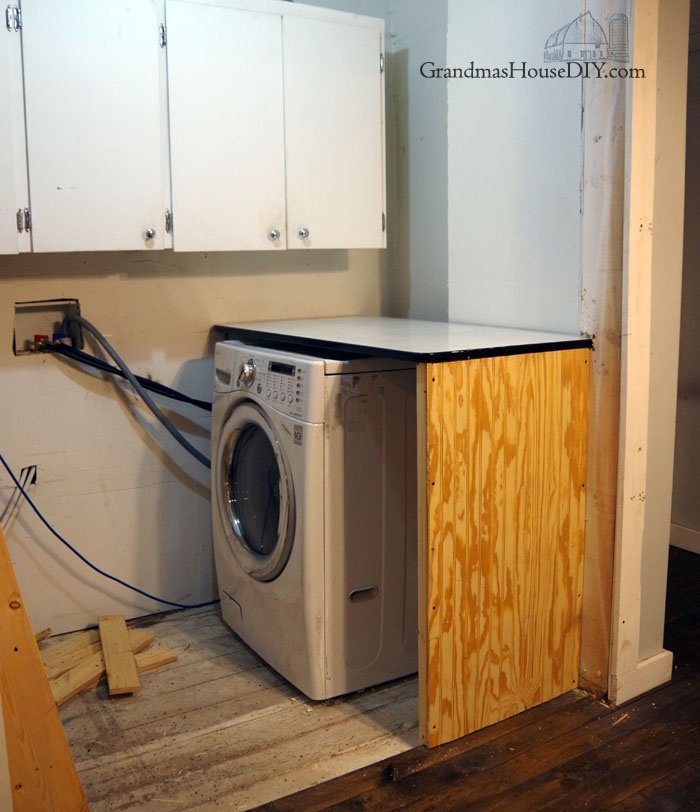
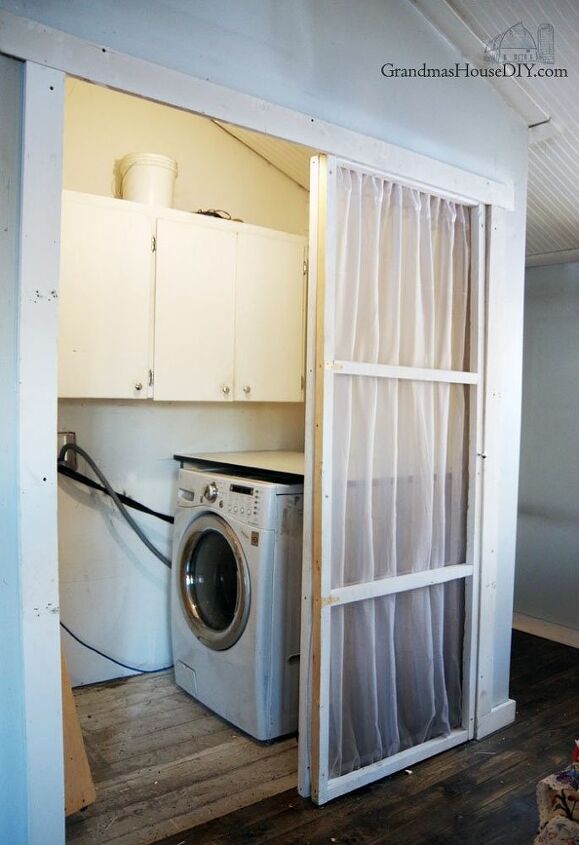
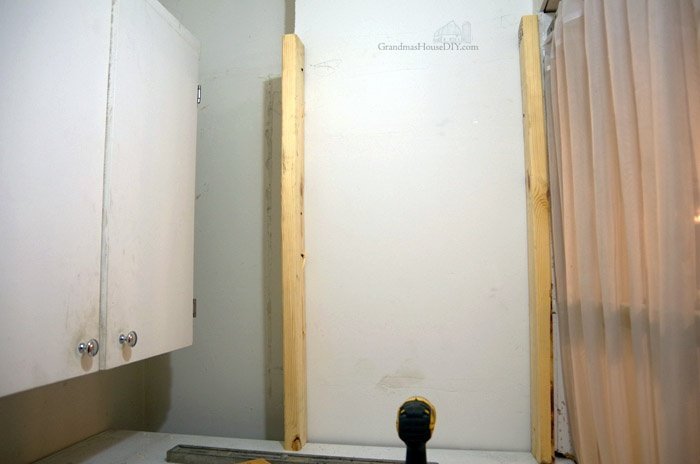
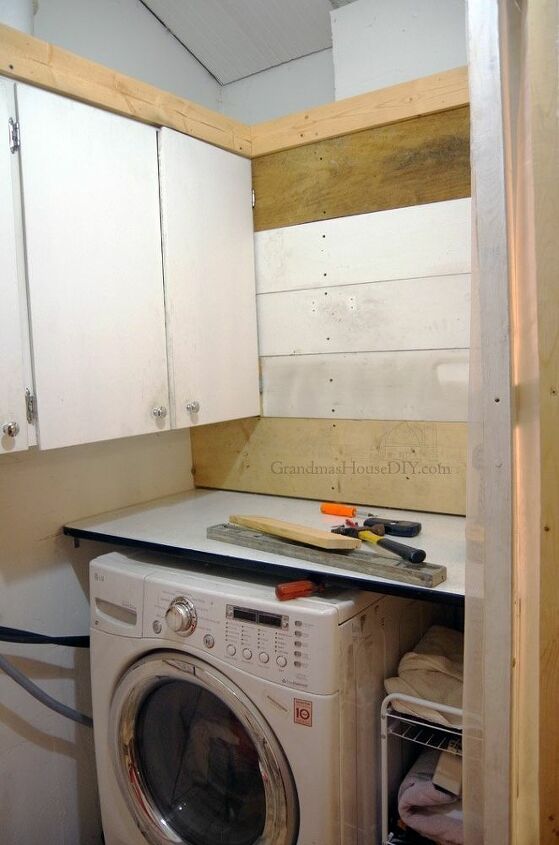
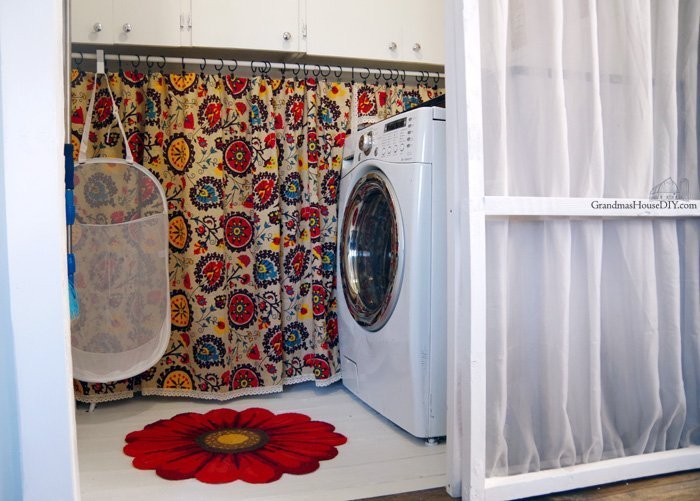
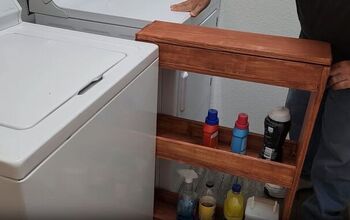
It worked out REALLY well to have the machine on the right because it literally takes up 30 inches of space, the exact width of one of my closet doors. I built a little “wall” with bead board to cover up the side of the machine and provide support for that side of the counter. And, also, for looks as you can see my closet doors are basically just sheers that are framed out.

It was at this point that I decided that rolling doors here would work better for me then the hinged doors. I took the closet doors down, removed their hinges and then created a frame at the top for them to be sandwiched in. I did this by removing the trim on the outside and lowering (and leveling) the top piece of trim across the top of the doorway. I did the same thing on the inside of the doorway with another 1×4. 

Then I just added casters to my doors and removed the knob on the door on the inside. This makes a lot more sense! The door on the inside on the right I will rarely (if ever) use and the door on the left rolls easily. They also lift and come out in the event I need them totally out of the way.

So, I have this bizarre awkward corner space that I’m not gonna bother explaining why it exists – this is an old house and “character” just happens all over the place and sometimes its just weird. When I first planned out this room I had actually anticipated putting the machine on the left but as soon as my plan hit reality it became clear that that was NOT the best way to utilize this space.So, my weird awkward corner space ended up behind my machine and now its a black hole because literally anything that falls back there will never be seen again.At first I was going to build shelves here and even after I decided the machine would be on this side I still thought I would build open shelves here above the machine…But I would never be able to reach them…I gave up.


I added a couple 2x4s for support and then simply covered it all with 1xs. (Like with everything in my home I am always determined to use what I have on hand. In this case the 1×12 came from the barn, I don’t know where the 1×10 on the bottom even came from and the 1x8s are leftovers from another project.)Moving on to still wanting shelves in this room though.
As far as I can tell there USED to be a door here on the left side. This is the 104 year old outside wall of the house but sometime, LONG before me, there was definitely a door here cut into the siding.By the time I got here this doorway was framed in and plastered over so I’m pretty sure this door was even before my grandparents’ time too.I think it MAY have been the back door of the house before the screened in porch was added in 1925… So, I have this weird cut out that I sheet rocked back in 2015.This was my Shelving Challenge.I decided to go ahead and use some leftover 2x8s I had but I was going to need to cut them at an angle to make it possible to still open the door on the upper cabinet. I also had a couple of long 1x8s leftover so I knew I had enough lumber to work with.I measured all the shelves to go from the corner to the old house siding, then I cut them all at that length. And then I nipped them off at the sharpest angle my miter saw would give me.


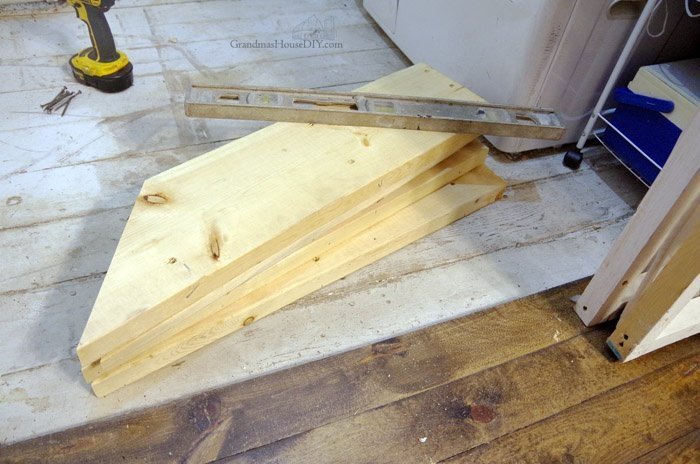
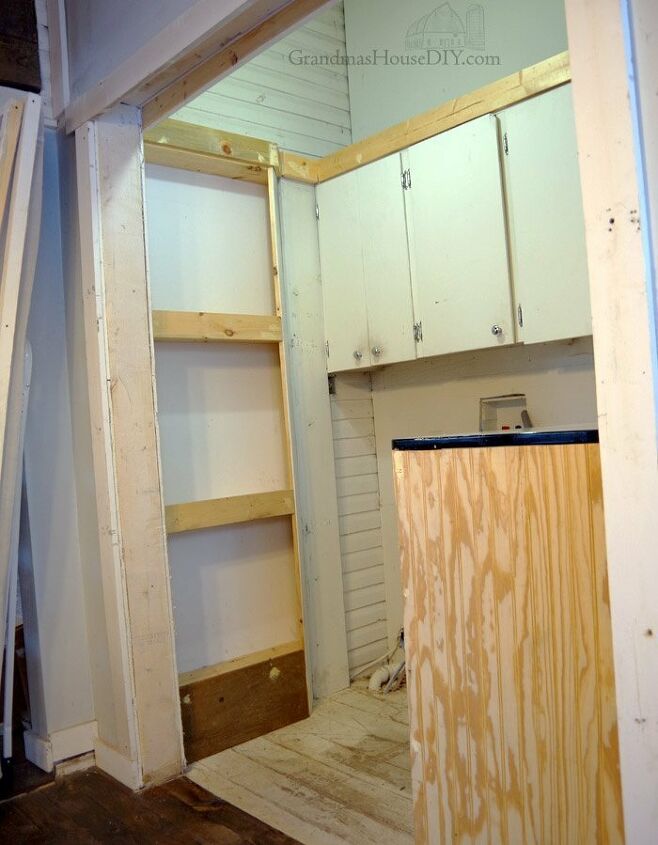
I knew I wasn’t going to be putting much weight on these shelves so I just put 4″ screws in at angles through the bottoms of them into the studs behind – leveling as I went.

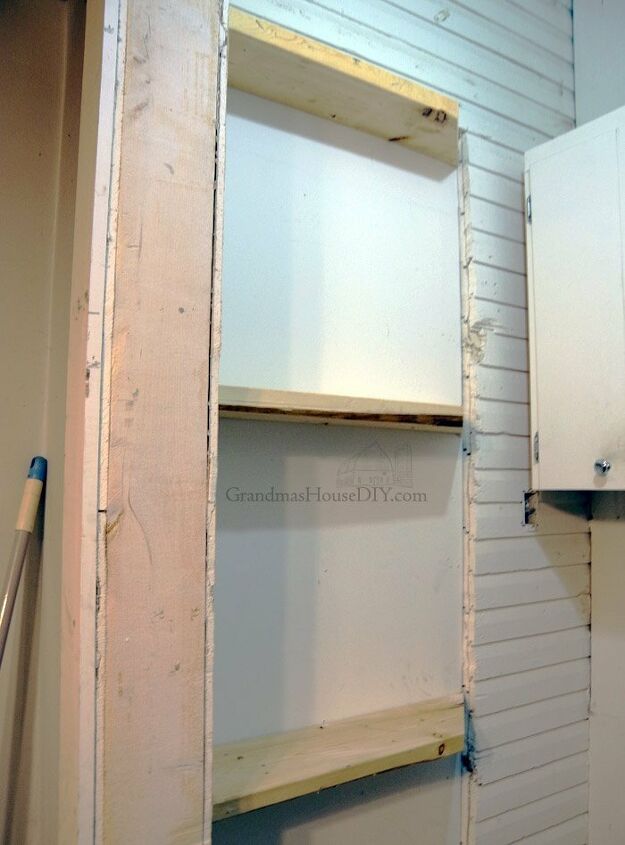
With the shelves “floating” I covered my angled cut with a 1×8 which also served to cover the gap between the wall and the cabinet. With 1x4s I trimmed out all of my shelves and also added 1×4 trim across the top of the large board I added to cover my black hole, the cabinets and my top shelf here, to make them all look connected and deliberate.

Because I was recycling pieces used to build something else I did have to do a bit more fixing with wood putty but it was totally worth it because, ya know what? I didn’t have to buy a single piece of lumber for this entire project!I either had it on hand or the majority of it came from my old pantry.Already I am so totally thrilled with how this room is turning out, next up: paint, organization and some pretty additions!(Yes that is a washer/dryer combo machine by LG and I absolutely LOVE it. In about 2 1/2 hours it washes and dries my clothes without needing an outside vent and using a LOT less water than a regular machine. It also plugs in to a regular wall outlet unlike dryers that require a much bigger receptacle. Cheers to never forgetting my clothes in the washing machine again lol! Oh and YEP it is kinda beat up and dented, I purchased it “brand new” from a scratch and dent place.)
Suggested materials:
  • Lumber   (Local Lumber Yard)
  • Screws   (Amazon)
GrandmasHouseDIY
Want more details about this and other DIY projects? Check out my blog post!
Go
Frequently asked questions
Have a question about this project?
  1 question
Comments
Join the conversation
 4 comments
Next