


How to Make DIY Floating Shelves for Less Than $20!

Floating shelves are a great way to add a minimalist and clean look to your home, and you can make them for your home for less than $20 a shelf! They aren't complicated to make and just take some woodworking skills and careful measurement to ensure that the shelves are sturdy and floating, without any brackets showing. Here is a step-by-step tutorial on how to build gorgeous, inexpensive floating shelves!
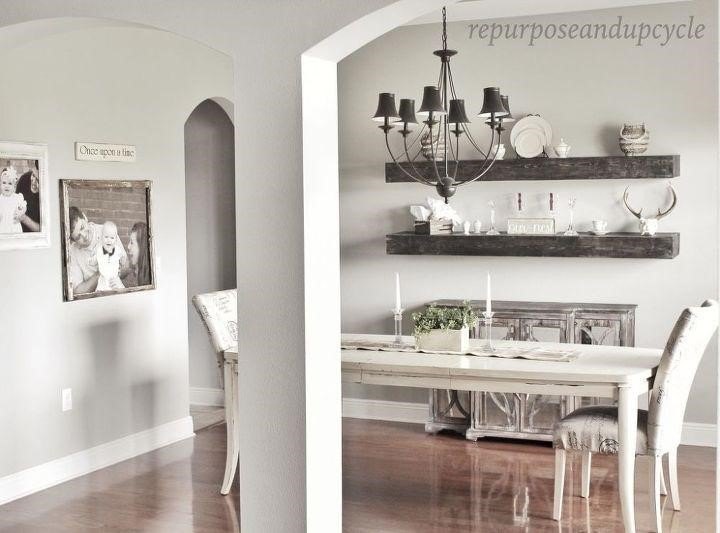
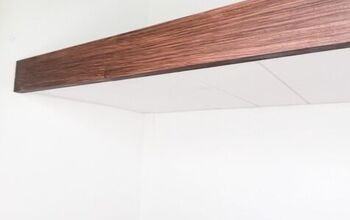
See post: Lindsey|DIY Dining Room Shelves
How to Make DIY Floating Shelves
Floating wood shelves can be made using numerous techniques. This step-by-step tutorial is just one option, but it’s a great option because it results in floating wall shelves that look great and are sturdy! If you are wondering how to make floating shelves strong, this tutorial will tell you exactly how to do that. There are three main steps: Build the outside of the shelf, build a bracket, and install the bracket and shelf. Follow the step-by-step tutorial below to find out how to make gorgeous wood floating shelves for your home.
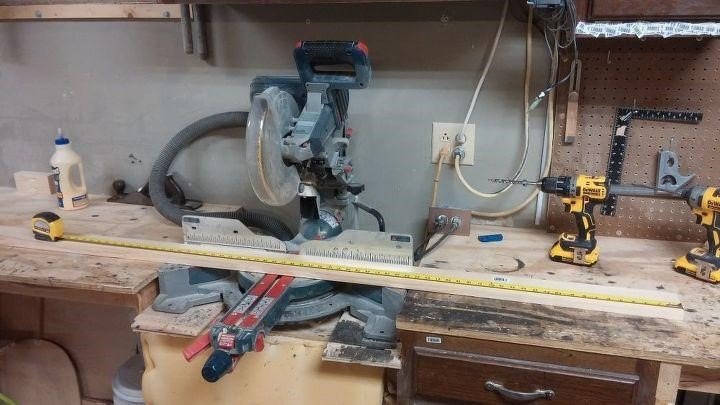
1) Gather your tools and materials
A floating shelf project requires mostly just wood and woodworking tools. For the wood, you will want to purchase pine wood and plywood. The exact dimensions and amount of wood will depend on how large you want your shelves to be and how many shelves you want to build. For tools and screws/nails, you will need pocket hole screws, finish nails, a miter saw, a drill, a Kreg jig and bit, a sander or sandpaper, a tape measure, a pencil, and a stud finder. If you do a lot of woodworking projects already, you’ll likely have most of these supplies in your workshop. If not, consider purchasing them or borrowing them from a friend if you don’t plan to use them a lot in the future.
See post: Jacob Jennings|Refined Rustic Floating Shelves
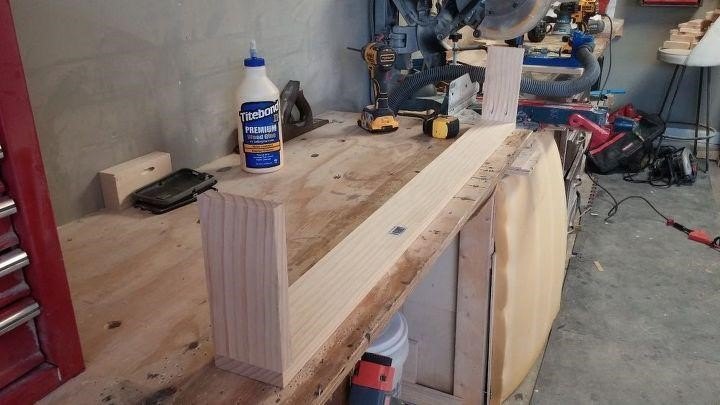
2) Create the front and sides of your floating shelf
For the shelf to float, you will need to create the outside of the shelf first, which will slide onto a bracket that you attach to the wall. First, you should cut wood for the outside front and sides of the floating shelf. The dimensions you cut the wood pieces to will depend on how large of a shelf you want to make. It’s recommended to make the shelf at least 3” tall and at least 6” deep. This makes the installation easier. The length can be whatever you decide.
Cut the front board to the length and width you decided on for your shelf. Then cut the side boards according to the depth you decided, considering the width of the front board in your calculations. Using a Kreg jig, drill two pocket holes in each of the side boards and then connect the front board to the side boards using pocket hole screws.
See post: Jacob Jennings|Refined Rustic Floating Shelves
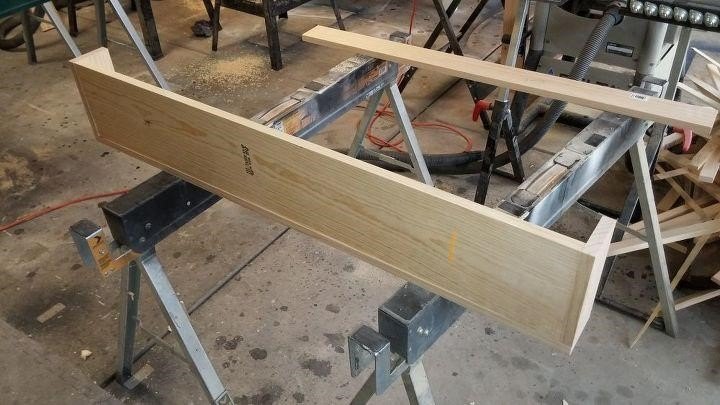
3) Cut and attach the top board to your shelf
Measure inside the front and side boards to determine the dimensions that are needed for your top board. Cut the board to the appropriate dimensions and use pocket hole screws to attach it to the front and side boards.
See post: Jacob Jennings|Refined Rustic Floating Shelves
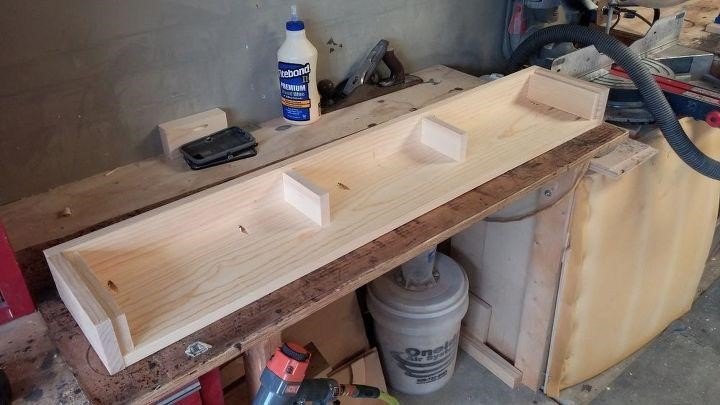
4) Add support pieces inside the wood box
Add four support pieces inside the wood box that you have built so far. These supports are important for keeping the plywood bottom of the shelf in place. Attach the middle two supports using pocket hole screws. Attach the side two support boards using nails. Ensure that your boards are the proper height to allow a piece of plywood to lay on top of them, flush with the front and side board edges.
See post: Jacob Jennings|Refined Rustic Floating Shelves
5) Finish the outside of the shelf by cutting and attaching the bottom plywood piece
Cut a piece of plywood to match the dimensions of the bottom of your shelf so that the plywood sits nicely within the front and side boards. Glue it in to the side supports and nail it down to stay put. Sand the box as needed.

See post: Jacob Jennings|Refined Rustic Floating Shelves
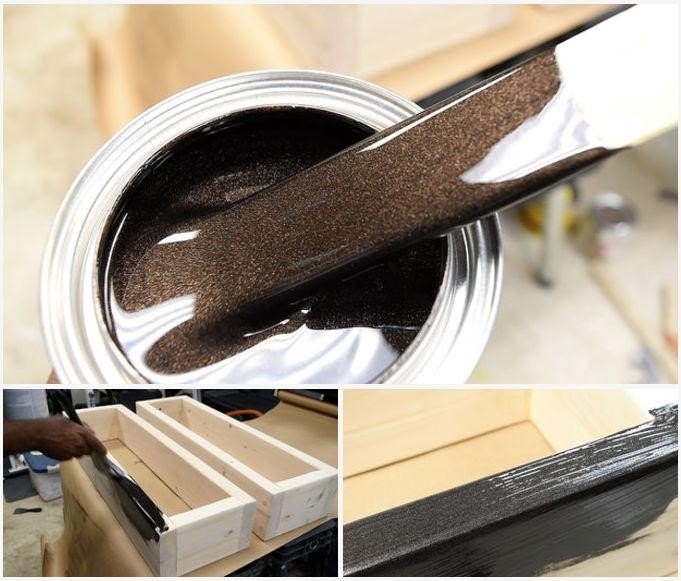
6) Stain or paint the outside of the shelf
Using a stain or paint of your choice, stain/paint the outside of the shelf. Some good options are Minwax stain or a semigloss interior paint.
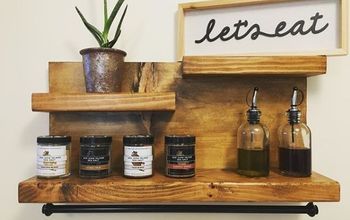
See post: Glen|How to Make a $7 Floating Shelf
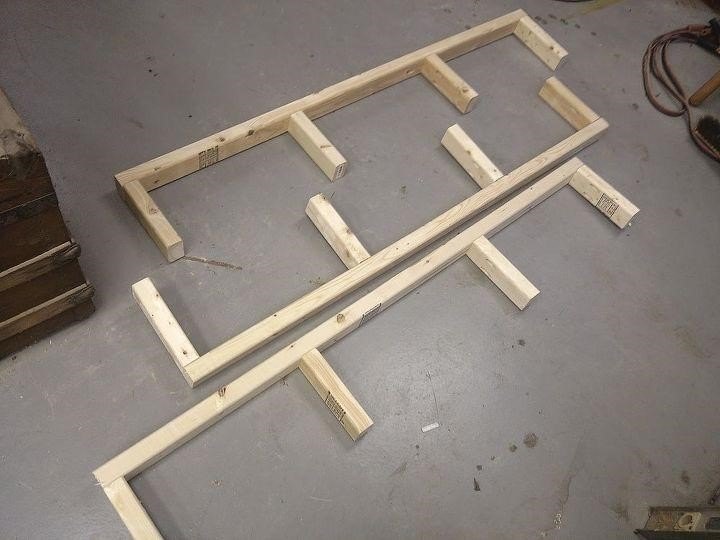
7) Create the support bracket
Now that you have the outside of the shelf complete, you will need to create the bracket that the shelf will slide onto to attach to the wall. The exact dimensions for your bracket will depend on the dimensions of the outside of the shelf you already created. Therefore, take careful measurements of your outside box to create a perfect bracket for it. You will want to ensure that your shelf can easily slide onto your bracket. Using a saw and pocket hole screws, create a bracket like the ones shown below. The number of supports needed in the middle of the bracket varies depending on how long you chose to make your shelf. Longer shelves will need more support pieces throughout the bracket while shorter shelves will not need as many.
See post: OnBlissStreet|$20 DIY Floating Shelves
8) Attach the bracket to the wall
First use a stud finder to locate the studs, marking them with a pencil. If possible, you will want to attach your bracket to the studs. If this is not possible given where your studs are and where you would like your shelf to be, you will need to use drywall anchors to make sure that your shelf stays put. Use a level to ensure that you attach your bracket exactly level. This will ensure that your shelf is level when you add it to the bracket.

See post: OnBlissStreet|$20 DIY Floating Shelves
9) Slide the outside shelf onto the bracket and secure it with nails
Now that you have the bracket in place you will want to slide the outside shelf onto the bracket. Next use finish nails to nail the outside shelf to the bracket. You can just put in a few nails in the far back of the shelf, all along the back edge. Then you’ll have a beautiful floating shelf!
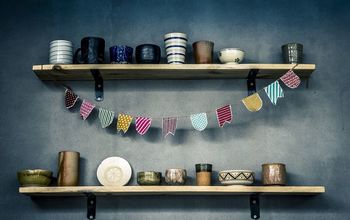
See post: Joanne Diamond|A Lesson Learned About Building Floating Shelves
How to Make Floating Corner Shelves
If you prefer to create DIY floating shelves for a corner, it is an even easier process.
Floating corner shelves are general significantly smaller than traditional floating shelves. Therefore, they require less support. Also, the fact that you are installing them in a corner makes it easier logistically. Follow the easy step-by-step tutorial below to create a floating corner shelf.
1) Install shelf supports
Mount 1” x 2” pieces of wood to the walls where you want to place the shelves. Use a stud finder to ensure that the supports are mounted to studs, not just the drywall. Also ensure that the outside ends of your supports are mitered.
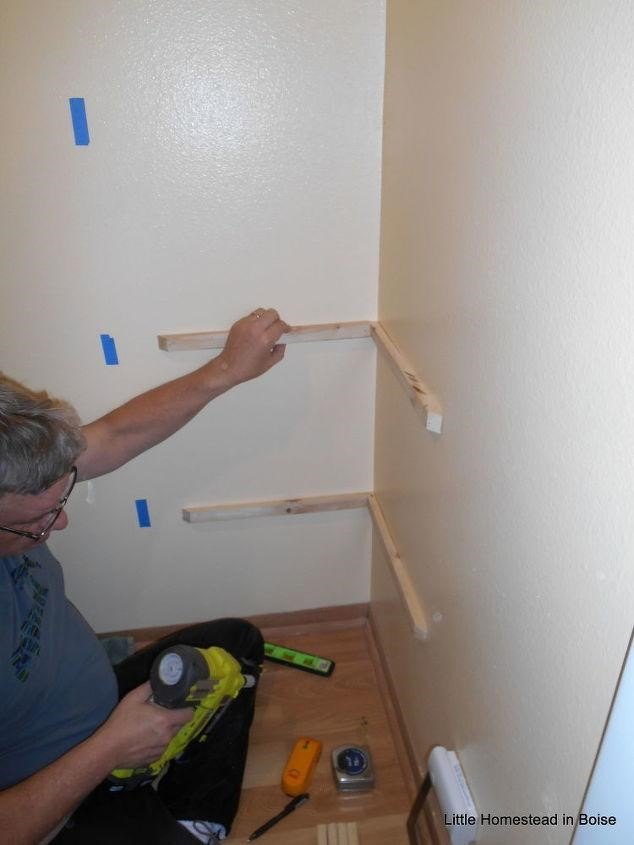
See post: Little Homestead in Boise|DIY Floating Corner Shelves
2) Add the front and top of the shelf to the supports
Attach another 1” x 2” piece of wood, mitered at both ends, to the front of the shelves, creating a triangle. Then cut a triangular piece of plywood and attach it to the top of the supports using finish nails.
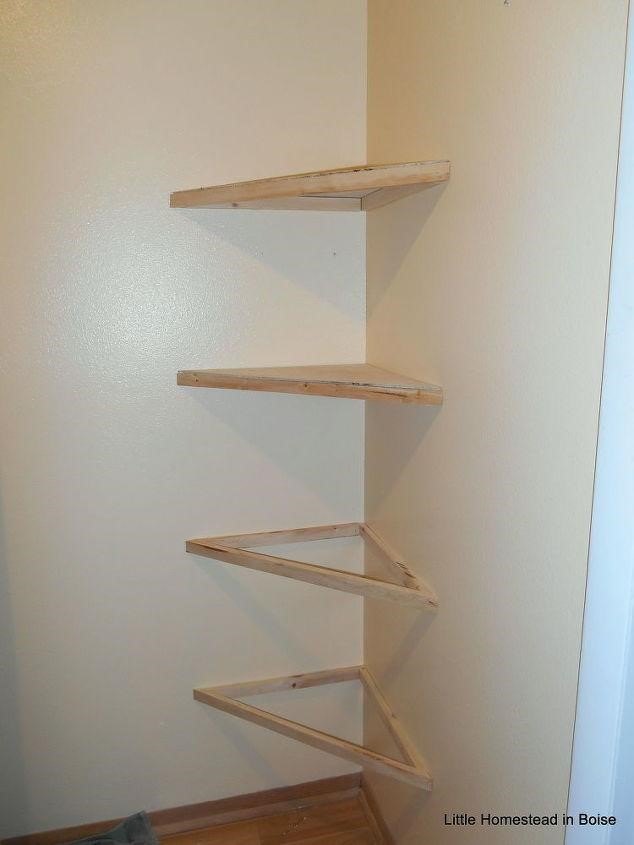
See post: Little Homestead in Boise|DIY Floating Corner Shelves
3) Add trim and stain/paint according to your preference
Nail 1" x 3" wood to the front of the shelves and nail quarter round trim to the top edge of the shelves. Stain or paint to your personal design preference. Now you’ll have beautiful floating corner shelves to place home décor items on!
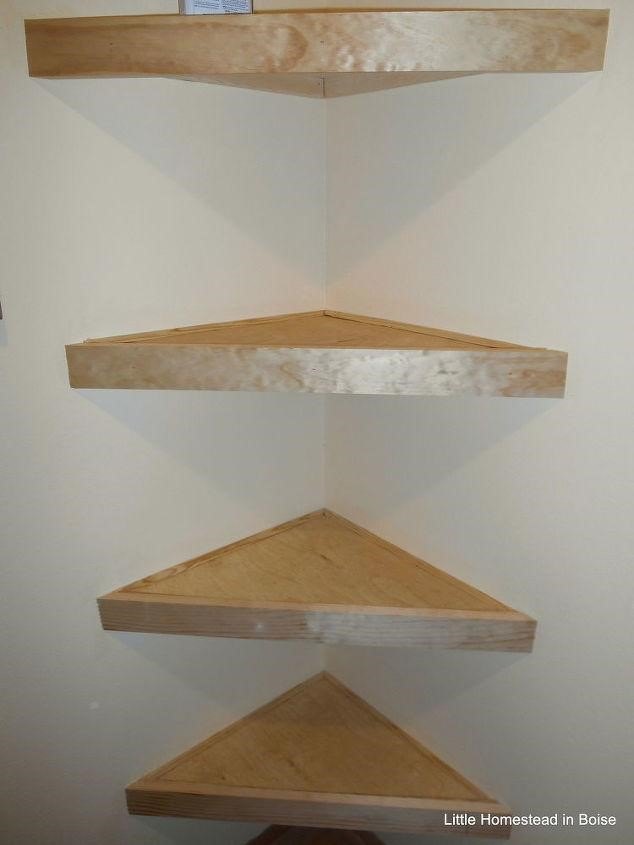
See post: Little Homestead in Boise|DIY Floating Corner Shelves
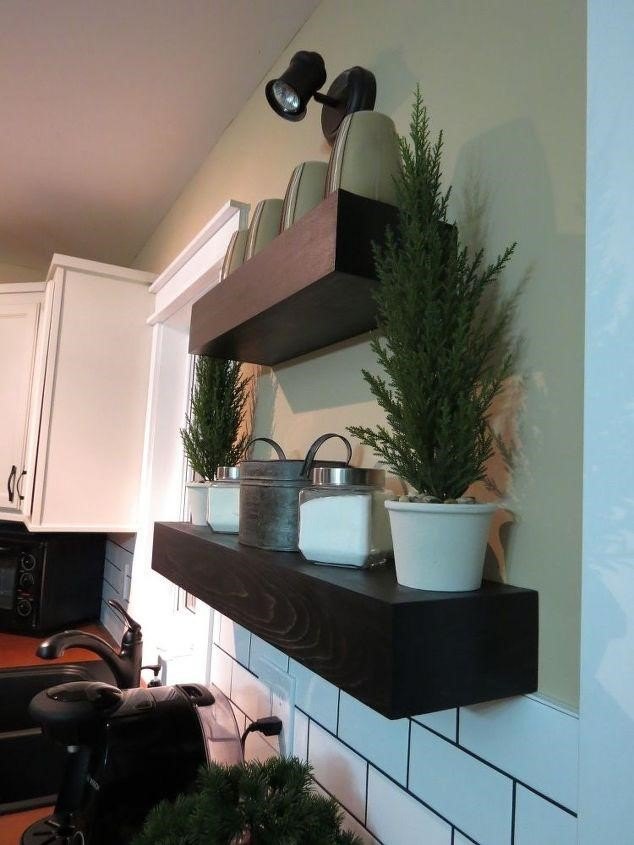
DIY floating shelves can be quite simple to make, especially if you are familiar with basic woodworking tools and techniques. Floating wall shelves are great because you can completely change the look and feel of them depending on the type of wood you use and the finish you choose for them. Consider where they might look great in your home. Perhaps they will be perfect for a kitchen wall, with plates and decorative cutting boards on them. Perhaps they will be perfect for a little corner of your living room that needs a little extra interest. No matter where you choose to place them, by following this tutorial you can create gorgeous, sturdy floating wall shelves for your home. Don’t forget to share this tutorial with your friends and family to help them know how to create gorgeous floating shelves for their homes too!
Written for the Hometalk community by: Mary | The Handcrafted Haven


Frequently asked questions
Have a question about this project?