19 Amazing String Art Creations to Give a Try
String art is one of the best and simplest ways of getting an eye-catching piece of art at home. Have you ever considered creating your own DIY string art? Working out where to get started and what patterns to use could be stopping you from getting going. In this case, why not let yourself get inspired by some of the best projects around? We have gathered together a big, varied selection of string art patterns that might help you to decide.

A Beating Heart Pattern
This project started off when Hometalker Angie @ Ambient Wares found a couple of wooden hearts. She sanded them down to the wood and then used a wood conditioner before staining with red oak stain. After painting the hearts, she marked where the nails should go to form a heartbeat design. The string was then pulled around the nails for a great end result. Get tutorial here

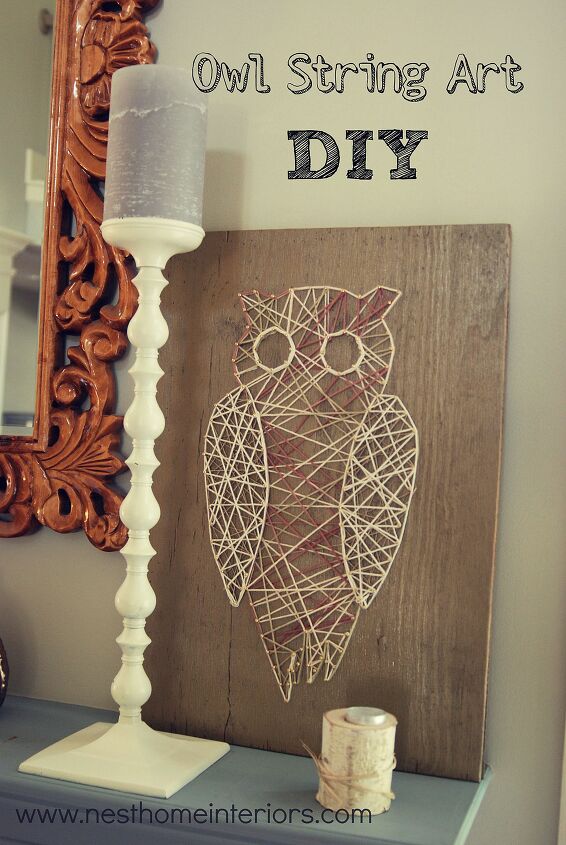
Create an Owl String Art Design
In this case, string and nails are used to create a lovely owl shape on a plywood background. Hometalker Nest Interiors produced this striking piece of string art using very other few materials. Apart from the plywood, paint, an owl template, nails, and thin yarn or jewelry hemp are used. The nails are put in about ¾” apart and the string is added. Get tutorial here
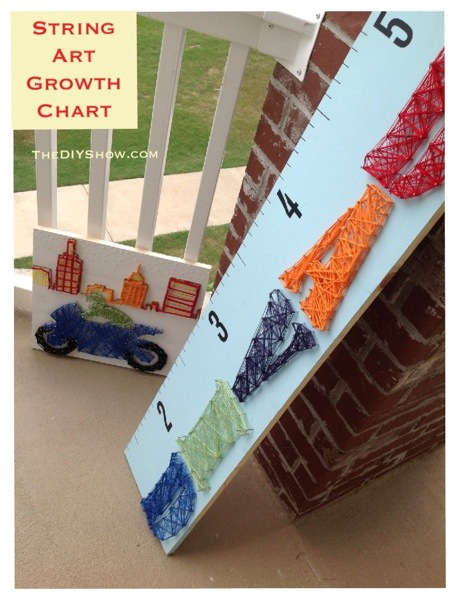
Get a Unique Growth Chart
A 1 x 12 x 4 top choice white wood board was the starting point for this string art project. Hometalker TheDIYShow.com then turned it into an attractive growth chart for recording a child’s height. The board is painted and then the child’s name is added using string art patterns. This leads to a stylish, personalized growth chart that is great fun. Get tutorial here
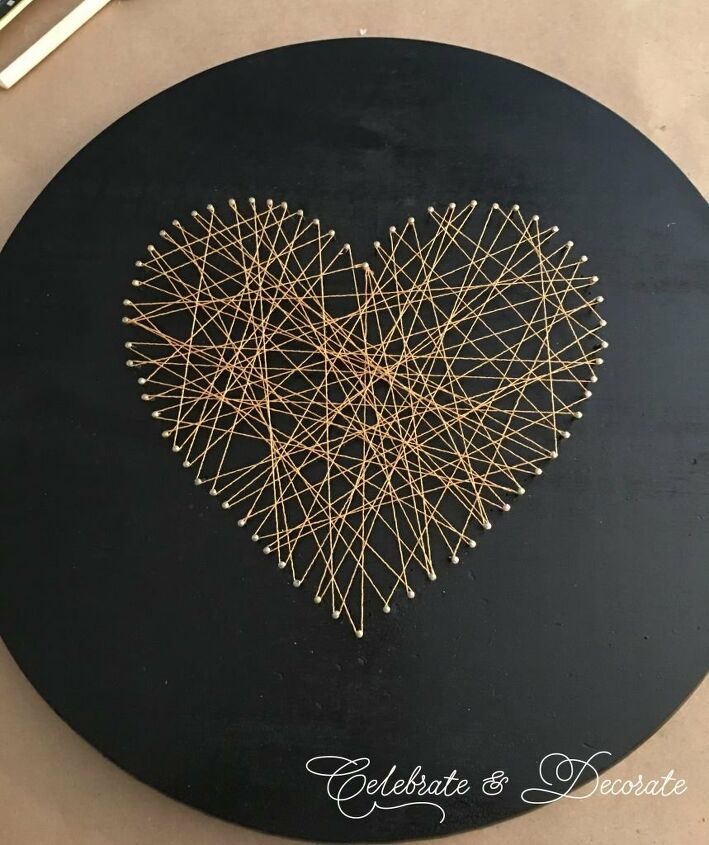
Create a String Heart
In this case, we can see how easy it is to create a beautiful heart shape using nails, chipboard, and embroidery thread. Hometalker Celebrate & Decorate (Chloe Crabtree) showed us how it is done. She pointed out the importance of making the nails the same height and making sure that the thread has enough tension in it is another of her top tips. Get tutorial here
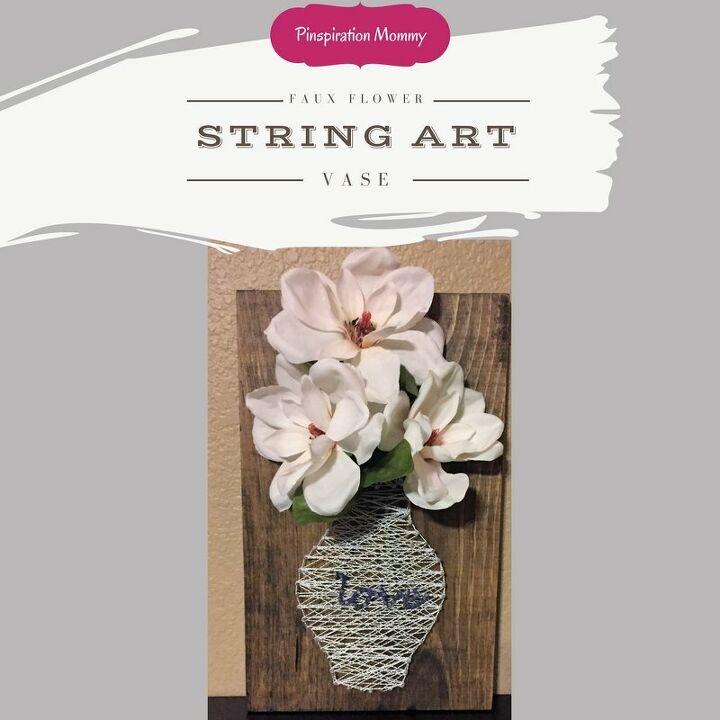
Create a String Art Vase
This clever project uses faux flowers and a string art vase to great effect. Hometalker Pinspired to DIY used a stained wood board and then traced the outline of the vase using a drawing of one. Embroidery string was then carefully wound around nails using this outline. Finally, the faux flowers were added for the perfect finishing touch. Get tutorial here
Make a Mason Jar
Another smart idea is to create a stylish mason jar in this way. That is what Hometalker Décor Home Ideas shows. It all starts with a wooden board and a printed mason jar template to work from. Rather than marking with the nails and taking the paper out, this project involved driving in the nails and then ripping out the paper. It works either way. Get tutorial here

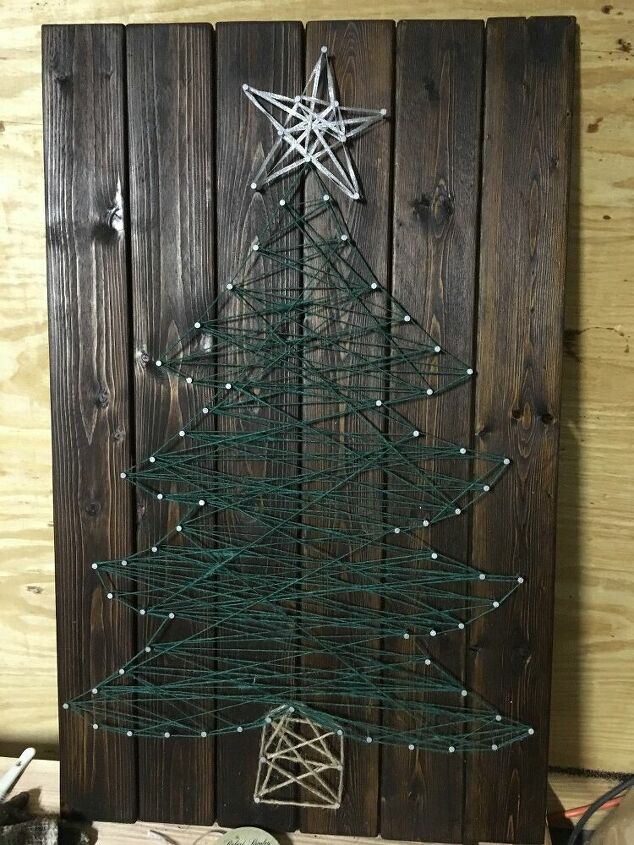
Make a String Christmas Tree
This is a highly versatile type of DIY art that can be used in a number of ways. For example, Hometalker Amanda shows us her project to make a classy Christmas tree with just a few simple steps. This model uses colored twine, with metallic ribbon as the star. The twine goes back and forwards to give a thick, impressive look for the festive season. Get tutorial here
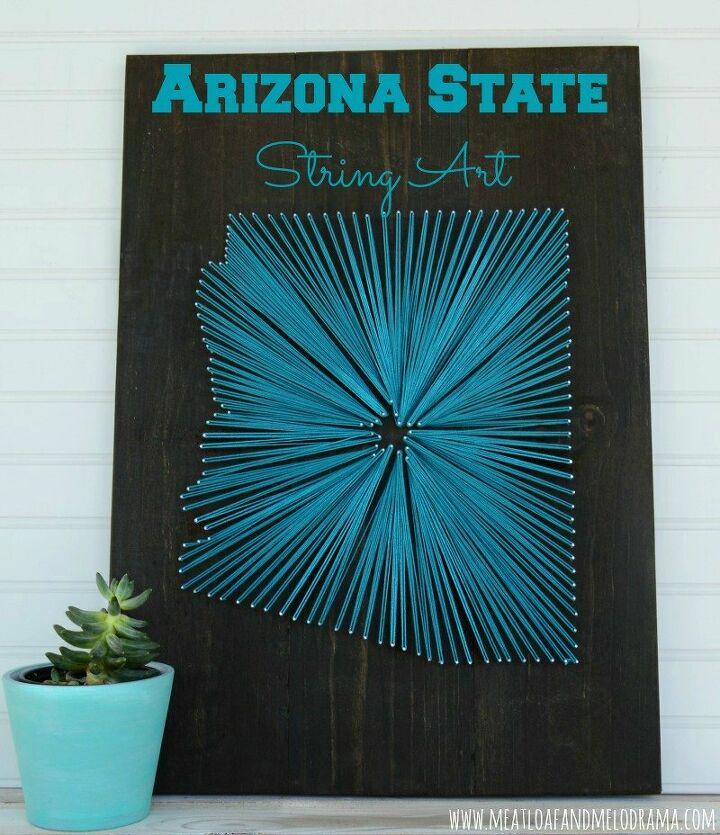
String Art for Your State
This project involves tracing the outline of Arizona and then using colored string to fill in the lines. The end result is pretty neat and the aqua-colored string goes well with the dark walnut board. The image above comes from a project carried out by Hometalker Dee M. She says she finished this string art project with the help of her daughters. Get tutorial here
Add Style to a Picture Frame
With this project, a fairly dull photo frame can have a touch of glamor added to it. Hometalker Troom Troom shows us exactly how to do it, starting off by painting the wooden frame your chosen color. Size 8 common nails are used. Unlike with some other string art patterns, the distance between the nails is carefully measured out a centimeter apart. Get tutorial here

Use Pins and Cork
This project is even easier to complete than the rest, as it doesn’t involve hammering nails into wood. Instead, you just need to push some pins into cork tiles for similar results with no hassle. This terrific idea comes from Hometalker Where The Smiles Have Been. It is quick and easy enough even for complete beginners to carry it out at home. Get tutorial here
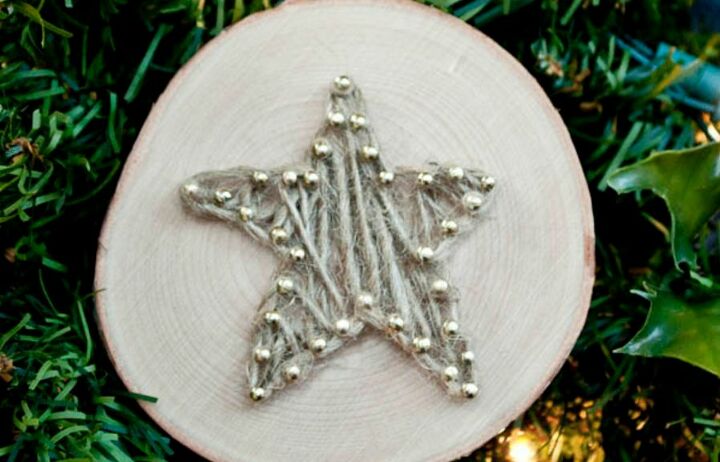
Combine with Wood Slice Techniques
Combining string art patterns and wood slice ornaments produce a cute, rustic feel. The image above comes from Hometalker Bobbie Byrd – Clumsy Crafter, who created a fun Christmas decoration. It begins with a template on paper and with twine wound around gold finishing pins. This model was hung on the Christmas tree, but you can put them anywhere. Get tutorial here
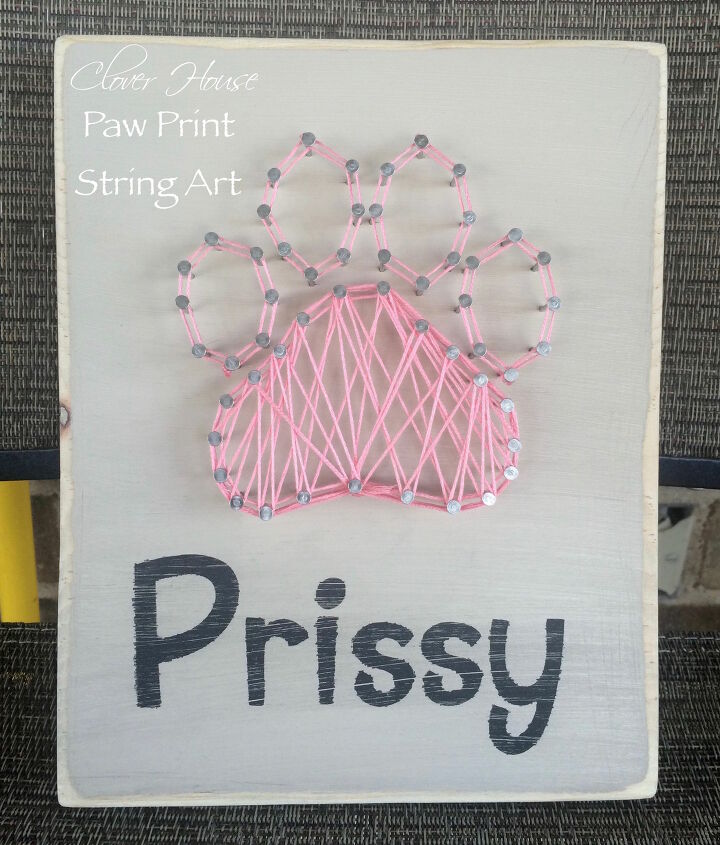
A Cute Pet Memorial
This cute string art project pays tribute to a pet that had passed away. Hometalker DeeDee used a sanded board, paint, a paw pattern, and some small nails to produce a very nice piece of art. She uses craft glue to secure the tied off ends. For the string, it was embroidery thread used, although there are other options you could use too. Get tutorial here
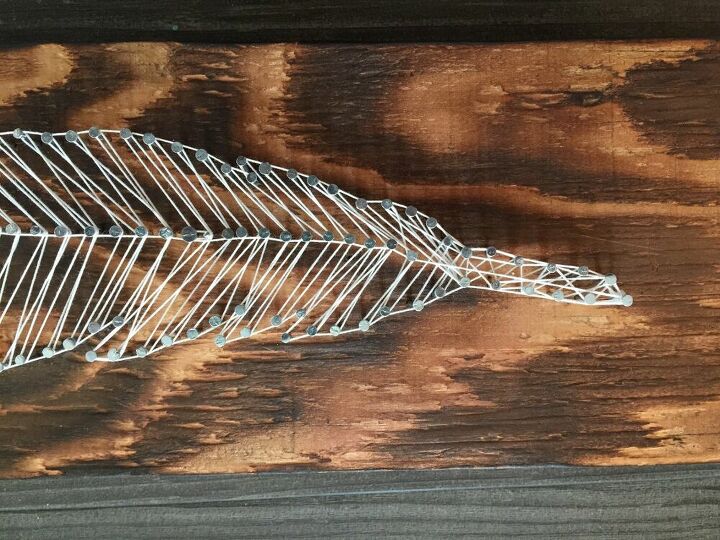
Make a String Feather
You can make just about shape or design that you would like to in this way. With this project, we can see how a neat feather can be made on a wooden board using just nails, strings, and imagination. The Hometalker Chandra | did this using 2/4″ finishing nails for more stability. She tied a knot at the bottom and then worked her way up. Get tutorial here
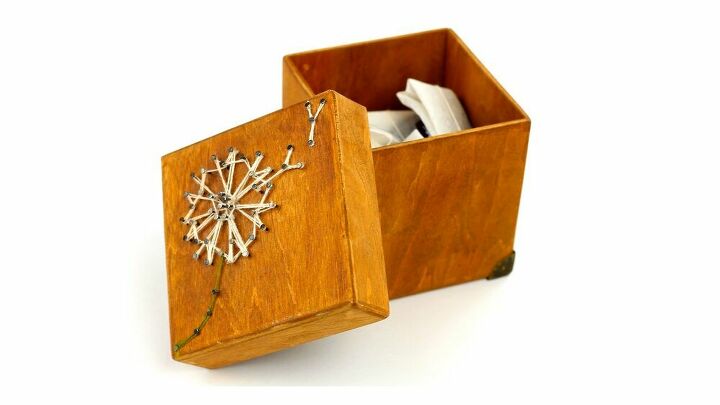
String Art on a Wooden Box
This little wooden box has a floral string art pattern added. It is a short and sweet project carried out by Hometalker Troom Troom with 5/8 length nails and a mixture of green and white threads. The first step is to paint the box. After this, where the nails are to go needs to be marked. Once the nails are in, the thread is secured and wound. Get tutorial here
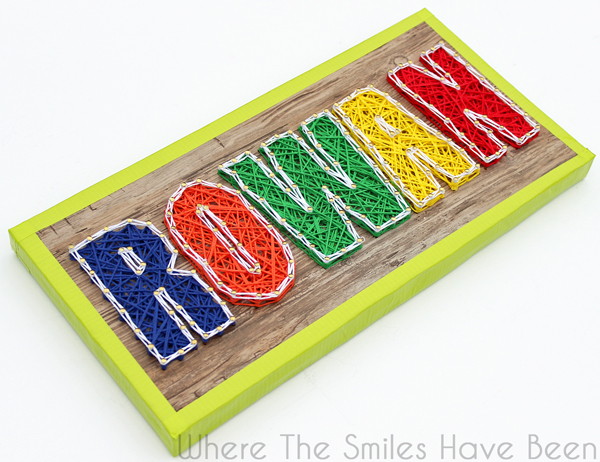
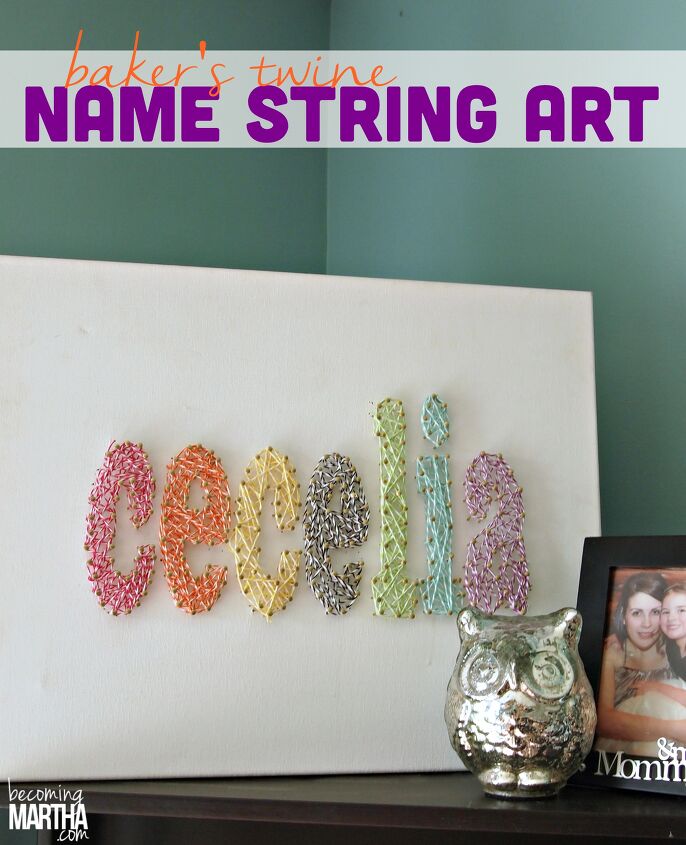
Make Names
This is a great way of writing out names using string art patterns too. With a DIY project like this, it is incredibly easy to make personalized gifts or fun nameplates to hang in kids' rooms. Hometalker Sarah Desjardins shows in the image above how this is done. She used a canvas background and different colored twine to write the names. Get tutorial here
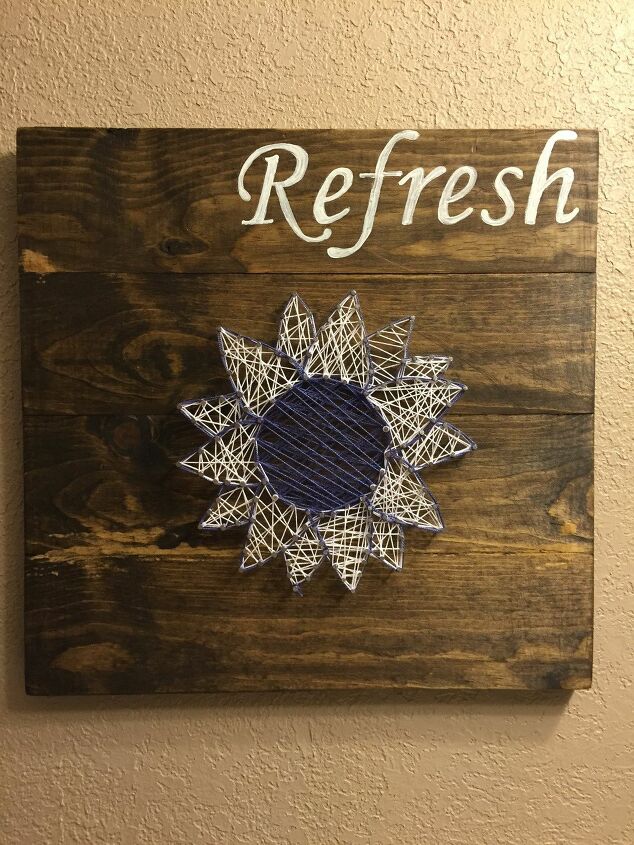
Make DIY String Art for the Bathroom
This sort of art project can be used to brighten any room in this house. This image from Hometalker Pinspired to DIY shows how these creations can be used to great effect on the walls in the bathroom. Wood boards were cut to size and attached together. After this, the pattern is used to show where the nails need to go before the string is wound on. Get tutorial here
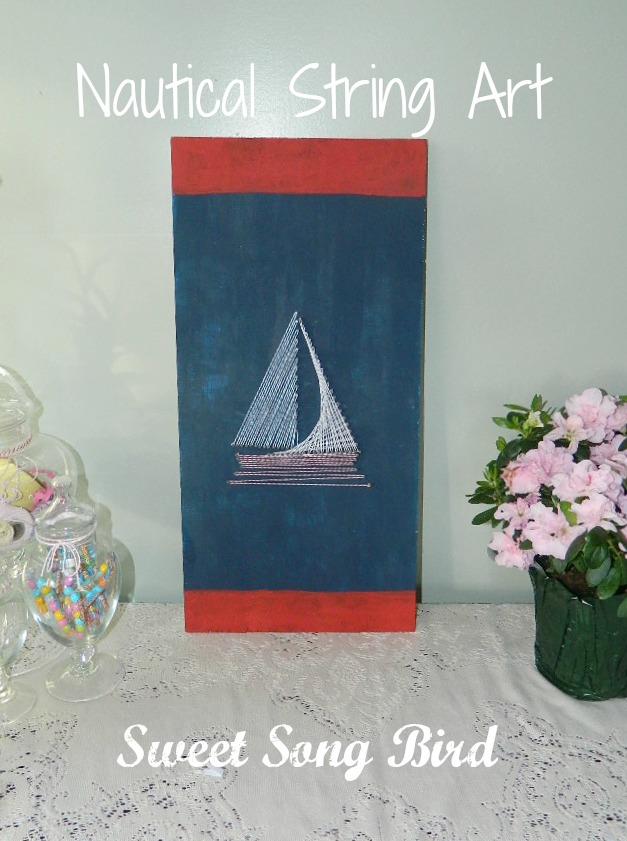
A Fun Nautical Look
You can be inspired in your DIY string art by many different sources and ideas. This picture from Evey’s Creations has a fun nautical theme that could be perfect for putting in a kid’s room. The template was carefully put into place to show where the boat goes. The nails and string could then be attached easily for a great look on the wall. Get tutorial here
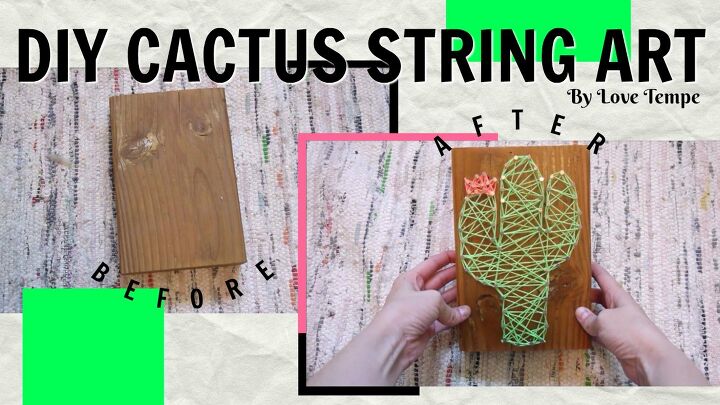
A String Art Cactus
For this project, an old block of wood was sanded and then sprayed with clear gloss spray enamel. Once the nails were hammered into place, embroidery floss was tied on and then wound into position. It was carried out by Hometalker Love Tempe. The end result is a lovely piece of string art showing a pretty cactus that looks fantastic anywhere. Get tutorial here
String Art for Kids
This type of project is perfect for getting the kids involved with. The fact that it is so easy to carry out means that just about anyone can give it a try and get fantastic results from it. The image you can see above is from Hometalker Angie CountryChicCottage. A fun tractor is among the string art designs for kids that she has tried. Get tutorial here