


DIY Pvc Pipe Easter Decor for Your Yard
I love creating my PVC pipe art and with Easter on it's way, I had to create some PVC pipe art just for the holiday.
Alright, let's get started!
Start by drawing out your pattern. This is by far the hard part. I wasted a lot of time and even more money on wasted supplies and even more pvc pipes. I have put all of my patterns into PDF format and now make them available for anyone who wants to start making their own PVC pipe art on my blog.
Want my download and print patterns? Get all 30+ of them here!
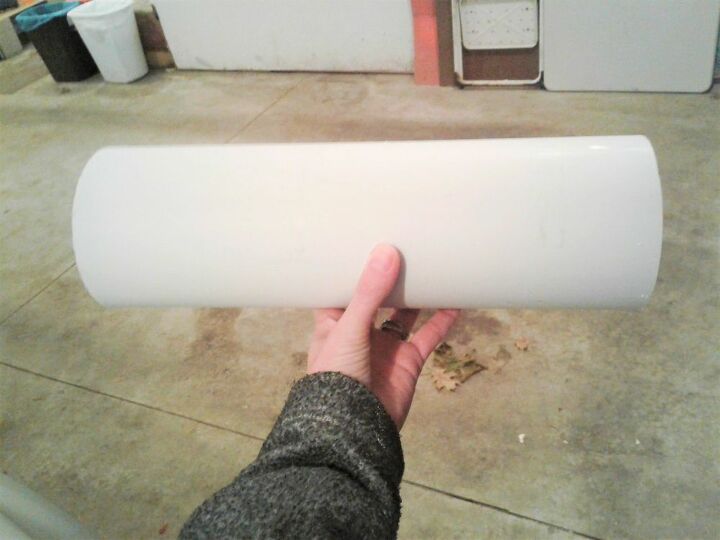
Print out your patterns (or draw them on to some paper) and then trace them onto your 4" schedule 40 pvc pipe. I like to always have a copy of my patterns so that I can reuse them over and over again if I want to make more and/or sell them!
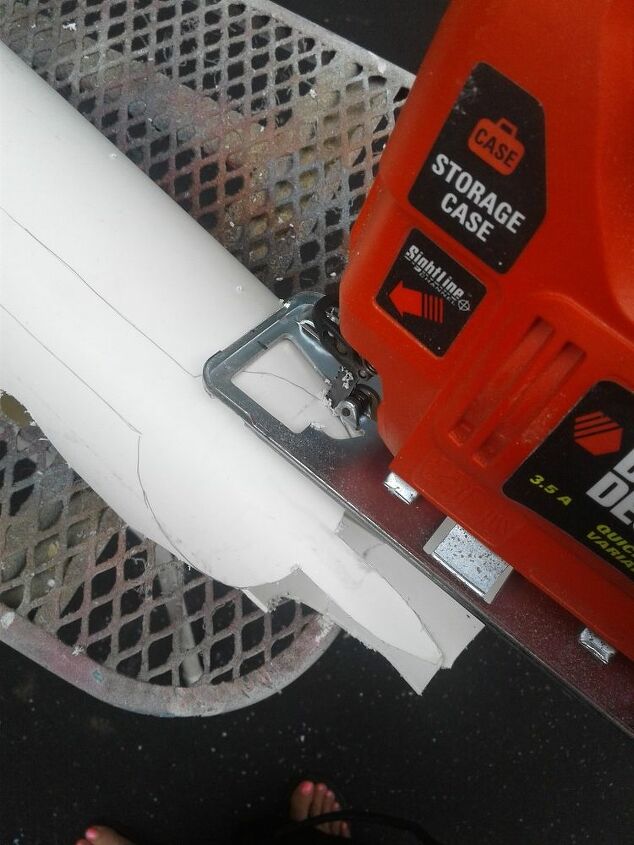
Once you have your pattern traced it's time to cut it out. Don't forget to put on your safety glasses!
Use your jig saw and take your time cutting out around your pattern lines. Using a jig saw is quite easy once you get used to how it maneuvers around all the corners, but after you cut out on pattern you will totally have the hang of it!
Then use some sandpaper or a file to smooth down all of your edges. Now is also a good time to remove the manufacturers ink marks on the pipe. You can use a sander to remove the ink or some acetone and a clean cloth or paper towel.

Then you will need a heat gun to reshape your pvc pipe. Use heat protective gloves to protect your hands from the intense heat of the heat gun. Aim your gun at the area you want to reshape and move it around the area until the section has softened and can be reshaped. You are not melting the plastic. You are heating it enough for it to become pliable. Once you have your section reshaped, hold it in place while it cools until it is permanently reshaped. Alternatively, you can dip the section into some cold water to make it reset faster. I usually like to hold it in place so I can tweak each section as it's cooling down.
Once you have it all reshaped it's time to paint it! Before I paint my pieces, I like to go over the entire piece with some sandpaper just to rough up the plastic a little bit for a better adhesion of the paint. Make sure to use spray paints that are meant for plastic so that they adhere good. For instances like this angel where she has some more details, I've used some acrylic paint or paint markers to add fine details.
Once you have your entire piece painted, spray the entire piece with a clear acrylic spray sealer to help protect the paint. I like to do at least 2 coats of sealer.
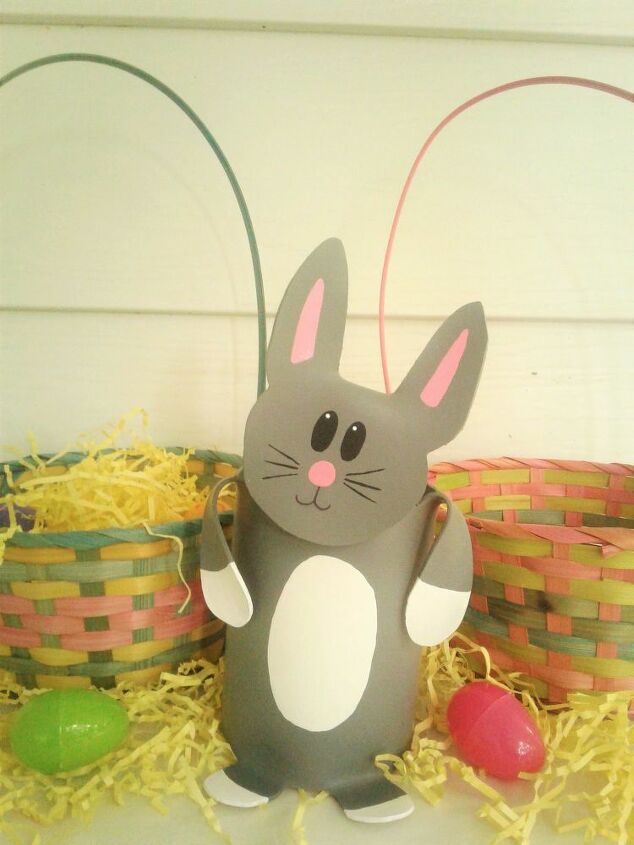
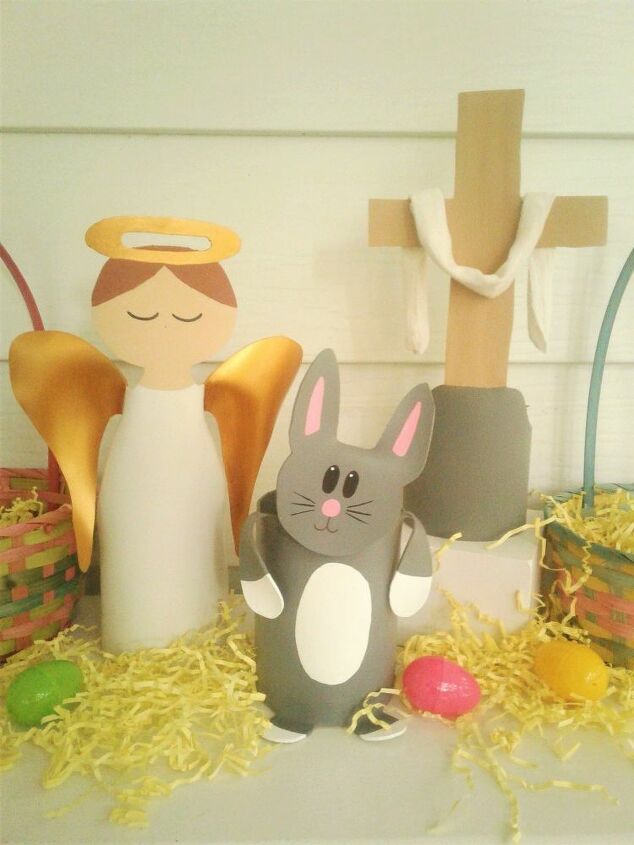
Here's my finished little Easter bunny all ready for our front porch.
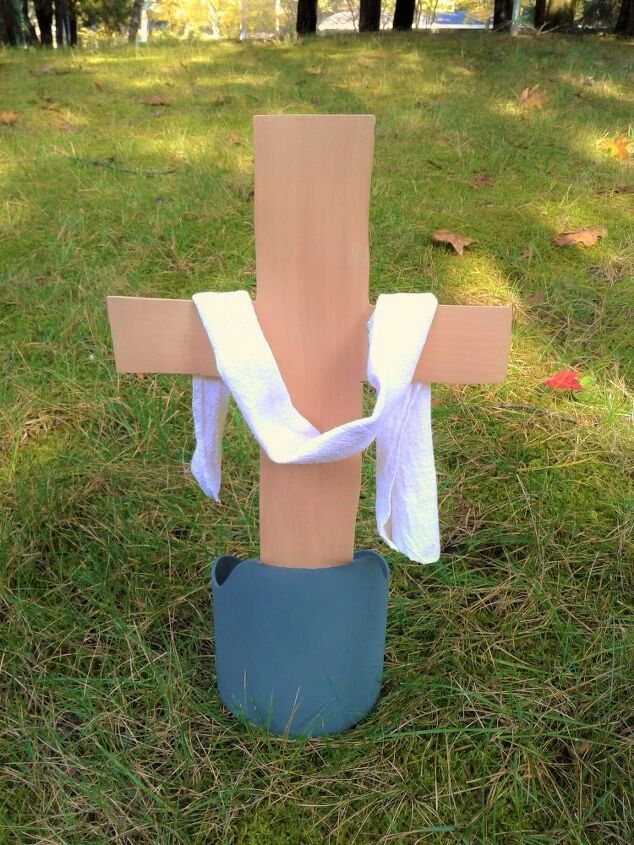
And here is a photo of the finished cross.
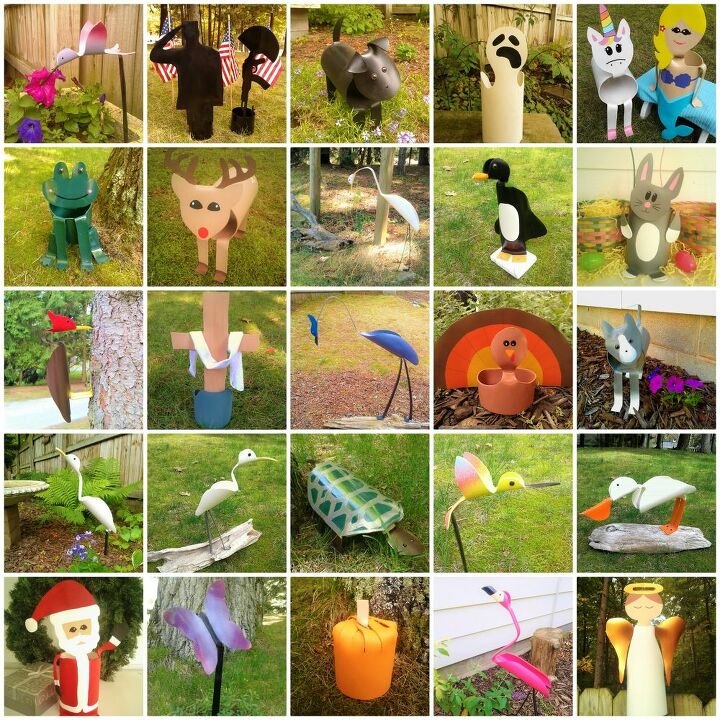
Here's another photo of a collection of the PVC pipe art that I've made so far. You can make PVC birds, PVC animals, PVC people and so much more.
Ready to start making some PVC art? You can find all of my patterns on my blog.
Resources for this project:
See all materials


Comments
Join the conversation
-
Incredible - seriously you should be selling them!! So talented - thanks for sharing the idea - very generous of you :)
-
Very cute. It's also refreshing that the faith element of the holiday is emphasized :)


Frequently asked questions
Have a question about this project?
I would like to learn how to make the frog and I cannot get it to load up is there anyway you could send me the instructions