


Rocking Chair Makeover: Chalked Paint and Upholstery

I found this old rocking chair at a local thrift store. It was in decent condition but had one lose arm and needed a new seat and back.
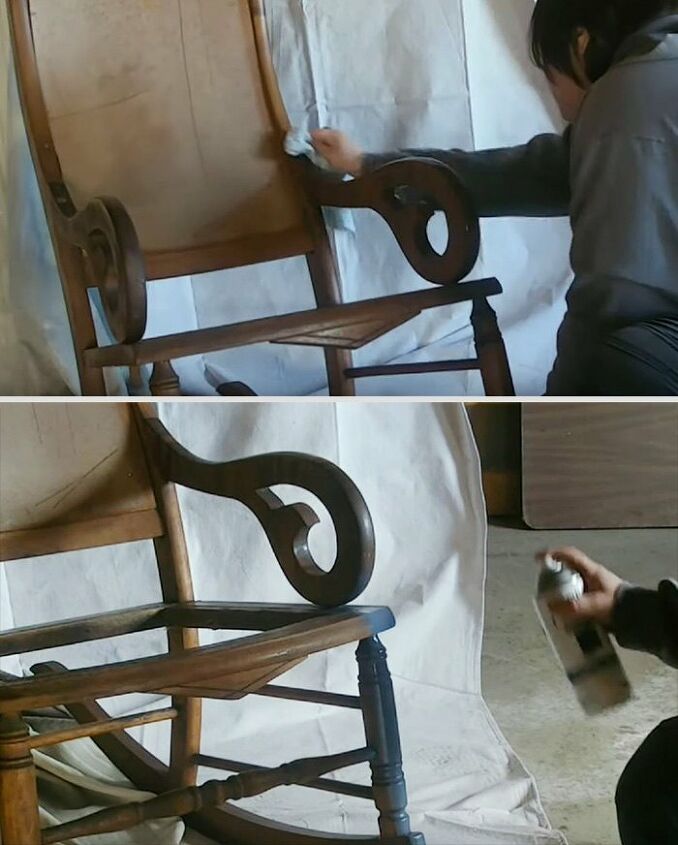
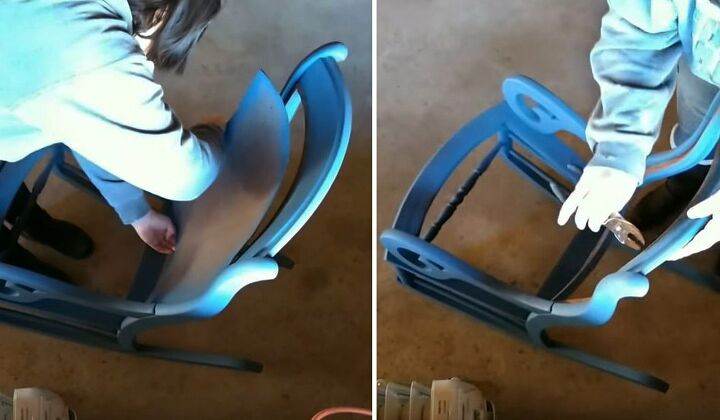
The first thing I did was give it a good scrub. I want to make sure I have all the dirt and grime off before I start painting. Then I used Rustoleum chalked paint in the color, Coastal Blue.
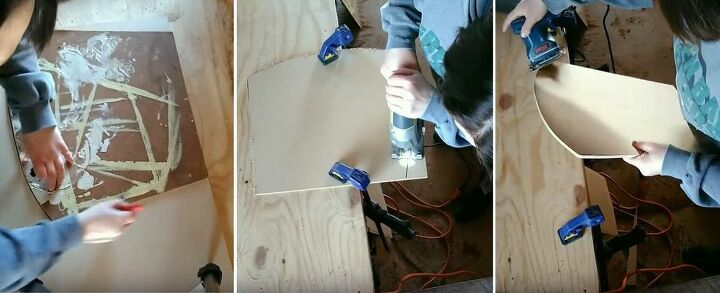
The chair needed a new seat so I traced the old seat on a new piece of mdf board, cut it out, and sanded. Now it's ready for upholstery.
The back of the rocking chair was fairly worn so I needed to get rid of it. Since it was so old and some of the nails had fallen out, it was flimsy enough that I was able to use my hands to pull it off. I did have to remove a few nails that remained in the chair.
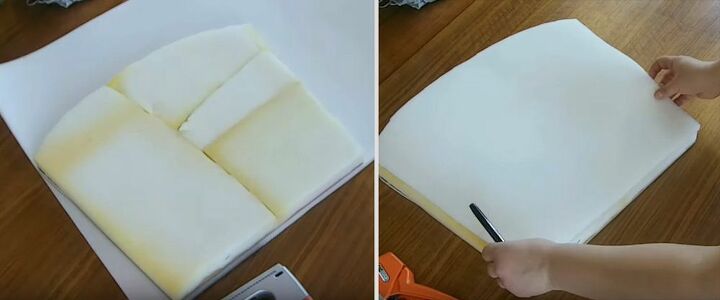
I had pieces of foam from an old project that I didn't want to waste, so I cut them to fit the shape of the seat and glued them to the board. I then cut out a piece of 1/2 inch foam to lay over the top. (the pieces of foam had been rolled up and sitting in the sun for a while, creating the discoloration)
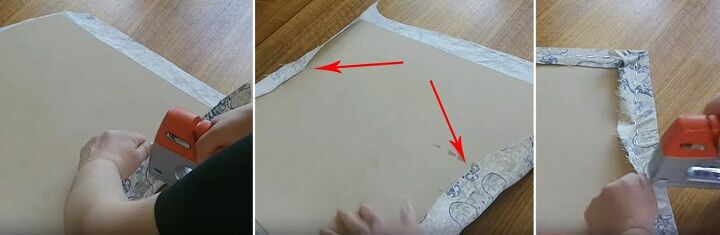
I started the upholstery process by pulling the fabric around one side of the seat and stapling it down. I turned the seat around and stapled the opposite side before I began stapling around the perimeter of the seat. This helps keep the fabric tight.
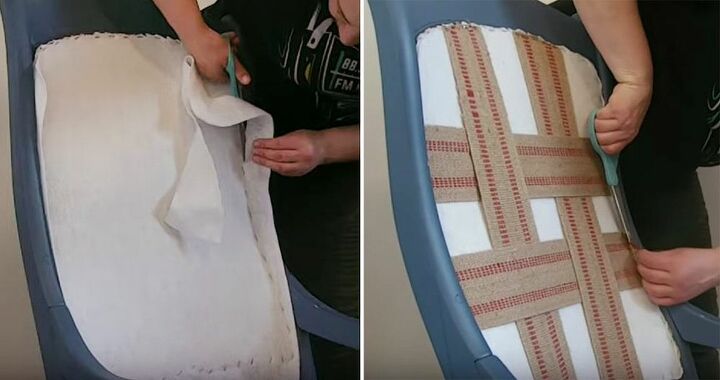
For the back of the chair, I used a solid color instead of the patterned fabric. When stapling the back, I start at the top center with a few staples and then I pull the fabric tightly down and add a few staples at the bottom. Then I staple around the rest of the back and cut off any excess fabric. I also used upholstery webbing to give it a sturdier back. Since this is a rocking chair and people will lean back on it, I wanted to make sure I made it as sturdy as I could.
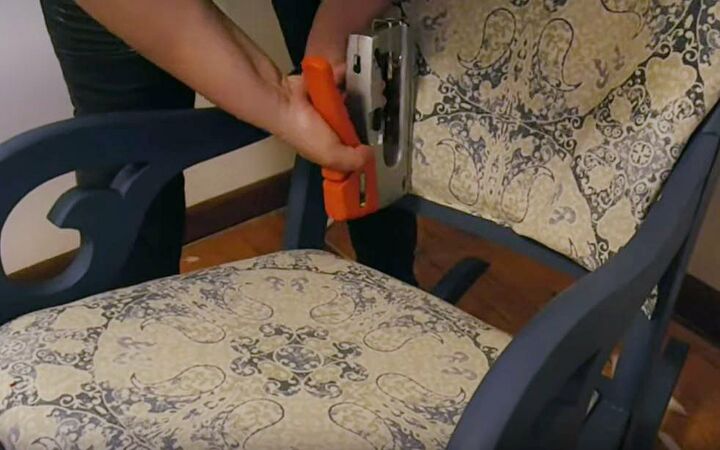
To finish it off, I placed a piece of 1/2 inch foam over the upholstery webbing and cut fabric to fit around the back. For this layer, I folded the edges of the fabric under, so hide the rough edges and give it a cleaner look. I also used the same process of starting at the top of the chair with a few staples, then pulling the fabric down and stapling the bottom in place. And then I continued stapling around the rest of the back.
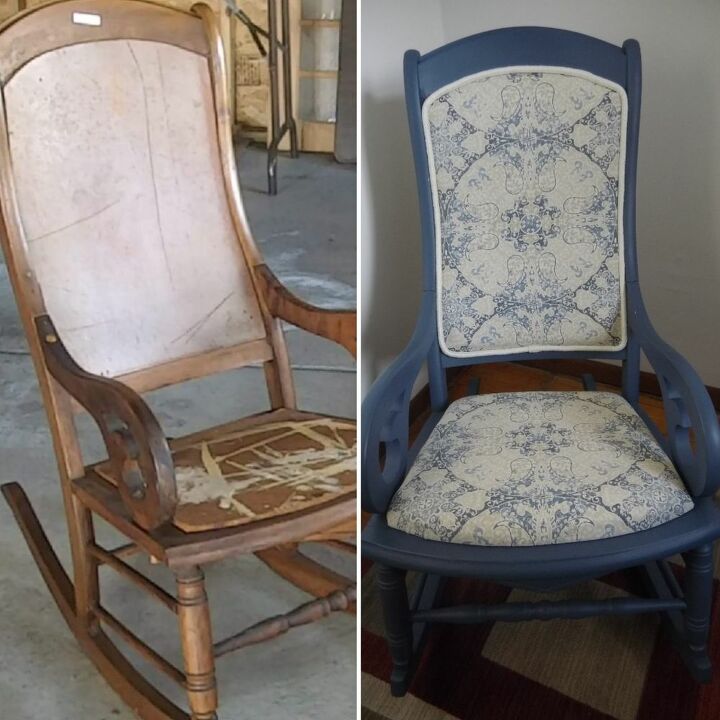
Before and After
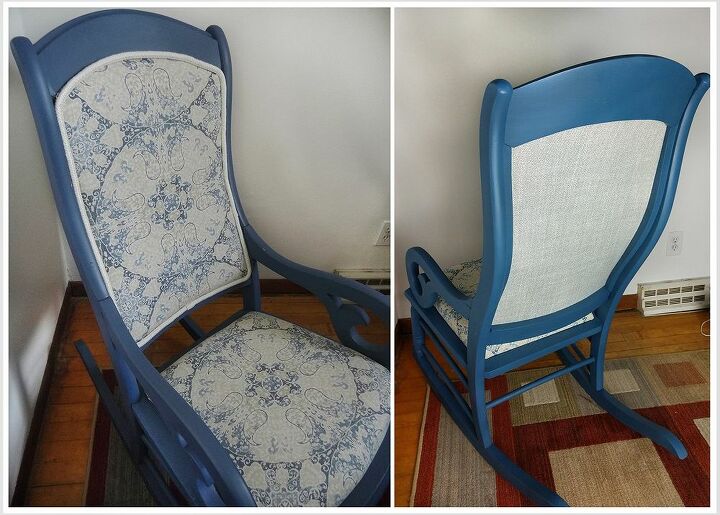
Final product!
Resources for this project:
See all materials


Comments
Join the conversation
-
Stunning!!!
-
It’s beautiful


Frequently asked questions
Have a question about this project?
I love everything,you did a wonderful, beautiful job. The color are great both the paint and material.
1 question ,why didn't you follow up with the fabric on the back?
How did you anchor (or apply) the cording? Love the look, btw!