Organize Your Home in Style With Our Top 10 Storage Bench Designs
Boasting practicality and style, our top ten storage benches will blow you away. Providing a neat focal point for any room, these DIY delights are the best way to free up some extra space in your room. Regardless of whether you’re storing shoes, tidying your living room or providing a perch for plants, our storage bench ideas have got you covered. So, if you’re ready to bring some much-needed storage to your home, check out our top ten picks.
Heavenly Church Pew to Shoe Storage Bench
To repurpose a church pew and make the ideal entryway storage bench, Heather Brown made two simple shoe racks. After measuring 2ft across and 1ft deep, Heather cut four plywood boards into shelves. From there, she made four bookends, each measuring 1ft by ½ ft. After screwing the structure together, she slid the shelves underneath her pew to create this simple yet effective shoe storage bench. Get tutorial here
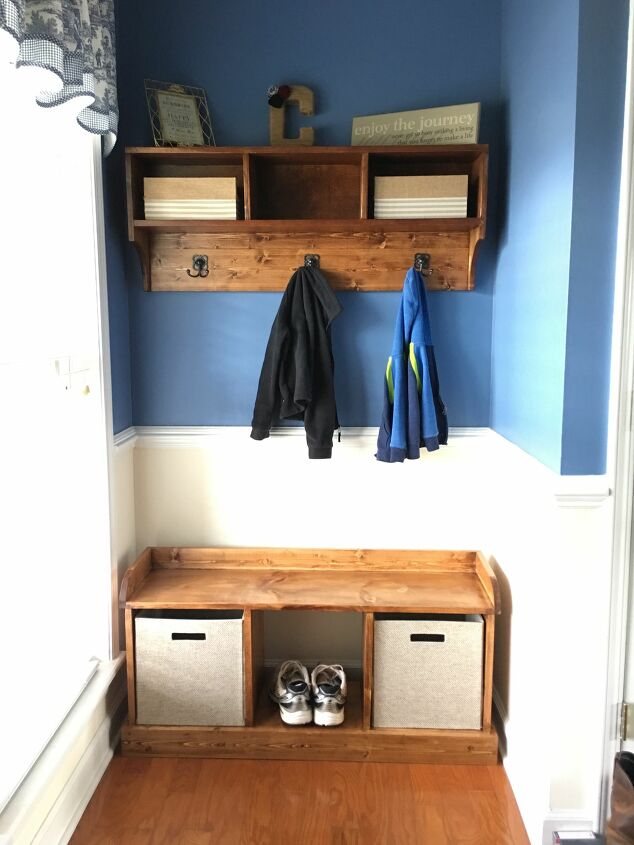
Entryway Storage Bench
You can create some symmetry between your coat rack and entryway storage bench with this perfect pine creation. The key to replicating this piece is to mirror the edging on the coat rack with the storage bench. After building a rectangular box, this Hometalker segmented the center before adding rounded edges to the top. This symmetry between the bench and the coat hook brings this piece together for a fresh, natural look. Get tutorial here
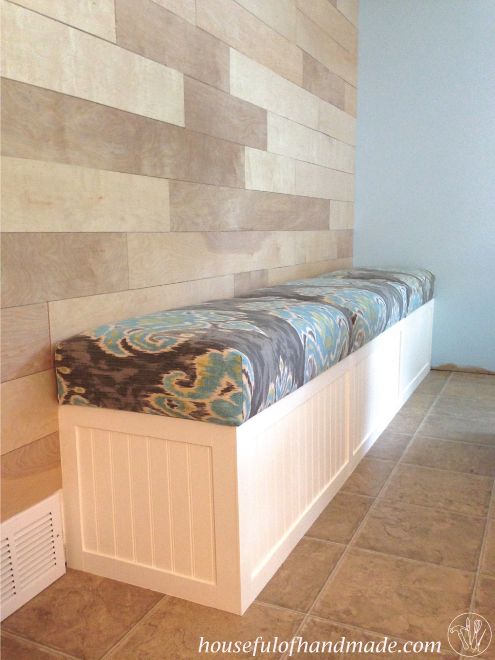
Delightful Dining Room Storage Bench
This dining room storage bench is a visual feast thanks to the wainscoting facade and eye-catching cushion top. After screwing two 2x4 boards into her stud wall, Hometalker Kati built a frame by constructing four rectangle frames. Once she’d fixed them in place, the front frame was attached before the wainscoting was added. Kati finished the bench with oversized cushions fixed to a plyboard base to create this stylish storage bench. Get tutorial here
Storage Bench Seat
Make a storage bench sturdy enough, and you’ll also have a perfect place to sit. For this piece, Bryan built two plywood boxes and covered them using pine boards. After cutting plywood to length, this Hometalker screwed them in place before gluing the boards in place. He built a lid using the same technique, adding a backboard so the bench sat flush against the wall. Finally, Bryan stained the front and lid for a neat, vintage look. Get tutorial here

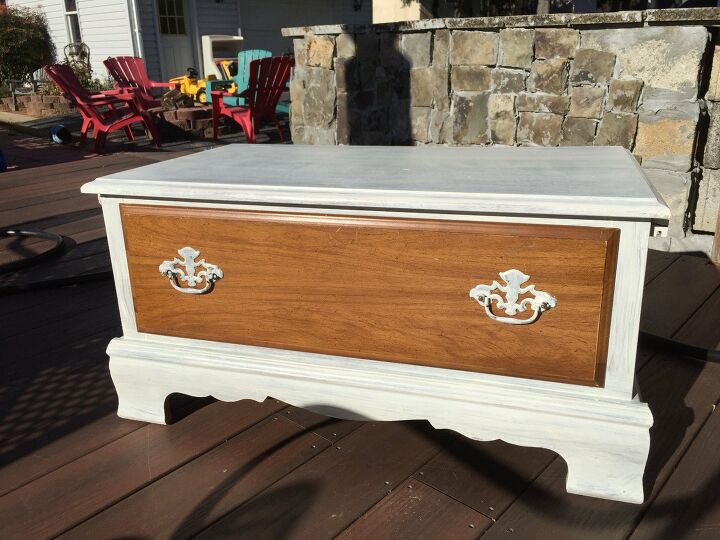
Vintage Dresser Storage Bench
An old dresser can become the perfect storage bench with a saw, some sandpaper and a lick of paint. To start, this Hometalker laid the dresser on its side and used a circular saw to cut just above the first drawer. After removing the excess, they sanded the tops to even up the top surface. They added screws for extra rigidity, and the top of the dresser was fixed in place to complete this neat little storage bench. Get tutorial here
Ingenious Outdoor Storage Bench
For beauty and utility combined, try this outdoor storage bench. Taking two 63” boards and fixing them to three 17” boards, Megan created a basic frame. She then screwed 18.5″ legs to the inner section of the frame, allowing it to stand an inch off the ground. After adding cross-supports, Megan built a lid by securing 65” boards together using three cross-supports. Finally, she added gate hinges for the lid and closed up the box using pine boards. Get tutorial here

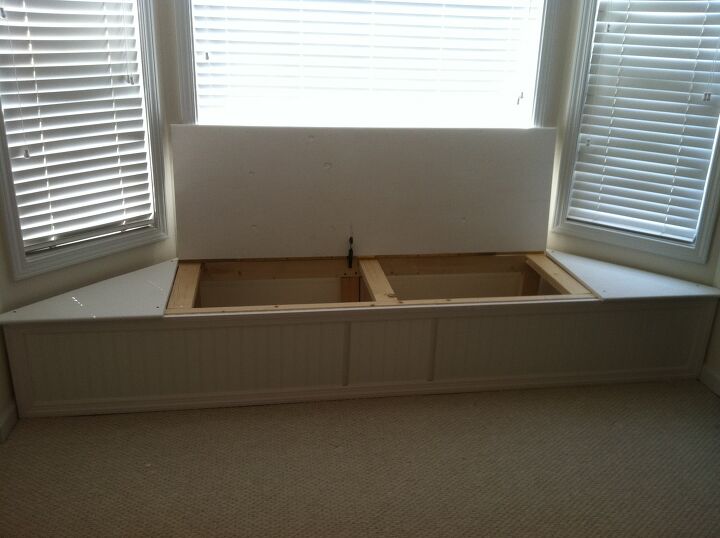
Brilliant Bay Window Storage Bench
By following the contours of his bay window, Steven found a way to make this excellent flip top storage bench. Taking 2x4 boards, this Hometalker built two frames (upper and lower) before connecting them with vertical supports. Once complete, he added wainscoting across the front and painted it white. To finish, he built a lid using ¾” plywood and bullnose molding for a storage bench that makes perfect use of your bay window space. Get tutorial here
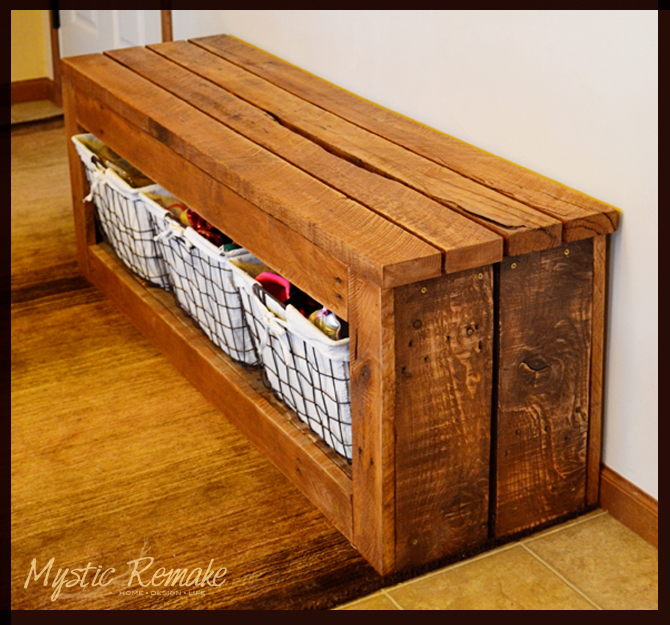
Perfect Pallet Storage Bench: Go Rustic with Ease
Pallets are perfect for the rustic look but they’re also extremely hardy. In making this storage bench, Kristy dismantled two pallets. The main boards were used to form the seat because no additional cuts were needed. For the base, sides and facades, she used the underside of the pallets, cutting them to approx 1 ½ ft high. To finish, Kristy sanded - but not so much that she lost the natural grain of the pallets. Get tutorial here
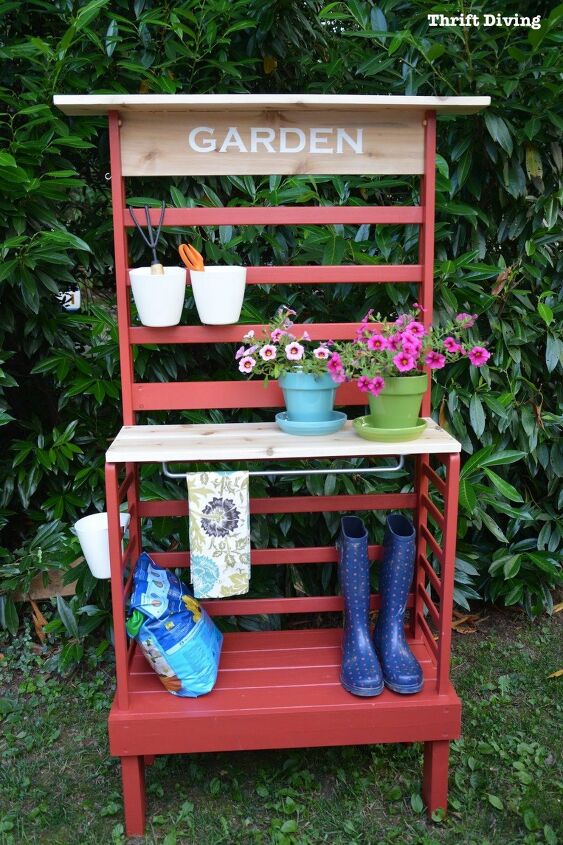
From Preschool Perch to Potting Bench
Dismantling her toddler’s bed, Thrift Diving noticed that the frame would make the ideal storage bench. Taking half the frame and standing it on its end, this Hometalker took treated wooden boards and cut them to the width of the bed. Once she’d built a base at the bottom of a frame, she added a seat and top shelf before painting. The end result is a cute outdoor storage bench for your potting plants. Get tutorial here
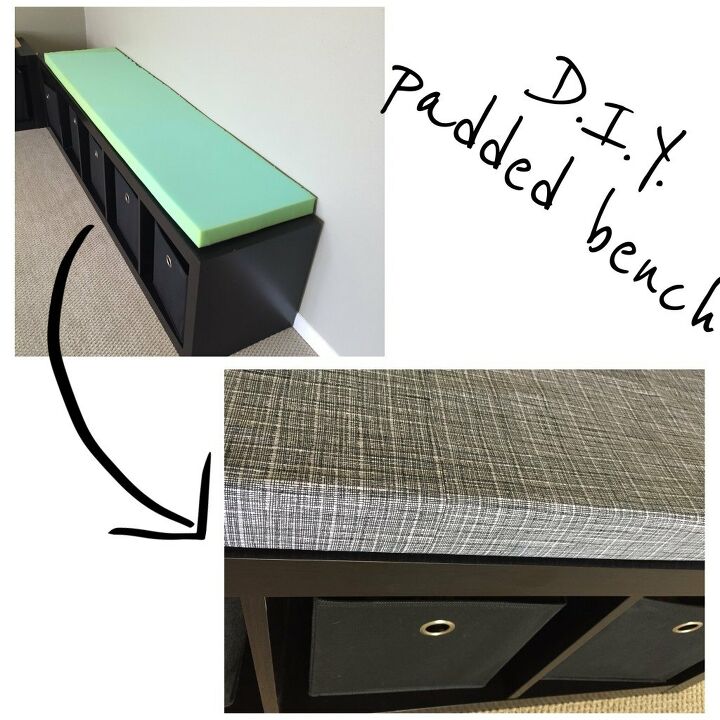
DIY Bench Cushions
Once you’ve built your storage bench, you’ll need something to sit on. To create these comfy cushions, Jaclyn Kent made a template using a piece of cardboard. Lining up the template with her storage bench, she cut a piece of foam to the right shape. To finish, she took a piece of material, leaving a 6-inch border around the foam. Finally, she glued the material to the original cardboard template (staples didn’t hold the cloth as well). Get tutorial here