


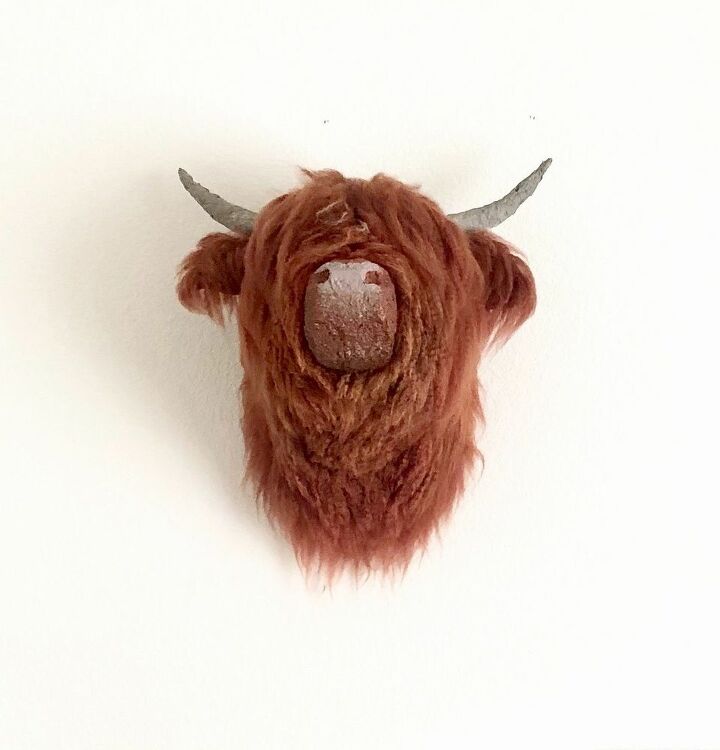
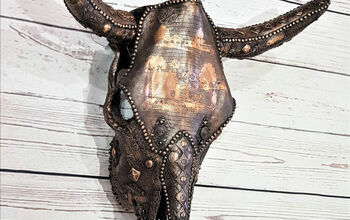
Papier-mâché Highland Cow Mount

Growing up in the Scottish Highlands, cute ginger cows were a big part of my childhood. I wanted to introduce this theme into my house somehow and so thought I’d tackle crafting a mount to take center stage above our fireplace. But whether you have a connection with Scotland or not, you can’t deny the beauty of these beasts and how a piece like this could light up your home too.
I think it’s important to note at this stage that I had never attempted anything like this before and so there may be better ways of creating a homemade animal head mount, therefore, please feel free to share your own thoughts and ideas in the comments below. However, these are the products I used and the method I took to create mine.
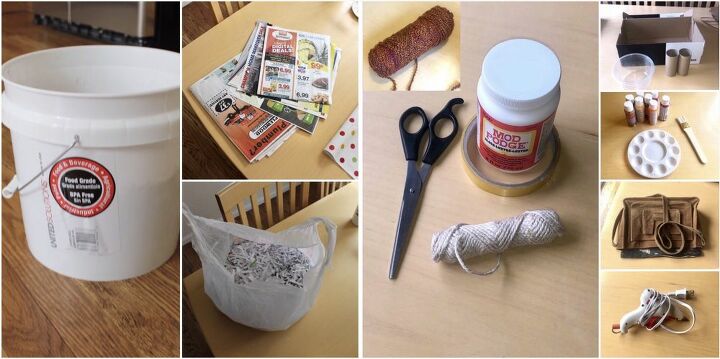
You will need:
- A bucket
- Shredded paper
- Sheets of newspaper
- Cardboard
- An old handbag that you don’t mind cutting up
- Paints
- Wool (ginger to resemble the cow)
- Wide brushes
- PVA glue or mod podge
- Scissors
- Celotape
- String
- A mixing container
- A glue gun
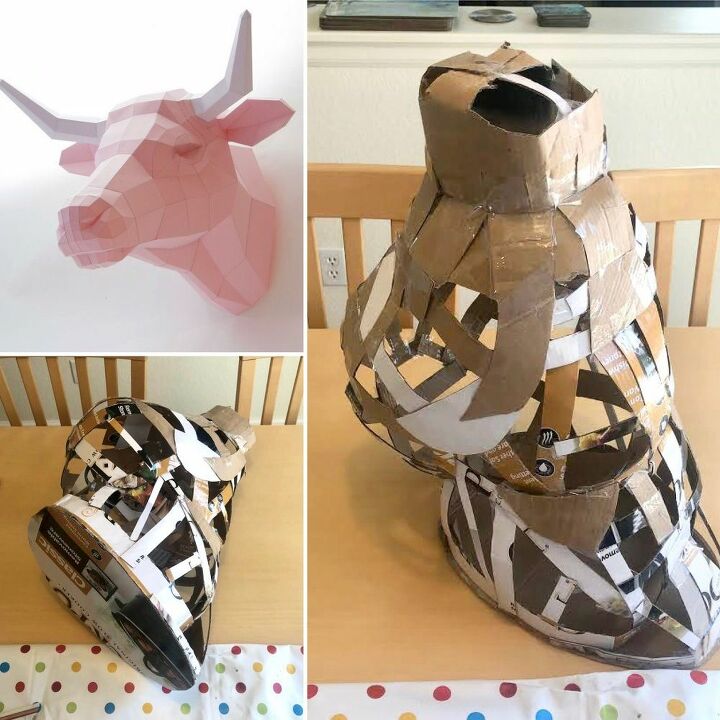
First off, I found an image online of a cow’s head that looked boxy and structural so that I could copy the contours and angles.
I started at the nose by making a cylindrical shape and then, using strips of cardboard from an old cardboard box, I started sticking pieces to the nose and so on. Try not to worry too much about how the head looks at this stage because the pre-hairy shape will be heavily disguised by all the wool later on. Aim to achieve a rough shape that can be recognised as the animal you are making. The horns and ears will come later.
This part does take time so please spend it so that it pays off at the end.
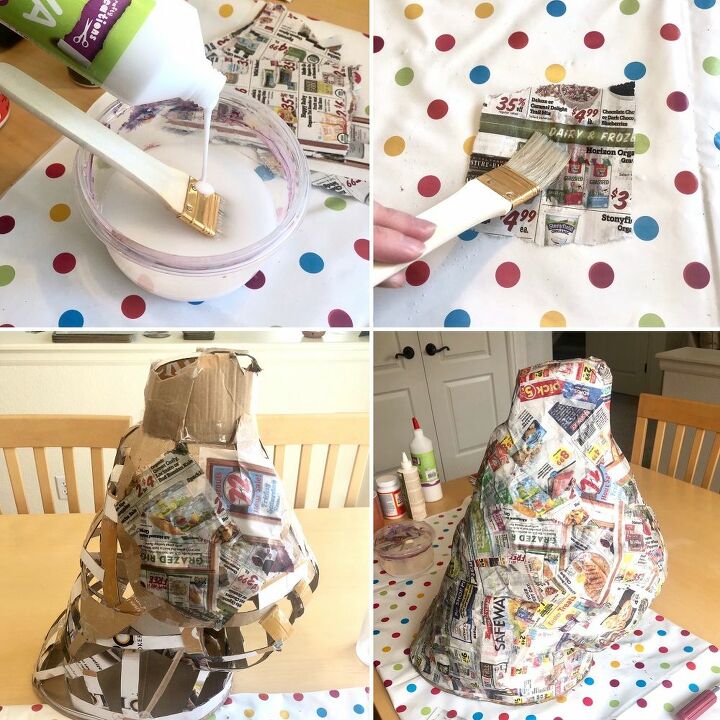
Next, cut up your newspaper sheets into small strips, then mix together PVA glue and water in a mixing container with a wide brush, roughly a 50/50 mix. Paste a layer of the PVA-water mix onto one of the small strips of newspaper and then brush the strip onto the cardboard cow head structure. Repeat this until the head is fully covered.
You can choose to do another couple of layers once dry and leave it at that, however, I then made another mix of papier-mâché to give the head texture and extra rigidity as I wanted it to be as solid as possible. This is how:
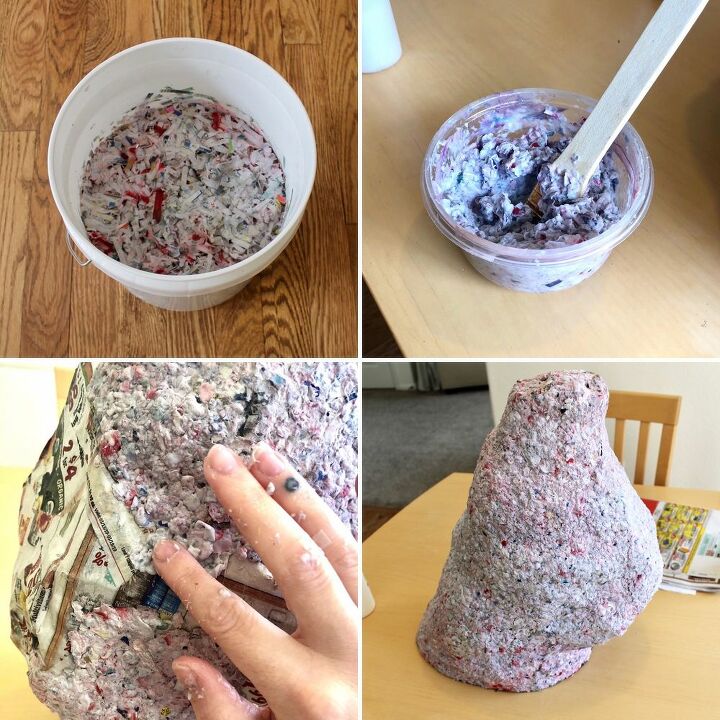
Add shredded paper into a bucket and mash with water. Once the shredded paper is fully saturated but not overly sodden, add enough PVA glue again to achieve a 50/50 glue-water mix with the paper. Mash until fully mixed.
Take a small chunk out and add to your mixing container so that you can adjust your recipe if needed before or during the application to your hardened cow head. Squish a generous amount all over and set aside to dry out throughly.
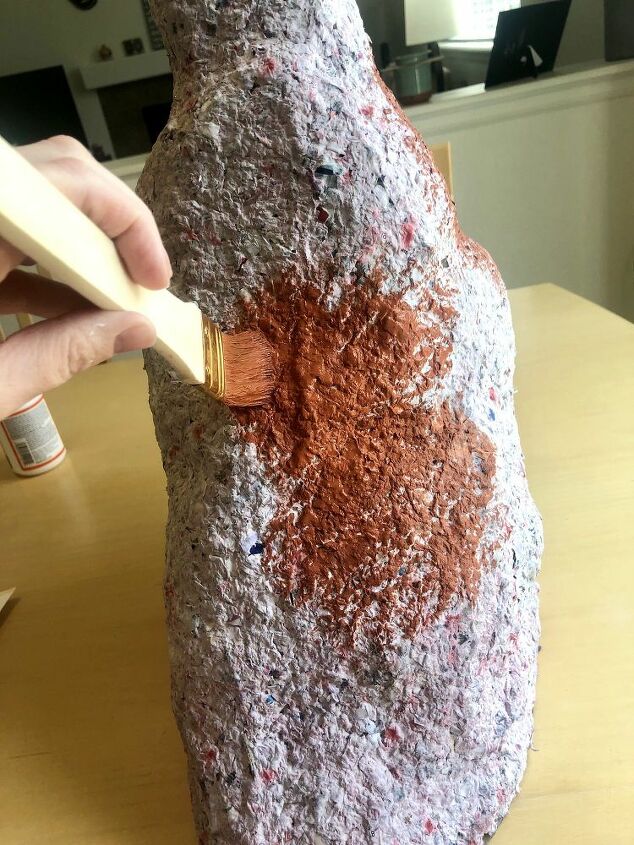
Once dry, paint the entire head in a ginger colour so that should any of the base show through at the end, it won’t stick out amongst the ginger wool.
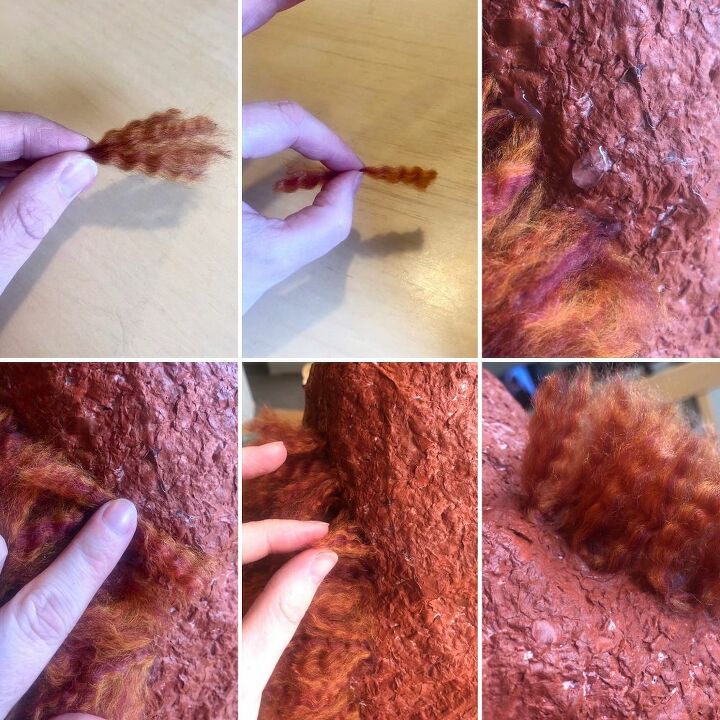
The wool I selected was twisted and multitonal which I thought would be perfect when unraveled to resemble highland cow hair. I think it worked pretty well, therefore, I would advise selecting a similar type of wool for your project.
First I snipped a piece of wool off the ball, unraveled it, pinched it half way along the length and then adhered it in the middle to a blob of glue made by my glue gun on the cow head. Once the glue blob was dry, I fluffed up the ends of the wool so that it stood up from the glued base.
A little tip to get your glue to dry a bit quicker - have a little pot of water by your side and dip the tip of your finger in the water and then press it into the glued wool. The water stops the glue from sticking to your finger and seals and cools the glue quite quickly. Please use extra caution when doing this though as I’m no scientist and have burnt my finger a few times when being careless!!!! 

Once I had covered the underside of the cow head and snout area with wool, I set It aside and worked on the ears and horns.
I made the ears by cutting pieces off an old faux-suede bag into ‘ear shapes’ and then pinched the middles together with glue to resemble ear flaps. I then covered them in wool like I did with the head.
I made the horns using old toilet rolls and card and covered them in the shredded papier-mâché mix from before and set aside to harden.
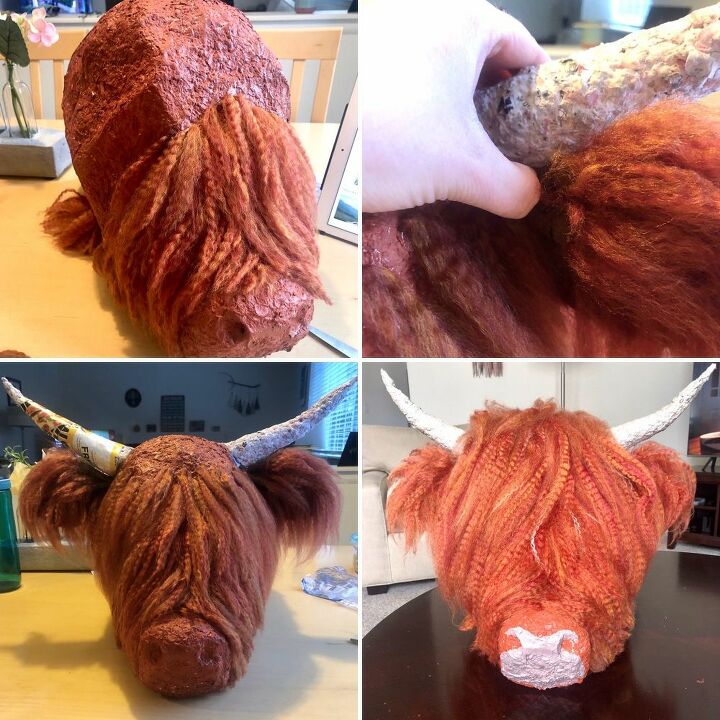
Once both the ears and horns were dry and completed, I attached them to the cow head with a very generous dousing from my glue gun and then continue to add wool until the whole head was covered.
I then painted a paler shade on the nose area and faded this in with the ginger paint for a more natural look.

By this stage, the head was rather heavy but a hot glued piece of string, when allowed to fully dry, hung to 2 small horizontal nails in the wall worked perfectly.
This was a tricky piece to make but so satisfying and therapeutic to craft. I would strongly urge you to have a go and exercise lots of patience to achieve the best results.
If you have any questions on this project, I will happily answer them!
Thank you for taking the time to read my post. Please check out my other projects as well as my instagram account for other crafty inspiration

Resources for this project:
See all materials


Comments
Join the conversation
-
I am very impressed! I don't think I have the patience for this but I wish I did.
-
Wow! As wee Jimmy would say…Fandabbidosie! What a beautiful cows head! It’s absolutely gorgeous! You have plenty of patience I’ll admit, but what a result…❤️❤️❤️ hoping you see those hearts, it’s a lovely cows heid! Xxx❤️🌹


Frequently asked questions
Have a question about this project?