


Paper Bag Floor

by
Wren Smart
When we bought our home, there were way more home improvement projects than we had money in the budget for. So, we lived with things until, little by little we could fix them. I hated our dining room. Gross carpet. Searching the internet one day I came across a post about paper bag floors. Thinking it couldn't be any worse than what we had, we went for it. It turned out amazing. Over 2 years later it still looks great.
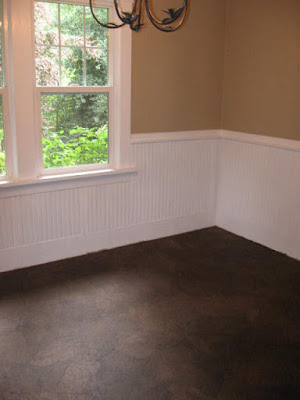
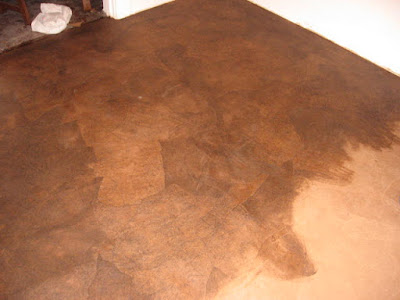
The finished product. Rich and beautiful.
Looking at the photo, you would never know it was just paper, glue and stain. It has a rich leather look and is super durable.
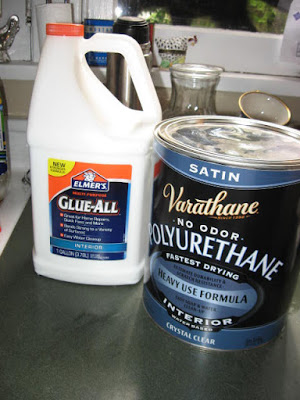
Paper, glue and a coat of poly.
We used two rolls of plain brown wrapping paper, and elmer's glue. Our biggest expense was the poly since we wanted to make sure that it stayed durable.
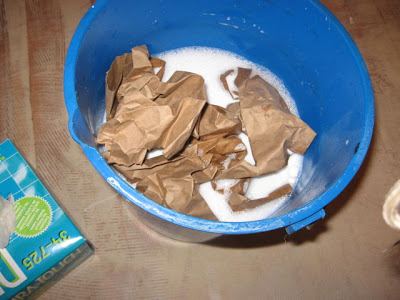
Torn wads of paper soaked in glue/water mix.
After prepping our floor, we tore brown paper into chunks, wadded it up to break the paper fibers and the soaked it in our glue mixture. A little messy, but so worth it in the end.
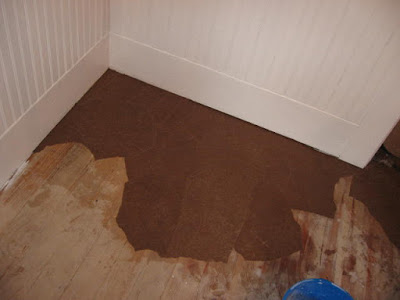
Smoothing on the wet paper.
Then came the creative part. We squeezed out the excess glue and smoothed the paper onto the prepared floor like a big patchwork quilt. The wrinkles in the paper and the slight finish difference between the sides of paper added to the interest.
Applying a rich stain.
We let the floor dry for a few days and then used old rags to add a rich stain and bring out more of the detail. Several coats of poly to seal it and we have an inexpensive floor solution that looks like a million bucks and holds up to our family!
Want more details about this and other DIY projects? Check out my blog post!
Comments
Join the conversation
2 of 298 comments
-
OMG... Genius
-
My sister did this and you need to make sure you smooth out the floor. She didn't and it made it impossible to mop or steam. Made it come up and it had tons of Poly on it!


Frequently asked questions
Have a question about this project?
can you use gift wrapping paper instead of brown paper
Could this be done on walls?
What was used for padding or prepping underneath the paper?