


How to Make a Headphone Stand
After destroying yet another expensive gaming headset, by rolling over the wires with the computer chair. I thought it was time to make a stand for the new ones, so they can be stored out of the way when not in use.
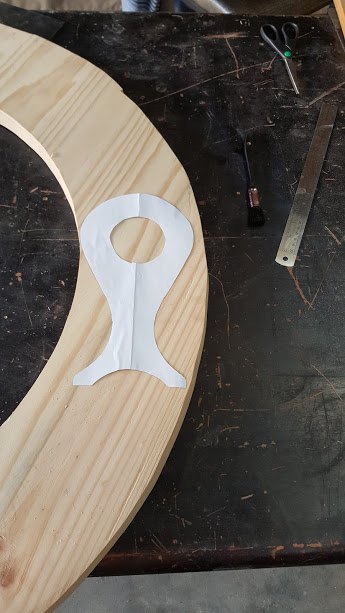
I found a suitable template that I liked and printed it out in Microsoft office. I used scrap wood which was the apron for my wine barrel table that did not work out first time. The template was put on top and the outline was traced.
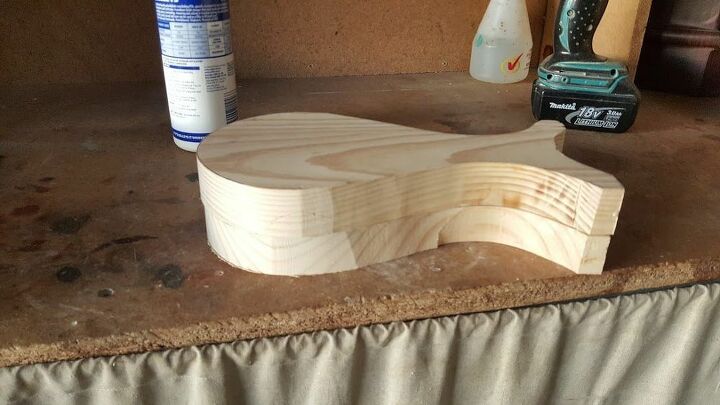
A jigsaw was used to cut out the templates. Not being very accurate with a jigsaw, the wood was cut slightly outside the lines. The headsets are fairly heavy, so 2 pieces of wood were cut and glued together.
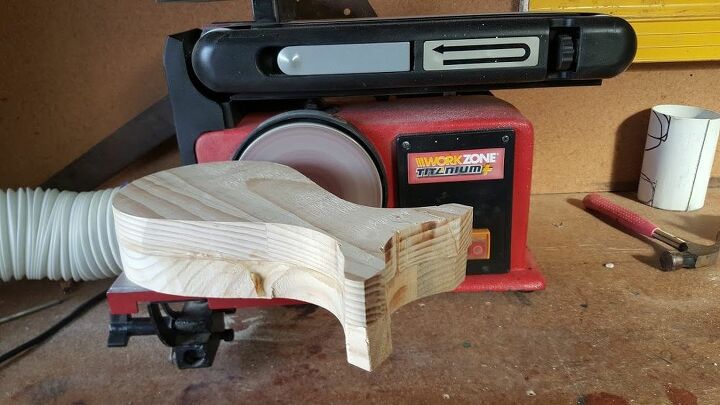
A tabletop sander was then used to sand the sides of the wood up to the template lines to remove the blade marks from cutting.
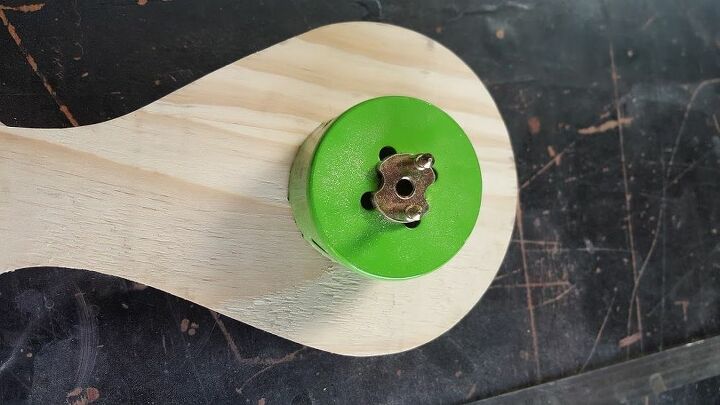
The center was marked out and using a hole saw attached to a drill the middle was cut out.
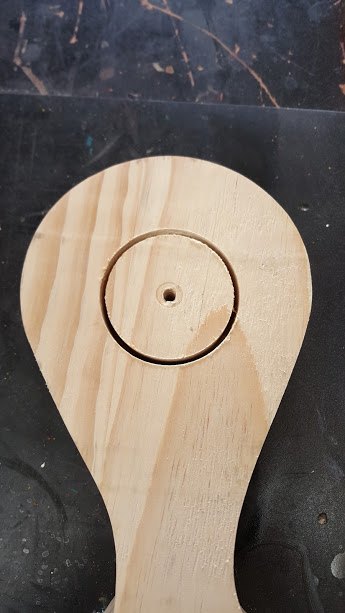
To get a nice clean edge only saw half way through then turned over your project and drill out the hole completely from the other side. This will prevent the wood from blowing out and gives a nicer finish.
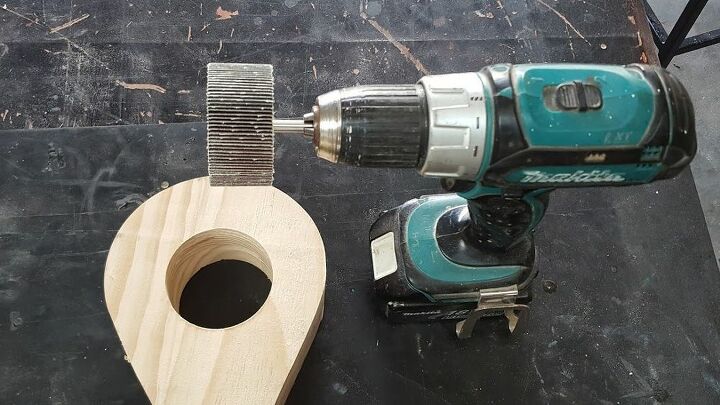
The inside was smoothed out using a sanding wheel attached to a drill.
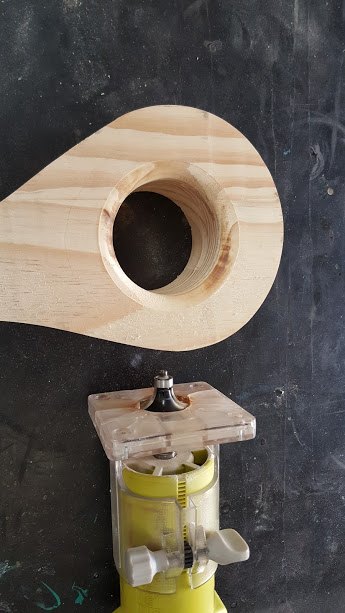
A router was used to remove the inside edge of the hole and the sides for a better cosmetic look. The stand was then sanded down using a orbital sander and stained using dark mahogany stain. And finally 3 coats of gloss varnish was used to seal in the colour.
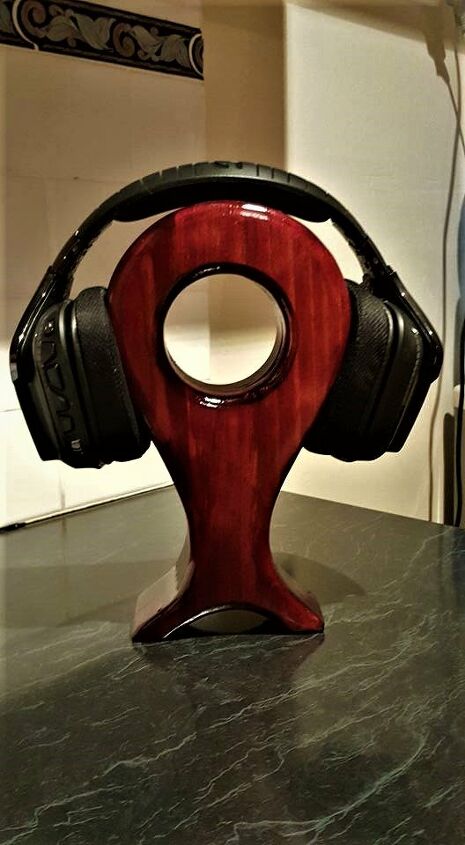
This was the finished headphone stand. To see another great project check out how to make your chalk paint look metallic in this chair makeover.
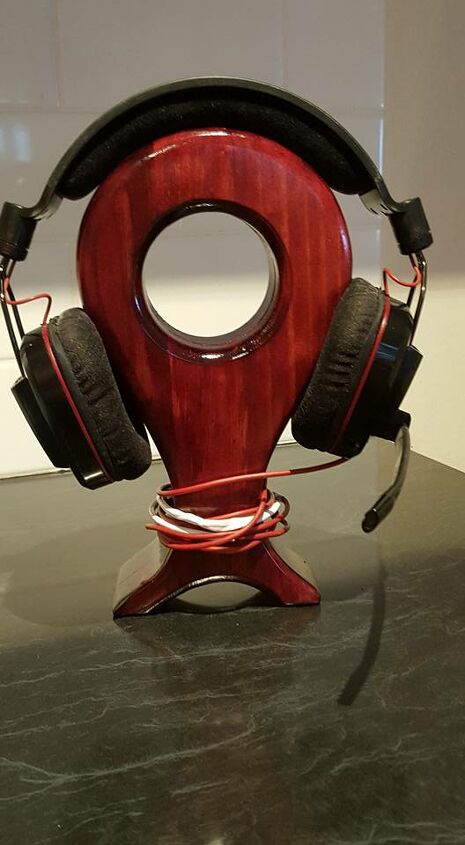
The excess cable can be wrapped around the base, so no more repairs to the cable like mine  . There was no cost to me with this project because I had every thing at home. Build time does not included varnish drying time. Another project you might like is a personalized coffee table.


Comments
Join the conversation
-
Great solution. Looks amazing. Great share.


Frequently asked questions
Have a question about this project?