


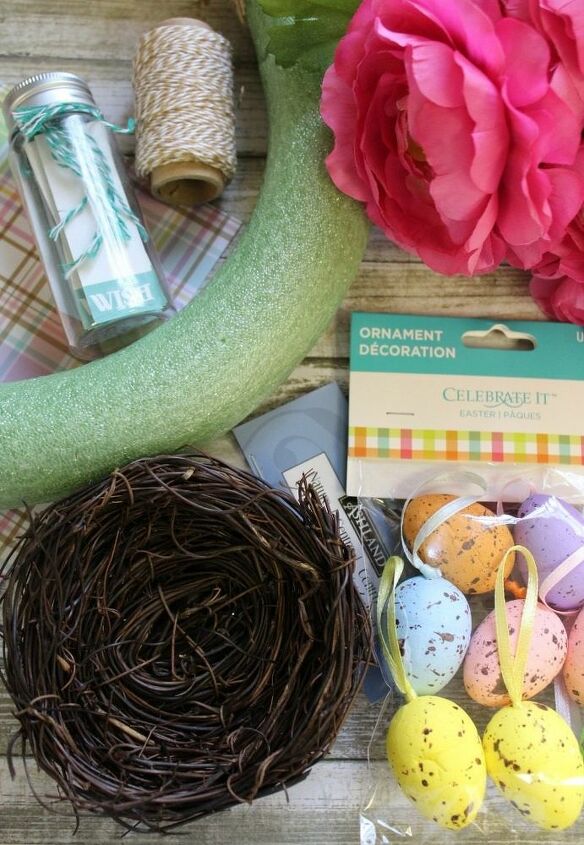
Simple Spring Wreath
Birds chirping, the sky is blue, and the weather is getting warmer! This easy spring wreath is just the thing when changing up your seasonal door decor.
1. Begin by applying some hot glue to the end of the burlap ribbon. Press it to the inside of the wreath form.
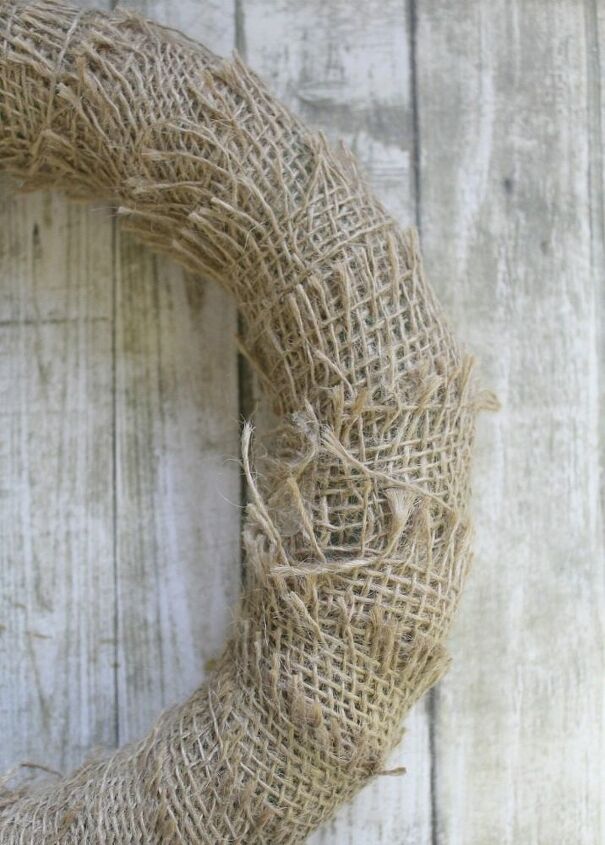
2. Start wrapping the wreath from with the burlap, pulling firmly and slightly overlapping as you go.
3. If you run out of burlap, secure the end with hot glue to the form and start a new roll, using the method suggested in step 1.
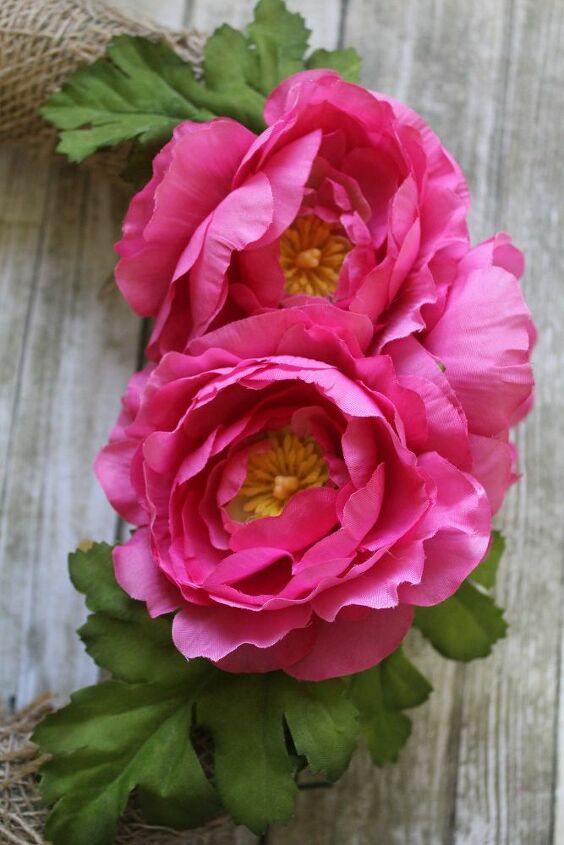
4. Once your wreath form is covered with burlap, you can begin adding the décor pieces. Remove the silk flowers from their stems. Remove a few leaves as well. Apply hot glue generously to the back and press into a cluster at the corner of the wreath. You can leave a space for the bird’s nest as we did, or omit it altogether if you wish.

5. Glue a few of the crafting eggs and affirmation tag to the inside of the wreath. Add some glue to the underneath and press it between the flowers.
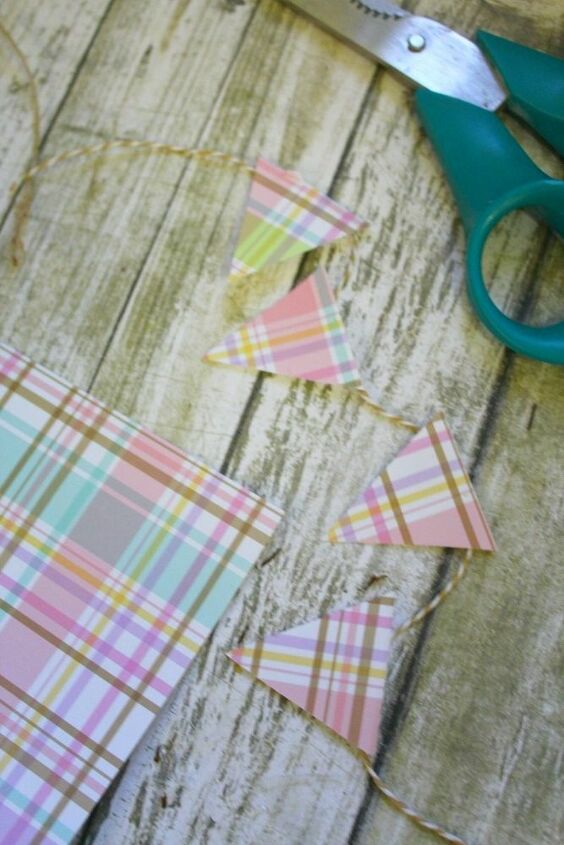
6. Create a small bunting banner by cutting triangles out of the scrapbook paper. Glue the triangles to the twine.

Add glue to the ends of the twine and display it across the top corner of the wreath.
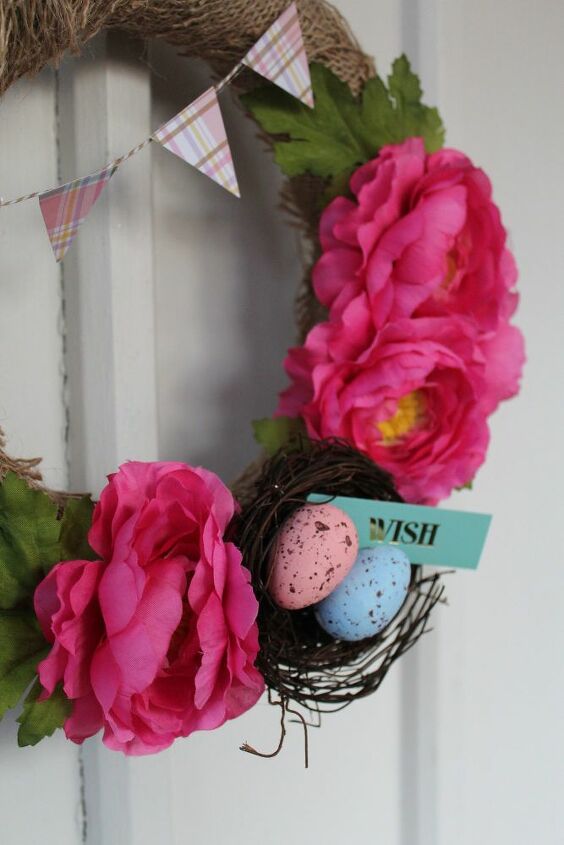
7. You can finish the wreath by adding some sprigs of greenery/leaves. Just add glue and press into place.
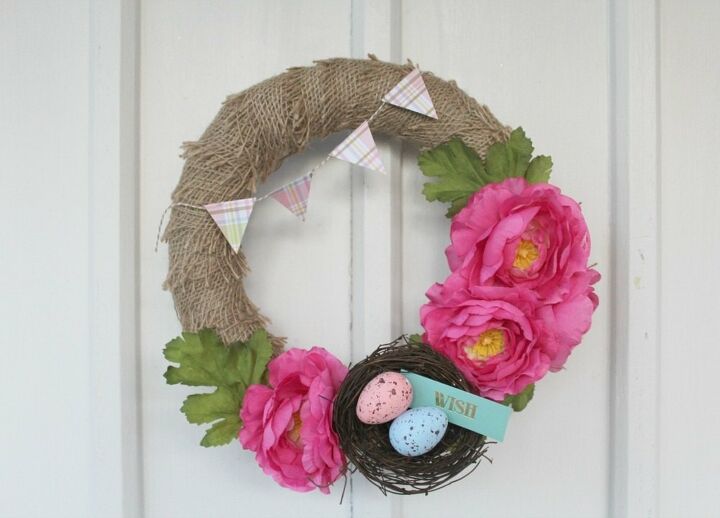
Your spring wreath is now ready to be enjoyed.
Resources for this project:
See all materials


Comments
Join the conversation
-
I love the bunting! So cute!
-
👍👍👍💟🎉


Frequently asked questions
Have a question about this project?