


Summer Wreath With Seashells

It's Summer time!! If you knew how long our Winters are here you'd know my excitement level. Time to break out the Summer storage tubs and get cracking...on a new wreath design!
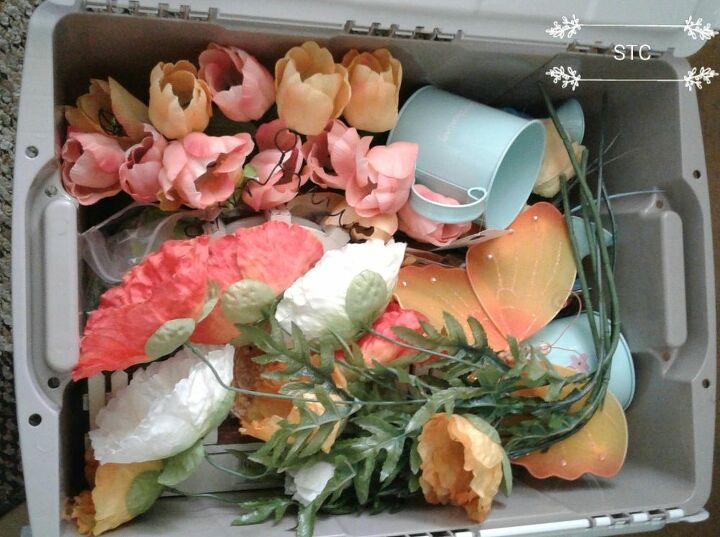
I live in a small beach town so I'm aiming to incorporate seashells into my wreath. I always start by hanging the wreath form on my wall and do a mock up to get a feel for how it will look, what flowers go coordinated best and so on. So in this case I'm going with yellow and teal flowers, burlap ribbon and large white seashells.
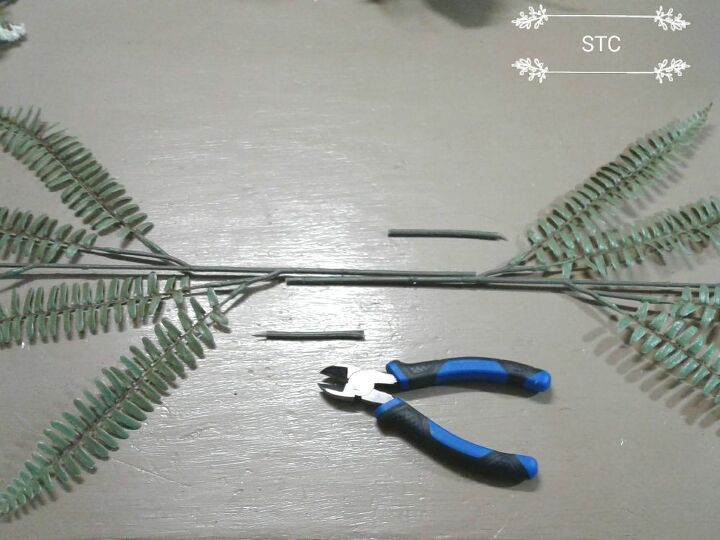
Here's the general order in how I would assemble the stems. #1 Base greenery, then #2 and #3 layering more shapes and textures to make it full. Next would be #4 my flower stems, then #5 my main accent flowers and last #6 the smaller "filler" stems to hide any gaps.

I cut the really long stems with my pliers and add hot glue to the stem and wiggle it in through the grapevine. I aim for a half moon shape, you can bend the stems to follow the vine or let them spill over the wreath mold. The 9 mark on the clock would be where I create the focal point for #5 flowers for instance and graduate away from that to less filled tips.
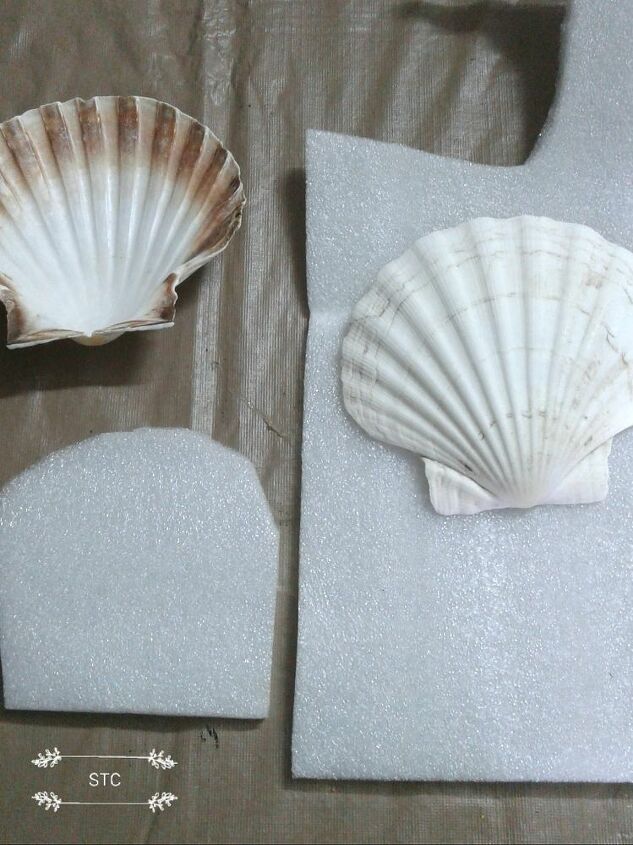
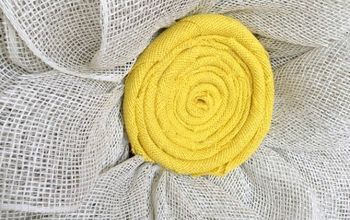
I spray painted my seashells with a coat of varathane to enhance and protect them for the outside. I typically keep cardboard trays used to hold grocery can on for these types of painting jobs. I will be putting 2 right side up and one upside don to mix it up, it's more pleasing to the eye as well to work in groups of odd numbers so I chose three.
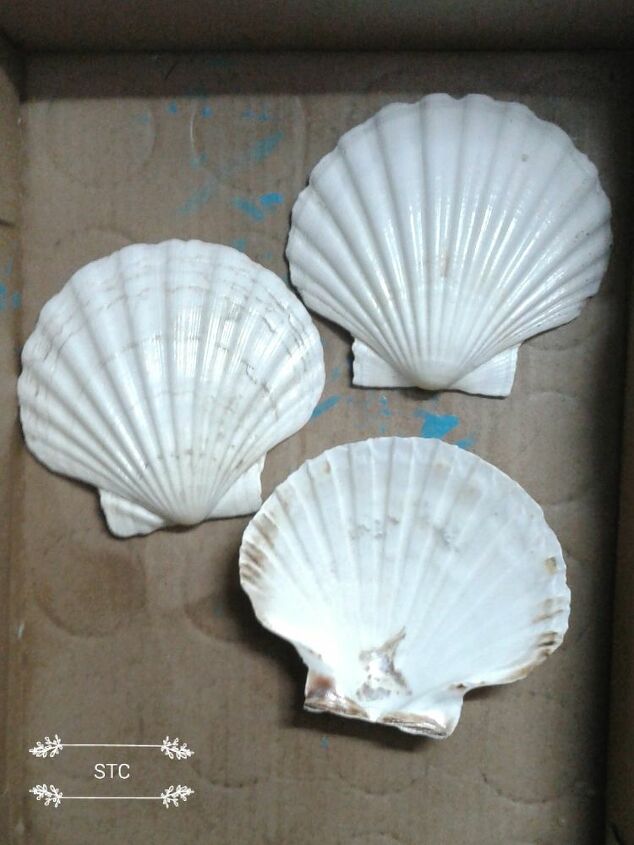
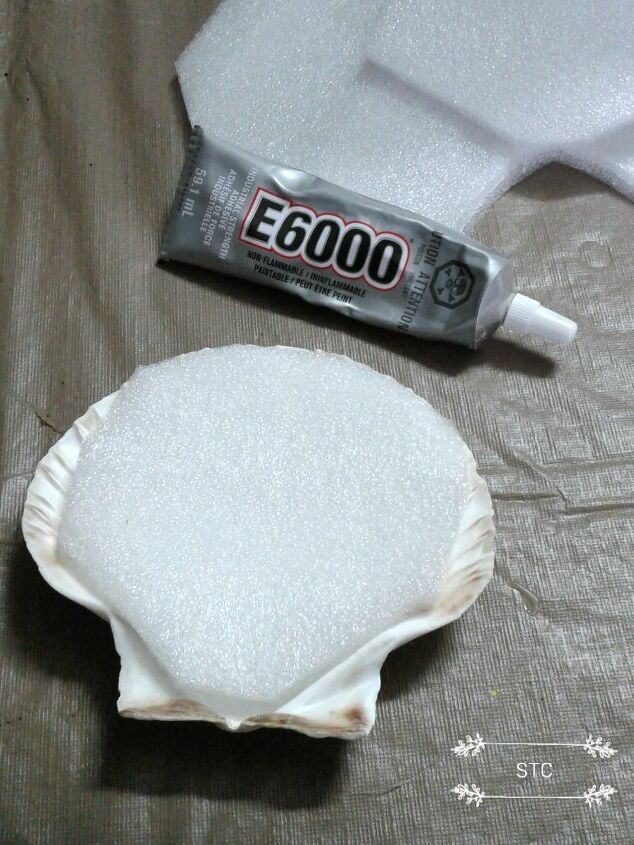
To adhere the seashells was a bit of a question mark because the gluing surface on them wasn't that large. I had this piece of 1/2" thick packaging foam kept and I thought it would work well as an insert for the hollow side of the shell.
Once it was glued in place it gave me a large gluing surface to attach the shell onto the wreath form.
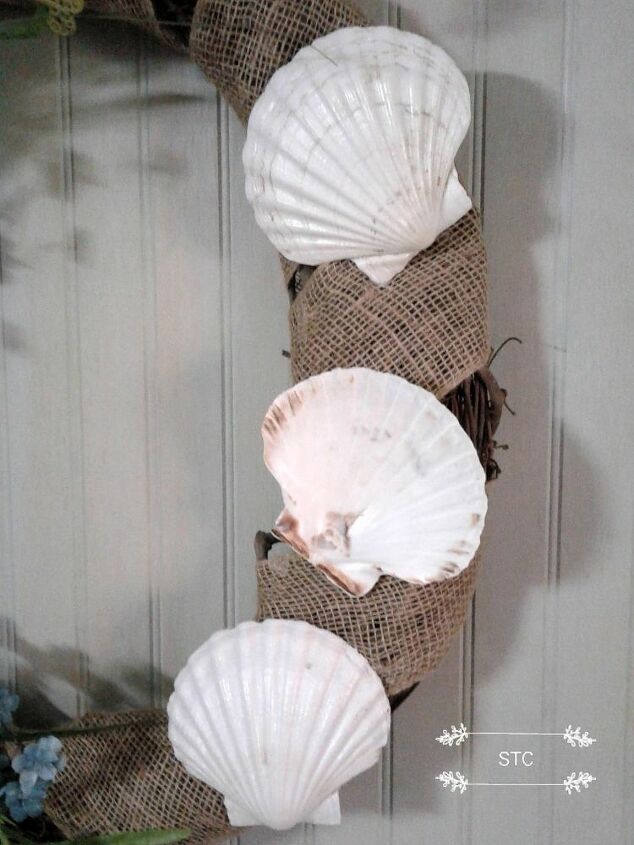
The previously mentioned burlap ribbon also gave me a little more for the glue to grab onto when I positioned them onto the wreath. I applied them haphazardly because you don't want it to look cookie cutter perfect.
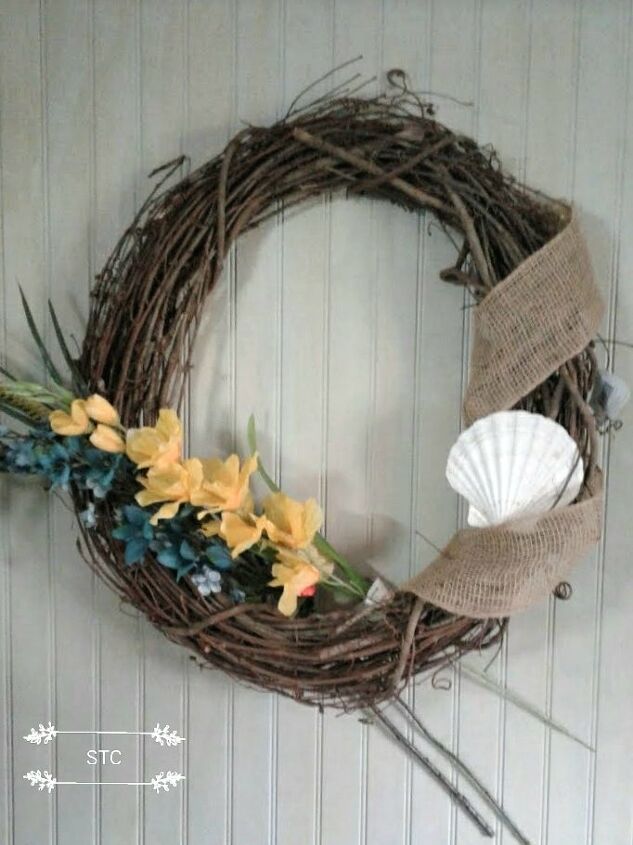
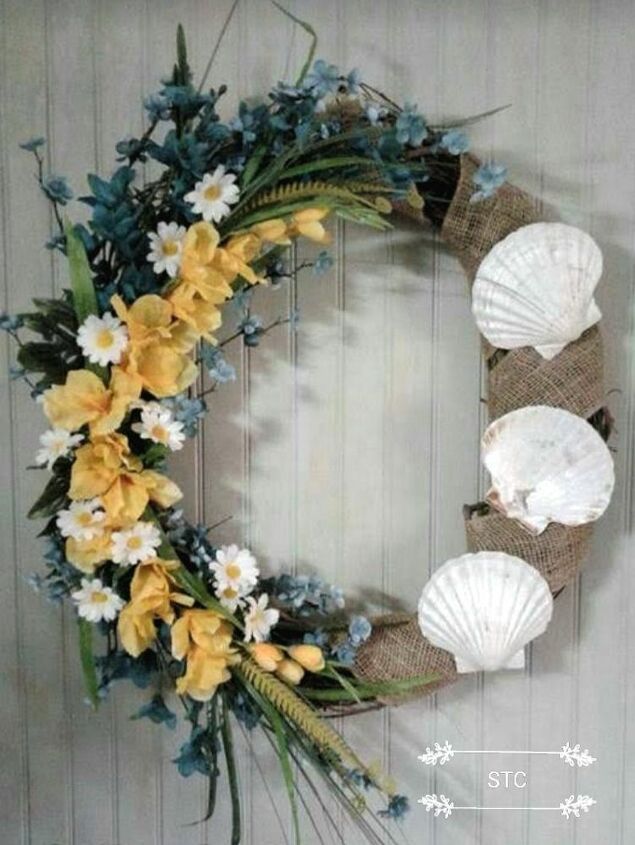
Here is the final look... as an afterthought I went back and added in some white daisies to make the other colors pop more and to tie in with the white seashells. Stand back from it and let your eyes tell you what needs to be tweaked or added to make it look great.
Isn't she lovely?
Isn't she wonderful?
Isn't she precious?
Less than one minute old.....
Just silly me singing a little little Stevie Wonder, but that's okay you sing when you're happy right?
*Note: Costs are in Canadian currency.
Resources for this project:
See all materials


Comments
Join the conversation
-
Love the creativity of wreaths. Never thought of doing a mock up first. She is pretty, lovely, and wonderful.
-
I am so excited for you, Trace! Summer is here!!


Frequently asked questions
Have a question about this project?