


How To Paint Linoleum Floors
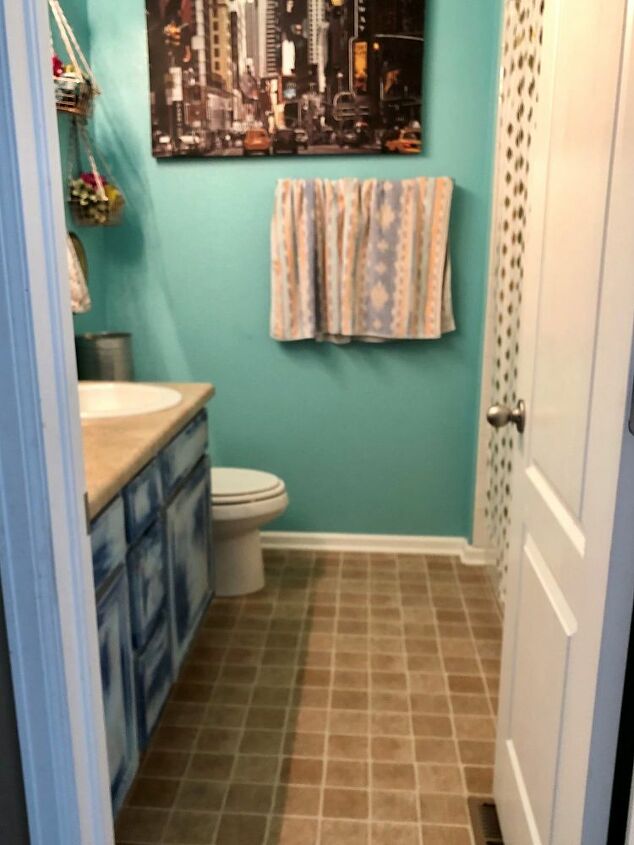
We bought our house when the framework was barely going up. We didn't upgrade much because when we had our meeting with the builders, my husband was out of town and I was nervous to make changes or upgrades that we couldn't afford. So, this means we were stuck with a lot of builder grade looks in this house, like the linoleum floors. I have never liked the tan bathroom floors and have wanted to change them up for a long time!
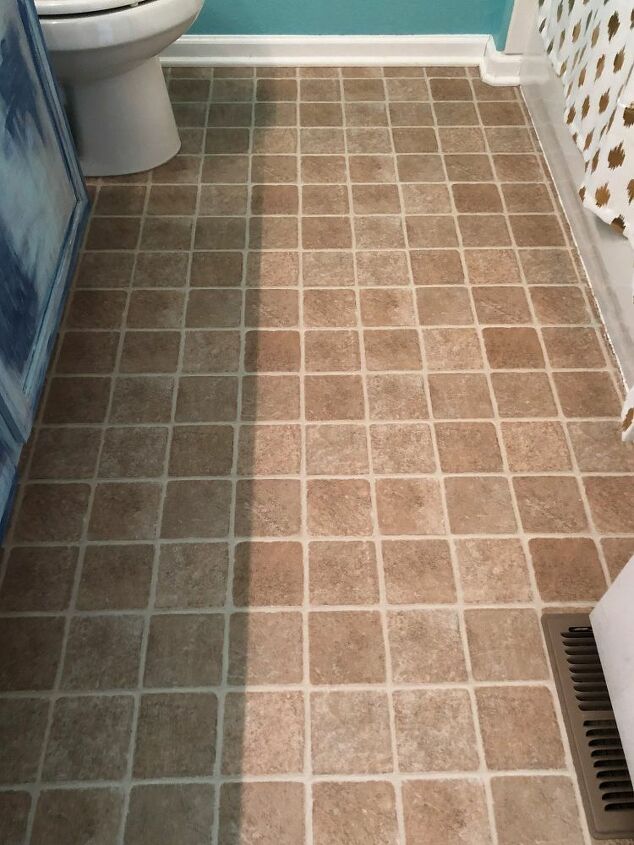
This is what my floors looked like before... ugly, right? I had seen so many before and after pictures of painted linoleum, but was a bit skeptical at first. I really wanted to give this bathroom a makeover and knew it was time to do something about this floor.
I have to tell you that I did this floor twice... I didn't prep the floor right the first time, so I had to re-do it. You can read all about that if you go to my blog post. This is the tutorial on how to do the floors the right way.

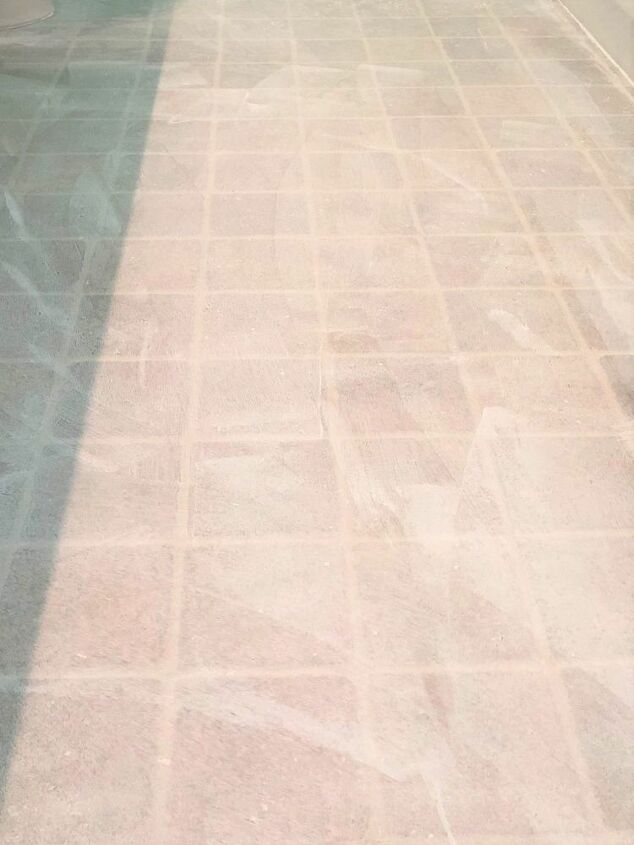
The first step is to use a deglosser on your laminate floors. Even if they don't look shiny, this step is crucial to getting the outcome you want. I used Klean Strip Liquid Sandpaper and followed the directions on the bottle. It's super easy to use... just spread on floor and use a scraper and clean rags to remove the top "shiny" coating on the linoleum floor.
I'm pretty good at painting in the lines, but if to be safe, you'll want to use painters tape on the baseboards, toilet, tub or any other areas you don't want painted.
When you floor is completely cleaned and dried, you'll want to use a roller to cover the floor with primer.
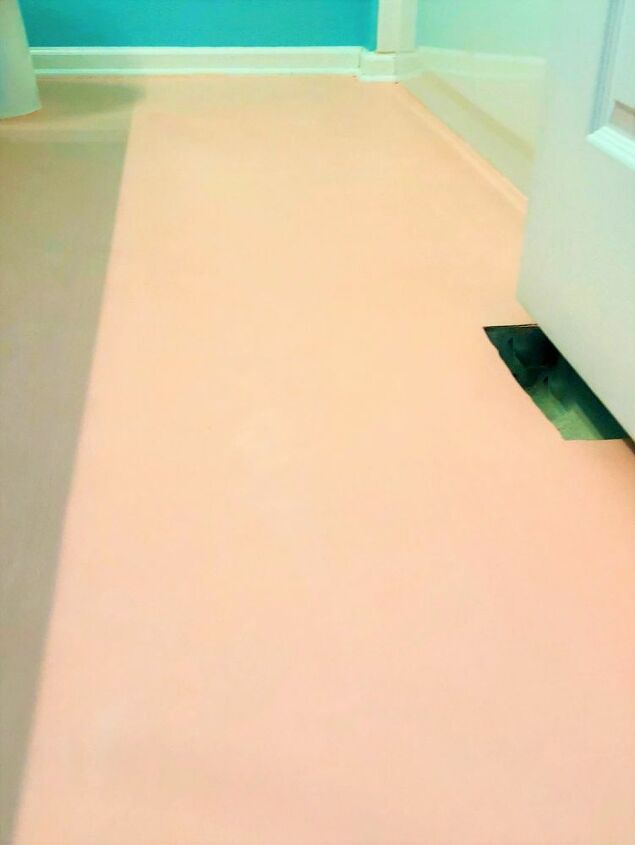
When the primer is completely dry, use a roller and your favorite paint color to paint the floor.

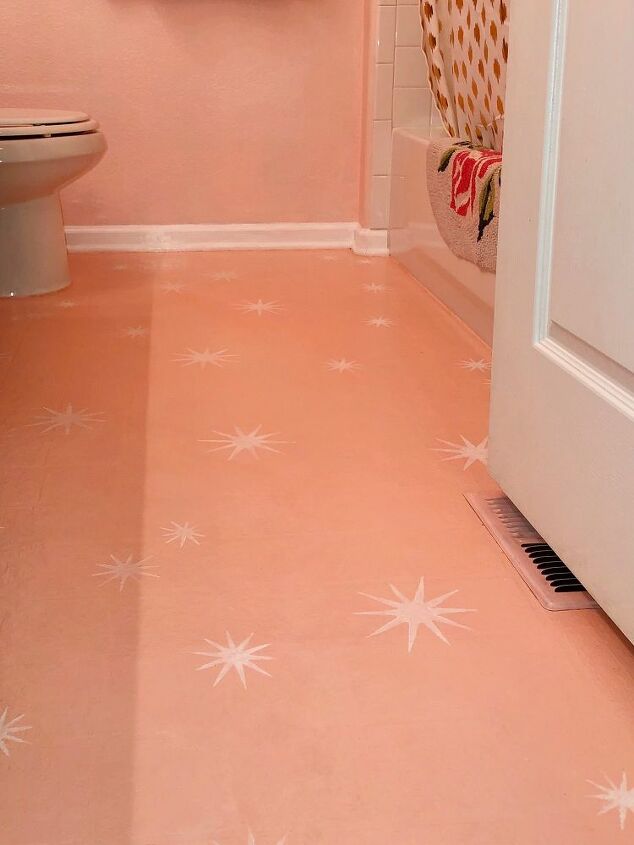
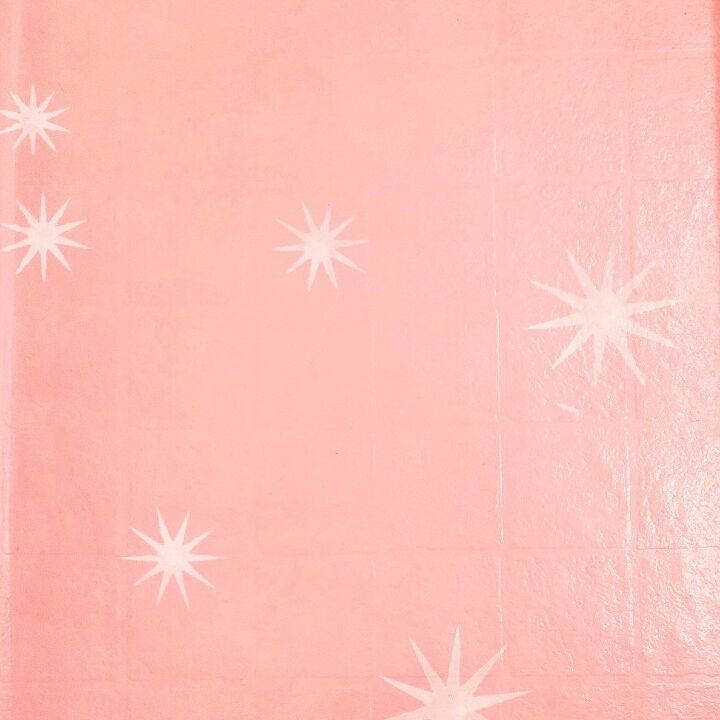
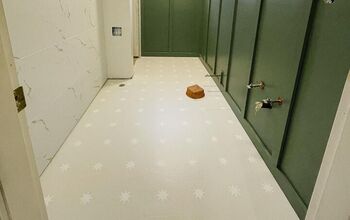
I used a soft, pretty pink for my floors. I used my Cricut to cut out different sized stars and used to stencil my floor.
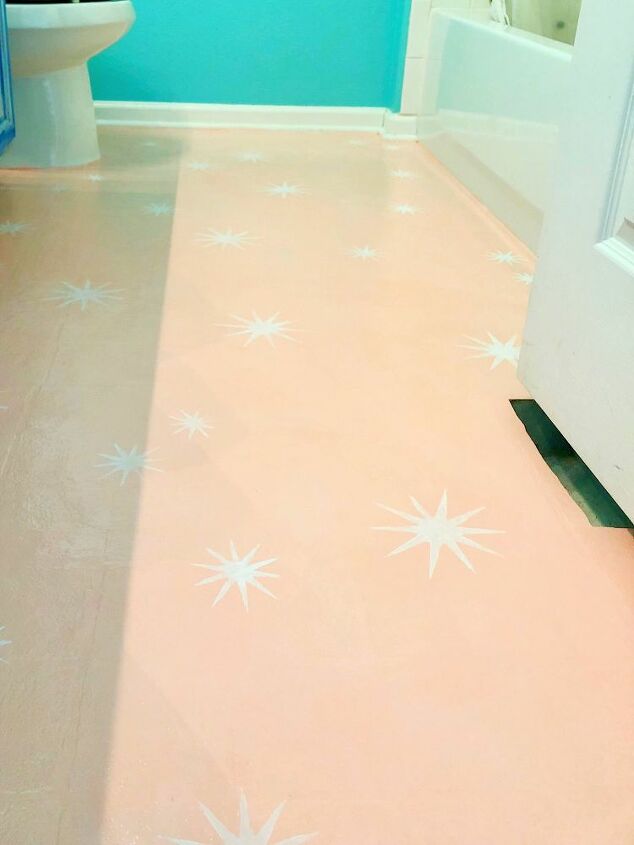
I had no plan for this part... I just added stars where I thought they looked good. I used the white primer for the stars.

When the floors were completely dry, you'll want to cover with a water-base polyurethane for floors. Follow the directions on the container. I added 4 coats of this sealer.
We have a dog and her hair gets on everything. I would have to clean the floor by hand and remove any dog hair in between each coat of poly.

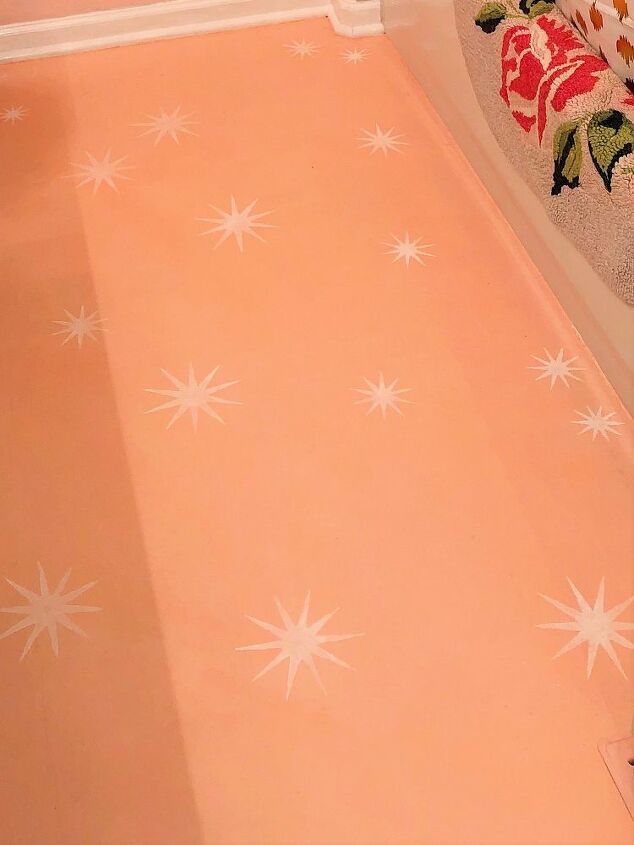
This floor was done a few months ago and I have to say it has held up perfectly! This bathroom is used everyday by 3 kids and still looks amazing.
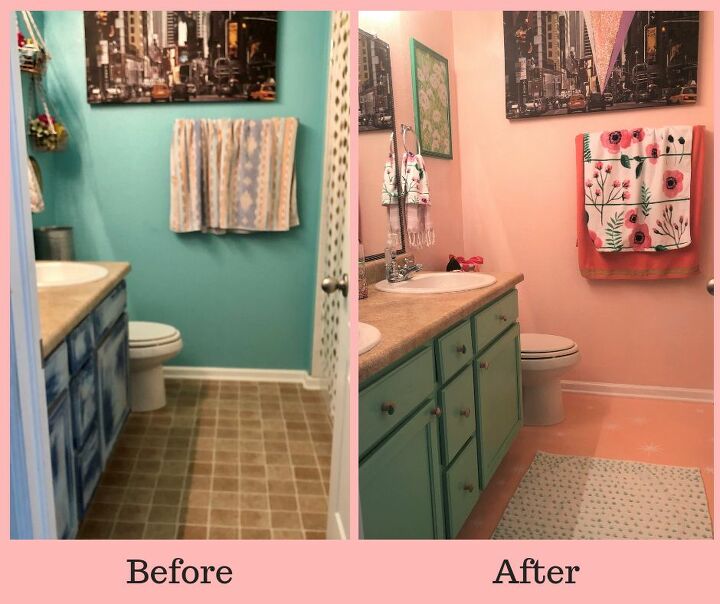
I've made a few other changes since then and I'm loving this bathroom... What do you think?
Resources for this project:
See all materials


Comments
Join the conversation
-
I love the color you used and the random stars! Thinking of doing something similar to my boring beige bathroom
-
By chance, are you able to share the graphic you used for the stars? I am hoping to recreate this design and LOVE the stars you chose!


Frequently asked questions
Have a question about this project?
What type of paint do you need to use on the floor? Im looking to do a kitchen. Also, how much dry time for each application? Of all products
can you sand the linoleum instead of liquid sanding?
Would this be the same process if I have tile? Is there a gloss I would have to remove? Also what color pink did you choose? I love it!!