


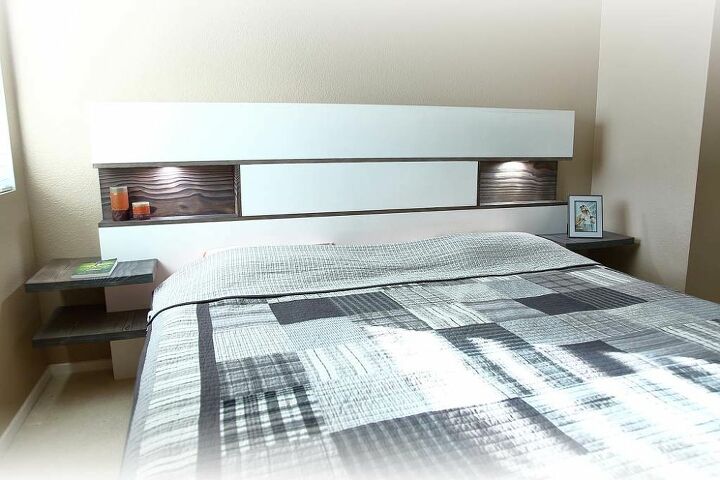
King Size Headboard

Upgrade your bedroom with this Modern King Size Headboard with shelves; you can adjust the size. Also the lights are such a great addition. Very simple to build.
Visit our website for more info and downloadable PDF, TheDIYPlan.
Tools for this project
• Drill
• Miter Saw
• Kreg Jig
• Table Saw
• Nail Gun
• Jig Saw
• Tape Measure
Material List
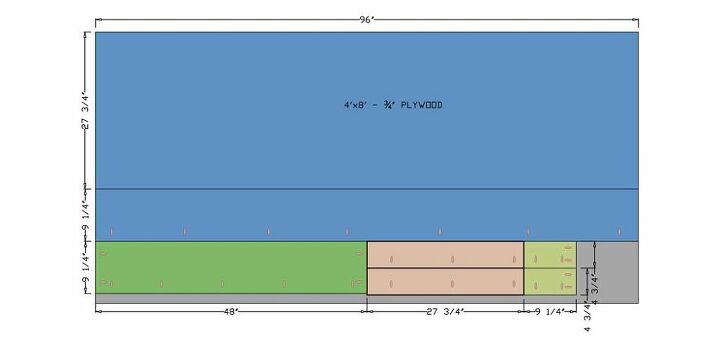
• 4'x8' - 3/4" Plywood (x1)
• 1x6x8' (x3)
• 1x10x8' (x1)
• 2x10x8' (x2)
• 4x4x8' (x1)
• 3" Slim LED Recessed Kit (x2)
• On/Off Switch and Wires
• 1 1/4" Pocket hole screws
• 2 1/2" Wood Screws
• Finish Nails
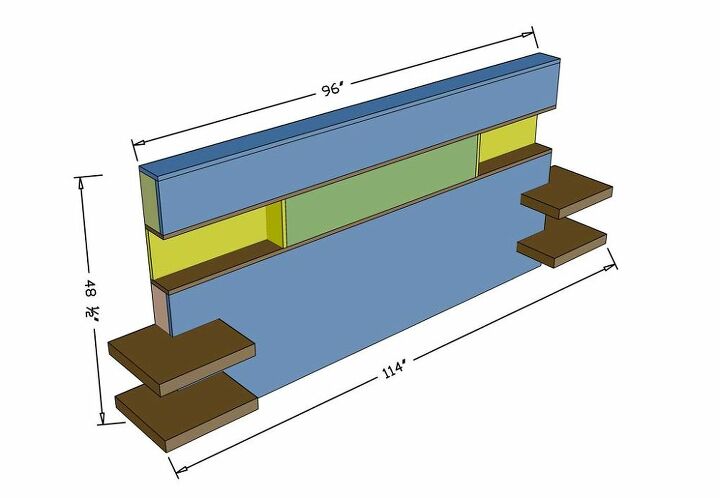
Cut list for this project
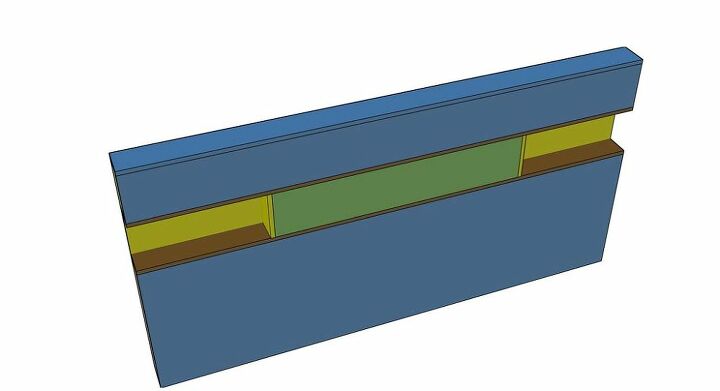
Step-1 Cut and Assemble Stained Boards

There are several pieces of this project that are stained but most wood pieces are painted white. We will start with stained pieces. Cut boards to provided dimensions in the cut list. Stain the boards separately before assembling them together.
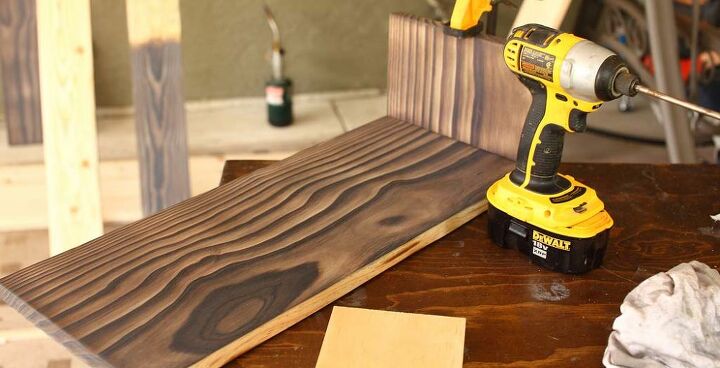
This makes the job cleaner instead of painting and staining after everything is assembled. Attach the two boards together making the L shape. Repeat two times.
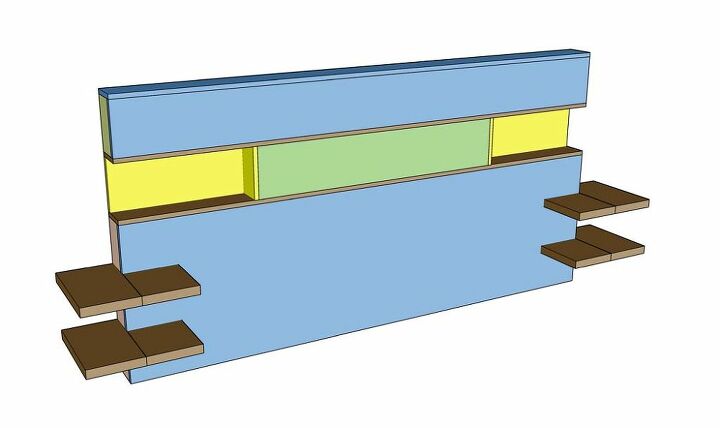
Step-2 Attaching the Middle Section
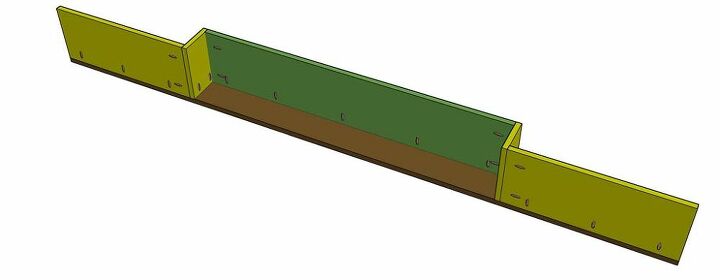
Take 1 full (96") 1x6 board and place L shaped boards on each side. Attach them using 1 1/4" pocket hole screws.
Also attach the middle piece of plywood. Make sure its painted white before attaching.
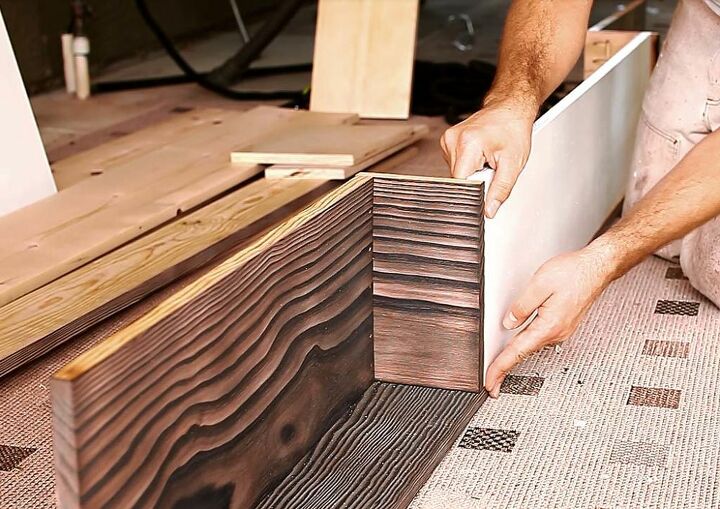
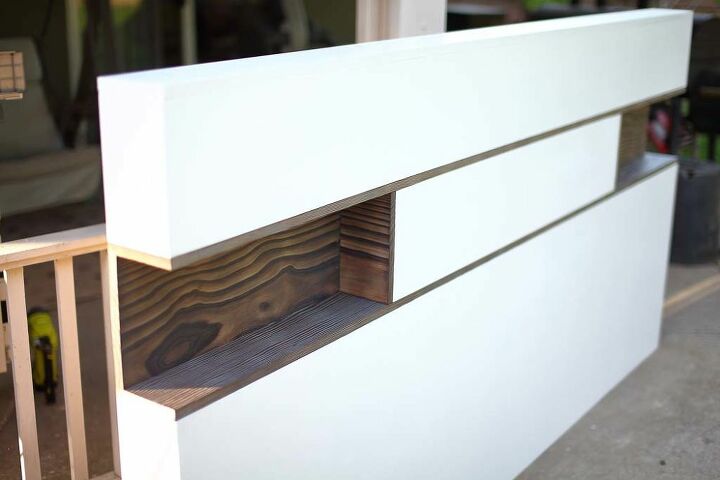
Step-3 Cutting Holes for Lights
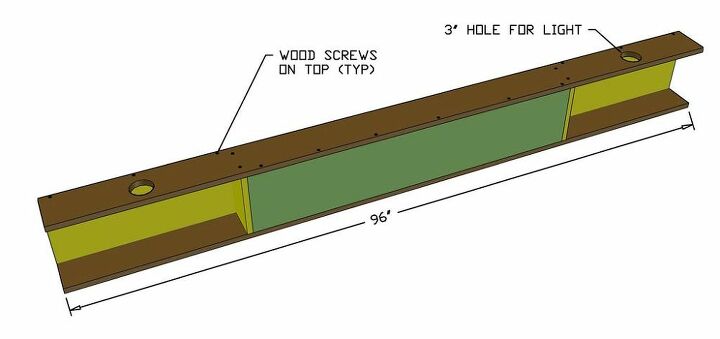
Then place another full size 1x6 board on top and attach it using wood screws from the top.
If you prefer to put LED lights, you would need to cut the holes before attaching the upper board. Also keep in mind where to place on/off switch for the lights. This might require additional opening on the board.
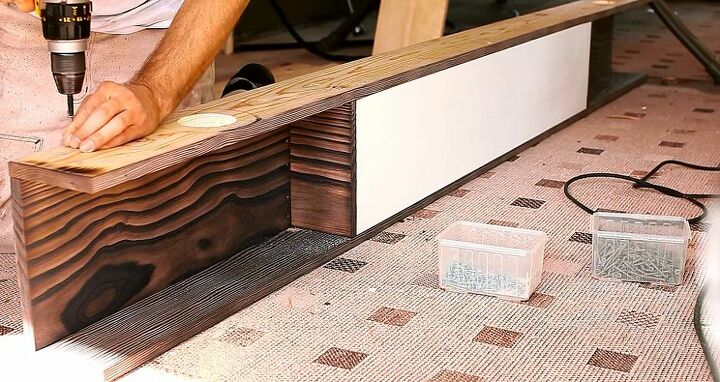
Step-4 Assemble Upper and Lower Sections

Now since the middle section is complete, attach the upper and lower section using 1 1/4" pocket hole screws.
Step-5 Attach Top Piece to Headboard
For the piece on top of the headboard, use Nail Gun with finish nails.
Step-6 Making Shelves
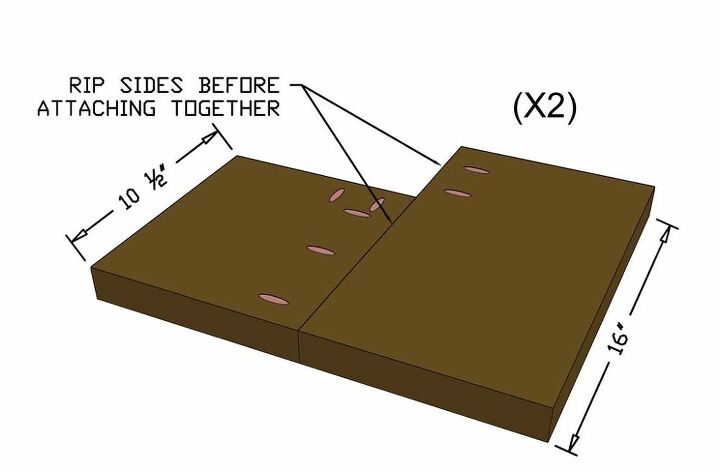
Take 2x10 and cut to provided dimensions in the cut list. Using pocket holes attache the two boards together making an L shape shelf. You might want to rip the two edges with a Table Saw so that two boards connect evenly. You will need to make 2 exactly the same shelves and 2 mirrored shelves.
Step-7 Support for Shelves
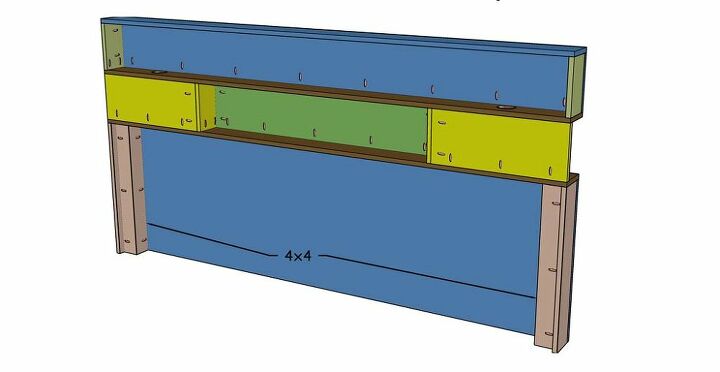
Before attaching the shelves we will add 4x4 in the back so that we will have a solid wood to attach the shelves to.
Step-8 Attach Shelves to Headboard
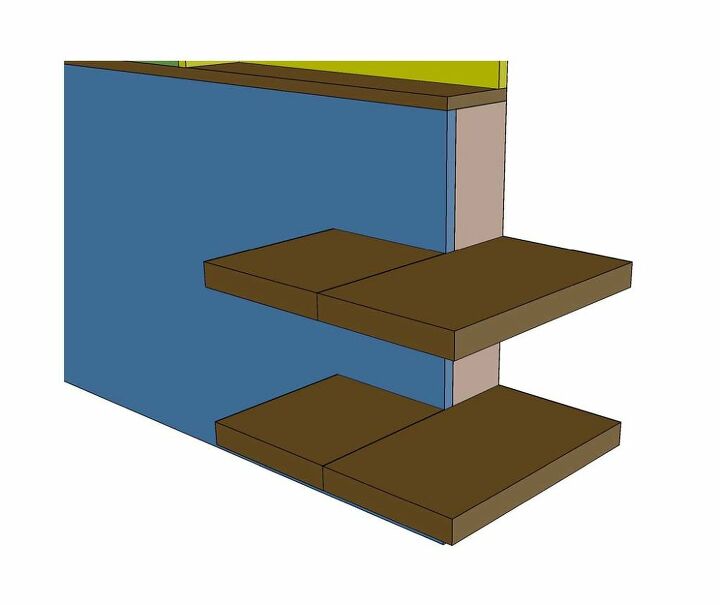
And finally attache the shelves at your desired height using the 2 1/2" pocket screws. You're all done with this King Size Headboard.
You're done! You can learn a CAD software to modify the plans or create similar plans for yourself.
Resources for this project:
See all materials


Comments
Join the conversation
-
I would like to see a picture of the finished project close up all around. I would like to attempt this project.
-
Very nice!


Frequently asked questions
Have a question about this project?
That looks great and came out beautifully. I wondered if the bed frame is attached or not; also wondered are the lights sitting above the holes cut out for them or actually inside the upper portion which would mean you would need access to them for replacement. Love the whole concept though.
Can someone make this for me?
What is the correct way to stain furniture