


How to Hide an Electrical Panel While Keeping an Easy Access

Hiding an electrical panel seems an easy enough task, but the common solutions are not always the most creative and aesthetic ones.
This is a picture a the room as it was before. I must admit that it is almost embarrassing! The room you see there was a room with built-in furniture. Can you guess where the electrical panel is?
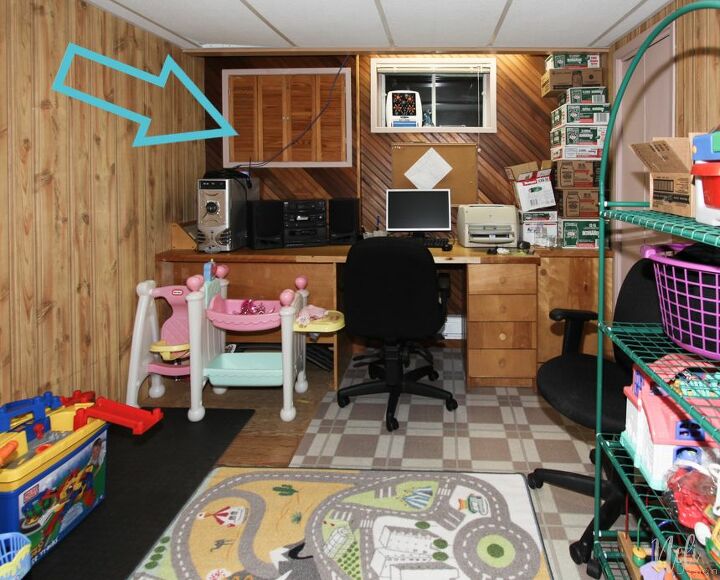
Yes that's right! I'm sure you would have figured it out even without the arrow!!
The plan was to open 3 rooms to create a room theatre. The arrow below shows where the electrical panel is and the X is the wall that was going to be demolished.
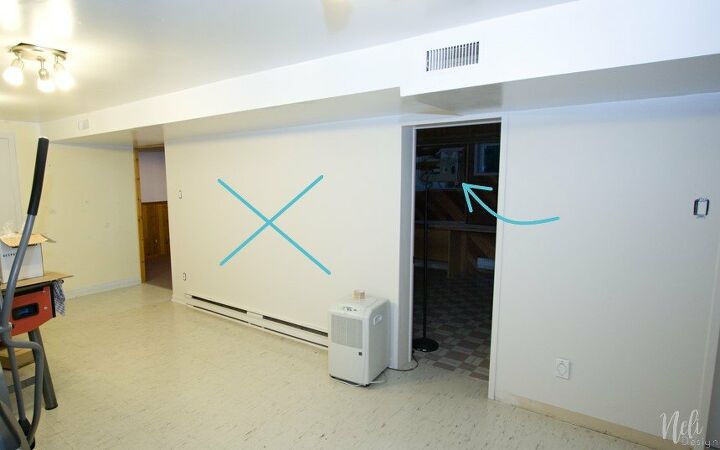
Now, the electrical panel was on the only remaining wall that was big enough to install the TV. But like I always say, there are no problems, only solutions!!!
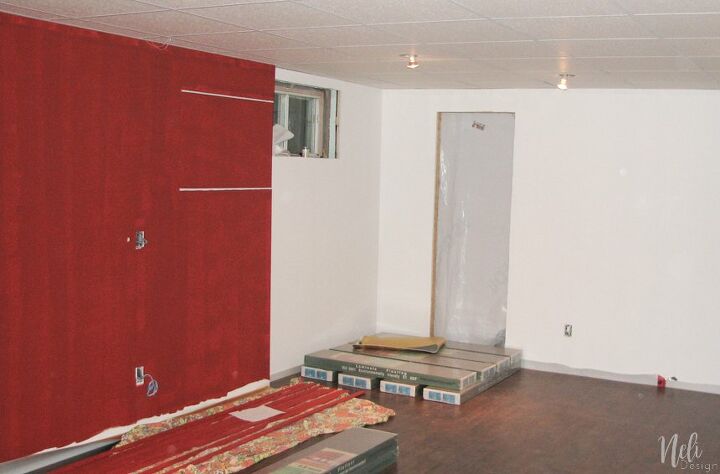
Once the demolition was done, we doubled the wall between the two windows using 2 x 3 studs.

Drywal was added, except over the electrical box, where we used a masonite with plastic rails. The 2 white lines below are the rails.
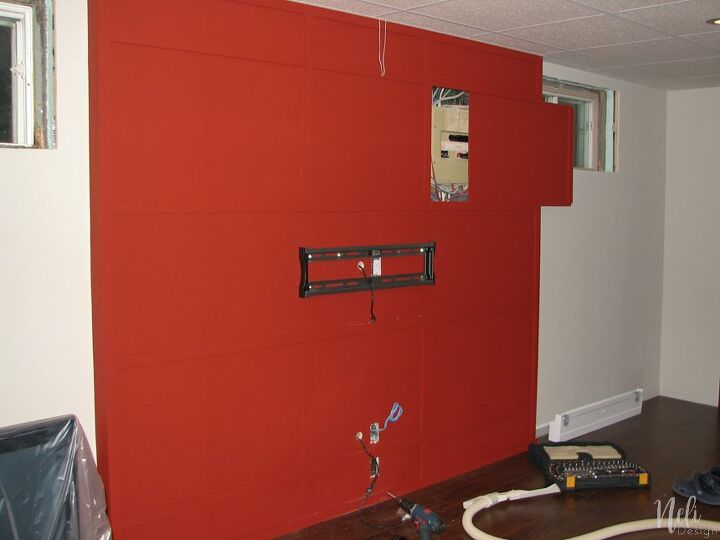
We then added mouldings making it look like casing and making sure the masonite will be able to slide.
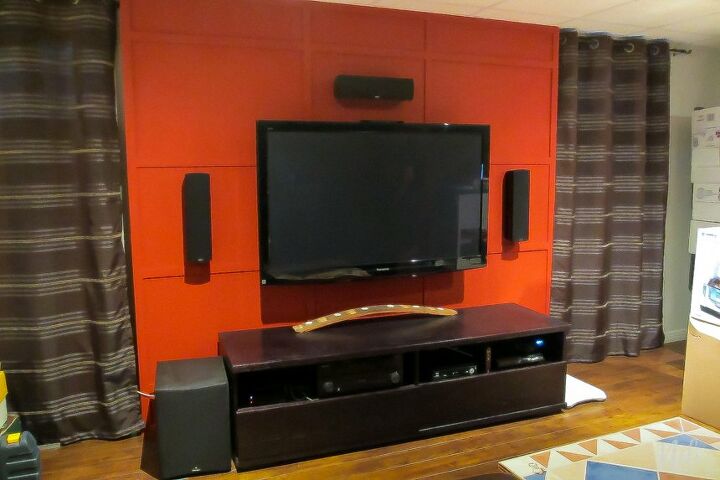
And this is what it looks like when the renovation was complete. There's no way to tell that the electrical panel is next to the television don't you think?
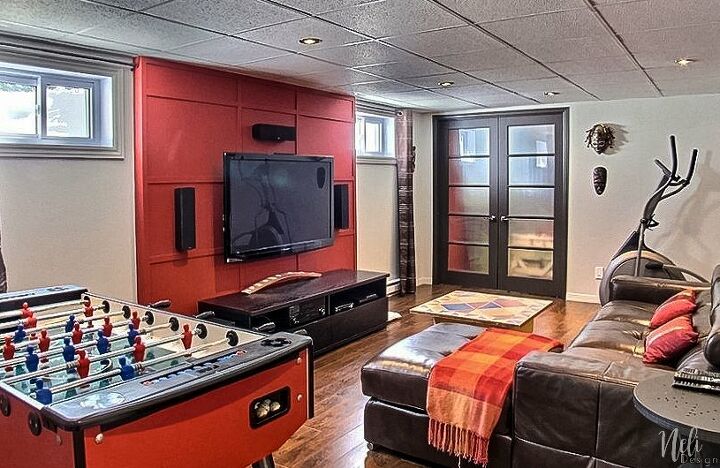
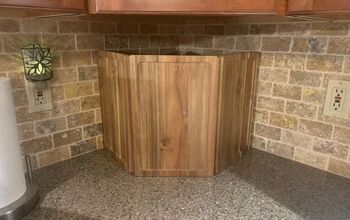
Now we have moved. And this is what I did with my new basement layout.
Resources for this project:
See all materials


Comments
Join the conversation
-
I think it's genius and I'm stealing your idea :)
-
Absolutely ingenious way to cover up an unsightly electrical mess! And an even better job of telling/showing a step-by-step of how to do it. Well done! Really wish that people would take just a couple minutes to READ and LOOK when someone takes the time and energy to carefully explain all the steps from start to finish---as you have. Great job!


Frequently asked questions
Have a question about this project?
Very nice! But my question is how do you get to the access panel when it is behind the tv?