


Making a Belt for a Treadle Sewing Machine

I found a pretty blue vintage sewing machine at a thrift store, and I went home without it. Then I decided that I loved it and went back to pick it up. And then sparks came shooting out of the motor, which caused me to quickly unplug it and hope it hadn’t caught on fire. Clearly the sewing machine didn’t love me back. In fact, I think it may have been trying to kill me. Okay, so maybe I had a $10 paper weight. No big deal. But wait! There was an antique treadle table in a local auction. Maybe, just maybe…
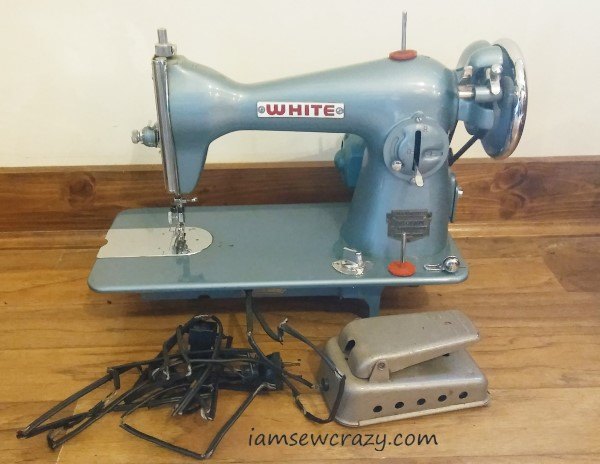
Check out my thrift store find. I knew the sewing machine was old, I knew it had issues (check out how chewed up the cord was) and I knew it couldn’t even make a zigzag stitch. BUT IT WAS ONLY 10 DOLLARS, and I loved it.
I cleaned it up, replaced the cord, oiled it, plugged it in, and started sewing. And then sparks came shooting out of the motor, which caused me to quickly unplug it and hope it hadn’t caught on fire. Clearly the sewing machine didn’t love me back. In fact, I think it may have been trying to kill me.
Okay, so maybe I had a $10 paper weight. No big deal. But wait! There was an antique treadle table in a local auction. Maybe, just maybe…
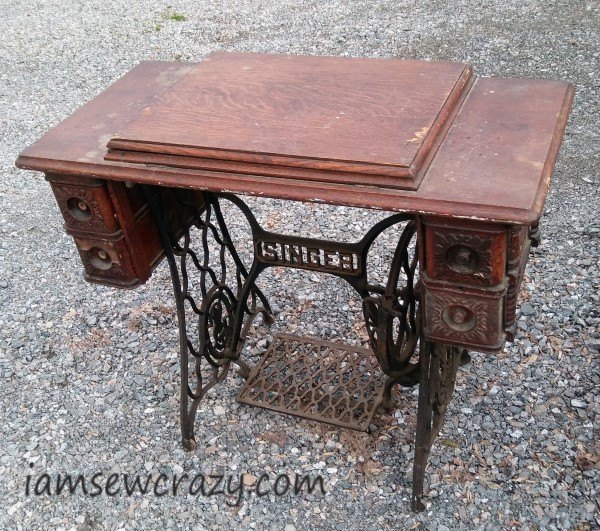
I bid on the treadle table and won it for just under 40 dollars. I was ecstatic to find out that my beloved sewing machine fit into the table PERFECTLY. Now I could run the machine without worrying about its evil plot to kill me!
I cleaned up the table and oiled the moving parts, and I was glad to see that it ran smoothly. But I couldn’t get rid of the smell of mold on the wooden parts of the table. (If anyone has any advice, please drop it in the comments section!)
But I also have a screened-in porch, and so that is where the treadle table went. I figured the moldy smell wouldn’t bother anything out there.

Before I hooked up a belt to the machine, I took the time to remove the deadly motor. The motor will probably be taken apart and used in future art projects… I can see some cool-looking fins inside it. (Now I’m getting distracted by things I can make out of the motor! Back to the treadle table…)
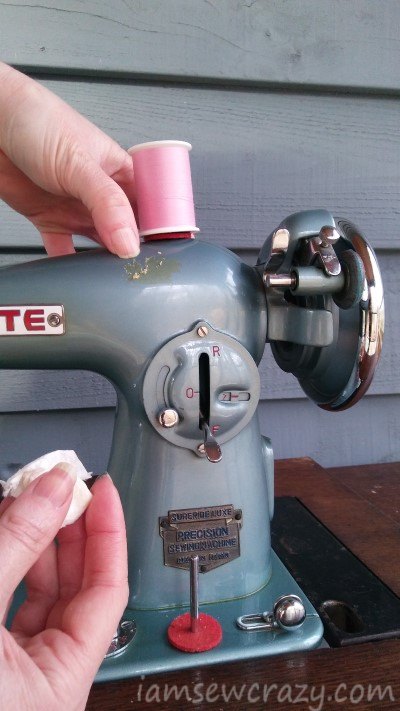
I also cleaned off the crystallized masking tape residue that was left behind by the previous owner. I used one of my favorite tricks here: a paper towel with butter on it. Rub some butter into the tape residue, and let it sit for about 20 minutes before you scrape the tape off.
Perfect! Now I just needed a belt to connect the machine to the table’s mechanism. I went shopping online and found some old-timey leather treadle belts, but I decided to try to make my own instead.
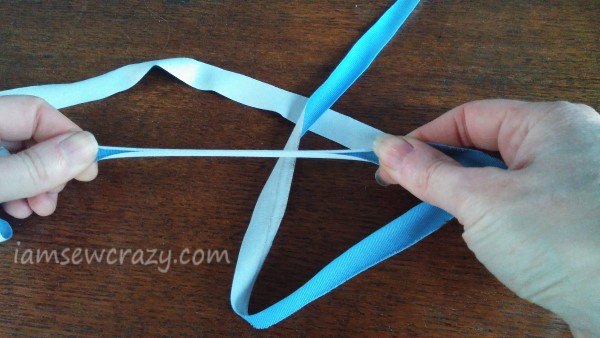
I used a 1/2″ strip of PUL (polyurethane laminate) fabric because it’s strong, grippy, doesn’t fray, and I had some on hand already. It’s waterproof, so it’s great for bag linings, the back of a picnic blanket, and other projects that you want to be wipe-clean or rainproof. And a lot of moms use it to make cloth diapers or as the backing for a changing pad.
I always find little things to make with it, and I stocked up a while ago when the blue color was being discontinued. The yardage I had was 60″ wide, and because it stretches, that was more than enough length to go all the way through the treadle table’s belt path. (I could have cut a lengthwise strip, and it wouldn’t have been stretchy. But I wanted to try the crosswise direction first, and play around with the fit.)
Note: The link to the PUL fabric is an affiliate link, which means that I will earn a small commission (at no extra cost to you) if you use that link to make any purchase.
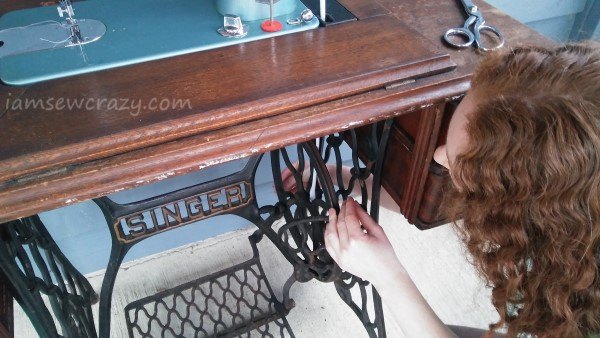
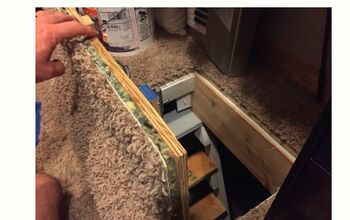
I threaded the strip of fabric through the table, following the path that the belt would take when it was running the machine.
I took note of how much length I’d need, then I slipped the fabric off of the large wheel underneath the table so that I’d have enough slack to sew the belt into a circle. The belt stayed looped around the axle of the wheel, but not around the outside of the wheel, so I had enough slack to sew it together.

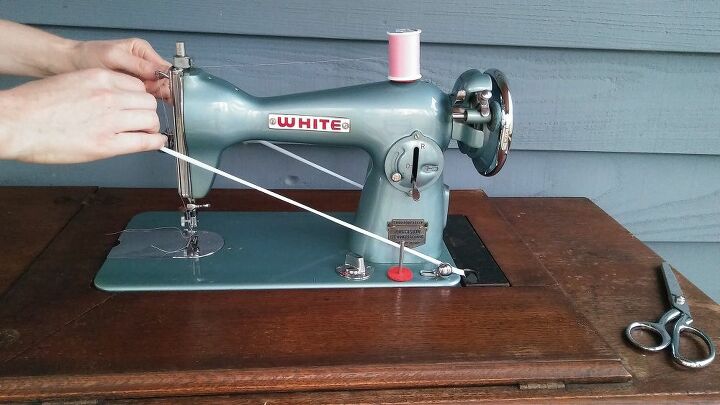
Then I sewed the two ends together by stretching it over the sewing machine and sewing a line parallel with the strip. I had to turn the handwheel to sew the belt together, since the machine had no motor anymore, and wasn't attached to the treadle table yet. After I had sewn the belt together, I passed the joined belt back over the sewing machine, stretched it around the large wheel, and tried it out.

It worked! The polyurethane laminate fabric is grippy and almost a little bit rubbery, so it seemed like the perfect thing to use. But the belt continued to stretch as it was under constant tension, and as it stretched, it started slipping. So I shortened it gradually by about 8 inches, and I considered switching to a lengthwise (and therefore not stretchy) strip of the PUL fabric. But after the belt had sat on the machine for about a day, it stopped stretching. Since it was working fine after a day, I decided to leave the crosswise strip on there.
The machine runs super smooth and quiet, and it took some getting used to, but I like the treadle action. I’m going to try free-motion quilting with it, because I love a challenge. Here’s a video of my treadle machine running: I’m using it to demonstrate how to sew perfect circles. It’s a really fun hack that uses a thumbtack and doesn’t require any marking or tracing. If you’re interested, you can click the link to see the full tutorial!


Comments
Join the conversation
-
Oh my gosh you are awesome! That was great. I never would've known how to make that into a treadle. I'm really inspired, thank you :-)


Frequently asked questions
Have a question about this project?