


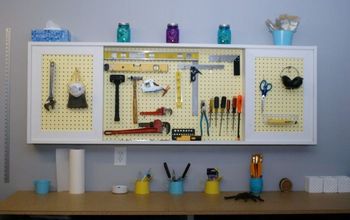
How to Make a Tool Cabinet Organizer

I was lucky enough to find a wooden cabinet with a perfect front rolling door in the dumpster,I decided it would be the basis for my tool cabinet. After a long time in which I stored my tools in tool boxes, I decided that it was time to arrange them so that they would hang in front of my eyes and I would not have to spend much time looking for them. Sometimes I even forgot that I had a certain tool because of the mess in the toolboxes. Today most of my work is done at home and so I do not need to take the tools to other places so this is an excellent solution for me. Now I just open the tool cabinet and immediately start working.
Hope you will like this project, and if you have any comments, I'd be happy if you write in the comments below. Please subscribe to my channel  https://www.youtube.com/channel/UCkNrUodcQbCM8FDGpFouOrw?sub_confirmation=1 Facebook: https://www.facebook.com/kultakaladesign/
Thank you!
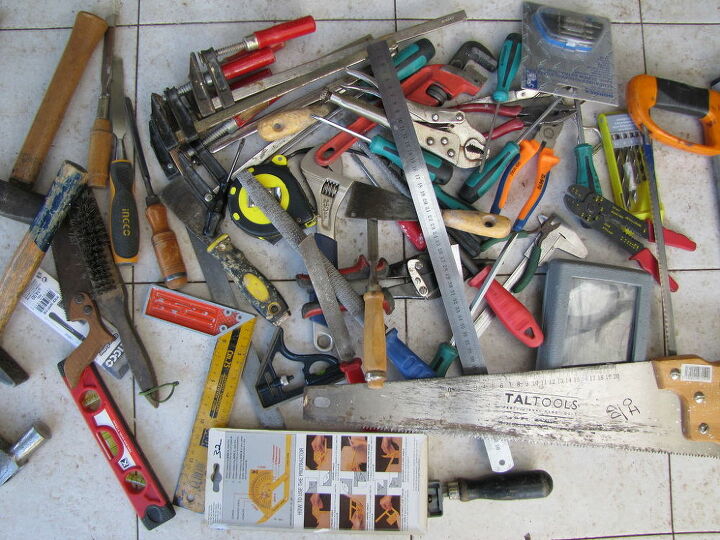
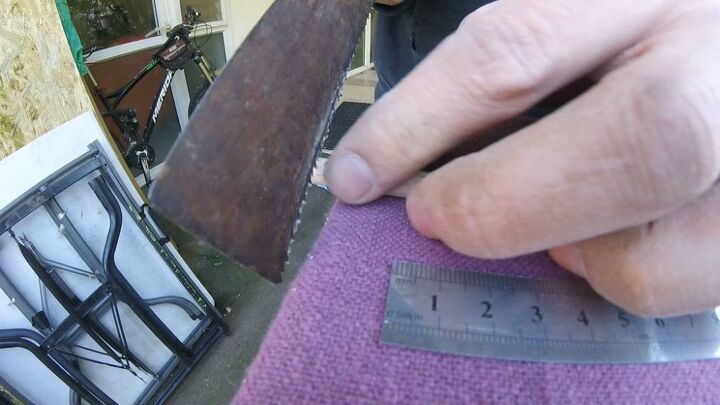
I took all the tools out of the boxes to see the variety of tools and sorted them into categories according to technology:wood, metal, measuring tools, screwdrivers and so on.
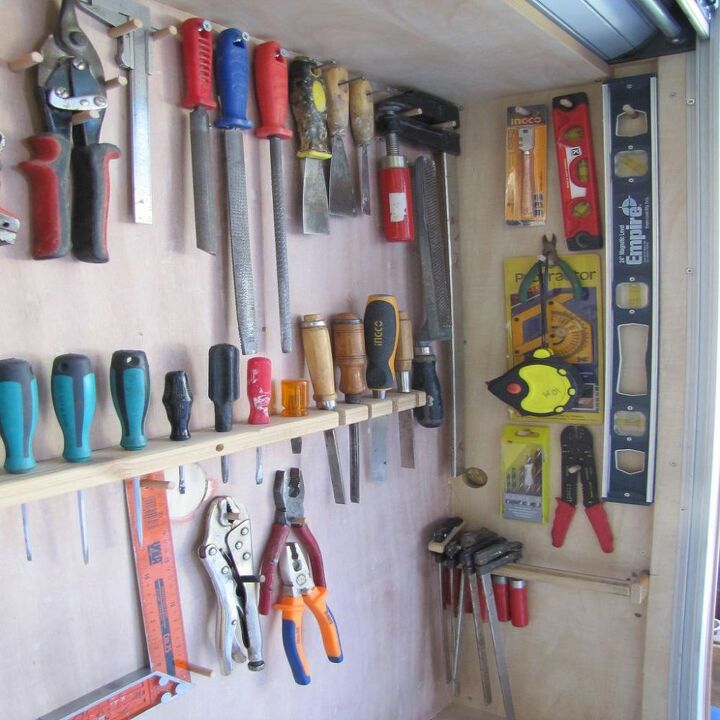
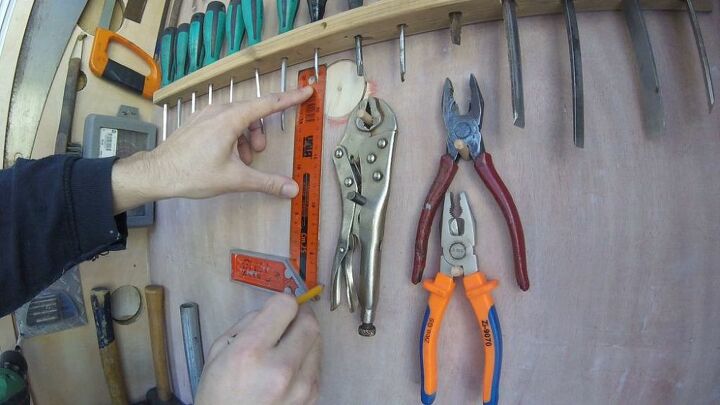
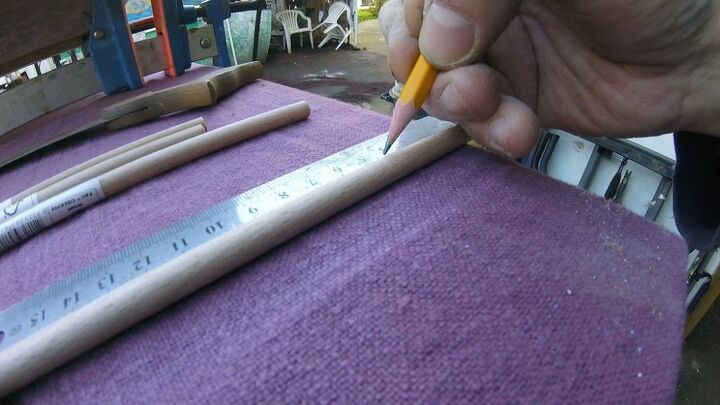
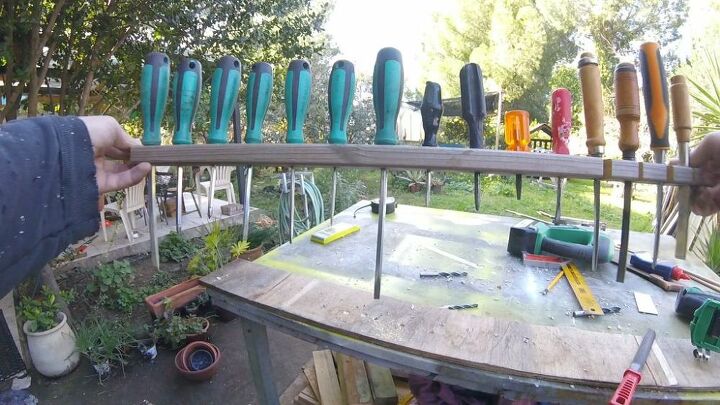
I bought wooden sticks 8 mm thick. I held each tool against the back of the cabinet and marked in pencil the locations for the drilling.I drilled with an 8 mm drill marked with a masking tape the desired depth for drilling.I sawed the wooden sticks 4-5 cm long, I smoothed the edges and tapped them with a hammer. Tight tolerance keeps them in place without moving, in the future if I want to change locations I can just pull them out, or saw them.
Learn how to organize a toolbox like a pro DIY-er.
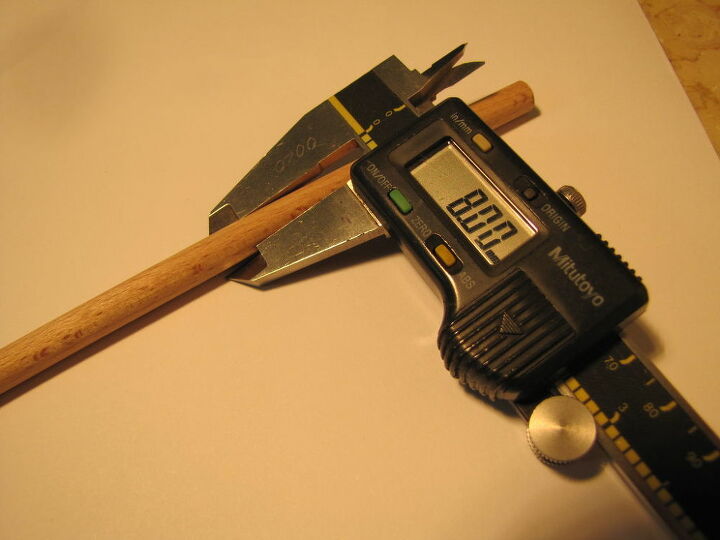
measure the Wood sticks
cut Wood sticks
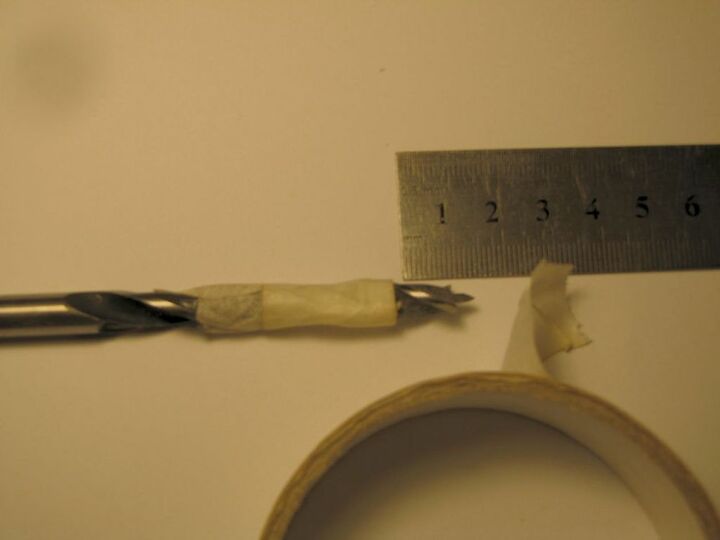
Mark Drill depth with masking tape
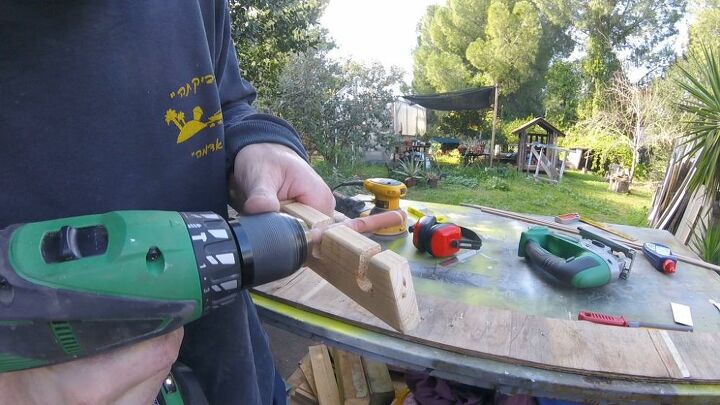
I made a shelf with holes and grooves for screwdrivers and chisels.At first I arranged all the Screwdrivers and chisels on the table and measured the gaps between them and the diameter of each one.I took a wooden profile (20x40 mm) and marked it for drilling, I cut the edges at a 45-degree angle so there was room for a screw to hold it to the cabinet.
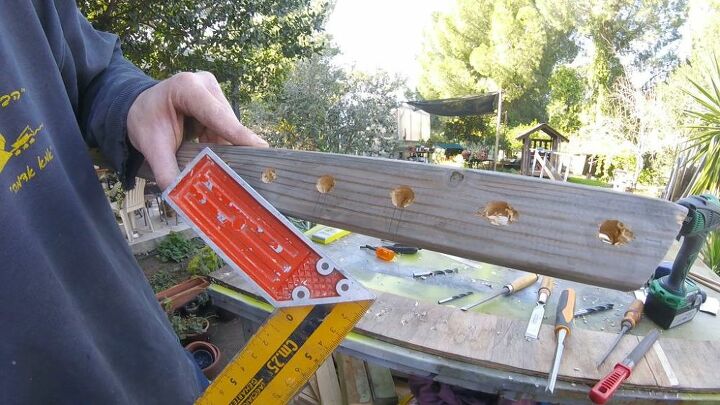
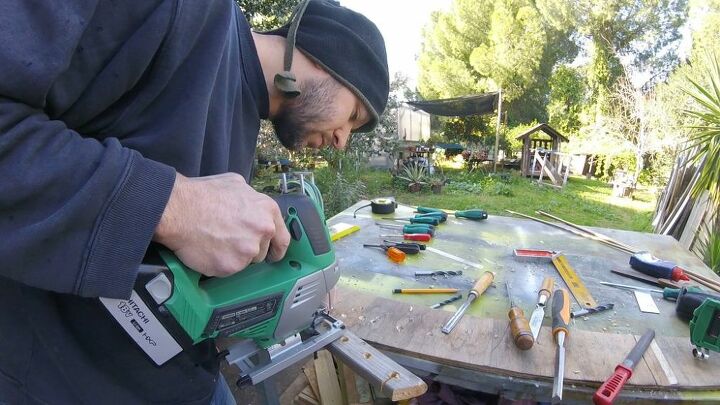
I drilled 10 mm holes for all the toolsand to the chisels I also opened a groove with my Jig-Saw.Then I sand everything with Orbit Sander.
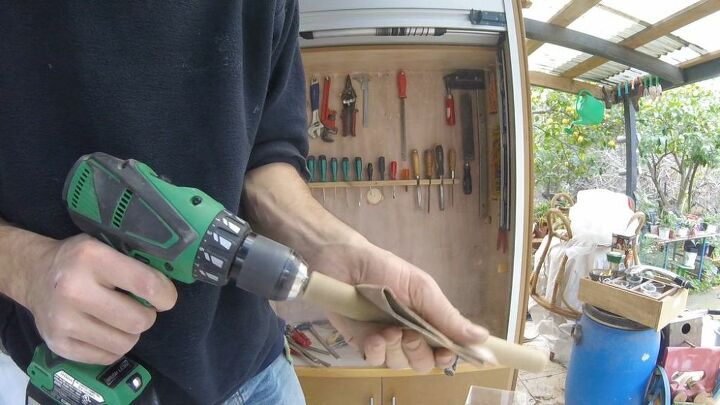
From the broomstick I made a rack for the clamps.In the picture you can see a nice method for quick sanding of the stick.I attached a screw to the stick and I grabbed the top of the screw with the drill ,I turned it around and smoothed it with sandpaper.
Sanding
Tools:Drill Impact driverOrbit SanderHeat GunJig sawL-SquarePencil TapeDigital calibermeterhammer8 mm drill8.5 mm drill10 mm drillProtective glassesGlovesBreathing maskEar protectorsMaterials:Wood screws M4x30Wood sticks 8mmStrong Magnet 8.5 mmwooden profile 20x40 mmBroomstickSanding papers 150, 400
Comments
Join the conversation
-
Great design. This project has moved to #3 on my garage renovation worksheet. Thanks for sharing.

-
Cool! I'm going to try this. Thank you.


Frequently asked questions
Have a question about this project?
Your materials list includes a Go-Pro and tripod. Those made me giggle. Will they help my tool organizers turn out as well as yours did? :-)