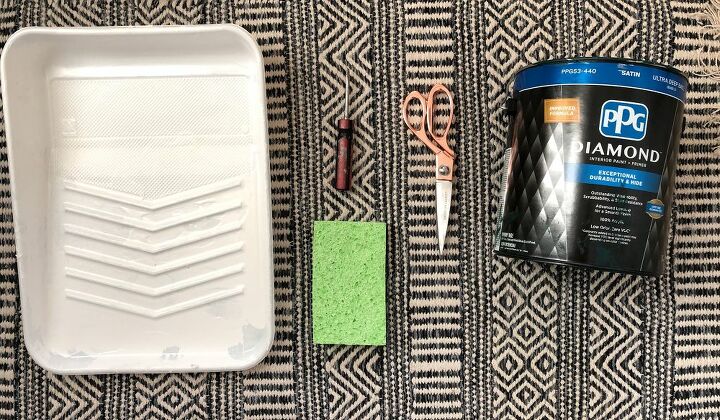
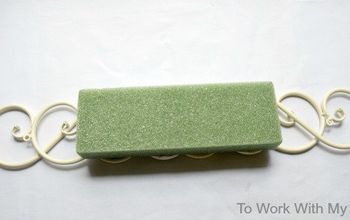
Gather Your Materials
- Sponge
- Paint (I used Night Watch by PPG)
- Scissors
- Tray for the paint
Have a boring, plain wall in your home? Make it a beautiful accent wall in no time! This project uses minimal effort with maximum effect!
This step is not necessary if you already have a color on the wall you like. If not though paint the wall in color of choice.
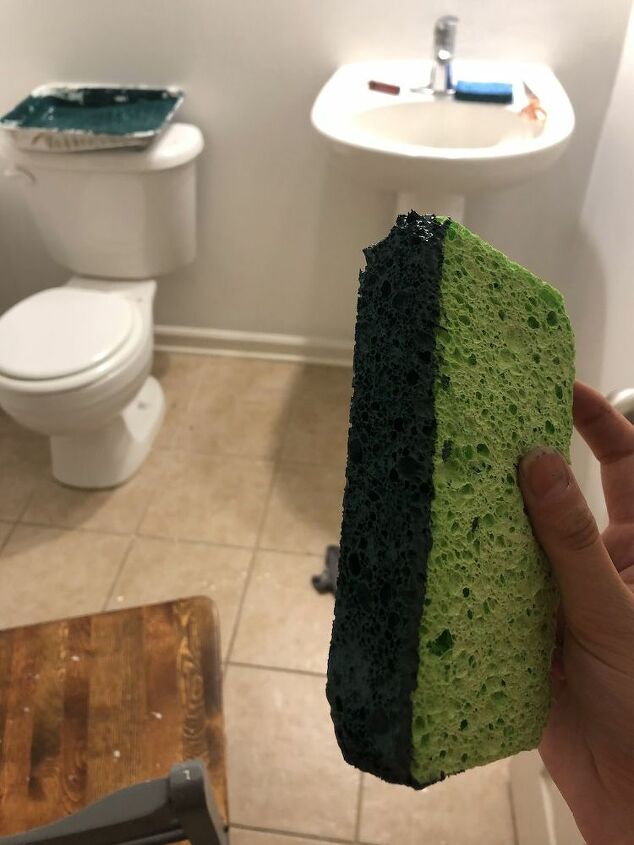
Cut the corners of the sponge so it's not so square. If you want more square, just leave the sponge as is.
Pour paint into a container where you can dip the sponge in completely flat. It doesn't not take much paint, so don't pour too much. Dip the sponge into the paint and scrap on the side of the container any excess paint. You really don't want much on there, less is better to start. You can always stamp over if you want it darker.
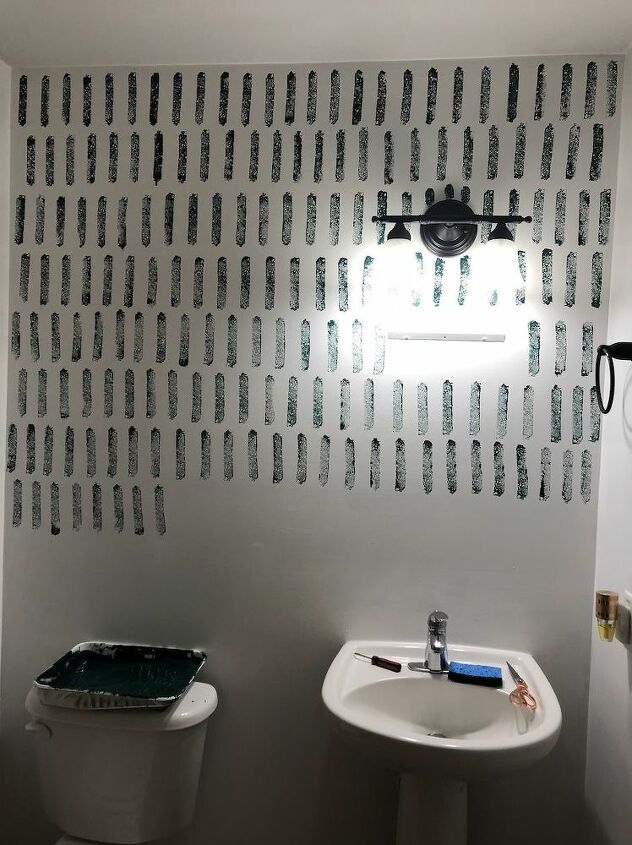
In a straight line, simply stamp the sponge onto the wall. You can spread each "stamp" out as much as you'd like. I did 3-4 stamps before re-dipping into the paint.
For spots around something, (sink, mirror, toilet, light, etc.) I grabbed another sponge, my pack came with three, and cut the length that would fit around the area. In the smaller, tighter areas (behind the sink and toilet) I used a piece about 1-2 inches long and just make the length with that smaller piece.
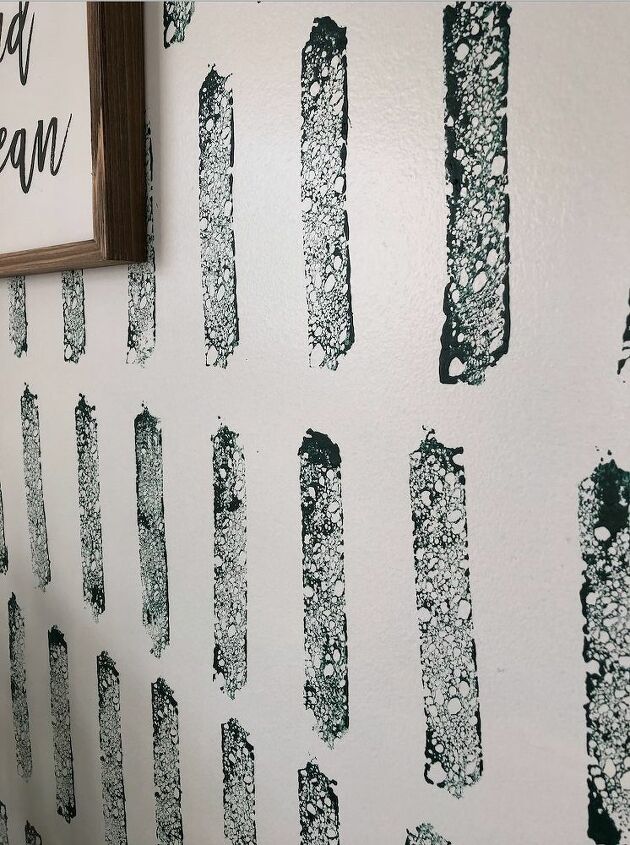
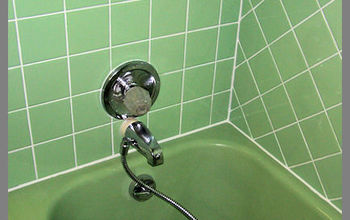
The beautiful after shot of our bathroom!
Now you're all done and have a beautiful, wallpaper-like accent wall in your home! :)
Follow us on Instagram @sommer.stains
We started out with a dingy, dark tan half bathroom painted by the previous owners. We knew we...
If you’re looking for a really cool and modern wall finish for your walls and don’t want to spend a...
If you love Iron Orchid Design moulds and an old world finish follow me as I create it using acrylic...
This easy to make fresh magnolia wreath is perfect for the fall season, the holidays and the winter...
I found an old solid wood dresser at a thrift store and gave it a face lift with a little TLC and...
Hey friends! I’ve got a quick wall stencil tutorial for you today (aka, a FAUX WALLPAPER tutorial)!...
Have a small wall space (this wall space is 22" wide) and want to bring a cute accent on a budget....
I’ll let you in on a little secret...hexagon is going to be a huge trend this year wether it’s the...
I wanted to give our family room an entirely new look, and this DIY paneled wall treatment makes...
We... the Pickle and I, have an ever growing list of home improvement/nesting projects that we're...
How to Stencil a WallSimple Made Pretty has been compensated for this post. All opinions are mine...
This post is sponsored by Stencil Revolution.When I first saw this oversized three drawer dresser, I...
There is one thing I love about a blank palette; you can let your imagination go crazy. This room...
Give some new life to old crockery and plates with this simple fun craft. Paint your plates using a...
Our entry way has gone through several changes in the 12 years we've lived in our house. But the...
If you have outdated tile in your bathroom, kitchen, laundry room, porch or anywhere in your home...
*This post was sponsored by Dremel. All opinions are my own.I am pretty excited to be sharing this...
Cutting Edge Stencils wants to show you how you can take your stenciling skills to the next level...
I love accent walls. We recently moved into this home that mostly has gray walls but I am a color...
We created an open plan kitchen and dining room area and still wanted to pull the two spaces...
I was out in Orewa and saw a very interesting Mosaic chair, I thought that something similar would...
Hand painting boho style throw pillows is one of the most therapeutic DIY’s I’ve done recently. When...
Recently, I taught a group of middle and high school students how to renovate and flip a townhouse...
Lets face it, built-in showers never have enough storage. Here’s an easy fix, no drilling of tiles...
Empty tin cans are one of my favorite craft supplies. They are sturdy but flexible and with a little...
I’m sharing an easy DIY accent wall tutorial with you and how you can achieve this look on your...
I love old bottles! I have a collection of them in my kitchen window. And, I find it hard to throw...
This beach apartment bathroom actually needs an overhaul but I had neither the time nor the energy...
We love our neighbors! From time to time our neighbors offer us furniture they would otherwise put...
Anyone else really love plants but super tired of paying $50-$100 for cute plant stands. I certainly...
Our DIY kitchen remodelIn March of 2016 Ted and I set out on a mostly DIY kitchen remodel journey...
Its one of those spaces that never looks pretty... the pantry! I set out to tackle this tiny area by...
Terrariums are a beautiful way to get your green on in the winter months when it’s too cold to grow...
When I saw Monica from House of Esperanza feature this easy DIY sign holder on Instagram, I just...
Have a question about this project?
Loved this so much we just did it in our laundry room!
Carlene I think that would be cute idea for a kids bathroom!!
It looks amazing! Did you alternate the position of the sponge - as in, turning it 180 degrees, so it wouldn't have a uniform look? The old-style sponge painting instructed to turn the sponge to avoid repetition but it might have worked in your favor on this project.
Thank you! I did not! For every time I dipped into paint I sponged on the wall 3-5 times before re-dipping. Therefore as I went each one had less and less paint resulting each stamp to look different. If you wanted to differentiate between each stamp you definitely could rotate your sponge or even use two that you slightly cut differently! It’s just all personal preference :)
What size sponge did you use? (Thickness wise) I did this recently and didn't care for the look, my sponge lines were skinny, but I love this look and you're sponge lines seem thicker than mine were.
Not sure what the thickness is, I just used whatever set of sponges I could find. I purchased these from Walmart, I think they came in a 4 pack.