


DIY Planter Box

Well, I finally called 'uncle' on the little wooden planter box that sits in the front yard by our garage door. As you can see in the picture below, I didn't really have a choice. Hubby and I bought this cute wooden, lattice framed planter box over 17 years ago. This project ended up costing about $24 since I had all the tools and most of the supplies on hand. I only needed to purchase soil & plants.
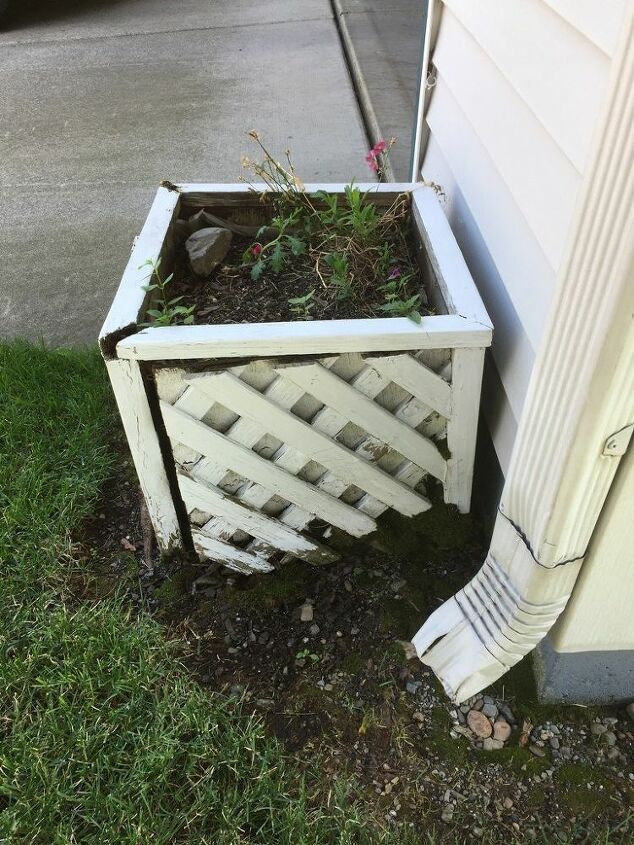
Time to replace this planter box
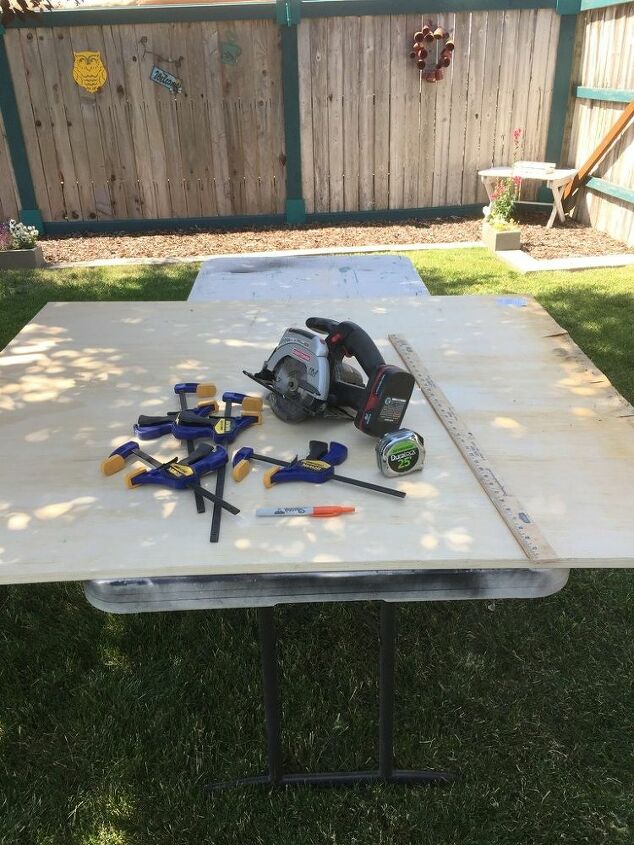
I prefer to reuse materials or use materials I have on hand. For this new project, the first step was to measure the size of the existing planter. It was 18" by 18". The space where it sat was a little larger than that size so I decided to keep the height of 18" but increase the width to 22". I had some plywood and found it was plenty to make the box. I also had an 8' treated 2" x 4" board, that would work well for the corners of the box. We have several large tables so I chose one, set it up and grabbed the supplies I would need: battery-powered skill saw & drill, measuring tape and yard stick, marker, screws, clamps, wood. I used my skill saw to make the cuts on both the plywood and the treated board.

When the sides and legs had been cut, it was time to assemble the planter box. Since I was working alone, the clamps came in really handy! I clamped the first side of the planter box to the work table then clamped the side I was attaching to the 2" x 4" leg. Once attached, I used the drill to screw the pieces together using 2 screws for each leg.
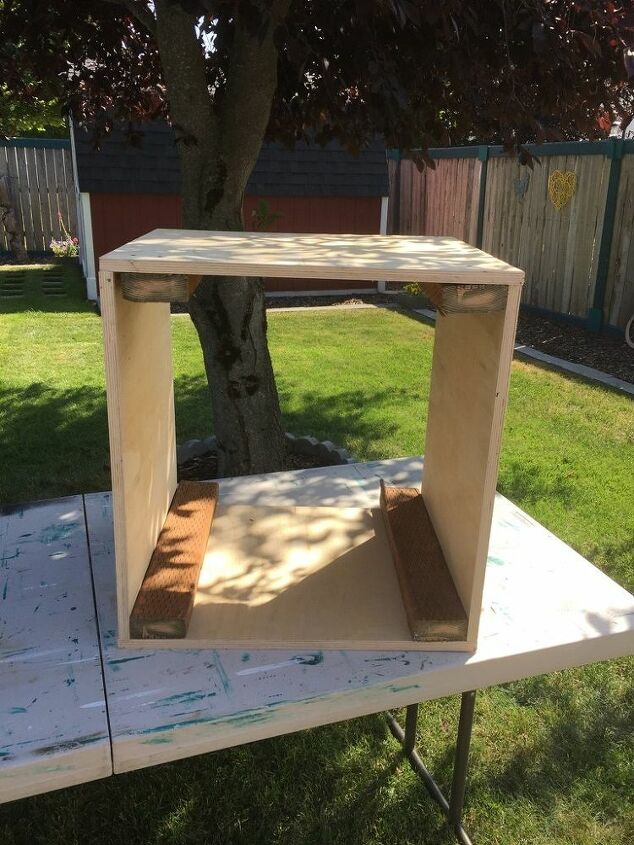
The screws I use these days are brass ones with a star head. I have no trouble with these screws as they do not strip like the regular Phillips head ones do. With the first two pieces attached, I followed the same process to attach the rest of the sides.
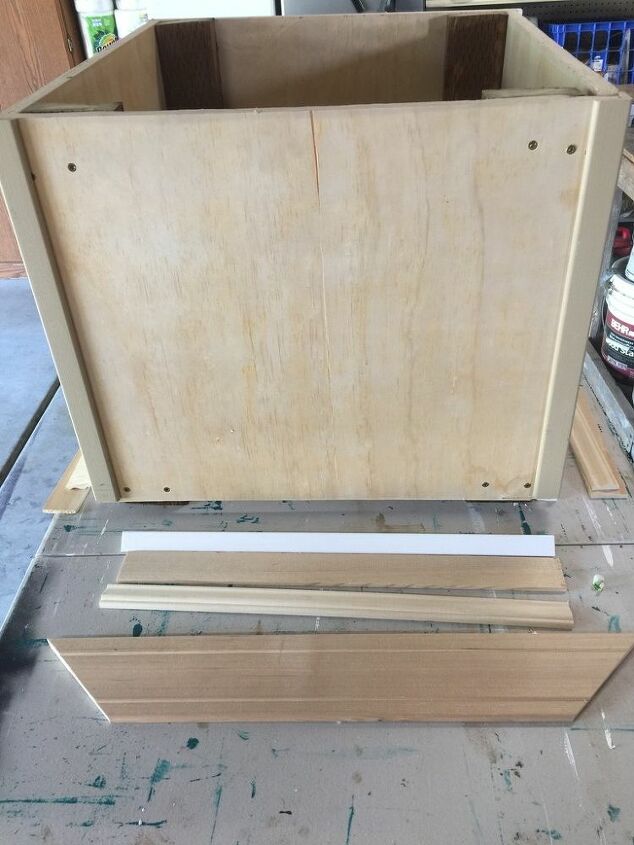
Now that the planter box was assembled, it was time to add trim to make it purdy! I headed into the garage to measure, cut and attach the trim. My little compound miter saw is my go to tool for cutting trim. It cuts each piece quickly and with precision. I ended up using 5 different types of trim for this cute little planter box so my little saw and I made many cuts.
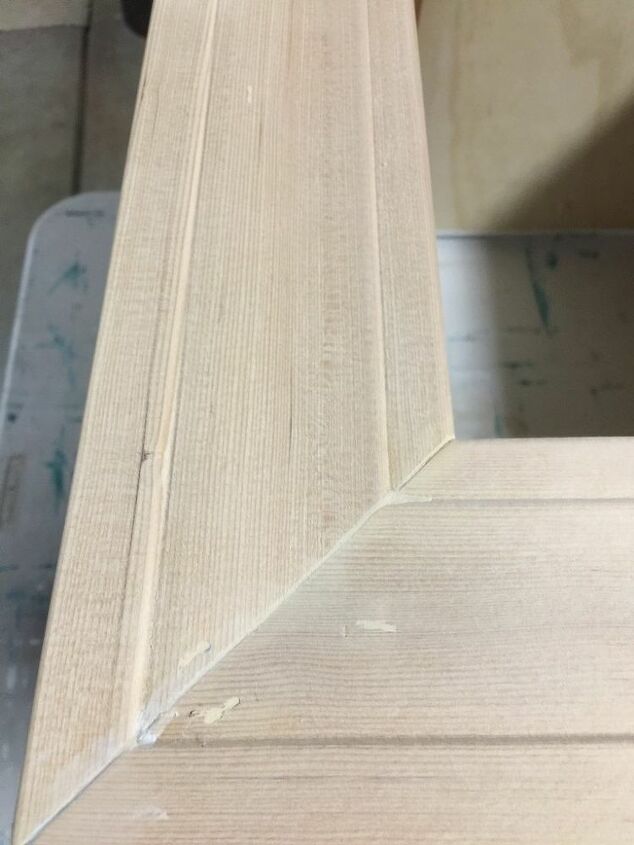
The first trim I attached was the 1' corner molding; doing so provided the dimensions I would need to cut the remaining trim. I used Elmer's wood glue and my 18 gauge nail gun. You can use finishing nails if you don't own a nail gun. After all the trim was attached, it was time to fill in the holes from the nail gun and the gaps where the wood met. I used wood putty for the small areas and paintable caulk for the larger ones. Both those products dry quickly and once dry, I used a sanding block to smooth all the areas.
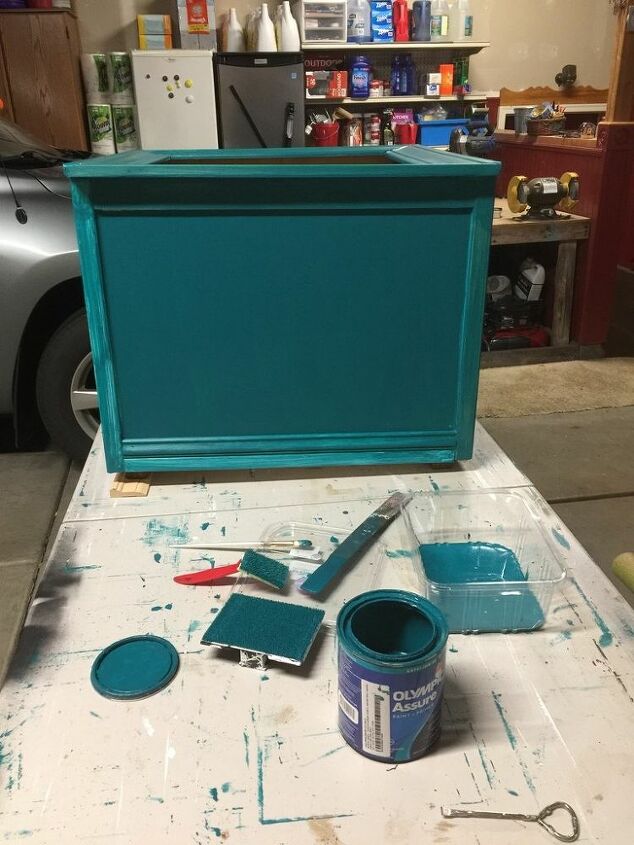
The paint I used is Olypmic Assure in Tahitian Teal from Lowes. I used a variety of painting supplies to apply the paint - small paint brush, small painting pad, regular size painting pad & small roller. This project took 3 coats of paint, especially on the two pieces of vinyl trim. I painted the inside of the box from the rim to about 4" so it would be finished where it would show above the soil.
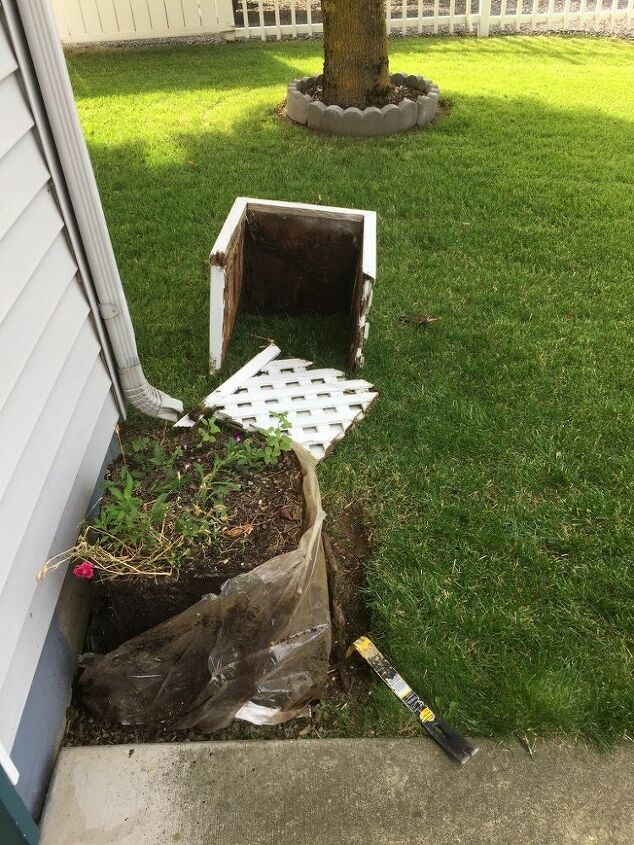
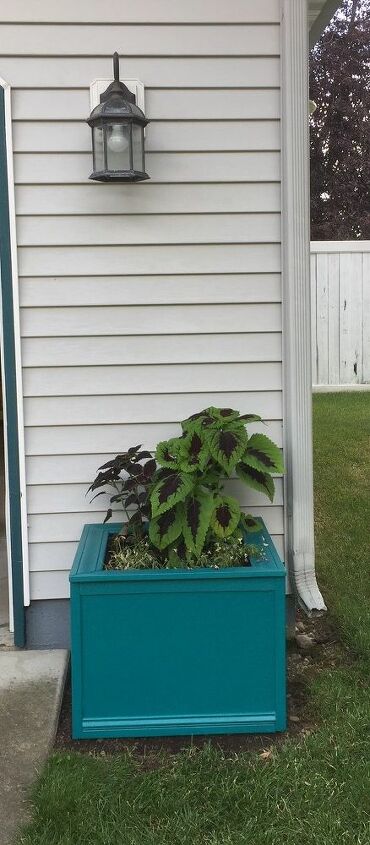
Time to remove the old planter box and install the new! I wasn't sure how difficult it would be to remove the old box so I took my crow bar with me to the front yard. I pulled on the front piece and it just fell off in my hands! I didn't even need the crowbar! When I tugged on the left side, all 3 sides raised off the ground so I just lifted it all in one piece. I removed the plastic since the new planter box was larger and I would need to add soil to what was already there.
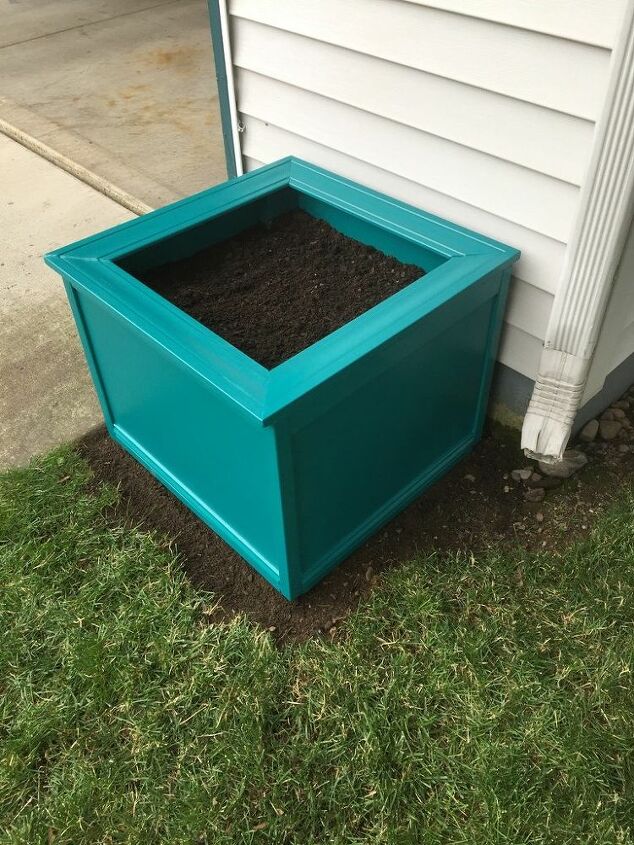
I carried the new planter out of the garage so I could set it over the soil. I was surprised that it was so much bigger than the last one! I had two bags of top soil and one of Miracle grow and used almost all of it. Before filling the new box with soil, I centered it on the wall and leveled it by placing a small wooden block under the front left leg. The ground slopes down from the house so I was surprised that only one leg needed leveling. I used landscape cloth between the soil and the sides of the planter to help protect the wood from moisture. Instead of attaching the landscape cloth to the wood before putting it around the existing soil, I just held it in place as I filled the box with soil. I stopped filling the new planter box about 2 1/2" from the top.
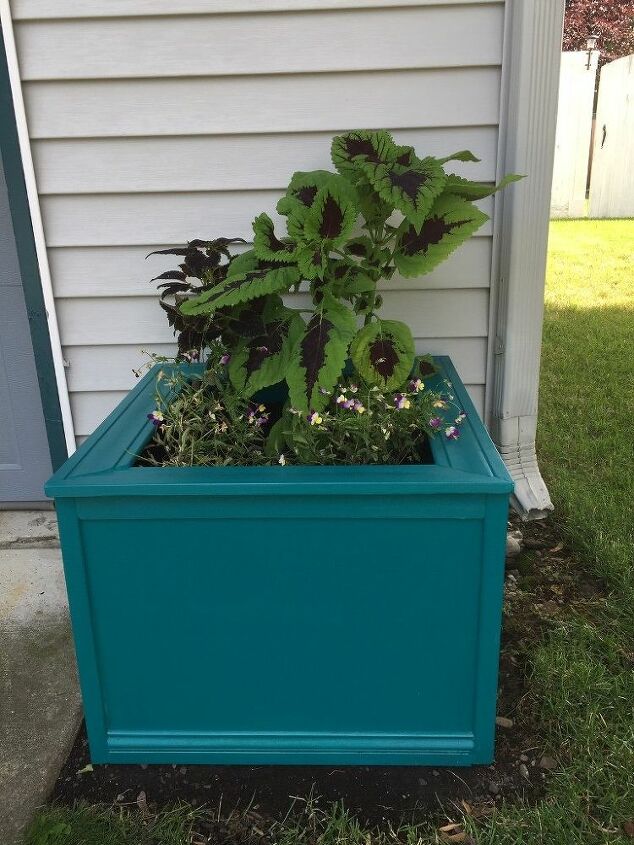
Time to fill this new little beauty with a few plants! Since I needed to raise the soil level in this planter box due to the larger size, I had to remove the small plants that were growing in the old planter so new ones will be needed. I wanted one with some height for this space and planned to go to the local nursery here in town to see what their selection was. Well, I found a couple of plants for this new planter! I bought two types of Coleus, brought them home and planted them. Then I realized that I could use a 3rd plant to provide a balanced look. Not wanting to go back to the nursery or wait (who wants to do THAT ?!), I found a little pansy growing in the backyard so I just transplanted that.
All three plants appear to love their new home!
Instructions:
- Measure and cut plywood using skill saw 4 pieces of 18" x 22"
- Cut four 19" pieces of treated 2" x 4" board to be used for the legs
- Using screws & drill, attach the plywood to the legs (see photos)
- Sand all rough edges using a sanding block or orbital sander
- Once the box has been assembled, attach trim using wood glue and nail gun
- 1" corner trim on all 4 corners 1/2" corner trim along the bottom on all 4 sides2" trim along the top on all 4 sides1" decorative trim above the 1/2" corner trim on all 4 sides
- Measure and cut 3" baseboard trim at a 45 degree angle to frame top of planter
- Attach 3" trim to top of planter box using wood glue and nail gun, lining up the angled sides
- Fill in all holes with wood putty
- Caulk all places where the wood is not flush
- Sand all areas with sanding block
- Apply paint using your choice of applicator
- Move planter to new location, fill with soil and plants
Comments
Join the conversation
-
Great Idea ! My next project ,thank you! ⭐️⭐️⭐️⭐️⭐️
looks beautiful.


Frequently asked questions
Have a question about this project?