


Raised Oak Leaf Clay Dish DIY
I recently made flowers using clay for the first time and really liked working with it! So naturally I looked on Pinterest for inspiration for other projects. I saw lots of ideas including dishes, bowls, magnets and jewelry to pin but nothing really piqued my interest.
I wanted to make a dish that looked different from the usual. And then, while perusing through one of my favorite online decor sites, I came across a lovely oak leaf dish. and had a light bulb moment!
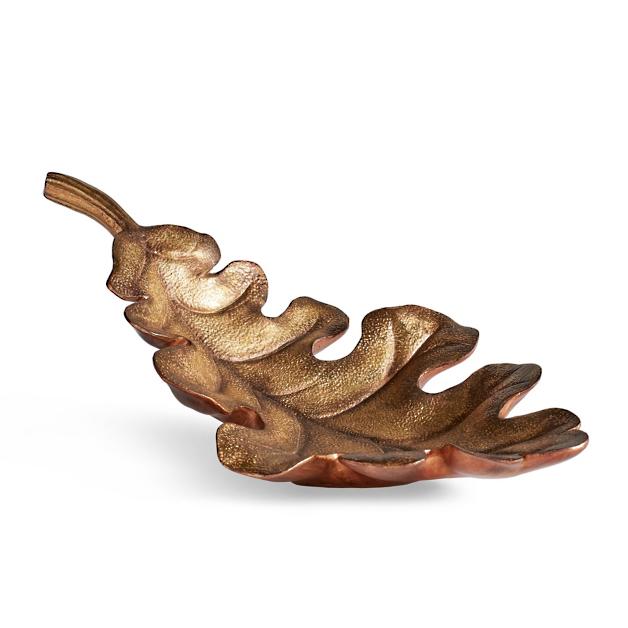
How easy would this be to re-create in clay - at least something similar! In fact, check out how easy it really was!
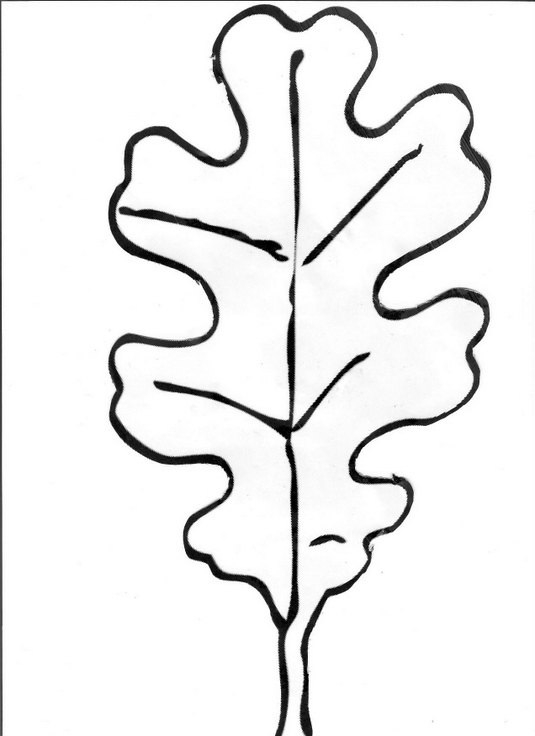
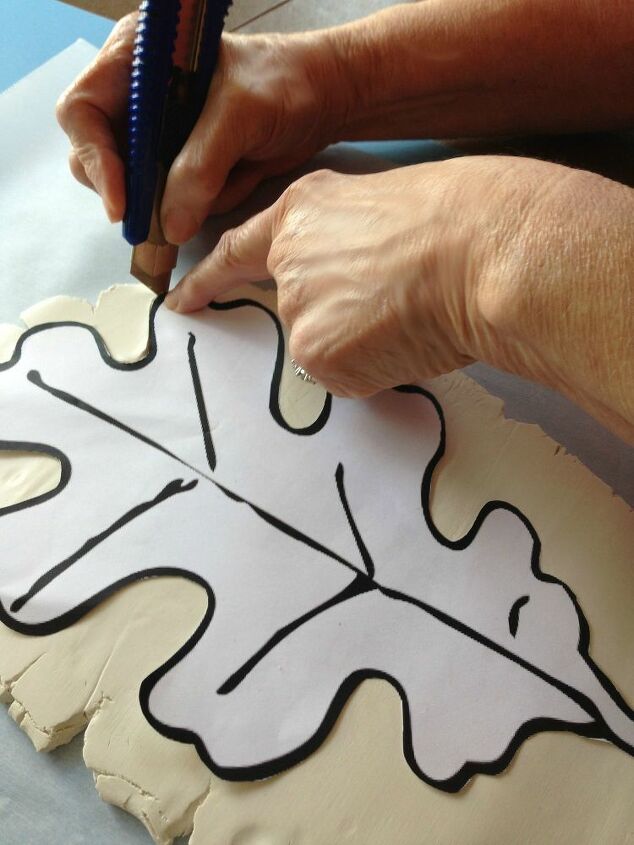
First, find a free pattern of a leaf online that would make a nice dish shape. Then, copy, print and cut it out!
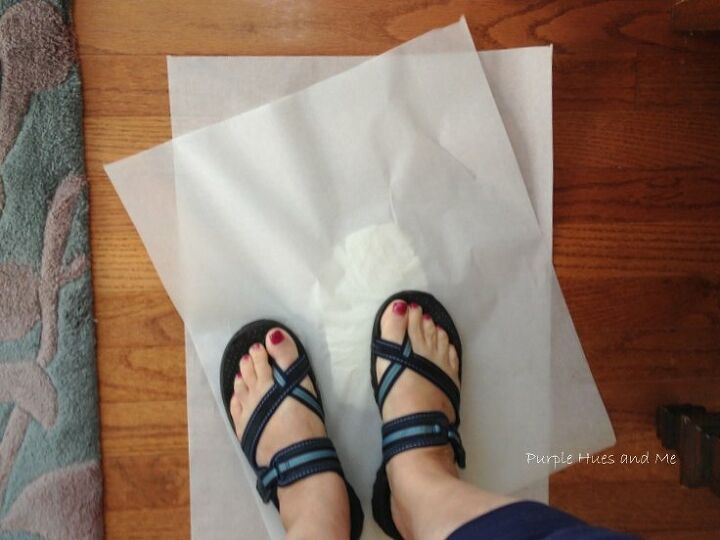
Next, get a block of oven bake clay to make the dish. I had some old clay in my stash that I wanted to use. But it was quite hard.
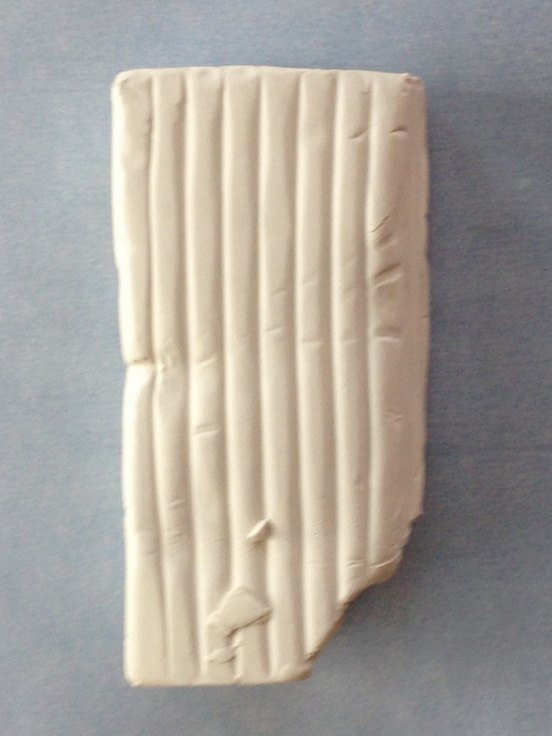
In fact, after trying to pound it with a hammer to make it soft, I had to put it between parchment paper to stomp on it to help get it pliable. And that worked somewhat!
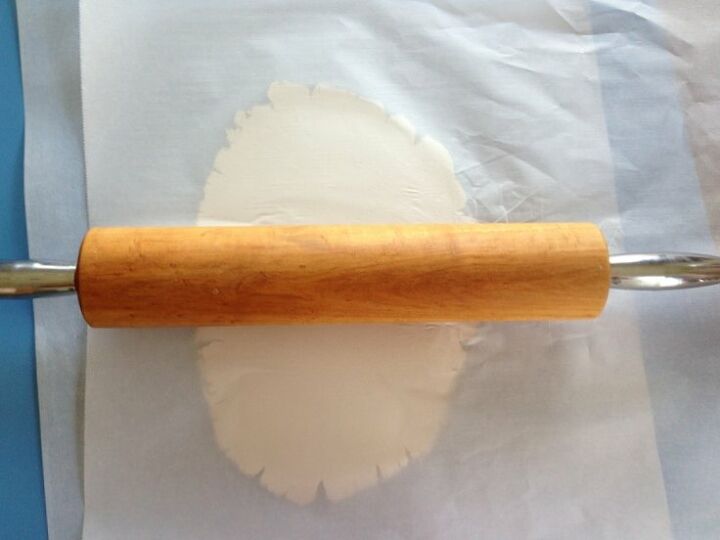
I was able to roll it out using a rolling pin - but still, it was hard rolling and had to ask hubby to help with that!
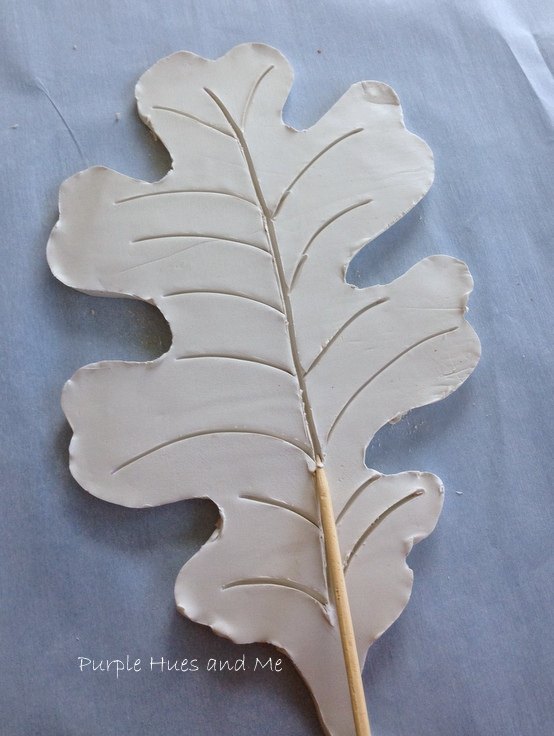
Next, lay the leaf template down on the flatten clay and start cutting it out using a craft knife.
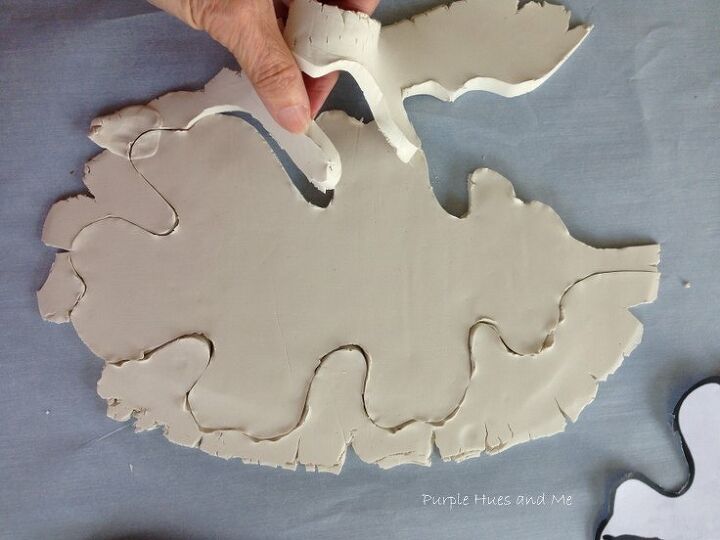
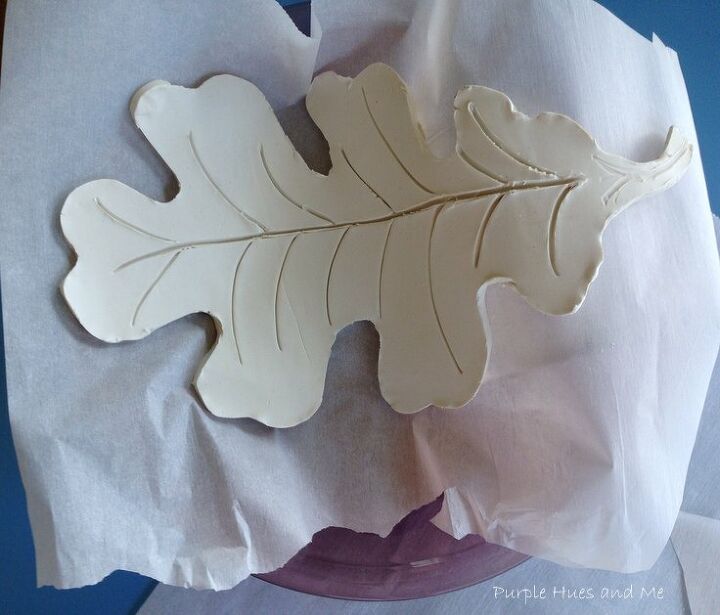
I was pleasantly surprised how easy it was to remove the excess clay from the leaf pattern.
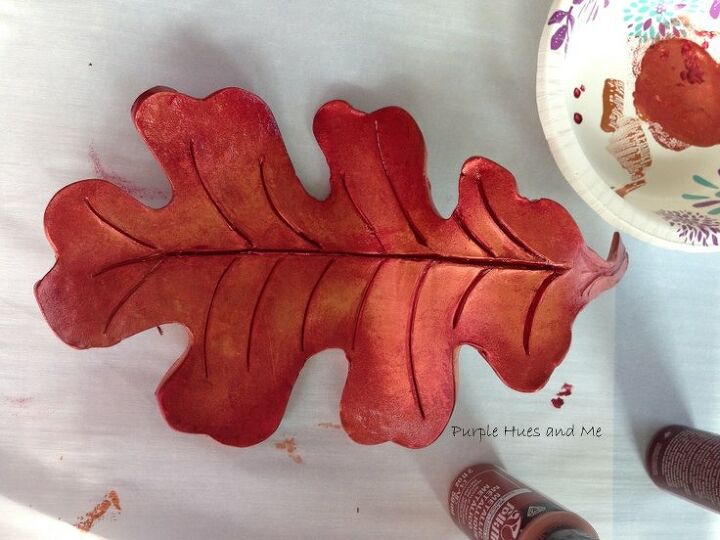
Then use a wooden skewer to add vein lines to the leaf.
Next, time to bake! Since the dish that inspired me was curved with a flat base, I used a small glass to lay the leaf on to curve the clay dish inside the glass bowl. Be sure to place parchment paper down on the glass bowl first to prevent sticking. Follow the package for baking - 275 degrees for 15 minutes and then let cool off completely.
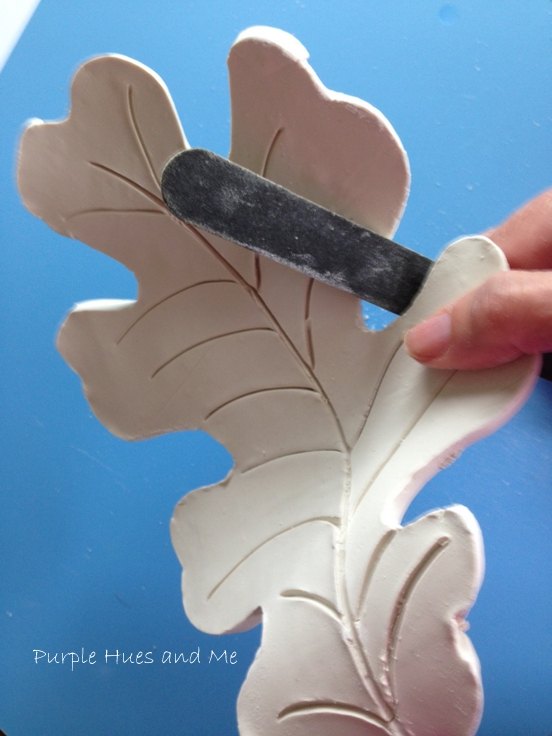
I left the oven baked clay dish out over night and then used an emery board to help smooth and round out all of the edges.
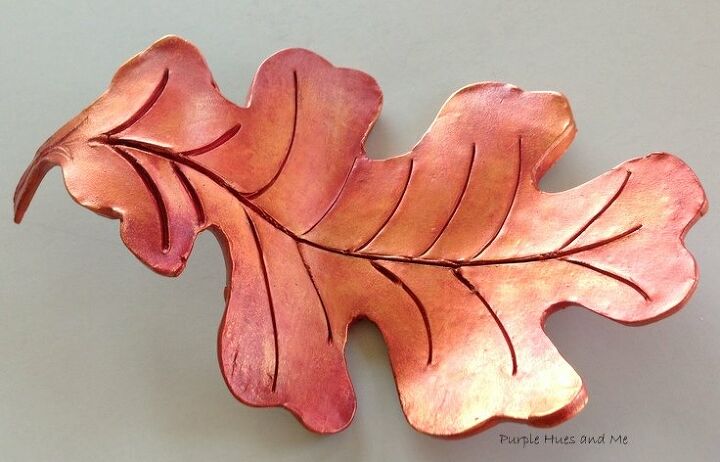
To paint the dish, I did a bit of research on how to paint polymer clay and read never to use spray paint or nail polish on clay. The chemicals in the spray can and polish will eventually break down the clay and destroy the item. So I painted the leaf veins a berry metallic color using acrylic craft paint.
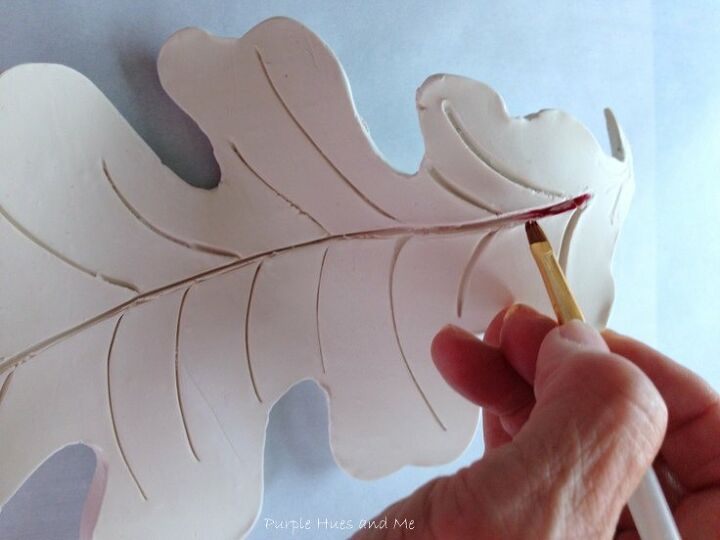
Then used a copper metallic to paint the leaf all over. I also blended the berry and copper colors together and added the mix around the edge areas for a shaded look.
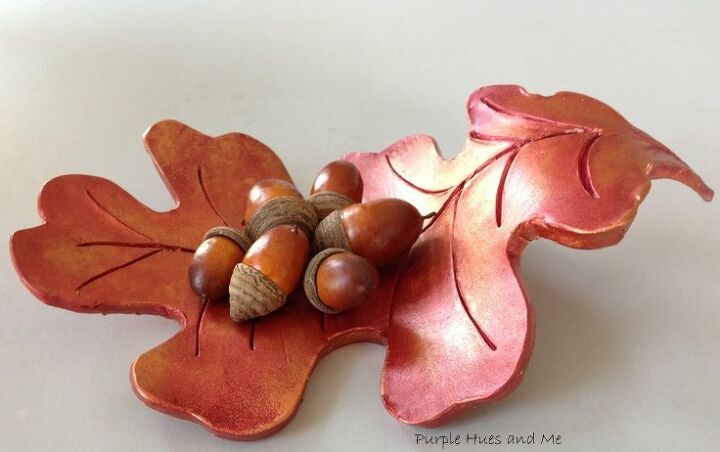
And finally, sealed the leaf dish with mod podge.
Don't you just love how this turned out! And it was really that easy! How's this for a unique clay dish!
Resources for this project:
See all materials


Comments
Join the conversation
-
Gorgeous! Great paint job! Looks sooo realistic! I love it sooo much! ( :
-
Many thanks, Tracy! You made my day, week!💜


Frequently asked questions
Have a question about this project?
Love this idea for adults and kids! Different sizes and colors!! Congrats on the great idea!
my real question is what kind of sandals are your wearing??? I love them!
Is the clay and all the finishes you used food safe? It’s beautiful, and I have that clay and never used it, so inspirational!
How much clay fo i need for this leaf and what was the measurements of the leaf