


Make A Beautiful Removable Bathtub Cover
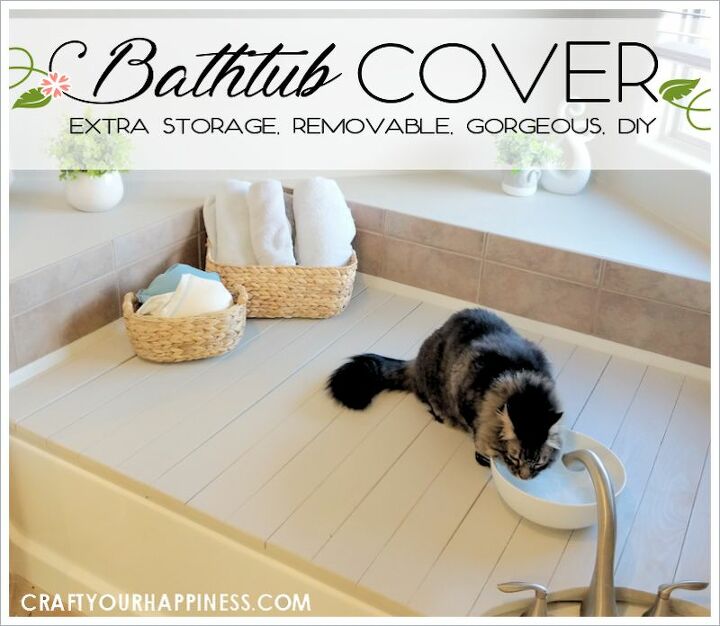
If you have a tub or garden tub but are not a "bathtub" kinda person this project might be for you! Cover it with this beautiful wood cover. It can be removed if you use your tub now and then or you can use the tub for storage and keep it in place. Makes a nice sitting place too while your in the bathroom! We did it on a garden tub but it would be even easier or a regular one. Below is a quick summary as there are quite a few more steps than would fit on this post. SEE ALL PHOTOS AND DIRECTIONS HERE
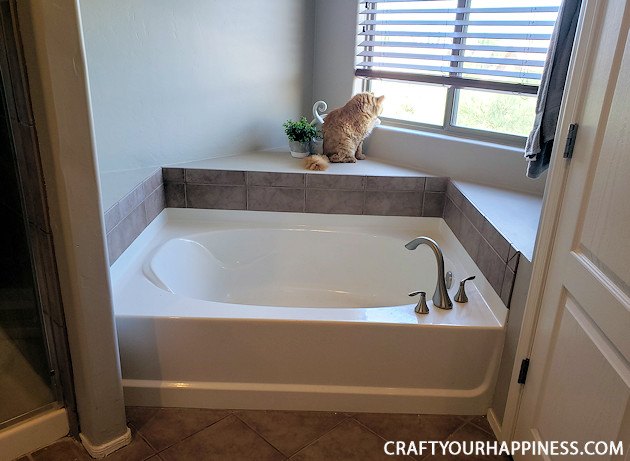
OK people... this is going to be different for each of your own specific tubs so we're giving general info on how we did ours. This post shows a few of the steps. Check our site link within this post to get full details. This was our garden tub. As we don't use tubs it was just taking up space and always full of cat hair. (We're not tub people, but we're cat people.) We came up with idea of a removable cover.
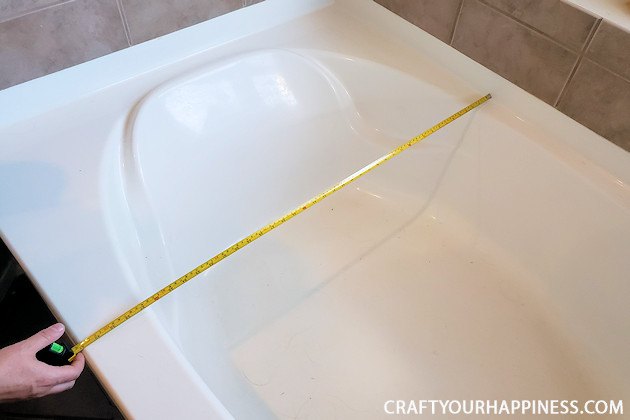
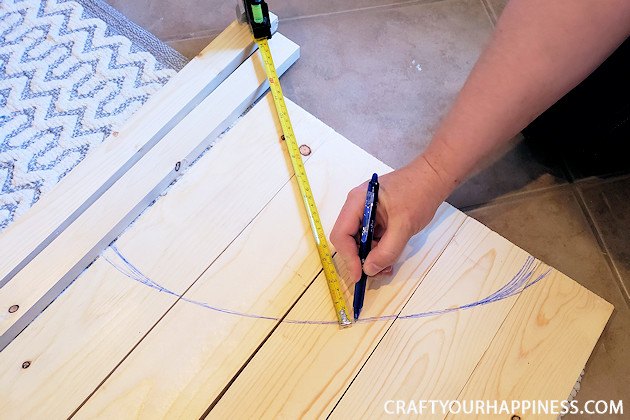
First we measured all directions.
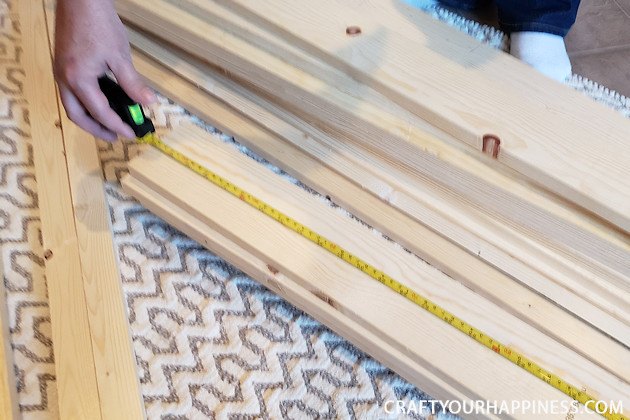
We chose to use cheap pine boards 3.5″ wide and cut to the width of the bathtub… Enough pieces to go across the top..
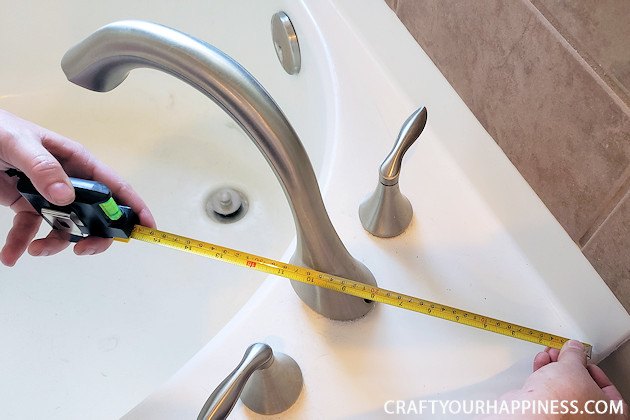
Because our faucet was mounted to the tub itself, we had to measure around it to cut out the space. If your faucets are wall-mounted, simply skip this step.
After cutting our main boards we used a jigsaw to cut the space for the faucet.
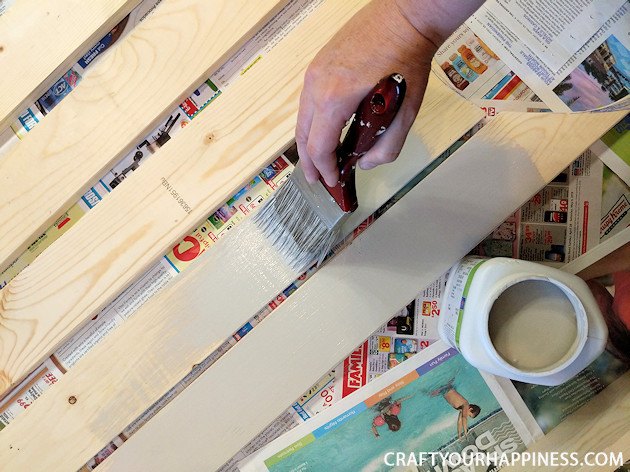
Once the sanding was done we painted them.

Once the paint is dry, do a dry-fit of your work and line it up to make sure everything looks right.
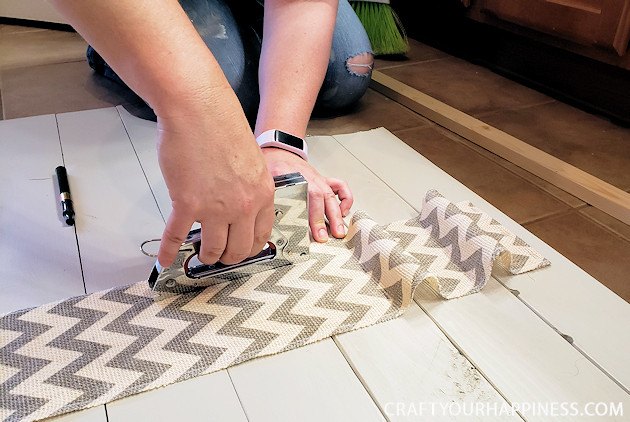
For convenience when removing, we opted to string our panels together with some heavy duty fabric. This is completely optional and, as we discovered, would work better for a smaller, standard size bathtub. The amount of wood needed for a garden tub was a little too heavy and cumbersome for this approach.
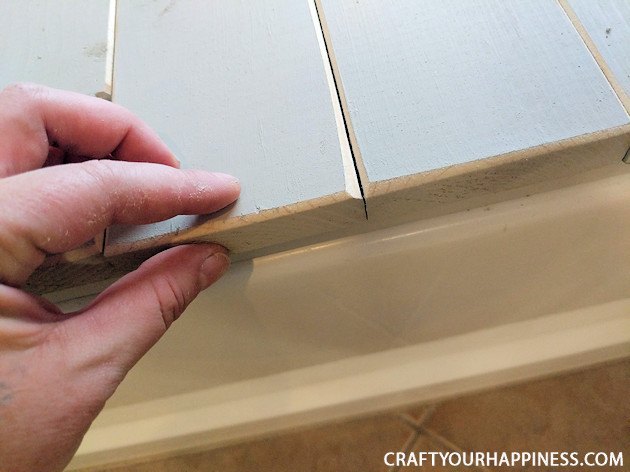
We also chose to sand ALL of the edges of each board at an angle, taking off the sharp corners. This really is worth the extra 15 minutes and will give your project a much more finished look, so we highly recommend it.
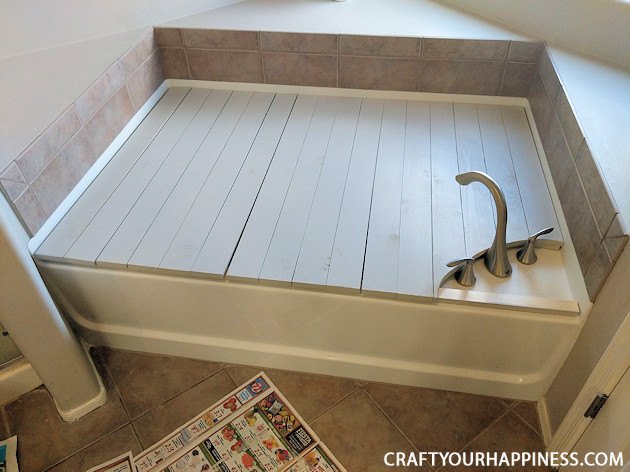
Because we had the back of the tub seat to deal with, we placed out 1″x 2″ boards around the frame of the tub and then unrolled our wooden topper. This gave us a level surface that we were happy with.
Resources for this project:
See all materials


Comments
Join the conversation
-
I have the same tub n the same problem with the cat hair. Great idea.
-
Due to fibromyalgia and RA, I can't soak in the tub, although I want to....the tub in the master bath in the house we just moved into is just taking up space, it's not in the budget to have the tub removed and a larger showering area at this time. This is a perfect solution, thank you for sharing!!!


Frequently asked questions
Have a question about this project?
How to make your bathtub look nice again?
It looks like a beautiful tub to me....something I would use......maybe not something I could get out of., since I Need that bar for help?
If you aren't going to use the tub, why not remove it? May for resell?