


Clean, Modern Console Table

Console tables come in all sorts of shapes and designs. From spindle turned legs to rustic or old farmhouse styles, there are a lot of options out there. For those of you, like me, who prefer a simple, modern option with clean lines - this DIY is about as easy as it gets. It requires only minimal materials and very few tools to complete.
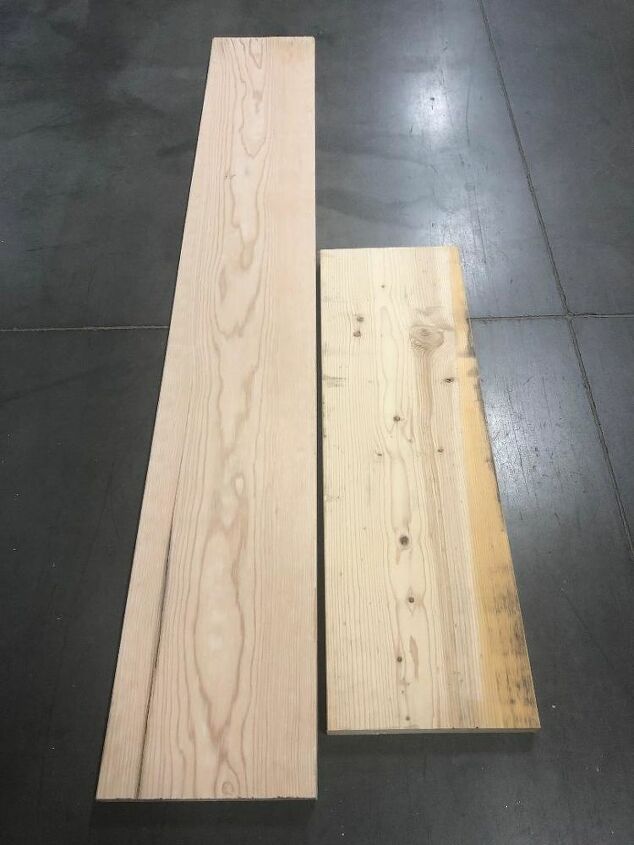
Start by purchasing 2x12 lumber - the length depends on how long you want to make your table. This design is really adaptable to shorter or longer versions. For our console table, I bought a 12 foot 2x12 from Home Depot and cut 5 feet off of one end.
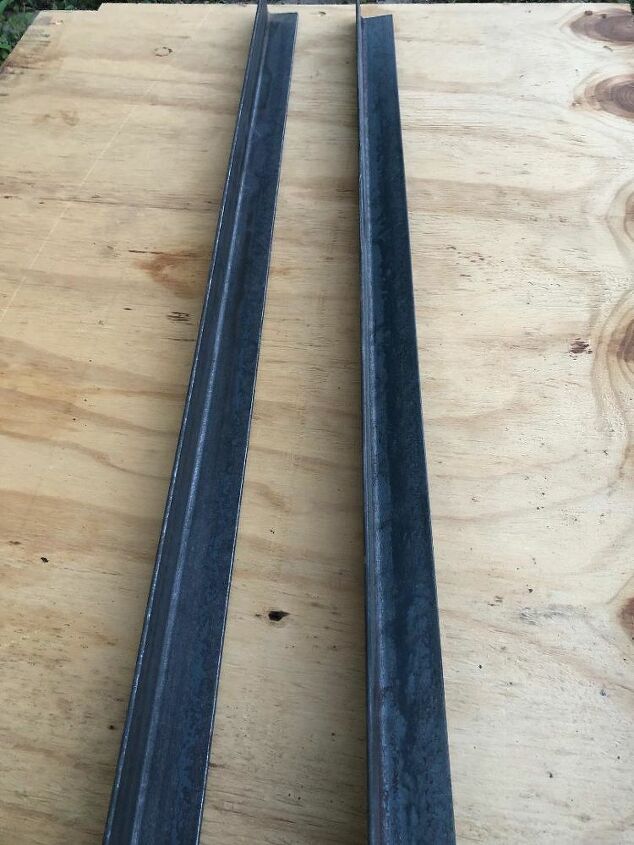
You'll also need to purchase angle irons for your legs. Again, you can easily make your table shorter if you'd like, but I went with 1 1/2" x 36" angle irons.
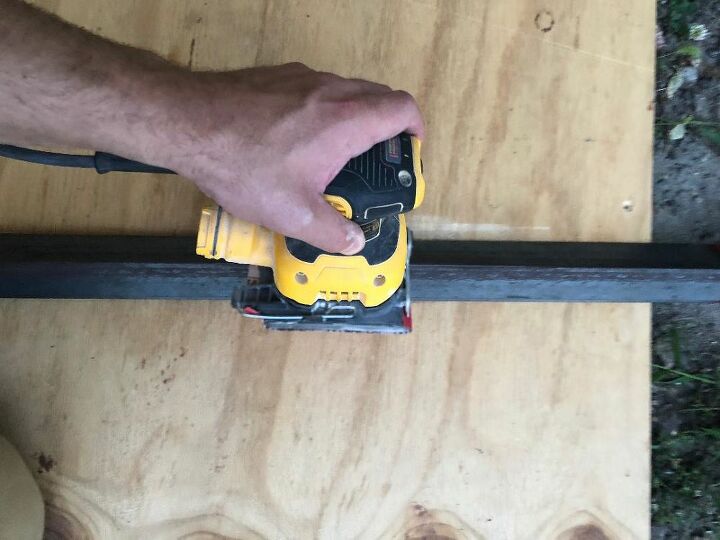
Now that materials are purchased, I started by working on the table legs. Clean up the angle irons and prepare them for painting by sanding them down (I used medium grit sandpaper) and wiping them down with a rag and some Mineral Spirits.
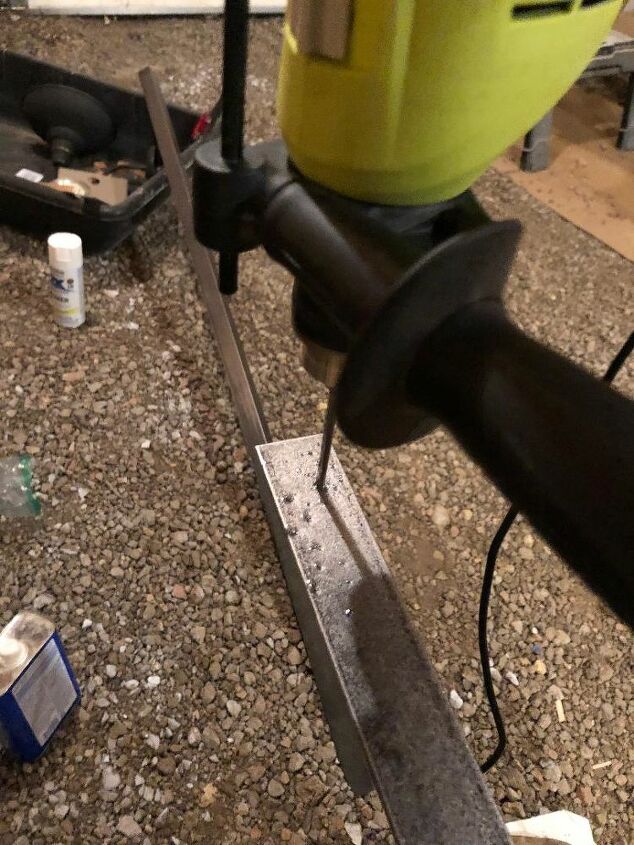
Next, drill 3/16" holes where you'll use screws to fasten those angle irons.
On the two front legs, I drilled 4 holes all on 1 side of the angle iron. Drill them 3/4", 3 1/2", 7" and 9 3/4" from the end. I drilled all 4 holes on one side so that no screws would be visible on the front side of the table.
On the two back legs, I drilled holes on one side at 3/4" and 9 3/4". On the other side of the back legs, I drilled holes at 3 1/2" and 7".
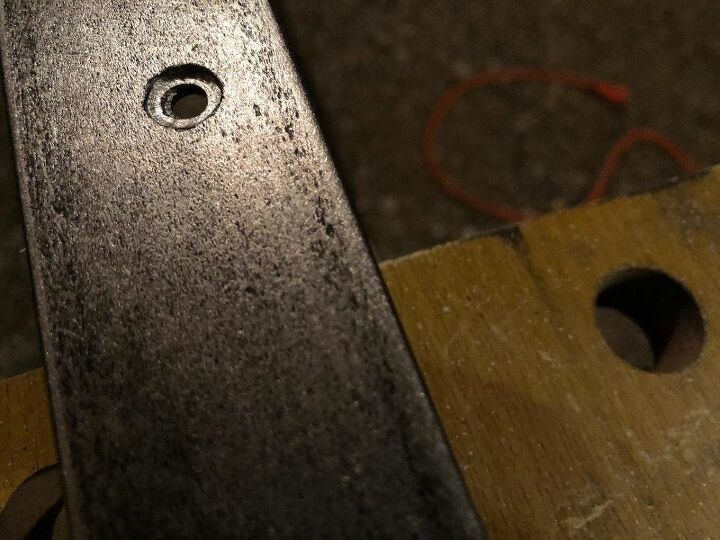
I used a 3/8" bit to countersink each of the holes so the screw heads will sit flush with the outside of the angle iron.
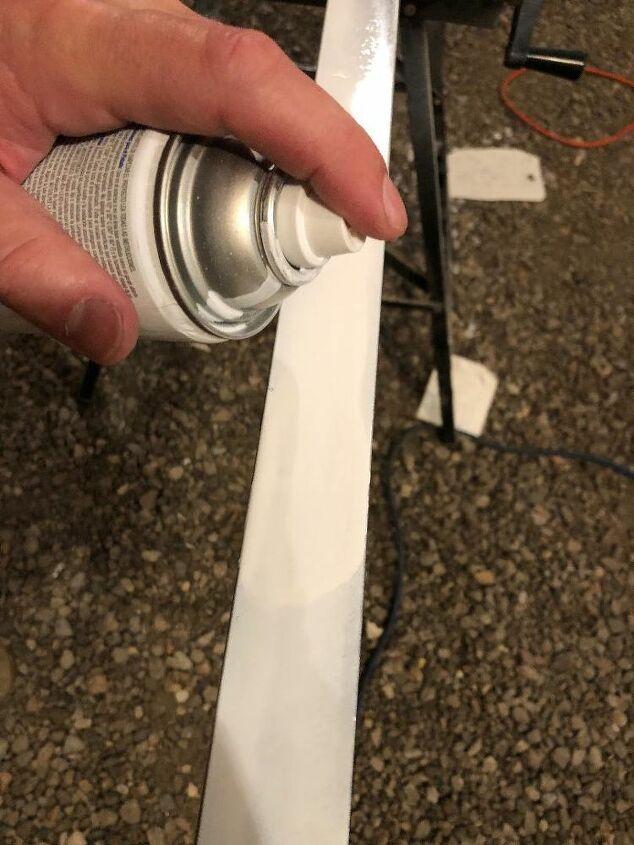
After your holes are drilled, spray the angle irons with primer and then the color and finish of your choice. I went with gloss white.
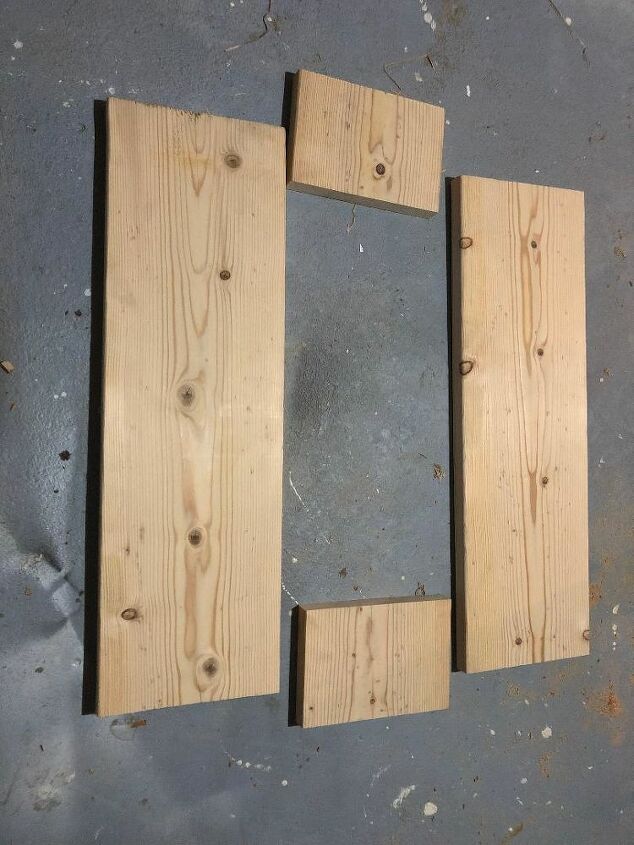
Between coats of primer and paint, I started working on the wood body of the table. Start by cutting your four pieces to length. I came up with the sizes for our console table based on the space we wanted to fill on our wall. I cut the top and bottom pieces to 51" and the side pieces to 7 3/4". Keep in mind, if you alter the size of your side pieces, it will change your hole locations on the angle irons.
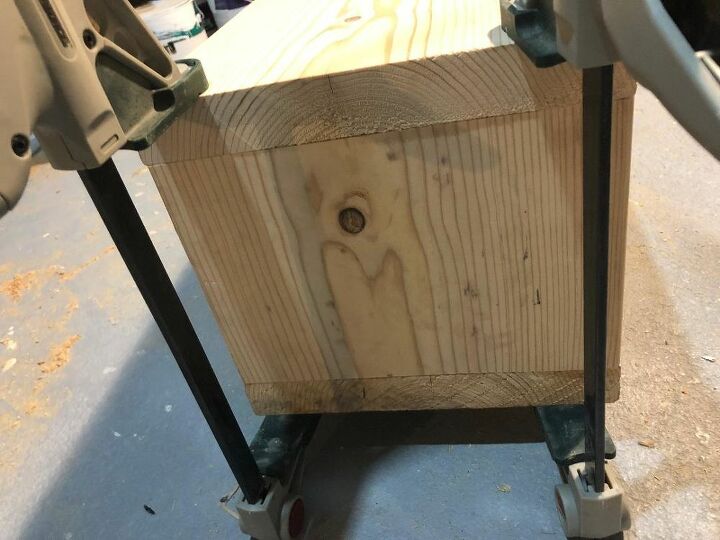
Glue, clamp and screw the wood box part of your table together.
I placed four 2 1/2" screws in the bottom of each side (where they won't be seen anyway) and then toenailed a 2 1/2" screw on each top corner where it will eventually be covered up by the table leg.
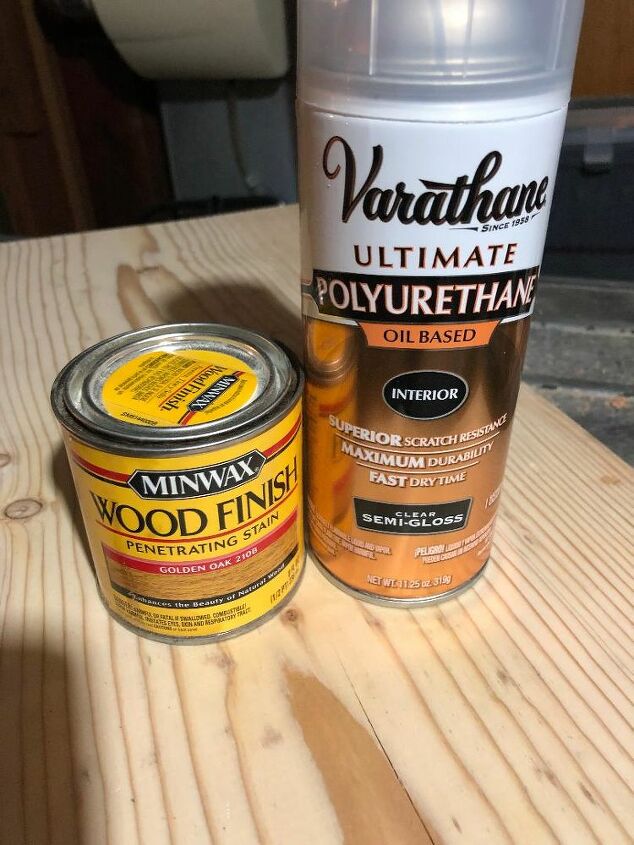
Next - sand, stain and apply polyurethane. I used golden oak stain and a spray polyurethane. After the urethane dries, I recommend doing a very light sanding with very fine grit sandpaper.
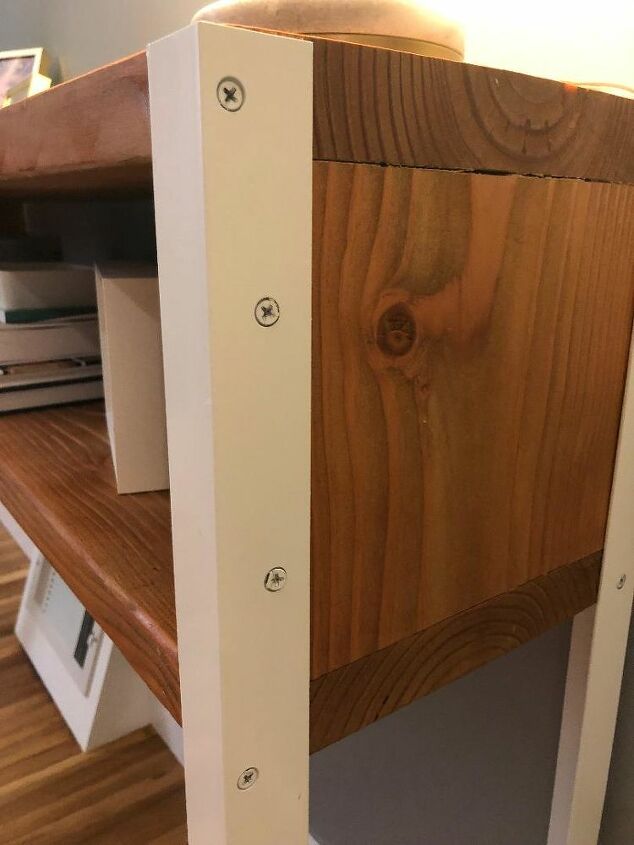
Lastly, attach your table legs. I used 1" screws and painted the screw heads to match the table legs. Screw on your front legs with the screwless side of the angle iron facing forward.
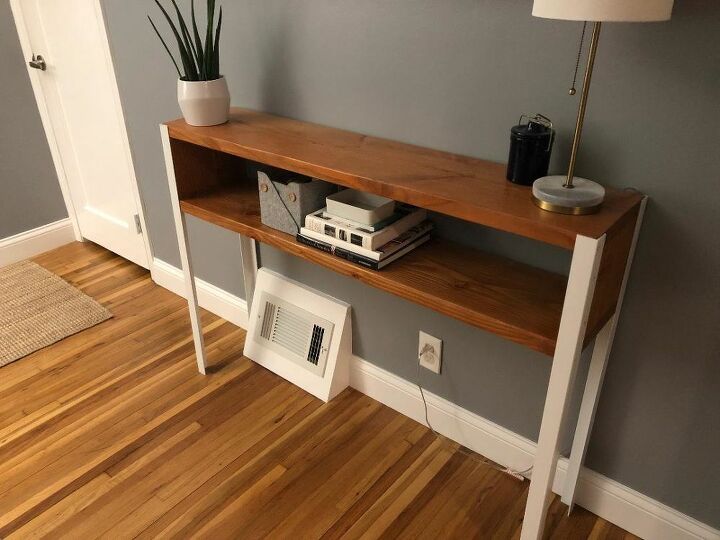
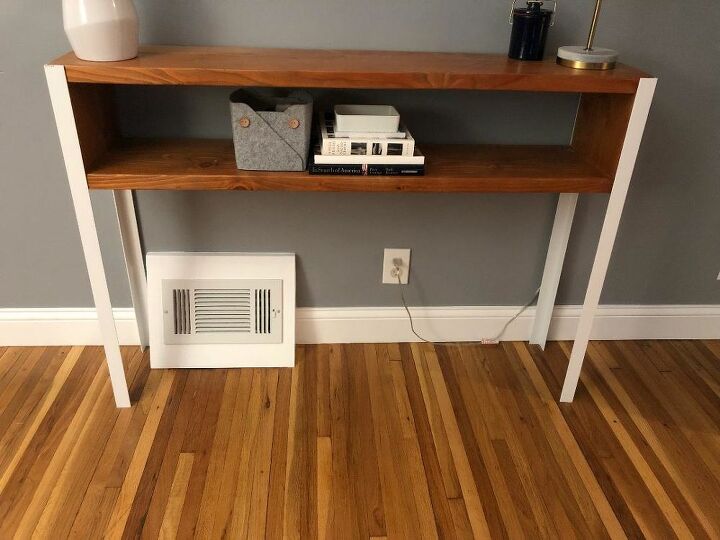
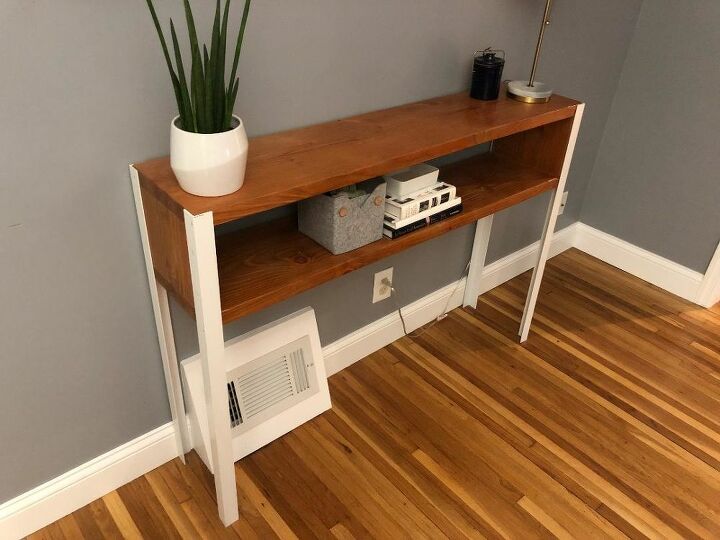
And there you have it! Angle irons and 2x12s is all it takes to make your own clean, modern console table. Follow me on Instagram at @woodyworking for more simple woodworking DIY projects.
Comments
Join the conversation
-
Great
-
This one is even better than your coffee table.


Frequently asked questions
Have a question about this project?
Do you think this technique would work for an outdoor chair ie would the joins be strong enough for someone to sit on?