


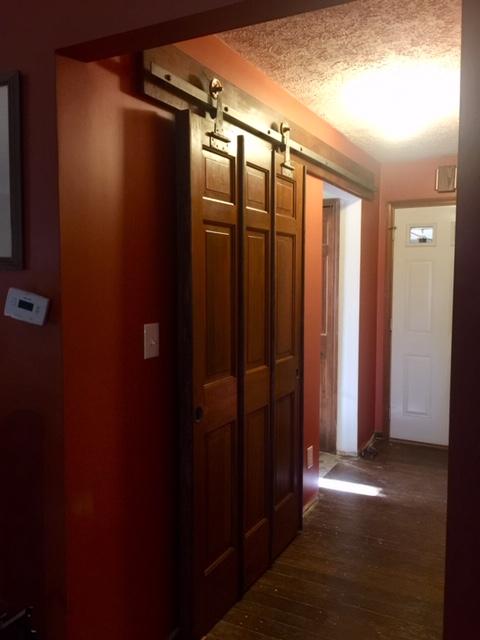
Repurposing Doors Into a Sliding Door

A relative recently experienced a health problem that resulted in them requiring a wheel chair. They remodeled a bathroom to make it handicap accessible. They relocated the toilet, switched out the vanity for a sink, and widened the doorway. They also widen the doorway to an adjacent laundry room to allow access to some clothes storage.
When they widen the doorways they also removed another door that was in the hallway and removed all the door trim, casings, and jams for all three doors. While all the re-construction was being done I helped out by making a sliding door that would work as a both the bathroom door and the laundry room door.
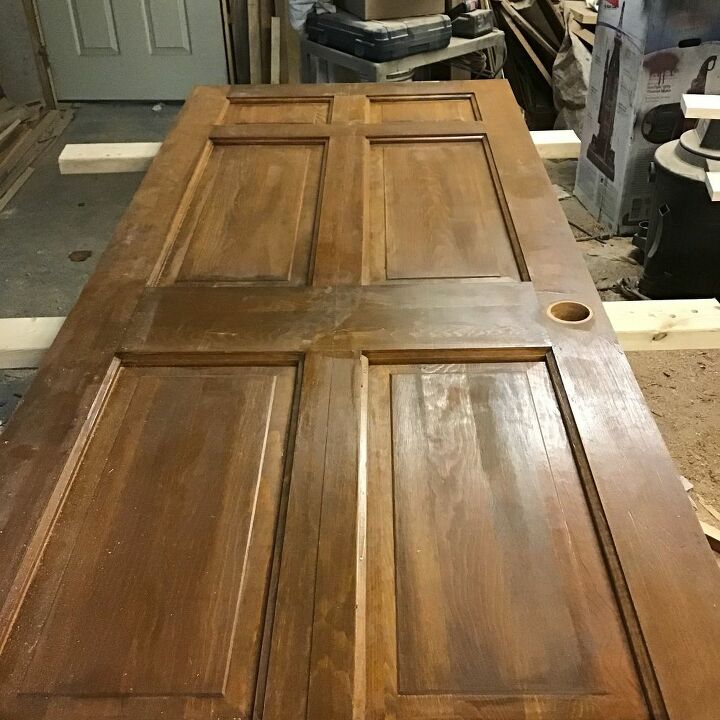
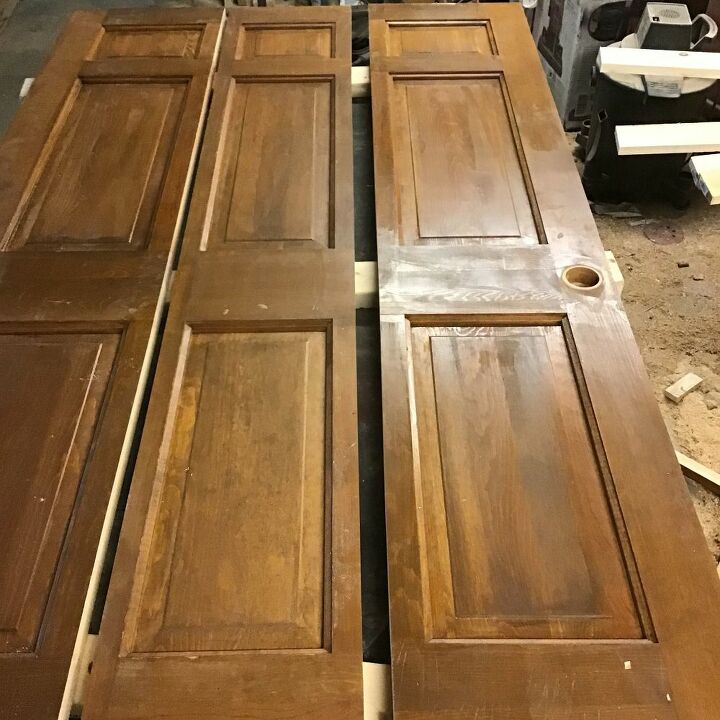
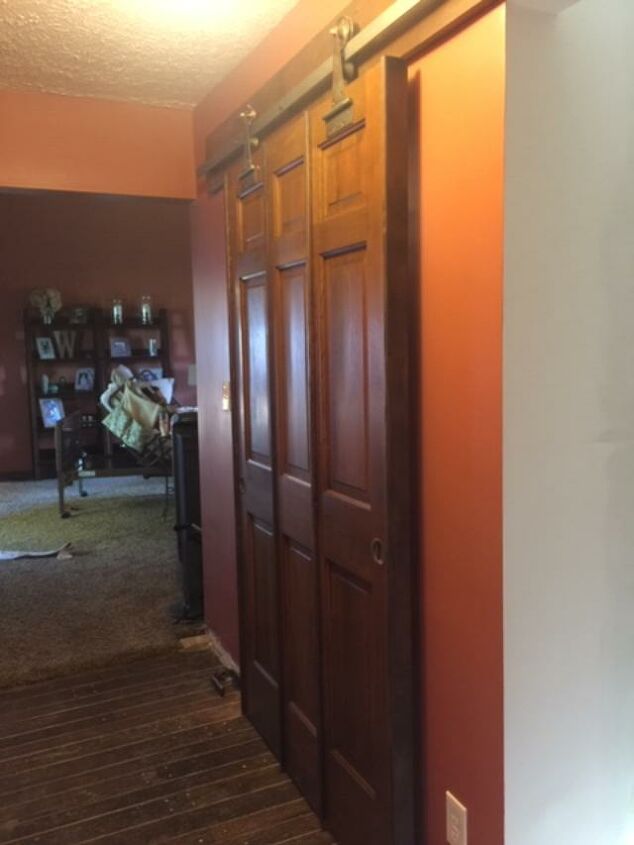
I decided to cut two 30” doors in half and combine one and a half door to make a slider that ended up a little over 45” wide. To join the sections I made some divider strips by grooving one by three pine boards with multiple cuts on my table saw. I apologize for failing to take photo , but these divider strips also worked as templates to drill matching 1/2” holes so the sections could be doweled and glued together. This essential made the three sections one door.
I did add: some metal bracing at the top and bottom edges for additional stability; and nailed on some end caps that matched the divider strips.
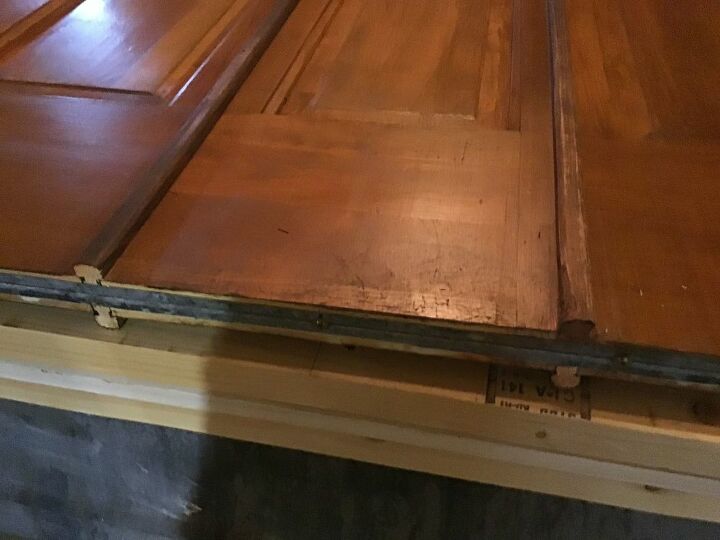
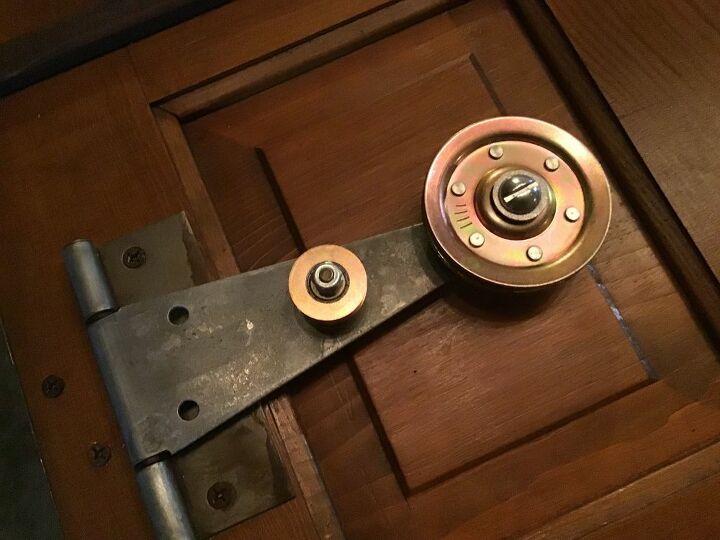
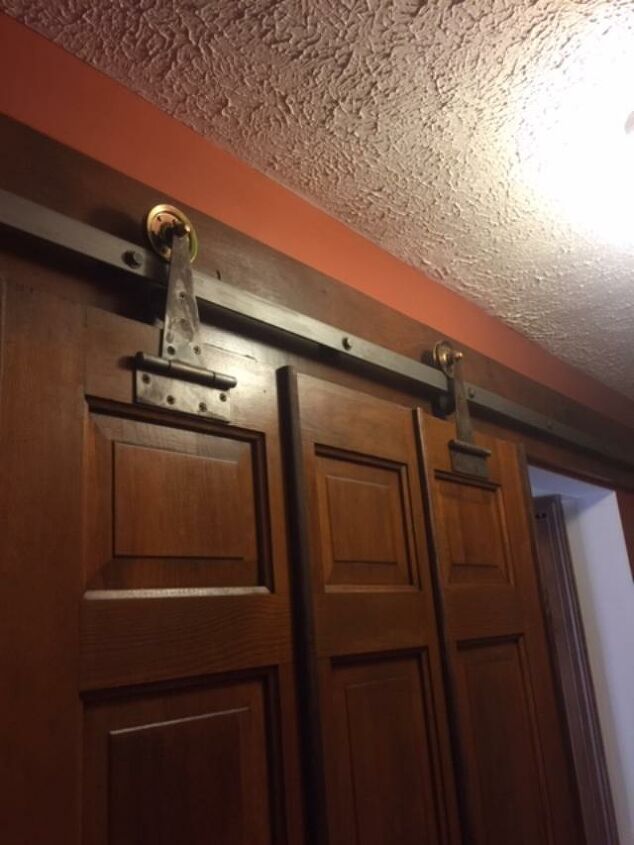
Because the track mechanism would need to be about 10 foot long. I decided to fabricate rather than buy the sliding door hardware. The track (3/16” by 1.5” by 10 foot cold rolled steel) was purchased at a local steel supply house for about $30. Three eights inch diameter holes were drilled at 16” intervals. The 10’ four quarter hickory header was left over from a previous project.https://www.hometalk.com/diy/kitchen-dining/kitchen-dining-furniture/an-extremely-large-dining-table-33200524
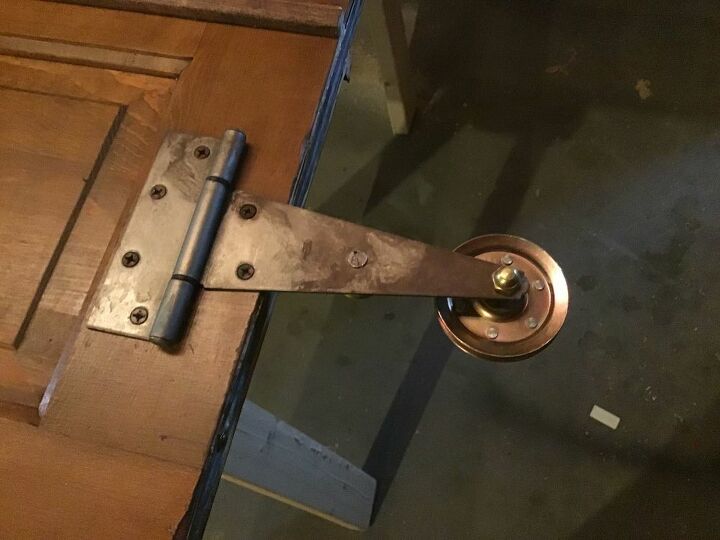
The additional hardware included tee-hinges, rollers (actually garage door cable pulleys), lag screws, washers, nuts and spacers. The spacers between the track and header were galvanized pipe reducers (1/4 “to 3/8”). They had to be drilled ever so slightly to accommodate the 3/8" lags. All the galvanized or zinc coatings were removed with muriatic acid. The parts were then throughly rinsed, dried/heated, and coated with polyurethane varnish. This resulted in almost all the hardware (except for the brass pulleys which were left as-is) having a raw steel look.
Finishes:
The hickory header and divider strips were stained and lightly over-sprayed with Rustoleum's warm carmel paint to match the door color. The doors were rejuvenated with Howard’s Restore-a-Finish.
Minor details-
- The small roller wheel you can see in one of the photos was intended to prevent the door from being lifted off the track. Ultimately it was slightly too small and was replace with a wooden roller.
- Eight 3/8" lag bolts attach the track. Four 5" lags secure the track to the header and the header to the wall. Four 2.5" lags finish securing the track to the header.
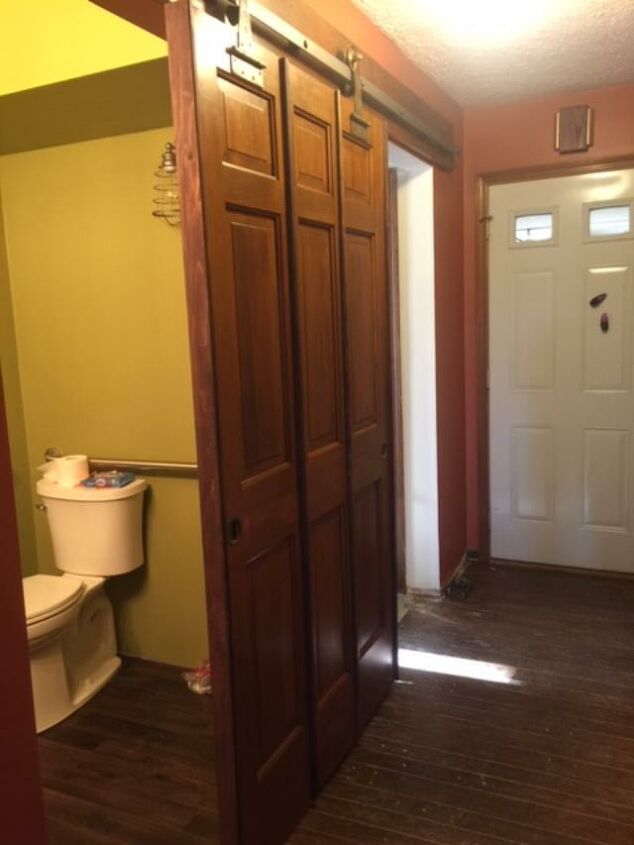
My two older brothers help me install the door and we were all pleasantly surprised how smoothly it went. I engineered some stops that also serve as guides. I plan to return and install simpler stops that prevent the door from going off the ends of the track. Guides are not really necessary.
Thanks for sticking with this posting and I hope it makes sense.
Resources for this project:
See all materials


Comments
Join the conversation
-
Nice job. Not some silly looking farmhouse door in a 70’s track house. You mentioned no guides, I assume at bottom. Stayed at airBnb with sliding door to bathroom. Door was very light and bellowed when used (I feared it would fall off track) Not a great place to not have privacy
-
Master at work for certain! Fantastic job!


Frequently asked questions
Have a question about this project?
What are your plans to cover the doorknob holes?
I love this!!! One question, I’ve seen some “barn doors” that were used for bathroom doors but the doors always had a 1/4-1/2 gap between the door and the frame. Were you able to make your door more snug to the wall?? I’f so how? I really want to do this but don’t want tge gap