


Make A Gorgeous Fall Outdoor Floral Arrangement Using Four Easy Steps
Easy
I love decorating for fall! I love the beautiful colours!
Every year I create a fall outdoor arrangement for the front walkway. I use a very simple four step process to make an arrangement that is artistic and balanced. It's very easy to follow and you can do it too!
Every year I create a fall outdoor arrangement for the front walkway. I use a very simple four step process to make an arrangement that is artistic and balanced. It's very easy to follow and you can do it too!
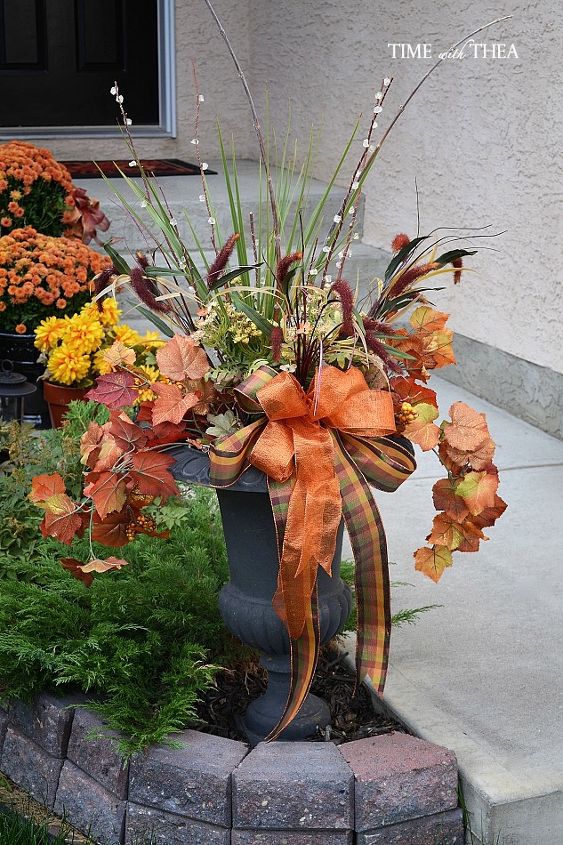
I made this fall outdoor floral arrangement following four easy steps: THRILLER, SPILLER, FILLER, EMBELLISHMENT.
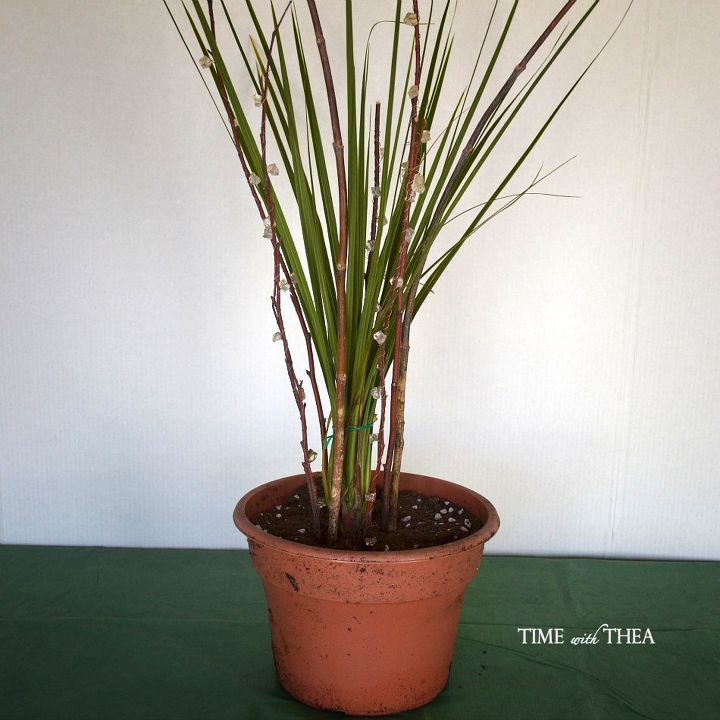
The first step is to fill your pot with soil and add your THRILLER in the middle. These are the tall pieces that will stand out in the centre. I used green dracena remaining from a summer container garden I had created. I also used some tall branches that I recycled from some tree trimming and some that I purchased on sale. By the way I make my arrangements in a plastic pot that I just insert into this black urn.
Here are some other THRILLERS I added to the centre.
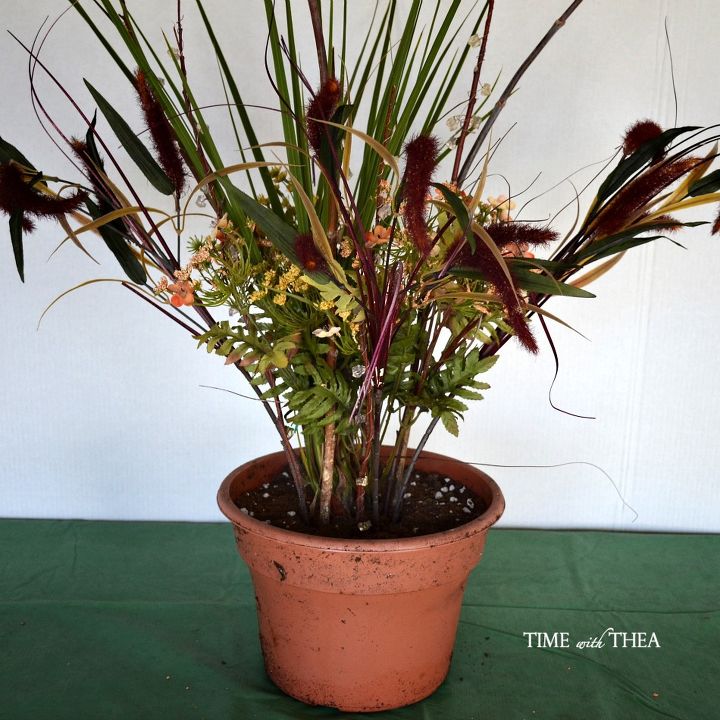
The second step is to add the SPILLER. These are the pieces that spill or cascade over the edge of the pot. For this arrangement I just have two long curved floral sprays that I bought for half price at an end of season sale.
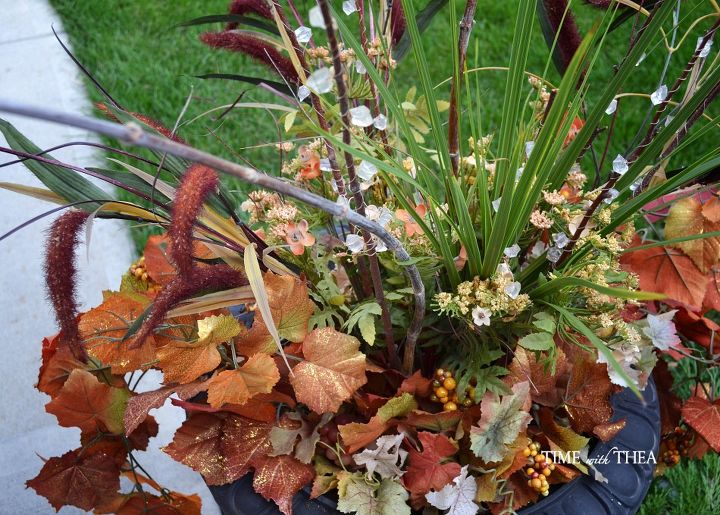
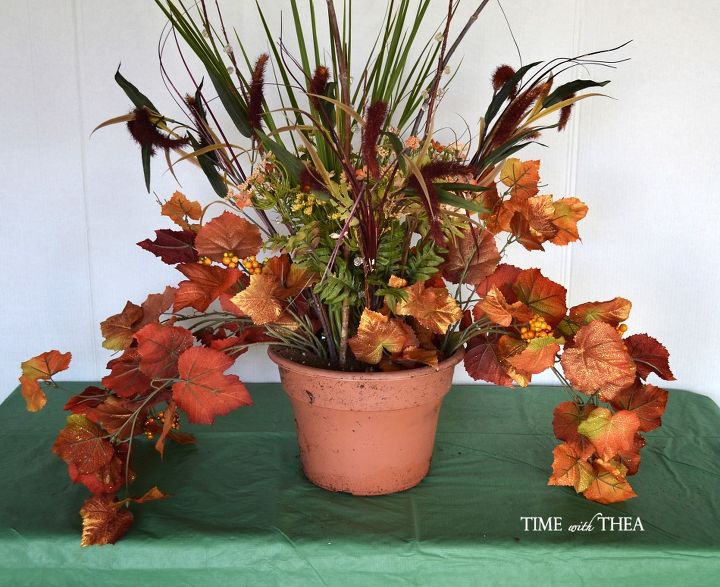
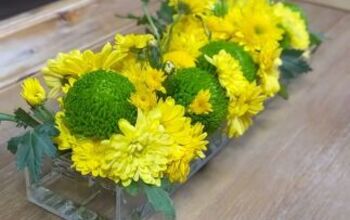
The third step is to add the FILLER. These floral pieces can be leaves and floral sprays. But you want them to be shorter than the taller thrillers and fill in the middle and base of the arrangement. I try to stay within a common colour theme but it is nice to add different pieces with different textures.
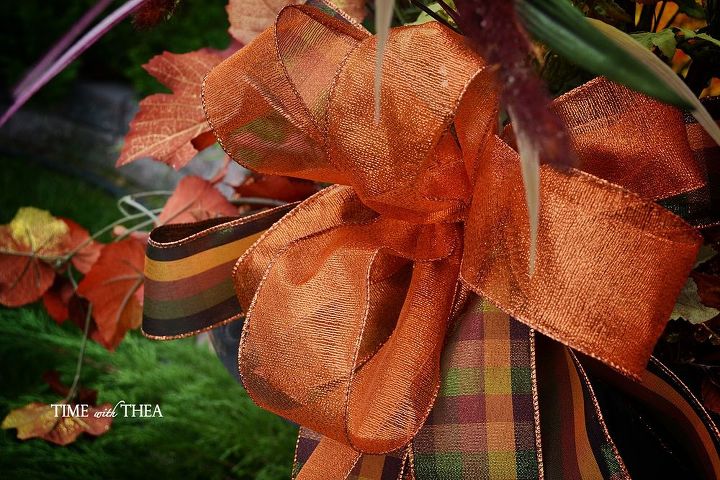
The last step is to add an EMBELLISHMENT. I made this large double bow using wired ribbon in coordinating colours and inserted it in the front.
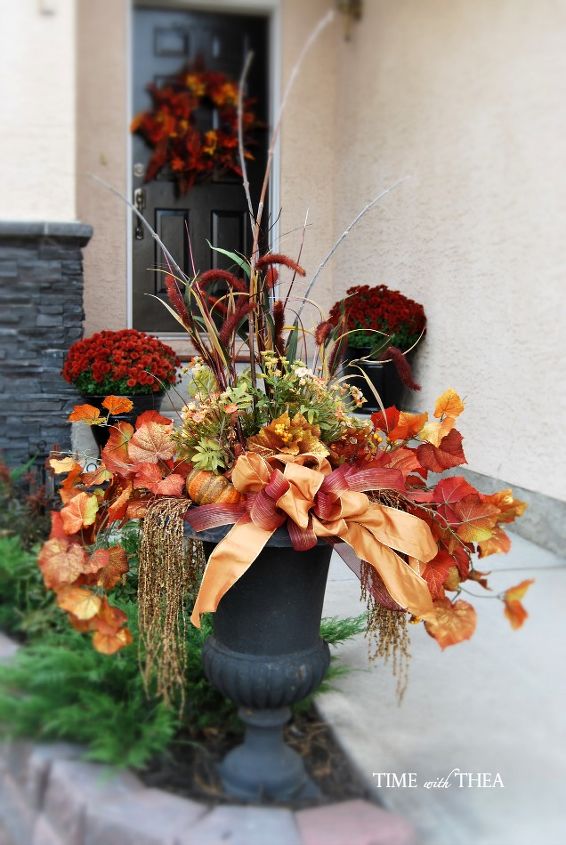
I collected the pieces for this arrangement over the year trying to collect items from nature, using what I already had and keeping an eye out for sales to keep the cost down. This is the fourth year that I have made this arrangement and each year it looks a little bit different. Here's a photograph of one I made a couple of years ago.

Want more details about this and other DIY projects? Check out my blog post!
Comments
Join the conversation
4 of 12 comments
-
Love it and thank you for the 4 memorable steps - i'm sure I'll do a better job. I'm going to try to make something for our farm gate!
-
It's beautiful but without a covering of the porch how does that ribbon hold up when it rains? :*( At least it didn't LOOK like it was under the porch?


Frequently asked questions
Have a question about this project?