


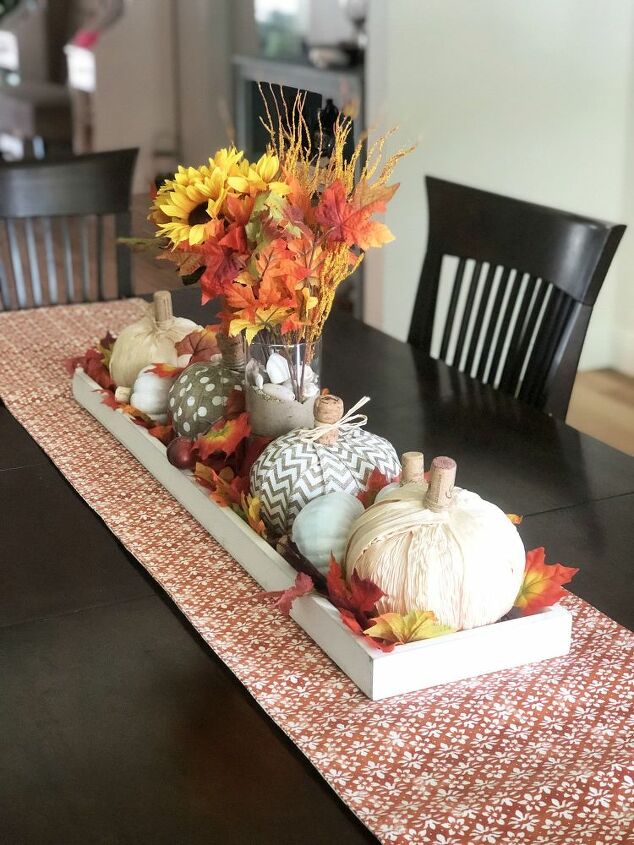
DIY Dollar Store Pumpkins Makeover
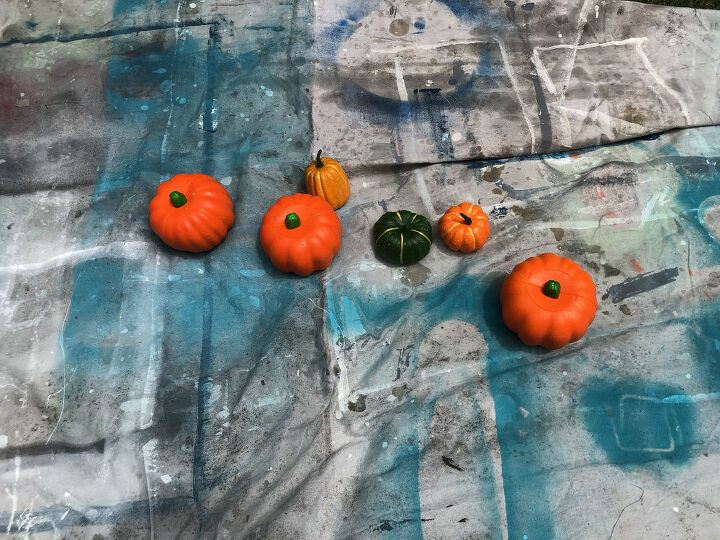
Even though we don’t get Fall in Southwest Florida where I live, it doesn’t mean I can’t decorate a little and pretend it is Fall. It’s always warm here and will remain approximately 92 degrees until probably October. Then the temps will go down into the 80’s for our Winter. But, I’m not complaining. I’d take this over a cold winter any day. Anyway, I have been seeing all this cute Fall Decor all over Instagram and online and figured I needed to join in on the fun. I headed to the Dollar Tree near my house to stock up on pumpkins that I planned to transform.
How I made my DIY Dollar Store Pumpkins…
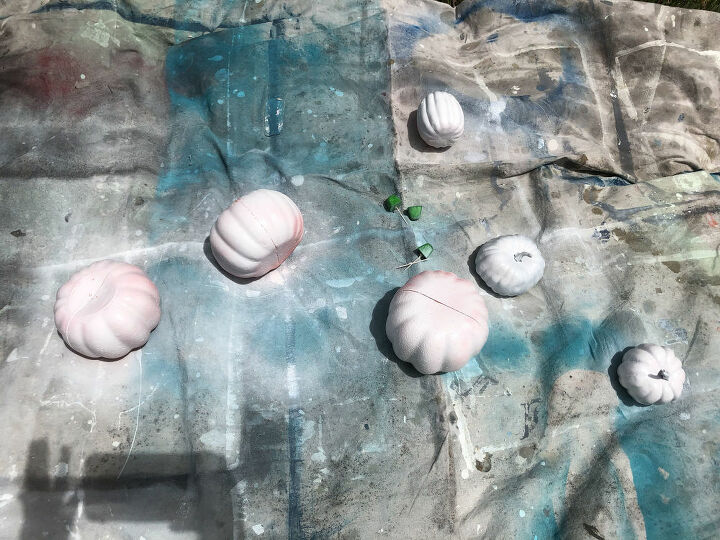
I started by spray painting them all white and wasn’t too worried about the larger ones being perfect since I knew I’d be covering them up anyway.
Lucky for me, my crafty friend Bannon was in town and was staying with us for the weekend. We had a lot of fun and a lot of laughs making these. She is super creative and was more than willing to help, and I was more than happy to have her assistance. I love her style.
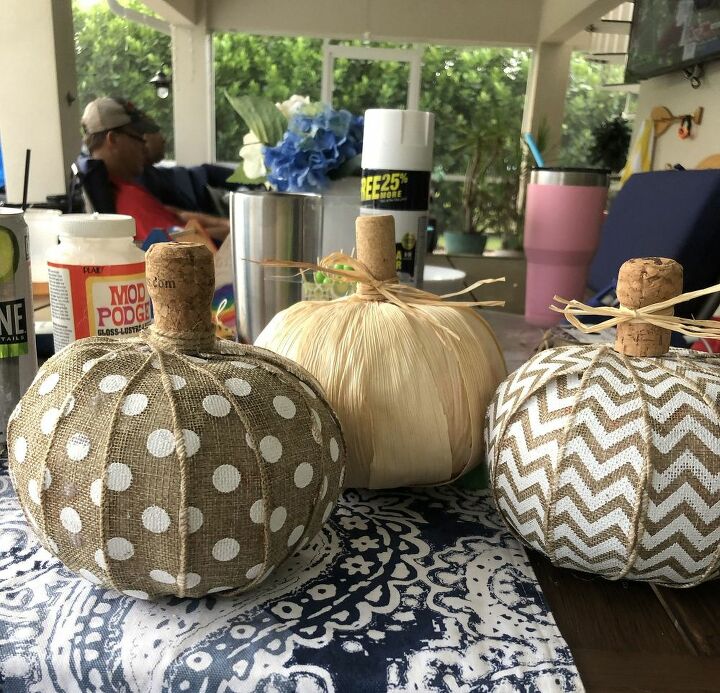
For the Large Pumpkins…
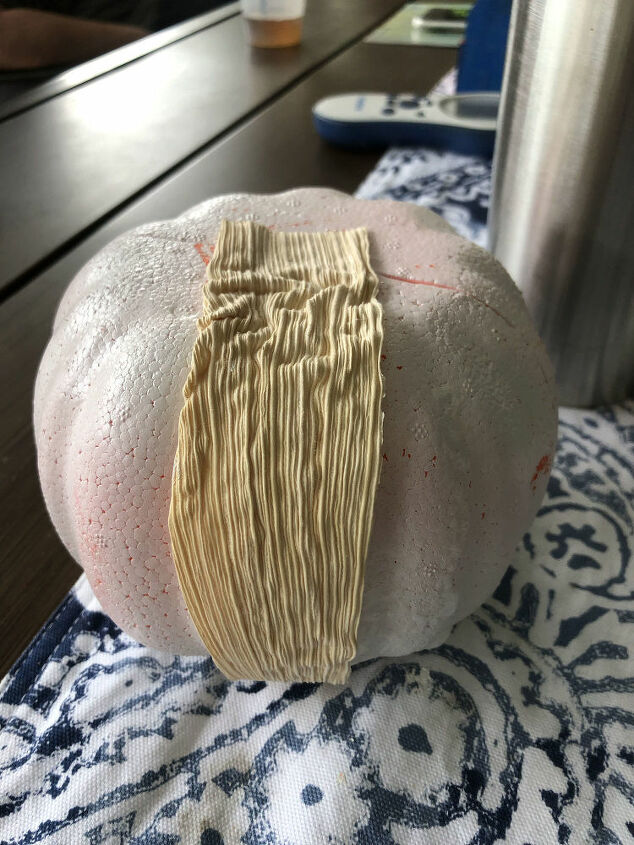
I bought 2 rolls of fun ribbon from the Dollar Store, and had the corn husks left over from last Fall when I made this wreath. If you decide to use the husks, they come in large strips and you will need to tear them into pieces.
First, we took out the green stem. They just pull right out. Second, using the glue gun, we put a bunch of glue on the top of the pumpkin, placed a strip of material on the glue and pressed hard to make sure it stuck. Third, we applied more glue down the side, and then a bunch of glue on the bottom of the pumpkin making sure to press them down as best we could. Mostly importantly, we made sure you to hold the pieces in place for a few seconds each time making sure they stuck. I used the green stem to hold down the glue in between pieces.
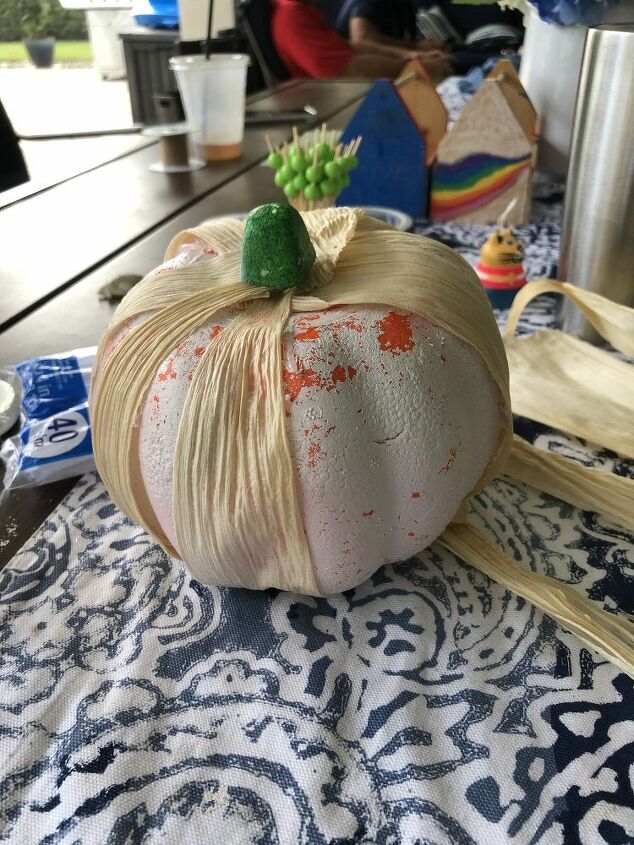

Once we were done, Bannon had the idea to replace the green steams with wine corks, or champagne corks instead. GENIUS! What a good idea! Luckily, I have a ton of wine corks because I save them all (and even made this project with my last batch). To apply it, I used the toothpick that came in the green stem. I just pulled that out and stuck it into the wine cork and then into the pumpkin. Or, of course, you could just use a brand new toothpick. Then we prettied them up with twine and raffia bows.
Here they are below. Pretty cute, am I right? For reference, we used one full roll of ribbon for each pumpkin, and about 1/2 package of corn husks (for 2 pumpkins).
For the small pumpkins…
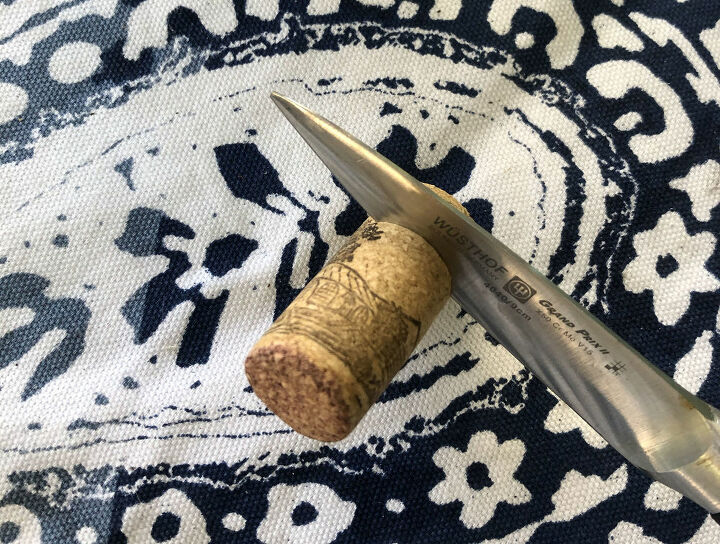
I decided to keep the small pumpkins white but take out the stems and use wine corks for those too. The corks were a little too tall though, so I cut them down a bit with a knife and then hot glued them to the tops.

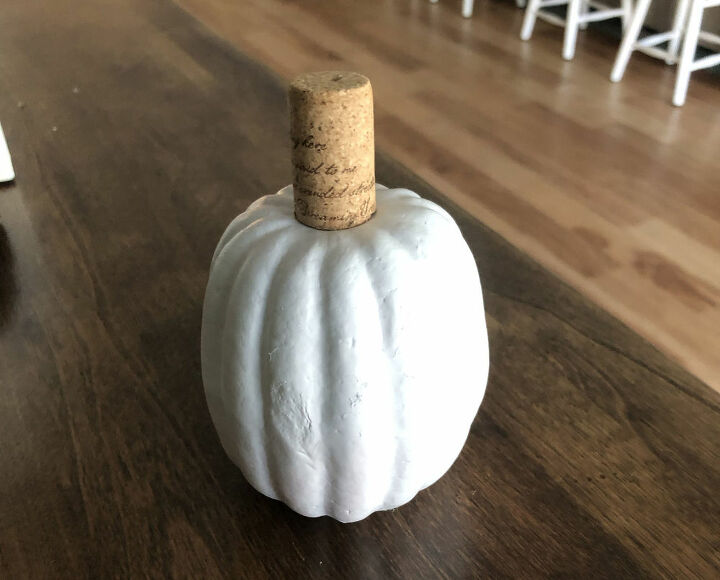
And here they are….

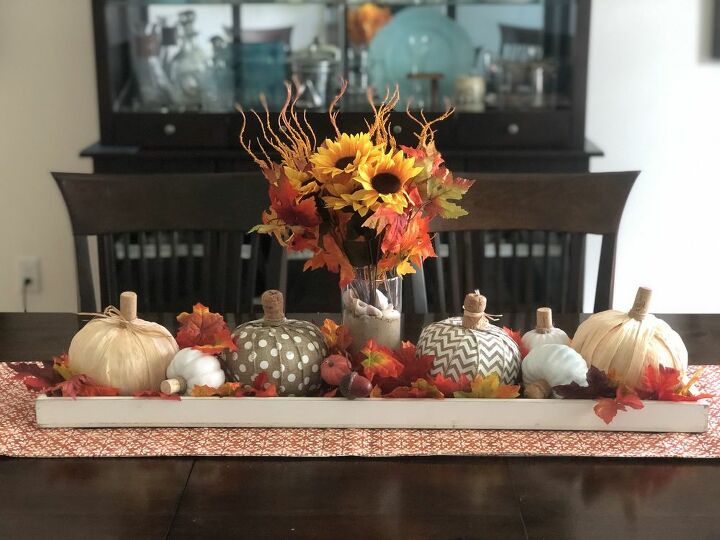
Finishing Touches…
I decided to put them all into a giant centerpiece on my dining room table. I purchased the faux Fall flowers and leaves from the Dollar Store. The large tray was found on the clearance shelves at Marshall’s for $10 and the table runner was found at HomeGoods for $12.99.
So, even though it is still VERY hot here, it feels a little more fall-like in my home. What do you think?


Comments
Join the conversation
-
These are so cute! I really love the ones with the ribbon. How creative!
-
I love the corn husk ones best. I will try this, probably next year. I intend to try growing my own corn over the summer. Even if the corn doesn't taste good, I know I'll be able to use it for this, lol,


Frequently asked questions
Have a question about this project?