


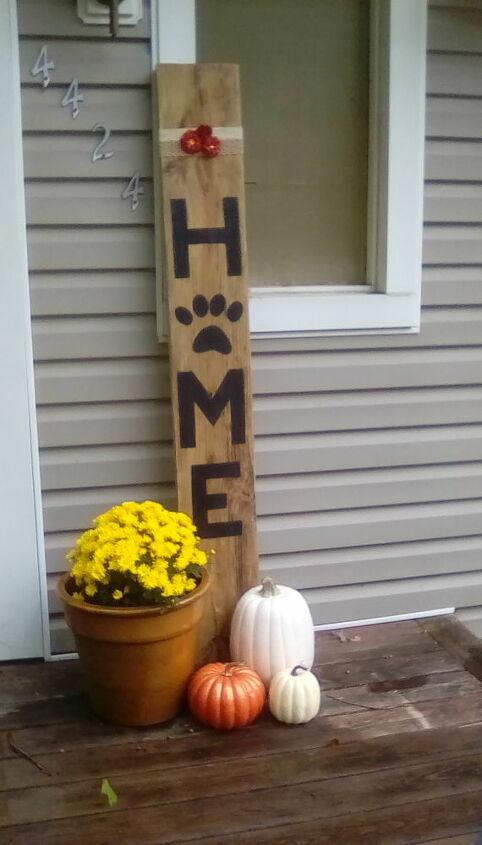
Home Sign W/Paw Print

Home sign w/paw print to dress front porch & welcome guests.
I have been seeing these HOME signs everywhere. The O is often substituted with wreaths, sports balls, team logos, paw prints, etc.
I've wanted one for a while so I decided to try to make one myself.
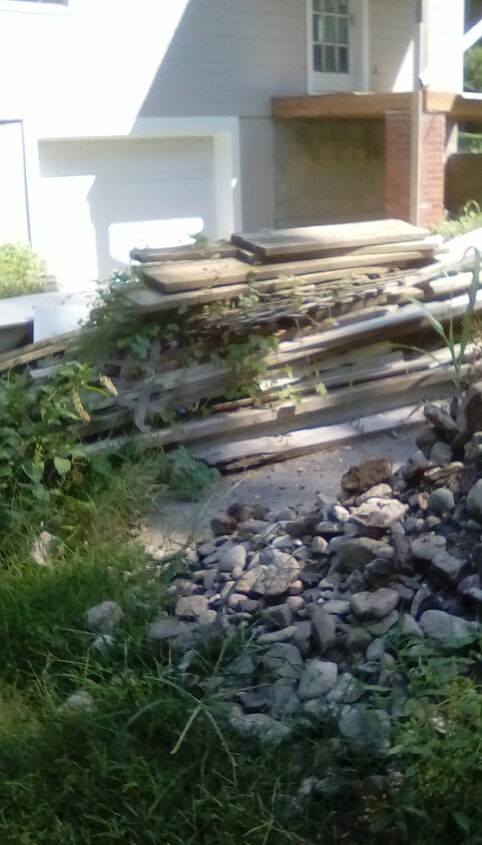
My neighbor has this in his yard. So I went "shopping" .
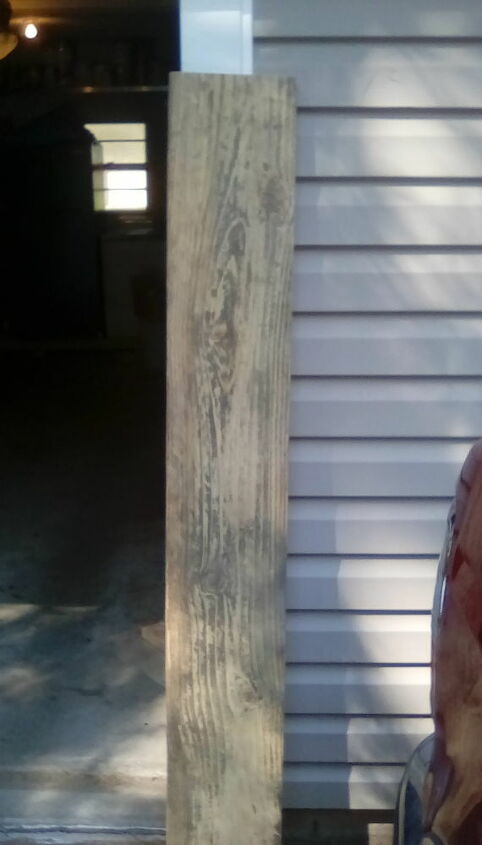
I found this beauty. It was perfect for what I needed.
I used a wire brush to clean the wood. I also sanded then cleaned the dust from the wood.
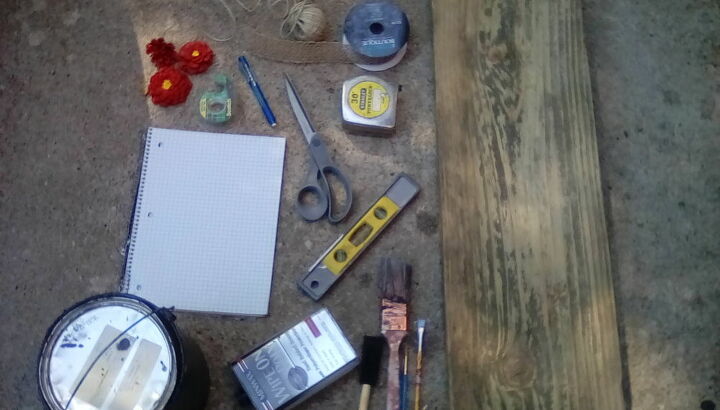
Here are the supplies I used for this project:
wood, twine, ribbon, pinecone flowers, paint, polyurethane and assorted paint brushes.
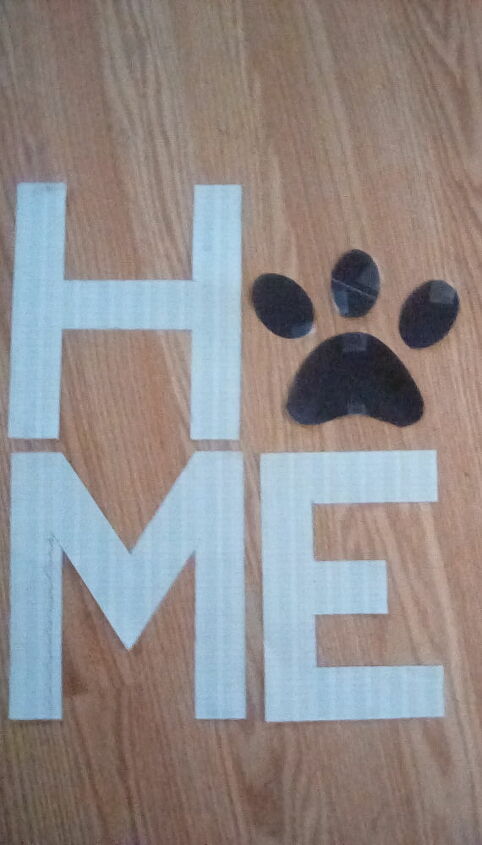
I used the tape measure, graph paper, scissors, tape and pencil to make my letters. First I measured the wood and decided the size for my letters then using the graph paper made the letters. I then printed my paw print from a coloring page I found on line. Next I cut out my shapes.
I taped the shapes to the board.
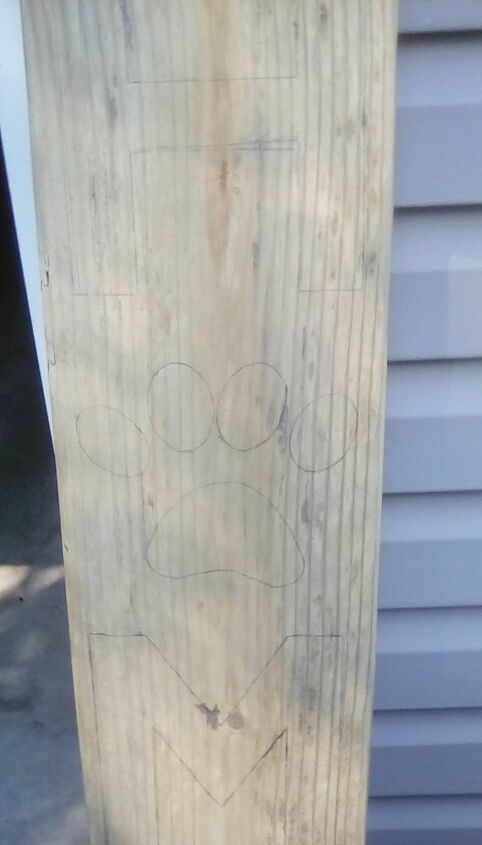
I traced around the shapes.
Next I used black paint to fill in the letters and paw.
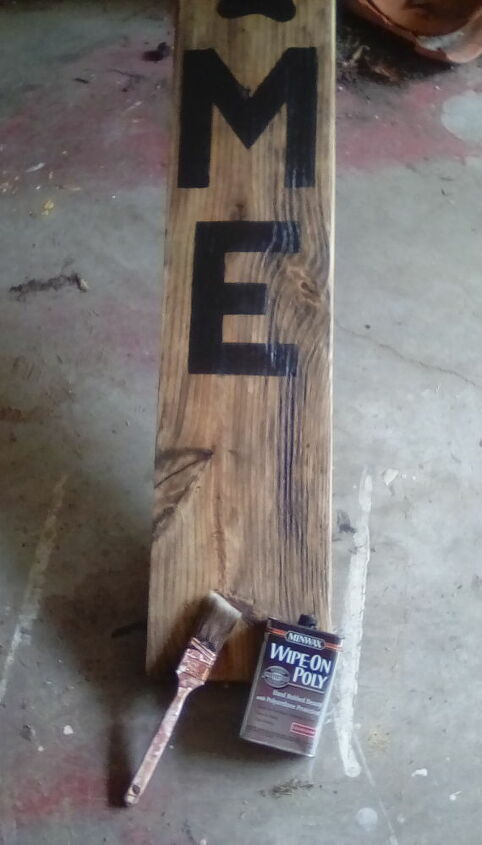
I let the paint dry for about 24 hours. Then coated all sides of the wood with 2 coats of polyurethane. After this dried another 24 hours I wrapped the twine around the board about 7 times. Then I wrapped my ribbon around the board. Then I attached my pinecone flowers. ( There are tutorials online for making these flowers. I didn't have the proper tools and it was very hard to do.) I used hot glue for the twine, ribbon and flowers to hold everything in place while the wood glue dried. I also used clamps on the twine and ribbon to hold everything tightly together.

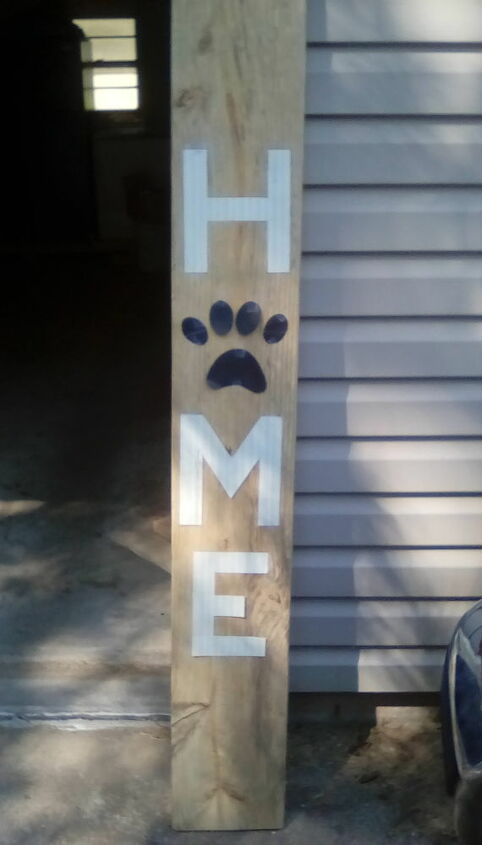
Here is the finished sign.


Frequently asked questions
Have a question about this project?