


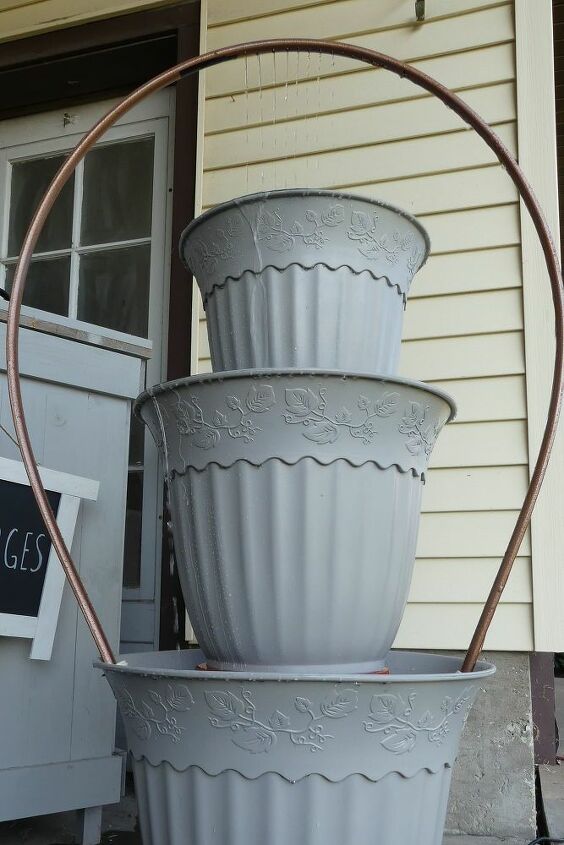
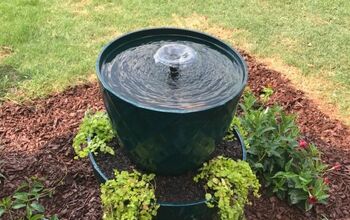
An Old Hula Hoop, a Thrift Store Water Pump, and Trashed Planters?

My recent project for another DIY site's 'trash to treasure' challenge got so much positive feedback that I've made it a tutorial! Water features are my favorite type of outdoor project and when they can be put together for next to no cost, they're even better! This one involves a yard sale hula hoop, a thrift store water pump, and three planters found next to a dumpster.
(Affiliate links on my website - all proceeds are donated to no-kill animal shelters and rescue programs!)
You'll need:
* A hula hoop (I found mine at a yard sale)
* A fountain pump (found mine at a thrift store but this link goes to Amazon for a similar one)
* 3 different sized planters (found them next to a dumpster!)
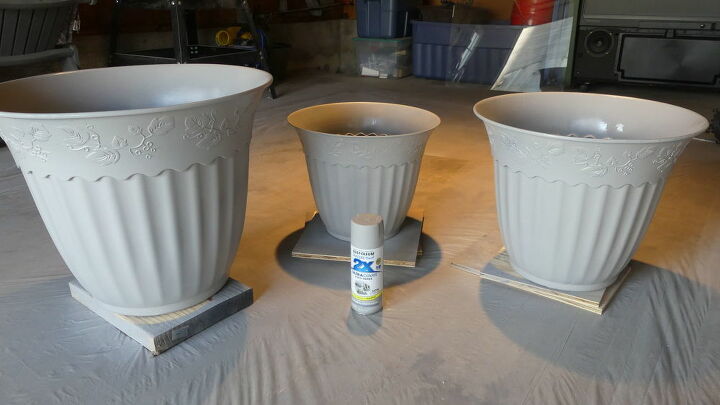
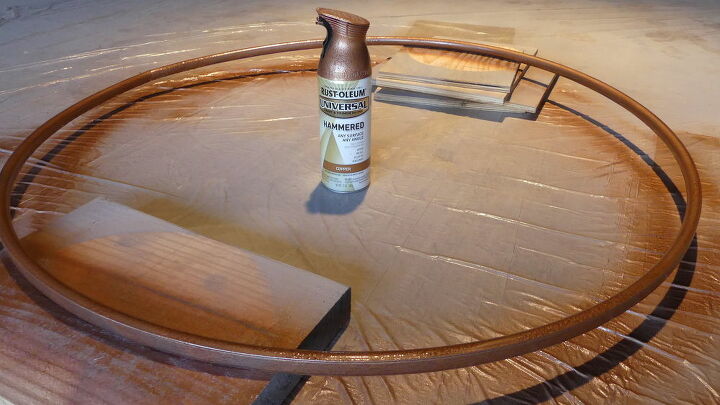
* Spray paint - I'm using Rust-Oleum's 2X Paint and Primer in Stone Gray and Hammered Copper
* Drop cloth
* Drill with bits for screws and pilot holes
* Epoxy putty
* A hose clamp
* Two hole pipe straps
* A marker
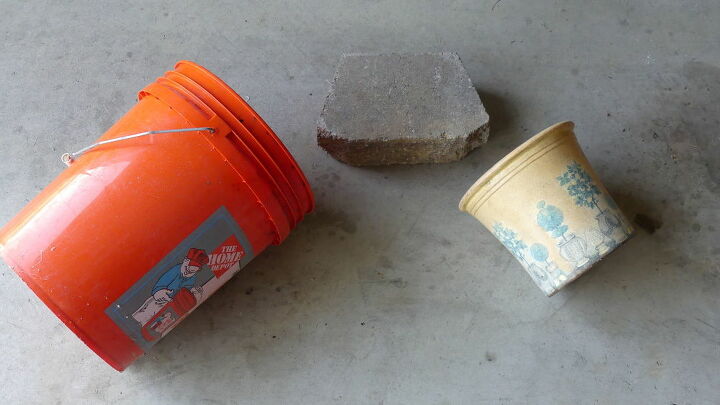
* Items to support upper tier planters - I'm using random things from my garage that will fit inside the planters - a bucket, a terra cotta planter, and a landscaping brick.
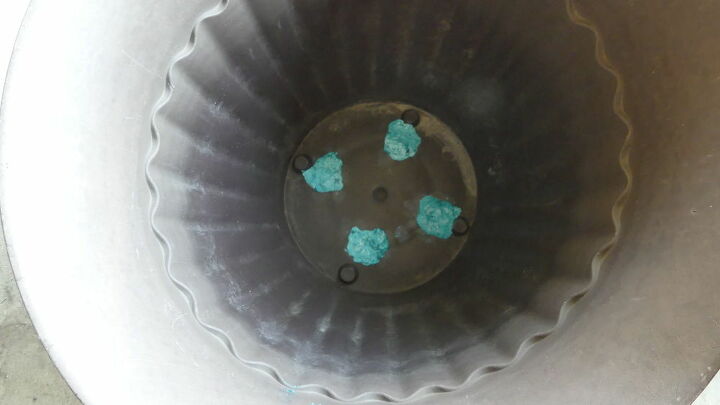
First, plug up any drainage holes in the planters with the epoxy putty.
Spray paint the planters with the stone gray. I'm painting the entire outside as well as about a third of the way down on the inside.
Then spray paint the hula hoop with the hammered copper to make it look like a copper pipe.
Once dry, take the hula hoop apart so it's no longer a hoop. Bend one end in to close it off. I'm using an office clip to secure but you can also use a hose clamp.
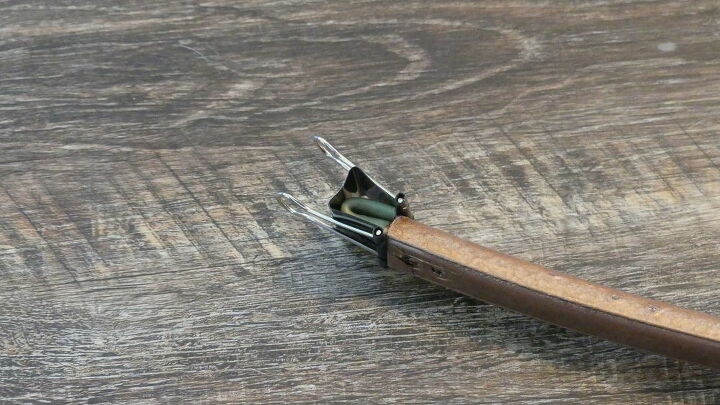
Attach the other end to the water pump and secure with the hose clamp.

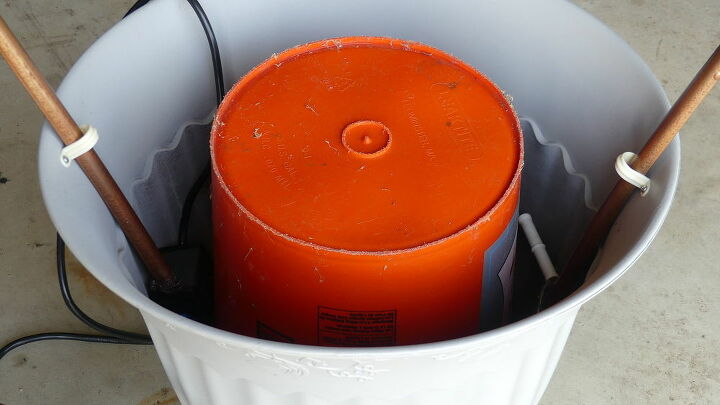
Put the bucket inside the large planter, upside down. Then place the water pump between the two.
Secure the hula hoop to the inside of the planter with the two-hole pipe straps so that the hoop loops up and over where the other planters will sit. Secure on the other side as well.
Set the mid-sized planter on top of the bucket, centered. Then put an upside down terra cotta pot and a landscaping brick on top of that.
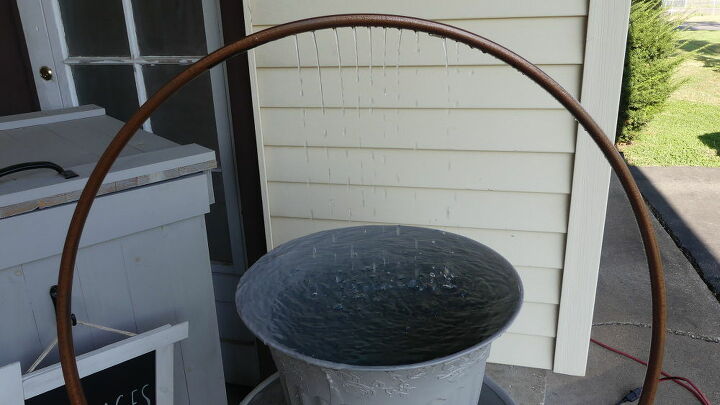
Place the smallest planter on the landscaping brick for reference. Note the area on the hula hoop just over the top planter and mark small dots with the marker. Remove the top planter and drill holes only on the underside of the hula hoop. Start with a few small holes - you can always go bigger or make more later.
Fill the planters with water and plug in the pump. Water should travel up through your 'copper pipe' hula hoop to the holes to make a gentle rain fountain, spilling over the tops for a cascading effect, and refill the pump at the bottom. If it seems like there is too much pressure inside the hula hoop, you can either turn down the water pump (if it has setting controls) or make the holes bigger or make more of them.
Resources for this project:
See all materials


Comments
Join the conversation
-
what an awesome idea….I love it.
-
The hummingbirds will ready enjoy this fountain's gentle trickle and even more with a shallower top level. Thanks for sharing this wonderful plan. 😀


Frequently asked questions
Have a question about this project?
Where are the photos of the project that was finished? We need to see that
If the photo with the hula hoop attached to the planter is the final project, it’s not very attractive. Sorry. It certainly needs something else, perhaps greens or no hula hoop?
Very creative, love it!
Are you able to still see the orange bucket once it's running?