


How to Transform Bed Springs Into a Snowflake Ornament

Raise your hand if you like to repurpose things.
Oh, good.
Me, too.
I found these bed springs at a flea market and knew that they could turn into something amazing. I was right. They make the perfect snowflake ornaments.
Here's the step-by-step on how I made them.
How To Make a "Spring" Snowflake Ornament
Supplies:
springs
cloth
glue
paper (for tags)

Step 1: Find the springs
This is actually so much easier than it sounds.
They were all over the flea market. These springs came in a “x” pattern already put together. They were four for $1.00. That’s cheaper than a McDonald’s diet coke.
And much better for you.
Step 2: Wipe the springs down
My springs look like they had seen better days. I didn't want to wash off too much of the patina and remove the vintage look, so I just took a rag and wiped them down. Mostly, I wiped the cobwebs off of them (and a little dirt, too).

Step 3: Spray paint the springs
You will want to use a satin spray paint that works with metal for this project. I started by spray painting the sets of springs white. I wanted a little more depth, so I spritzed a little gray spray paint. And finally? I added a top layer of glittered spray paint.
Make sure to stand back about 12" when you are spraying them because you don't want the spray paint to glum onto the springs.
Let the spray paint dry.
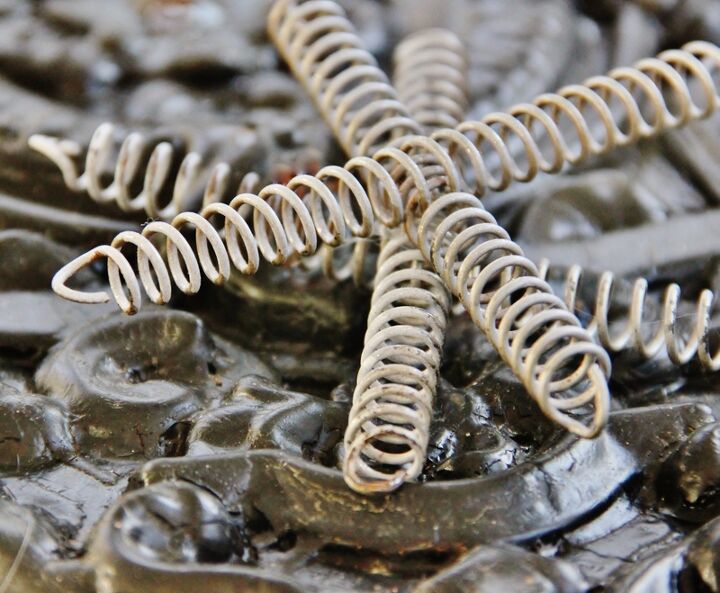
Step 4: Glue two “x” springs together
Glue the two spray painted “x” together.
I tried to hammer the two “x” together. Weak.
I tried ribbon. Weaker.
I tried several methods, but in the end regular old craft glue worked really well. Just twist the springs until they fit together and glue. Set them up on the top of a box and prop up with paper until the glue sets and dries.
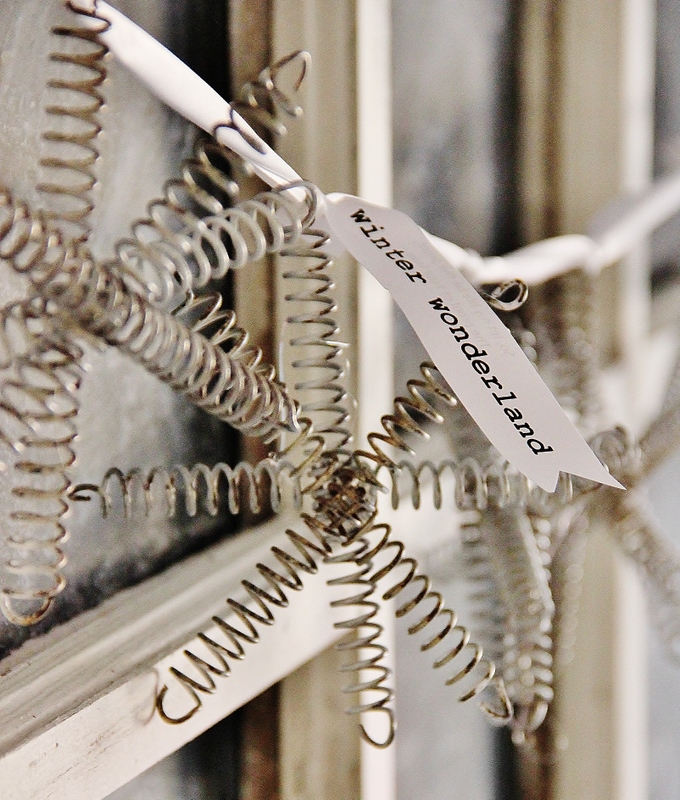
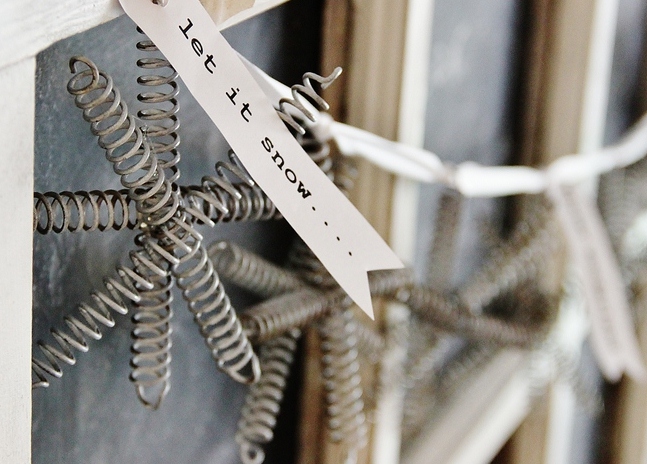
Step 5: Add a tag
These simple tags were so easy to make. I just printed out rows of text off the computer in the font that I chose. Next, I cut them in strips and attached them to the snowflakes with ribbon.
The snowflakes are so easy to decorate with. You can hang them on the tree or tie them to a wreath or tie them to the top of a frame to create a winter display.
You can see more Christmas projects with the link at the bottom of the post.
Here are a few more of my favorites:


Comments
Join the conversation
-
KariAnne,
such a cute idea. Now to find those springs. Thanks for sharing!
Rachel
-
Very creative. I’m looking for springs now 🤗 !!


Frequently asked questions
Have a question about this project?
Do you have a photo of the finished projects (not close up) to show all of it? Thanks!