


Saving an Antique Door.

I decided that I wanted to share this posting, but will rely heavily on photos to tell the story. As mentioned in earlier posts, I have been a customer of The Heritage Company, in downtown Kalamazoo for over 30 years. . Heritage sells some antiques and collectables but is primarily an architectural salvage business that buys and sells antique house parts (doors, windows, hardware, lighting, plumbing fixtures, and reclaimed lumber) for home restoration and/or repurposing.
Recently they referred a customer (a real-estate broker) looking for a replacement door for a building that is in a historic districting being rehabilitated for mixed use (office and residential)..

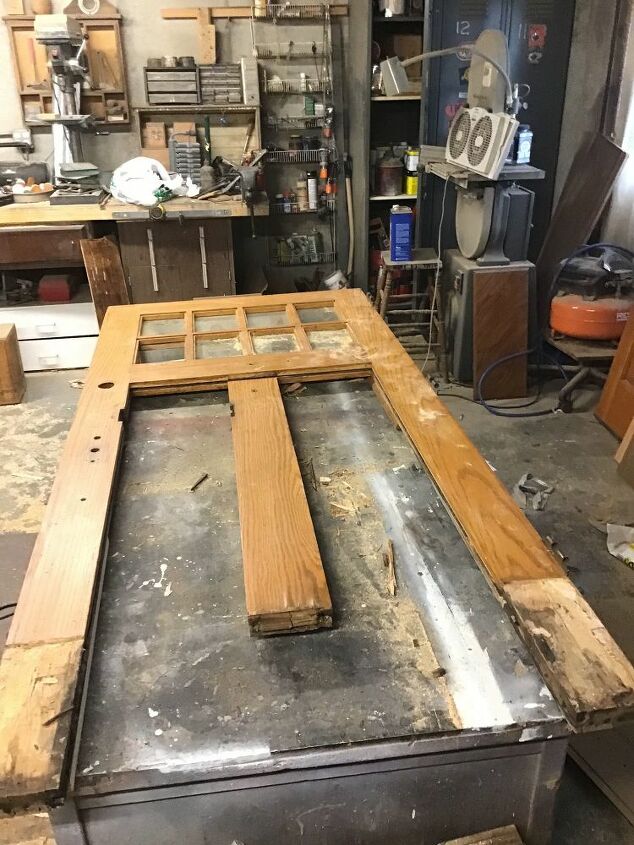
The existing door was in tough shape. Sometime in the past a large hole had been hacked into the door to accommodate a mail slot. Most of the veneer on the exterior side of the door was gone and the remaining veneer and flat panels were badly deteriorated.
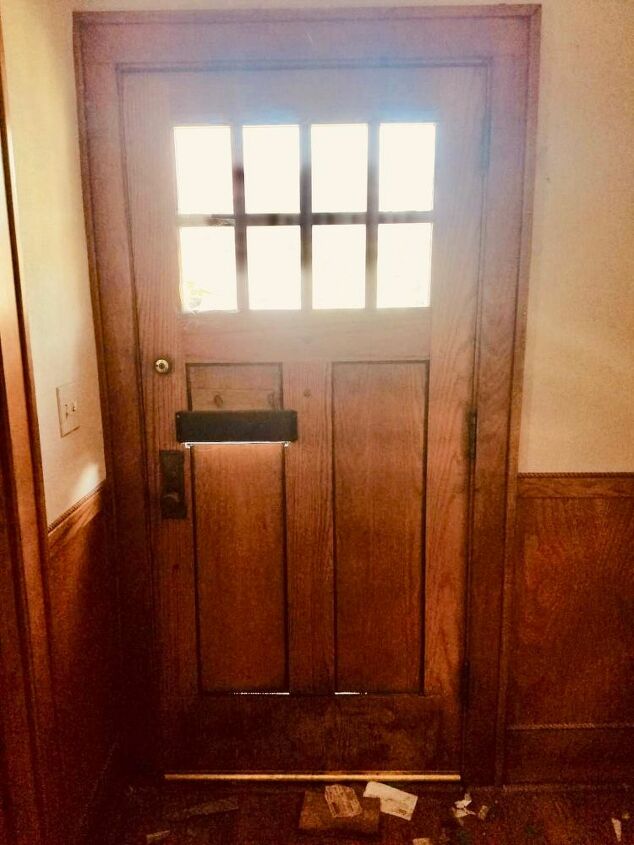
But it had been a great door with eight panes of bevel glass, although one had to be replaced.
But I thought it could be saved. I agreed to fix it on a time and material basis and gave them a range of what I thought the overall cost might be.
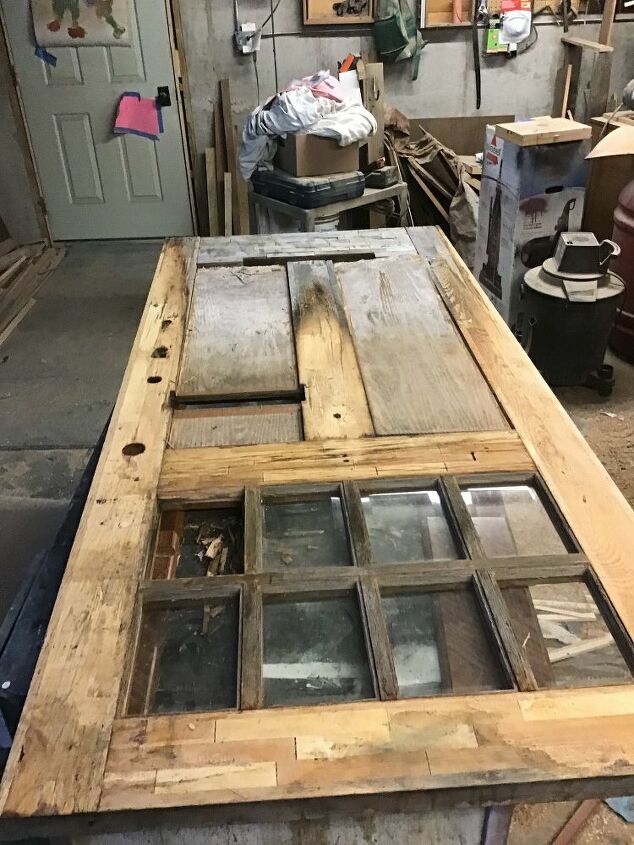
Once I got it back to my shop I removed the mail slot, cut out sections of the exterior side so i could remove the panels, and removed what little veneer remained on the exterior side.
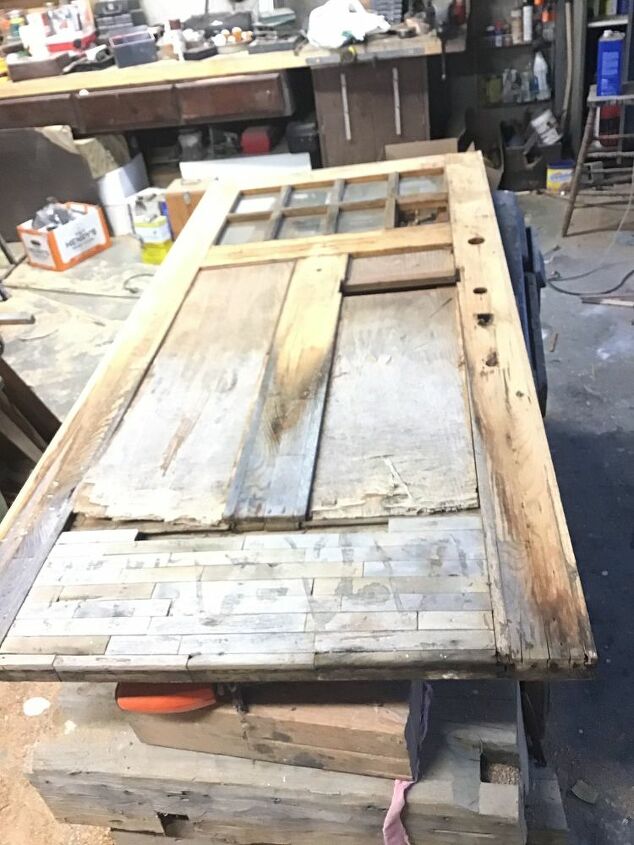
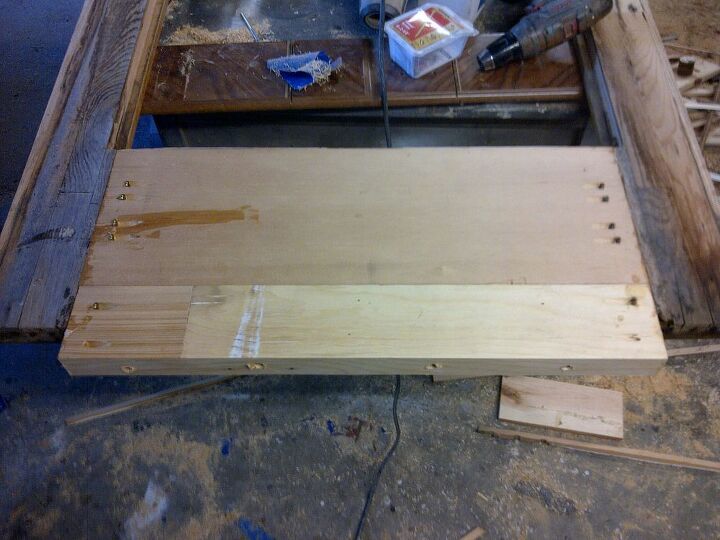
It became apparent I had to remove the veneer on the kick plate on the interior side of the door. Once I did, the whole kick plate deteriorated . I was comprised of small block that were originally jointed and glue to form the kick plate, but had deteriorated so badly I was able to remove it with my bare ands.
i replaced it with a sections of a old door I had in my stash.
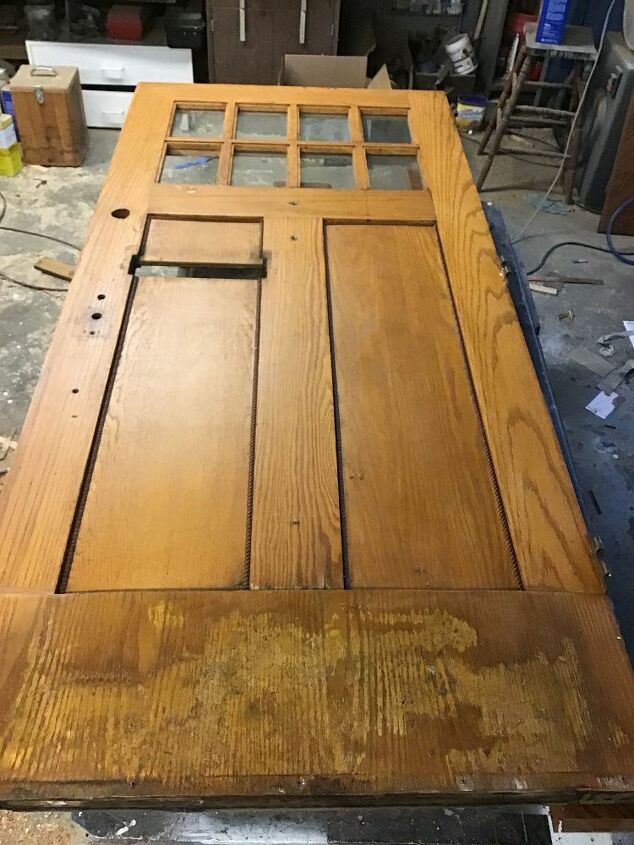
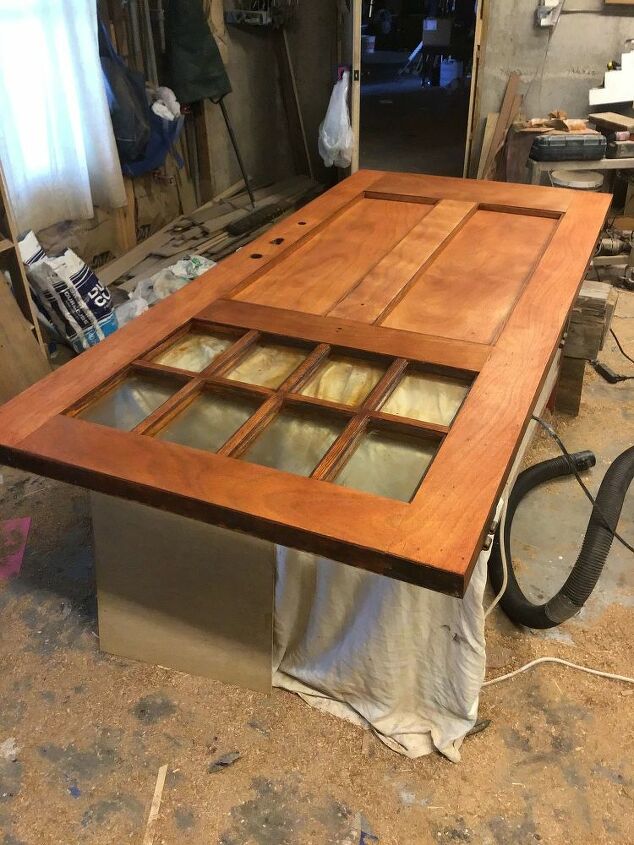
On the interior side I was able to reveneer only the kick plate using oak veneer purchased at Menards. I used TightBond III and a hot iron technique to adhere it. The technique is well described on YouTube.
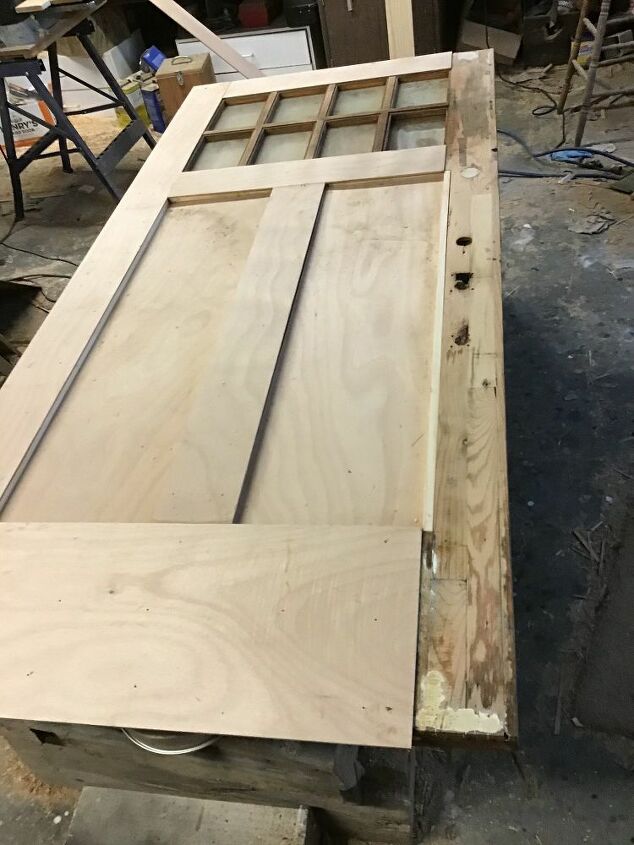
I then re-veneered the exterior side. The veneer was actually pieces of 1/8” marine grade plywood. I choose the plywood over actual veneer because:
- it could be cut on my table saw;
- it was only slightly thicker than the veneer that had been on the door originally;
- it was waterproof;
- the wood species was okoume, an African hardwood that resembles mahogany and finishes really well.
I glued the plywood to the door by applying TiteBond III to both the door and the plywood. Lacking the cauls and the number of clamps typically used in veneering, I resorted to using scrap pieces of MDF instead. I taped the plywood strips in place, covered them with the MDF, and then nailed through them to hold the plywood down until the glue set. Then I pried up the MDF and remove any nails that remained. I then trimmed the veneer using a router with a flush trim bit. I filled all the nail holes with wood filler. It was kind of sad to use this technique, but making sure the plywood was securely attached to the door was my primary objective and the nails did minimal damage.
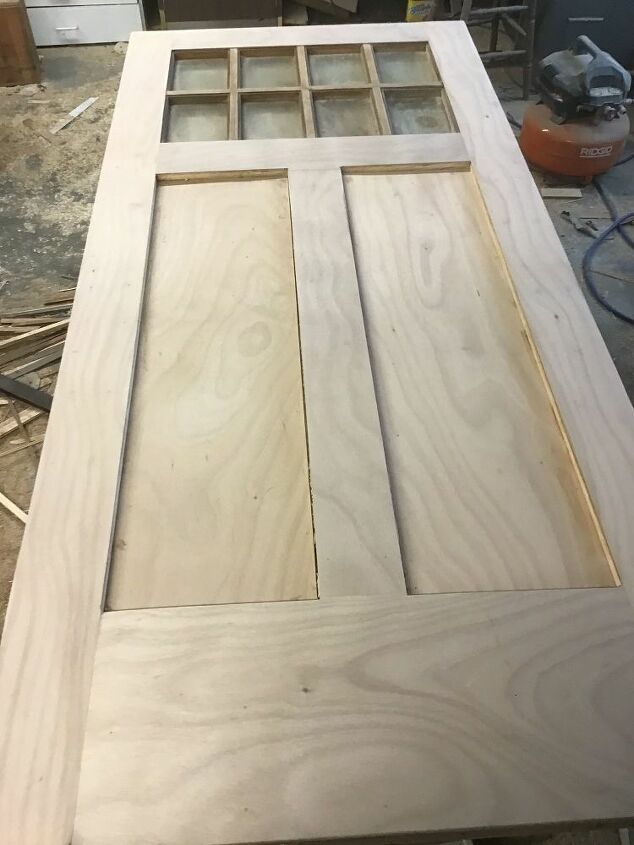
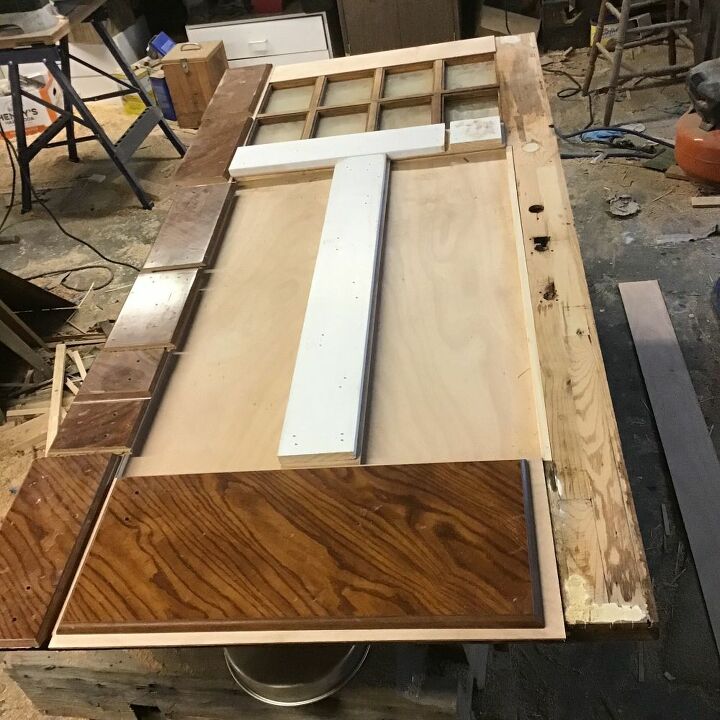
Panels were fabricated by gluing 1/4” oak plywood and the 1/8” okema plywood bac-to-back- (oak interior - okoume exterior). Panels were held in place with oak strips.
The fresh surfaces (kick plate and panels) on the inside of the door was stained and then the entire interior side was varnished with Helmsmans polyurethane spar varnish from MinWax.
The exterior side (which was almost all okoume) was sealed with Cabot’s Australian Timber Oil (ATO) The color choice was a 50:50 mixture of Mahogany Flame and Jarrah Brown. ATO is a specially product formulated primarily for decks, fences, and outdoor furniture. It is not the most long lasting finish I could have chosen, but it is the easiest to maintain and re-coat.
The hardware was primed and painted matte black.
The client and I were both extremely happy with the rehab and glad to have saved the original door. The cost estimate is for materials only. The door is being stored until the exterior trim is painted on the building, but I hope to add photos with the hardware after it is hung.
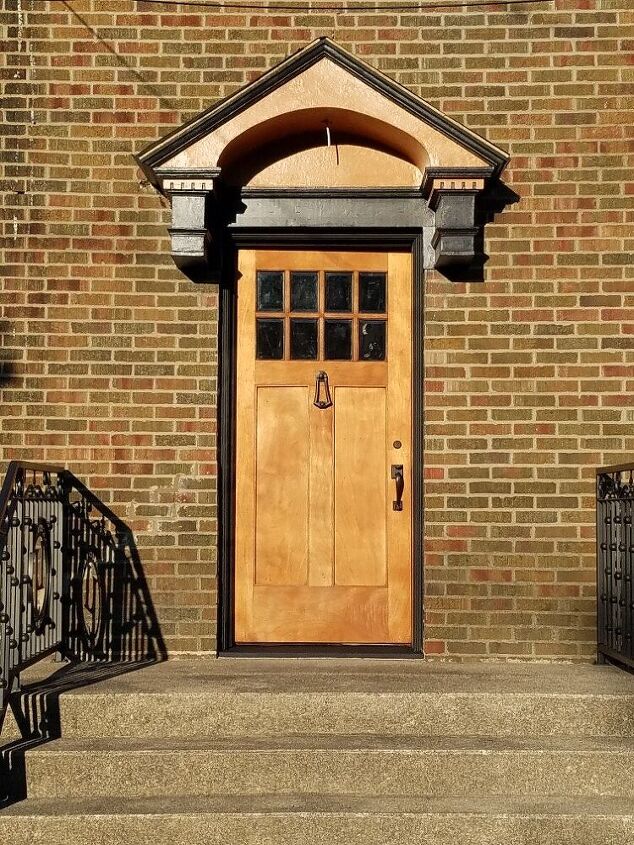
Photo of door installed with the surround painted.
Comments
Join the conversation
-
John, You are a God send. I am in love with my restored door. I’ve received so many compliments from passerby’s. The estimates to purchase a custom brand new oak door were north of $10,000. I am so grateful our paths crossed. You do amazing work.—Twala, a very satisfied client ♥️😊
-
Wow, The refurbished door looks absolutely amazing. You did a wonderful job


Frequently asked questions
Have a question about this project?