


Everything You Need To Know About Stenciling A Fireplace

Cutting Edge Stencils tile stencils are taking over the DIY home improvement movement! You can use tile stencils on almost any surface. We have seen stunning DIY makeovers with tile stencils on floors, walls, furniture, and you guessed it, fireplaces! Tile Stencils are an amazing decorating tool because you don’t have to be an expert to use it! If you’re a beginner stenciler that’s looking to makeover your fireplace on a budget, have no fear! By the end of this blog, you’ll know how to stencil your fireplace like a Pro!
For more stenciling inspiration Subscribe to our Youtube channel!
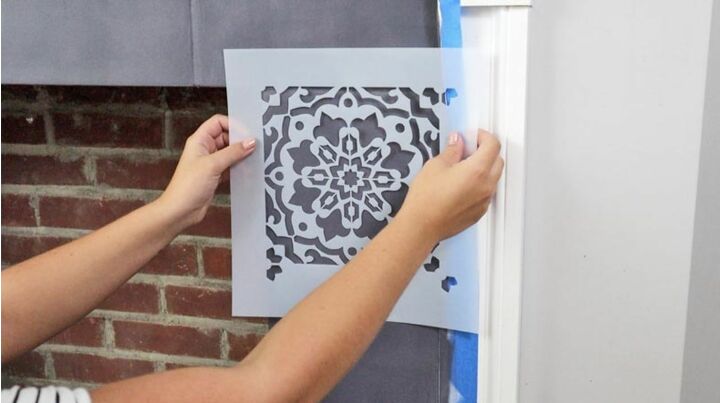
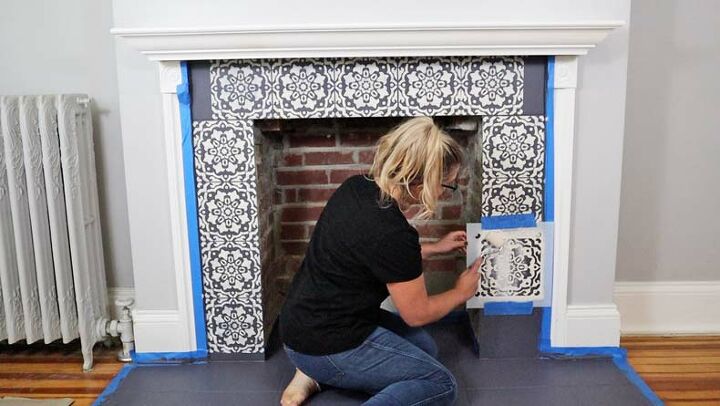
How to correctly measure your tile: When figuring out what tile stencil size to get, we recommend measuring your tile from tile edge to tile edge. Don’t include the grout line when you measure the size of your tile. For a fireplace, it’s no different! Before we stenciled this fireplace, we knew we wanted the tile stencil to fill the width of the legs and the height of the header. If your tile is an abnormal size, Cutting Edge Stencils can cut a custom tile stencil size just for you! For this fireplace, we used the Amalfi Tile Stencil.
Will the square tile stencils fit on my tiles if they are various sizes and/or have inconsistent grout lines?
Yes! With a tile stencil you can paint right over the original tile shape and grout lines. No one will notice your old grout lines! You’ll essentially be stenciling faux square tiles that will give your outdated fireplace a brand new look.
Important prep before stencil
1. Begin by sanding down your fireplace tile with 120-220 grit sandpaper. Giving your tile a good sanding will allow the paint to adhere to the tile.
2. Dust it off and wipe it down with a damp rag. You want very little dust on your tile before you continue your prep. We recommend using TSP, a heavy-duty cleaner that is specially formulated to remove dust and dirt.
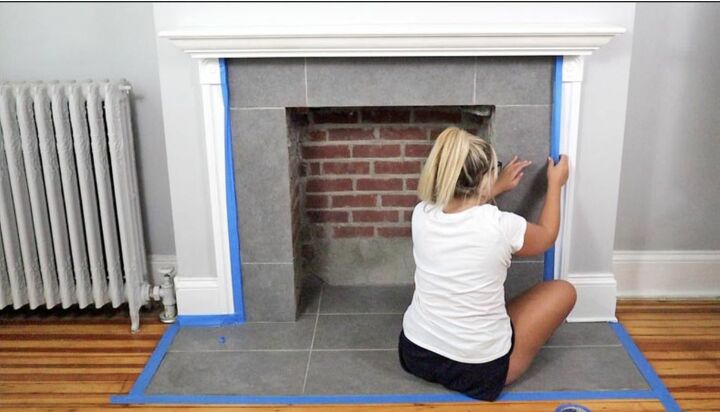
3. Tape the perimeter of your fireplace with low-tack blue painters tape. If you have a non-working firebox and you want to stencil all the way towards the back, don’t forget to add tape back there too! This will prevent getting any unwanted paint in certain areas.
Next step, Priming!
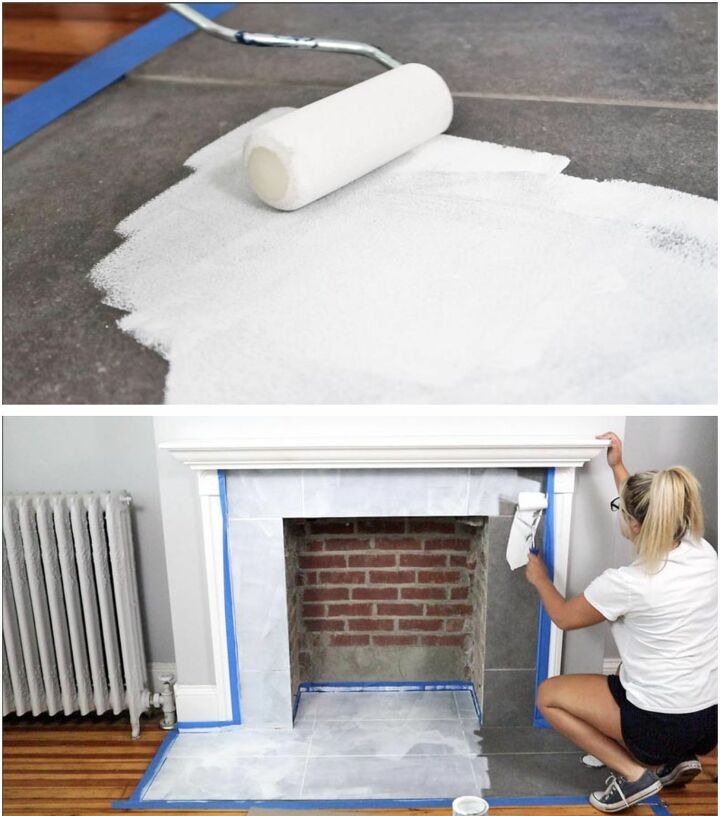
Apply 2-3 coats of bonding primer to your fireplace tile with a 4” dense foam roller before you start painting. We recommend using STIX primer because we found it provides the best adhesion. You can lightly sand off any small imperfections before applying your base coat but try not to sand through the primer. Let the primer dry a full 24 hours before you begin applying your base coat.
A common misconception is that you need to use “heat resistant paint” when stenciling your fireplace. Truth is, you don’t! Paint can withstand temperatures up to 200 degrees. We recommend using Benjamin Moore’s “Ben” paint in a flat latex finish. It will decrease your chances of paint seepage under your tile stencils and give you the best stenciling results. Apply at least 2 coats of your base coat before you begin stenciling.
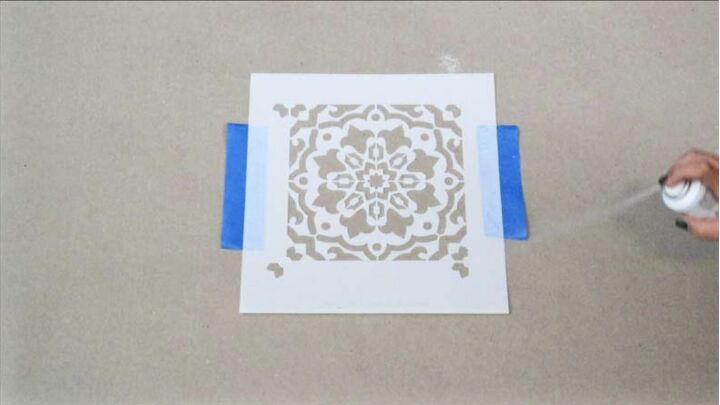
Apply repositionable spray adhesive on the back of your tile stencil. This will reduce your chances of paint seepage or “bleed” underneath your tile stencil. Add two pieces of low tack painters tape to two sides of your stencil to make sure it doesn’t shift or fall off while stenciling.
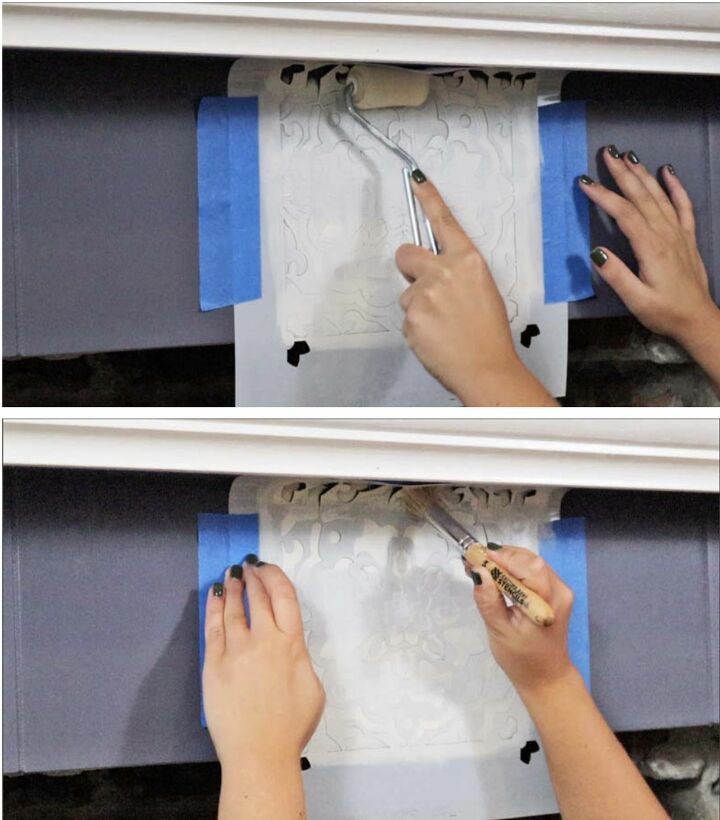
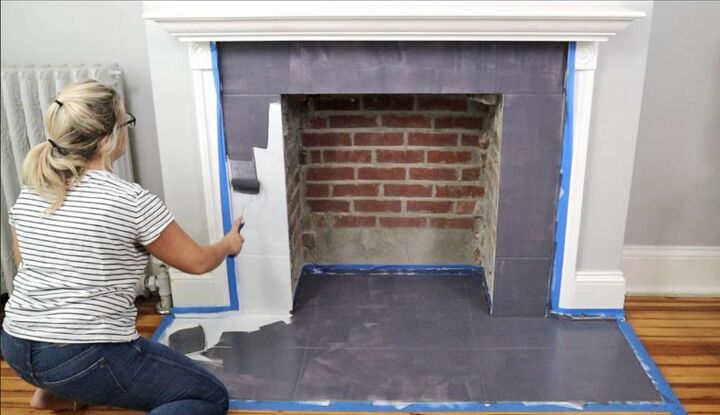
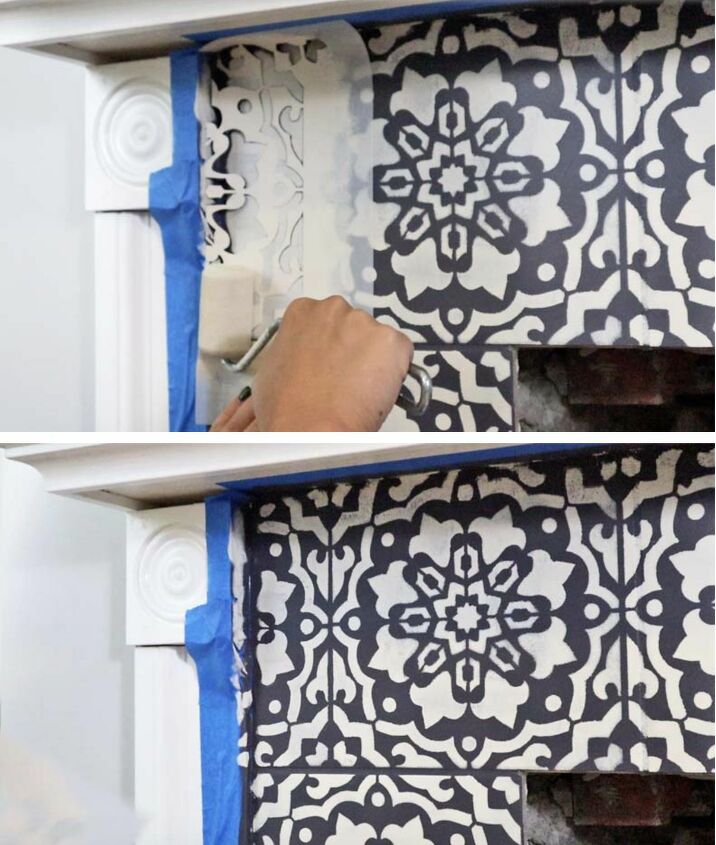
Gently roll the paint over your tile stencil with a 2" dense foam roller. If you press too hard, you will get some bleed underneath the stencil. Roll the paint towards the mantle, reaching the corner as much as you can. Take or 3/4” Professional stencil brush and pounce it towards the corner for a crisp line. You only have to wait 1-2 minutes for your faux tile to dry before you can move on to the next!
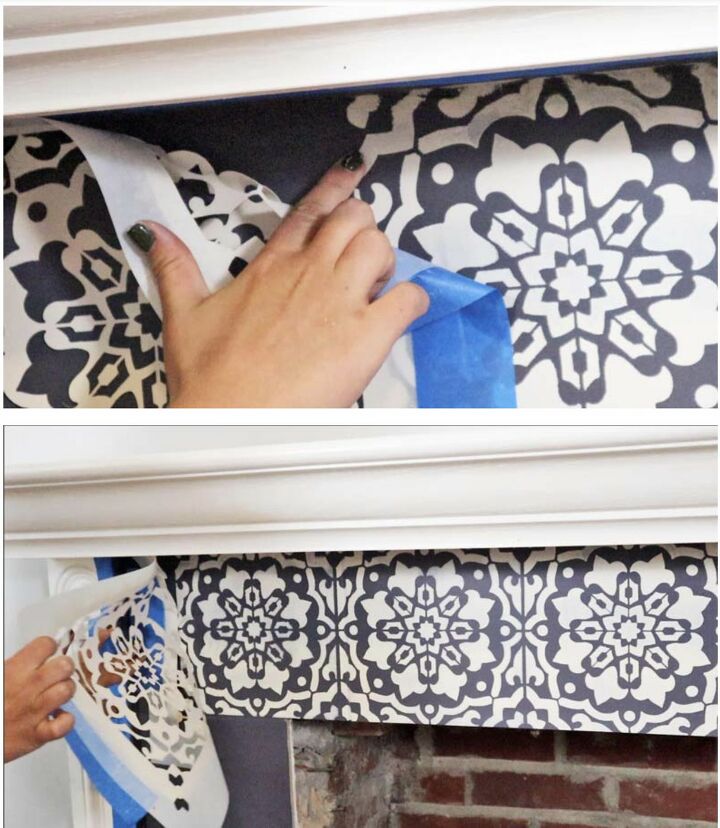
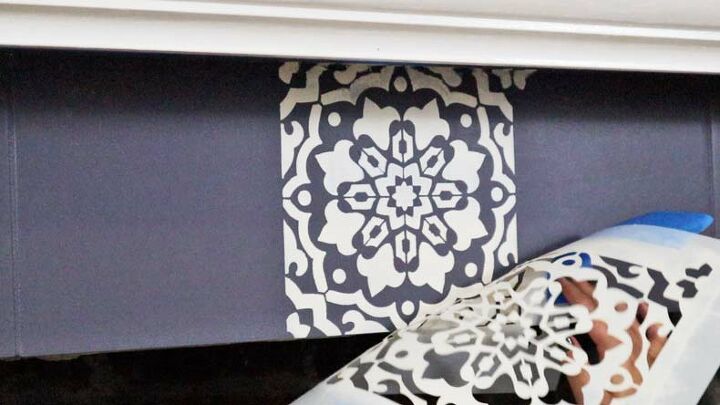
Once your stenciled tile is dry, align the tile stencil with the previously painted registration marks. Get through as many full tiles as you can and save the smaller tile sizes for last.
Place your first tile stencil on the leg right under the header. Again, work your way down until there is no full-size tiles left. We’re going to save the smaller sections for last.
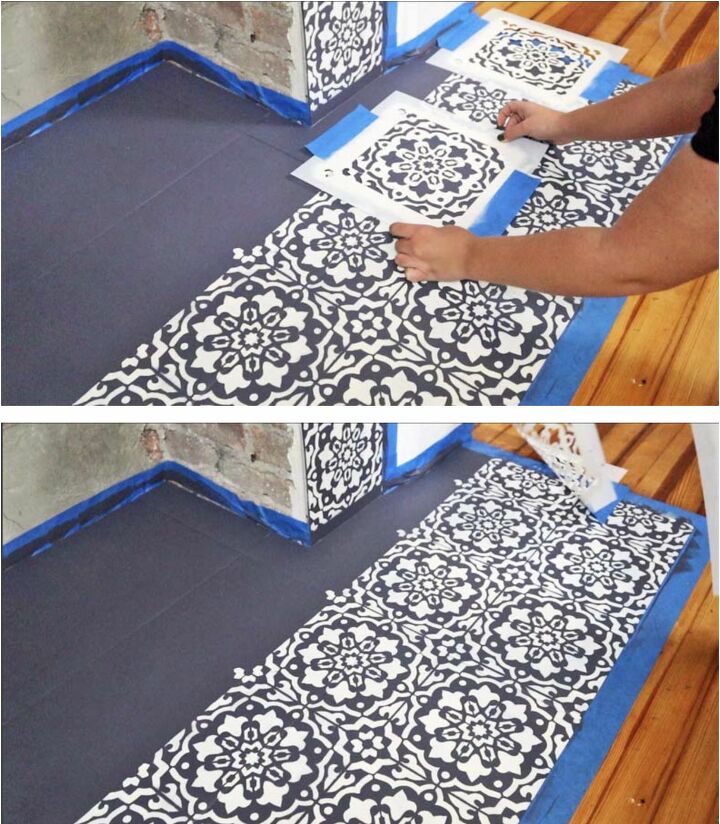
Find the center of your hearth and place your tile stencil closest to you. You are going to stencil your first tile then like the header, work your way outwards towards each end of the hearth. Once that row is complete, repeat the process while working inwards towards the firebox if you have a non-working fireplace. You also can leave that untouched and only stencil up to the legs.
You can cut your tile stencil down to a custom size to fit those specific areas! This is why having more than one stencil comes in handy! It’s great to have a backup when it comes to this part of the project.
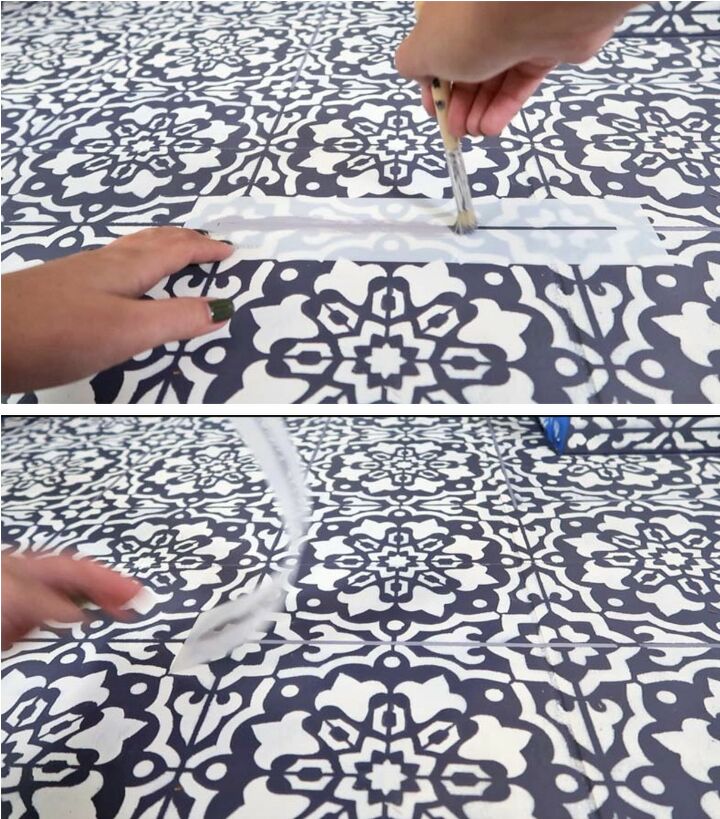
Place the FREE grout line stencil that comes with your tile stencil over the thin lines in between your stenciled tile. Grab a ½” Professional stencil brush and dip it into a little bit of your grout line color paint. You don’t need a lot of paint for this part so be careful not to overload your brush. Lightly pounce or swirl your brush over the grout line stencil. Follow through until the entire grout line section is covered.
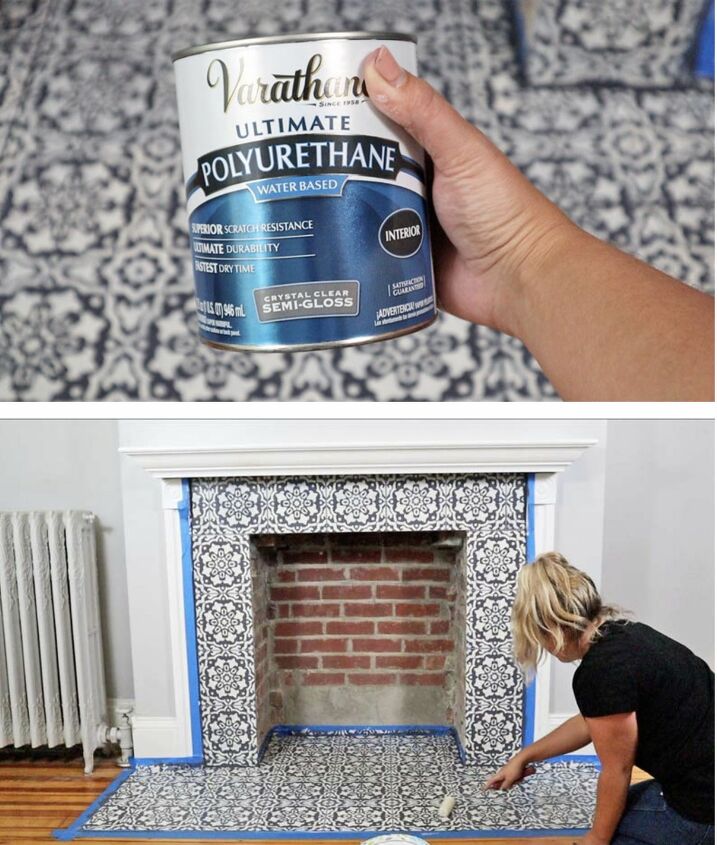
All you need to do to protect your stenciled fireplace tile is apply at least 2 coats of Varathane’s WATER BASED polyurethane. We HIGHLY RECOMMEND water-based polyurethane because it doesn’t yellow over time, it has a fast dry time, and it’s better for the environment!
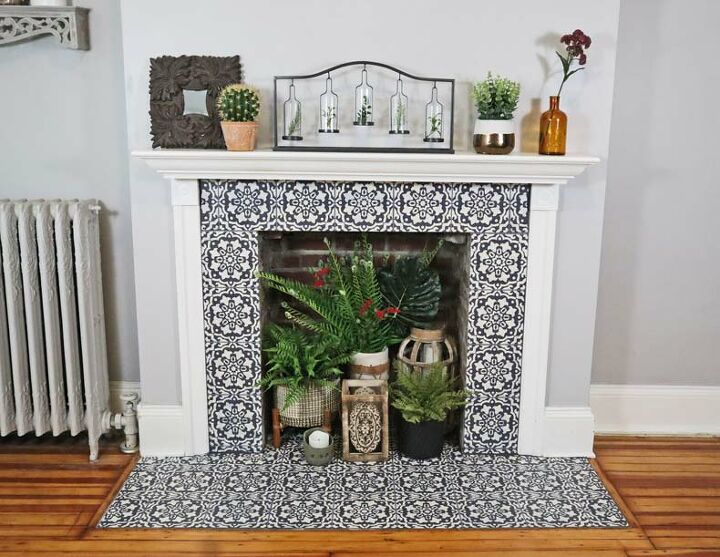
Now it’s time for the fun part, adding super cute decor! I got my fireplace decor inspiration from Pinterest.
Resources for this project:
See all materials


Comments
Join the conversation
-
there are three urls in the above post. One for the canned gel, one for the fake white birch logs and one for oak-ish looking logs. ;)
-
Wow, gorgeous!! And Great instructions. Thank you so much for that.


Frequently asked questions
Have a question about this project?
We have granite .... want to change it and this could be it ... any special differences to cover the granite?
Is that a functional fireplace? If so, how has the stencil/paint held up to the heat?
Beautiful job! Could u have painted the inside of the fireplace.? Would that paint have worked?